Single Front-end Installation
This page describes how to install a complete OpenNebula Front-end from binary packages available in the software repositories configured in the previous section. We recommend using a Host with the supported operating system as installation from packages provides the best experience and is referenced from other places of this documentation. If there are no packages for your distribution, you might consider reading the Building from Source Code guide to build OpenNebula on your own.
Proceed with the following steps to get the fully-featured OpenNebula Front-end up.
Step 1. Configure the OpenNebula Repositories
Follow the OpenNebula Repositories guide and add software repositories for the OpenNebula edition you are going to deploy.
Step 2. Add 3rd Party Repositories
Not all OpenNebula dependencies are in base distribution repositories. On selected platforms below you need to enable 3rd party repositories by running the following commands under privileged user (root):
AlmaLinux 8,9
yum -y install epel-release
RHEL 8
rpm -ivh https://dl.fedoraproject.org/pub/epel/epel-release-latest-8.noarch.rpm
RHEL 9
rpm -ivh https://dl.fedoraproject.org/pub/epel/epel-release-latest-9.noarch.rpm
Step 3. Installing the Software
Available packages for OpenNebula clients, the Front-end and hypervisor Nodes:
Package |
Description |
|---|---|
opennebula |
OpenNebula Daemon and Scheduler (EE comes with additional Enterprise Tools) |
opennebula-tools |
Command Line Interface |
opennebula-fireedge |
Next-generation GUI FireEdge |
opennebula-gate |
OneGate server which allows communication between VMs and OpenNebula |
opennebula-flow |
OneFlow manages services and elasticity |
opennebula-migration |
Database migration tools for EE (only in EE) |
opennebula-migration-community |
Database migration tools for CE - please request via online form |
opennebula-provision |
Tools to provision Edge Clusters |
opennebula-provision-data |
Data for Edge Clusters provisioning tools |
opennebula-node-kvm |
Base setup for KVM hyp. Node |
opennebula-node-lxc |
Base setup for LXC hypervisor Node (not on RHEL 7) |
opennebula-guacd |
Proxy daemon for Guacamole |
opennebula-rubygems |
Bundled Ruby gem dependencies |
opennebula-libs |
Shared Ruby libraries among various components |
opennebula-common |
Shared content for OpenNebula packages |
opennebula-common-onecfg |
Helpers for Configuration Management tool |
rpm: opennebula-java |
Java OCA Bindings |
python3-pyone |
Python 3 OCA Bindings |
There are also packages with debugging symbols for some platforms, e.g. openenbula-debuginfo on AlmaLinux/RHEL and opennebula-dbgsym on Debian/Ubuntu. Other architecture-specific components might come with similarly named packages, please query your packaging database if necessary.
Note
There are a few differences in package names among distributions. Those with varying package names contain mostly integration libraries and since they are for general use on installation Hosts, their names are left to follow the distribution conventions. Above, you can find the AlmaLinux/RHEL specific packages prefixed with “rpm:” and Debian/Ubuntu specific packages prefixed with “deb:”.
Install all OpenNebula Front-end components by executing the following commands under a privileged user:
AlmaLinux / RHEL
yum -y install opennebula opennebula-fireedge opennebula-gate opennebula-flow opennebula-provision
Debian / Ubuntu
apt-get update
apt-get -y install opennebula opennebula-fireedge opennebula-gate opennebula-flow opennebula-provision
Optional: Install dependencies for OpenNebula Edge Clusters provisioning
There are 2 main dependencies which needs to be installed on the FE for running provisioning.
Terraform – is needed to provision resources on public cloud providers, download the binary as follows
curl 'https://releases.hashicorp.com/terraform/0.14.7/terraform_0.14.7_linux_amd64.zip' | zcat >/usr/bin/terraform
chmod 0755 /usr/bin/terraform
2. Ansible – is used to configure the provisioned resources (cloud or on-premise). Ansible system package is installed as a dependency of the opennebula-provision package. However for HCI provisioning including Ceph, the system-installed ansible version may not be sufficient as it requires ansible-core 2.15+. It is advised to use latest Ubuntu for the FE if Ceph HCI provision is needed or install ansible 2.15+ on the system and make it default for oneadmin user.
Step 3. Enabling MySQL/MariaDB (Optional)
You can skip this step if you want to deploy OpenNebula as quickly as possible for evaluation.
If you are deploying Front-end for production/serious use, make sure you read the Database Setup guide and select the suitable database Back-end. Although it is possible to switch from (default) SQLite to MySQL/MariaDB Back-end later, it’s not easy and straightforward, so we suggest to deploy and use MySQL/MariaDB Back-end from the very beginning.
Step 4. Configuring OpenNebula
OpenNebula Daemon
Important
This is only for initial OpenNebula deployment, not applicable for upgrades!
OpenNebula’s initial deployment on first usage creates a user oneadmin inside the OpenNebula (not to be confused with system user oneadmin in the Front-end operating system!) based on a randomly generated password read from /var/lib/one/.one/one_auth. To set your own user password from the very beginning, proceed with the following steps before starting the services:
Log in as the
oneadminsystem user with this command:
sudo -u oneadmin /bin/sh
Create file
/var/lib/one/.one/one_authwith initial password in the formatoneadmin:<password>
echo 'oneadmin:changeme123' > /var/lib/one/.one/one_auth
Warning
This will set the oneadmin’s password only upon starting OpenNebula for the first time. From that point, you must use the oneuser passwd command to change oneadmin’s password. More information on how to change the oneadmin password is here.
Check how to change oneadmin password for already running services.
FireEdge
OpenNebula FireEdge is the next-generation web UI server that replaces the legacy Ruby Sunstone. It provides the Sunstone GUI — including additional functionality via Guacamole — as well as the OneProvision GUI for provisioning clusters. It is installed and configured by default.
Note
For advanced setup, follow the FireEdge configuration reference.
OneGate (Optional)
The OneGate server allows communication between VMs and OpenNebula. It’s optional and not required for basic functionality but is essential for multi-VM services orchestrated by OneFlow server below. The configuration is two-phase - configure the OneGate server to listen for the connections from outside the Front-end and configure the OpenNebula Daemon with OneGate end-point passed to the virtual machines. Neither or both must be done.
To configure OneGate, edit
/etc/one/onegate-server.confand update the:hostparameter with service listening address accordingly. For example, use0.0.0.0to work on all configured network interfaces on the Front-end:
:host: 0.0.0.0
To configure OpenNebula Daemon, edit
/etc/one/oned.confand set theONEGATE_ENDPOINTwith the URL and port of your OneGate server (domain or IP-based). The end-point address must be reachable directly from your future virtual machines. You need to decide what virtual networks and addresses will be used in your cloud. For example:
ONEGATE_ENDPOINT="http://one.example.com:5030"
If you are reconfiguring already running services at a later point, don’t forget to restart them to apply the changes.
Note
For advanced setup, follow the OneGate configuration reference.
OneFlow (Optional)
The OneFlow server orchestrates the services and multi-VM deployments. While for most cases the default configuration fits well, you might need to reconfigure the service to be able to control the OneFlow remotely over API. Edit the /etc/one/oneflow-server.conf and update :host: parameter with service listening address accordingly. For example, use 0.0.0.0 to work on all configured network interfaces on the Front-end:
:host: 0.0.0.0
If you are reconfiguring already running services at a later point, don’t forget to restart them to apply the changes.
Note
For advanced setup, follow the OneFlow configuration reference.
Step 5. Starting and Managing OpenNebula Services
The complete list of operating system services provided by OpenNebula:
Service |
Description |
Auto-Starts With |
|---|---|---|
opennebula |
Main OpenNebula Daemon (oned), XML-RPC API endpoint |
|
opennebula-scheduler |
Scheduler |
opennebula |
opennebula-hem |
Hook Execution Service |
opennebula |
opennebula-fireedge |
Next-generation GUI server FireEdge |
|
opennebula-gate |
OneGate Server for communication between VMs and OpenNebula |
|
opennebula-flow |
OneFlow Server for multi-VM services |
|
opennebula-guacd |
Guacamole Proxy Daemon |
opennebula-fireedge |
opennebula-showback |
Service for periodic recalculation of showback |
opennebula |
opennebula-ssh-agent |
Dedicated SSH agent for OpenNebula Daemon |
opennebula |
opennebula-ssh-socks-cleaner |
Periodic cleaner of SSH persistent connections |
opennebula |
Note
Since 5.12, the OpenNebula comes with an integrated SSH agent as the opennebula-ssh-agent service which removes the need to copy oneadmin’s SSH private key across your Hosts. For more information, you can look at the passwordless login section of the manual. You can opt to disable this service and configure your environment the old way.
You are ready to start all OpenNebula services with the following command (NOTE: you might want to remove the services from the command arguments if you skipped their configuration steps above):
systemctl start opennebula opennebula-fireedge opennebula-gate opennebula-flow
Warning
Make sure all required network ports are enabled on your firewall (on Front-end or the router).
Other OpenNebula services might be started as a dependency but you don’t need to care about them unless they need to be explicitly restarted or stopped. To start these services automatically on server boot, it’s necessary to enable them by the following command:
systemctl enable opennebula opennebula-fireedge opennebula-gate opennebula-flow
Step 6. Verifying the Installation
After OpenNebula is started for the first time, you should check that the commands can connect to the OpenNebula daemon. You can do this in the Linux CLI or the graphical user interface Sunstone.
Linux CLI
In the Front-end, run the following command as oneadmin system user and find a similar output:
oneuser show
USER 0 INFORMATION
ID              : 0
NAME            : oneadmin
GROUP           : oneadmin
PASSWORD        : 3bc15c8aae3e4124dd409035f32ea2fd6835efc9
AUTH_DRIVER     : core
ENABLED         : Yes

USER TEMPLATE
TOKEN_PASSWORD="ec21d27e2fe4f9ed08a396cbd47b08b8e0a4ca3c"

RESOURCE USAGE & QUOTAS
If you get an error message then the OpenNebula Daemon could not be started properly:
oneuser show
Failed to open TCP connection to localhost:2633 (Connection refused - connect(2) for "localhost" port 2633)
You can investigate the OpenNebula logs in /var/log/one, check files /var/log/one/oned.log (main OpenNebula Daemon log) and /var/log/one/sched.log (OpenNebula Scheduler log). Check for any error messages marked with [E].
FireEdge
Note
Make sure the TCP port 2616 is not blocked on your firewall.
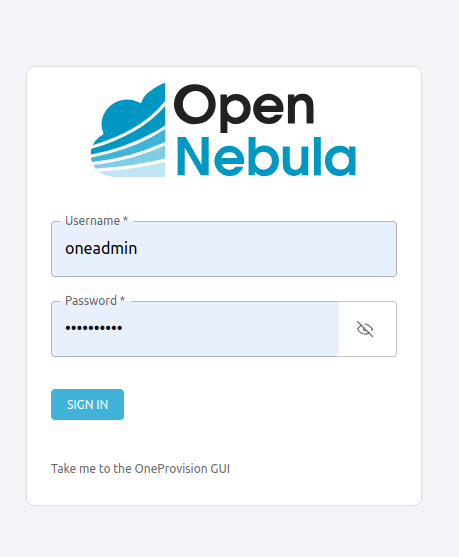
Now you can try to log in through the Sunstone GUI and Provision GUI. To do so, point your browser to http://<frontend_address>:2616/fireedge/sunstone to access to Sunstone and point your browser to http://<frontend_address>:2616/fireedge/provision to access to Provision. You should get to the login page in both cases. The access user is oneadmin and initial (or customized) password is the one from the file /var/lib/one/.one/one_auth on your Front-end.
In case of problems, you can investigate the OpenNebula logs in /var/log/one and check file /var/log/one/fireedge.log.
Directory Structure
The following table lists few significant directories on your OpenNebula Front-end:
Path |
Description |
|---|---|
|
Configuration files |
|
Log files, e.g. |
|
|
|
Storage for the datastores |
|
Action files for VMs (deployment file, transfer manager scripts, etc…) |
|
|
|
Probes and scripts that will be synced to the Hosts |
|
Configuration files for probes and scripts |
|
Hook scripts |
|
Virtual Machine Manager Driver scripts |
|
Authentication Driver scripts |
|
Information Manager (monitoring) Driver scripts |
|
MarketPlace Driver scripts |
|
Datastore Driver scripts |
|
Networking Driver scripts |
|
Transfer Manager Driver scripts |
Firewall Configuration
The list below shows the ports used by OpenNebula. These ports need to be open for OpenNebula to work properly:
Port |
Description |
|---|---|
|
Front-end host SSH server |
|
OneFlow server |
|
Next-generation GUI server FireEdge |
|
Main OpenNebula Daemon (oned), XML-RPC API endpoint |
|
Monitoring daemon (both TCP/UDP) |
|
OneGate server |
|
noVNC Proxy Server |
|
VNC Server ports on hosts for VMs. See VNC_PORTS |
|
Host-Host port communication required for KVM live migrations |
Note
These are only the default ports. Each component can be configured to bind to specific ports or use a HTTP Proxy.
OpenNebula connects to the hypervisor Nodes over SSH (port 22). Additionally, the main OpenNebula Daemon (oned) may connect to various remote Marketplace servers to get a list of available appliances, e.g.:
OpenNebula Marketplace (
https://marketplace.opennebula.io/)Linux Containers Marketplace (
https://images.linuxcontainers.org/)
You should open the outgoing connections to these services.
Step 7. Stop and Restart Services (Optional)
To stop, start or restart any of the listed individual services, follow the examples below for a selected service:
systemctl stop        opennebula
systemctl start       opennebula
systemctl restart     opennebula
systemctl try-restart opennebula
Use following command to stop all OpenNebula services:
systemctl stop opennebula opennebula-scheduler opennebula-hem \
    opennebula-fireedge opennebula-gate opennebula-flow \
    opennebula-guacd opennebula-novnc opennebula-showback.timer \
    opennebula-ssh-agent opennebula-ssh-socks-cleaner.timer
Use the following command to restart all already running OpenNebula services:
systemctl try-restart opennebula opennebula-scheduler opennebula-hem \
    opennebula-fireedge opennebula-gate opennebula-flow \
    opennebula-guacd opennebula-novnc opennebula-ssh-agent
Learn more about Managing Services with Systemd.
In production environments the services should be stopped in a specific order and with extra manual safety checks:
Stop opennebula-scheduler to stop planning deployment of VMs.
Stop opennebula-fireedge to disable GUI access to users.
Stop openenbula-flow to disable unattended multi-VM options.
Check and wait until there are no active operations with VMs and images.
Stop opennebula and rest services.
Step 8. Next steps
Now that you have successfully started your OpenNebula services, you can continue with adding content to your cloud. Add hypervisor Nodes, storage, and Virtual Networks. Or you can provision Users with Groups and permissions, Images, define and run Virtual Machines.
Continue with the following guides:
Open Cluster Deployment to provision hypervisor Nodes, storage, and Virtual Networks.
Management and Operations to add Users, Groups, Images, define Virtual Machines, and a lot more …