Virtual Networks
Commonly a Host is connected to one or more networks that are available to the VMs through bridges. OpenNebula allows the creation of Virtual Networks by mapping them on top of the physical ones.
Virtual Network Definition
A Virtual Network definition consists of three different parts:
The underlying physical network infrastructure that will support it, including the network driver.
The logical address space available. Addresses associated to a Virtual Network can be IPv4, IPv6, dual stack IPv4-IPv6 or Ethernet.
The guest configuration attributes to setup the Virtual Machine network, that may include for example network masks, DNS servers or gateways.
Physical Network Attributes
To define a Virtual Network include:
Its name (
NAME) to refer to this Virtual Network.The driver (
VN_MAD) to implement this Virtual Network. Depending on the driver you may need to set additional attributes, check the following to get more details:QoS parameters (optional) for each NIC attached to the network, to limit the inbound/outbound average and peak bandwidths as well as the burst data size that can be transmitted at peak speed (see more details here).
For example, to define a 802.1Q Virtual Network you would add:
NAME    = "Private Network"
VN_MAD  = "802.1Q"
PHYDEV  = "eth0"

OUTBOUND_AVG_BW = "1000"
OUTBOUND_PEAK_BW = "1500"
OUTBOUND_PEAK_KB = "2048"
Address Space
The addresses available in a Virtual Network are defined by one or more Address Ranges (AR). Each AR defines a continuous address range and optionally, configuration attributes that will override those defined in the Virtual Network. There are four types of ARs:
IPv4, to define a contiguous IPv4 address set (classless), see more details here
IPv6, to define global and ULA IPv6 networks, see full details here
IPv6 no-SLAAC, to define fixed 128 bits IPv6 address, see here
Dual stack, each NIC in the network will get both a IPv4 and a IPv6 address (SLAAC or no-SLAAC), see more here
Ethernet, just MAC addresses are generated for the VMs. You should use this AR when an external service is providing the IP addresses, such a DHCP server, see more details here
For example, to define the IPv4 address range 10.0.0.150 - 10.0.0.200
AR=[
    TYPE = "IP4",
    IP   = "10.0.0.150",
    SIZE = "51",
]
Guest Configuration Attributes (Context)
To setup the guest network, the Virtual Network may include additional information to be injected into the VM at boot time. These contextualization attributes may include for example network masks, DNS servers or gateways. For example, to define a gateway and DNS server for the virtual machines in the Virtual Network, simply add:
DNS = "10.0.0.23"
GATEWAY = "10.0.0.1"
These attributes are automatically added to the VM and processed by the context packages. Virtual Machines just need to add:
CONTEXT = [
  NETWORK="yes"
]
Virtual Network Definition Example
Getting all the three pieces together we get:
NAME    = "Private"
VN_MAD  = "802.1Q"
PHYDEV  = "eth0"

AR=[
    TYPE = "IP4",
    IP   = "10.0.0.150",
    SIZE = "51"
]

DNS     = "10.0.0.23"
GATEWAY = "10.0.0.1"

DESCRIPTION = "A private network for VM inter-communication"
This file will create a IPv4 network using VLAN tagging, the VLAN ID in this case is assigned by OpenNebula. The network will lease IPs in the range 10.0.0.150 - 10.0.0.200. Virtual Machines in this network will get a lease in the range and configure DNS servers to 10.0.0.23 and 10.0.0.1 as default gateway.
States and Life-cycle
The Virtual Network will be moving through different states to represent the actions you perform and their status. The following table summarizes the Virtual Network states and their meaning:
State |
Short state |
OpenNebula State Names |
Meaning |
|---|---|---|---|
Ready |
|
|
Virtual Network is ready to be used |
Locked |
|
|
Virtual Network is being created/deleted. Driver operation is in progress. |
|
|||
Error |
|
|
Error state, an operation failed. See the Virtual Network information with |
Failure |
|
|
Virtual Network update fails to update some Virtual Machine NICs. |
Adding and Deleting Virtual Networks
Note
This guide uses the CLI command onevnet, but you can also manage your virtual networks using Sunstone. Select the Network tab, and there you will be able to create and manage your virtual networks in a user friendly way.
There are three different ways for creating a network:
Creating the network from scratch.
Making a reservation from an existing network.
Instantiating a Virtual Network Template.
End users typically use the last two ways, instantiation and reservation. The administrator can define a network template for being instantiated later by the end user or create a virtual network where the end user can make a reservation from.
To create a new network from scratch put its configuration in a file, and then execute:
$ onevnet create priv.net
ID: 4
You can delete a virtual network using its ID or name:
$ onevnet delete 0
$ onevnet delete "Private"
To list the virtual networks in the system use onevnet list:
$ onevnet list
ID USER      GROUP       NAME        CLUSTER    BRIDGE    STATE  LEASES
 0 admin     oneadmin    Private     0,100      onebr.10  rdy         0
 1 admin     oneadmin    Public      0,101      vbr0      rdy         0
In the output above, USER is the owner of the network and LEASES the number of addresses assigned to a virtual machine or reserved.
You can check the details of a Virtual Network with the onevnet show command:
$ onevnet show 1
  VIRTUAL NETWORK 4 INFORMATION
  ID             : 4
  NAME           : Private
  USER           : ruben
  GROUP          : oneadmin
  CLUSTERS       : 0
  BRIDGE         : onebr4
  STATE          : READY
  VN_MAD         : 802.1Q
  PHYSICAL DEVICE: eth0
  VLAN ID        : 6
  USED LEASES    : 0

  PERMISSIONS
  OWNER          : um-
  GROUP          : ---
  OTHER          : ---

  VIRTUAL NETWORK TEMPLATE
  BRIDGE="onebr4"
  DESCRIPTION="A private network for VM inter-communication"
  DNS="10.0.0.23"
  GATEWAY="10.0.0.1"
  PHYDEV="eth0"
  SECURITY_GROUPS="0"
  VN_MAD="802.1Q"

  ADDRESS RANGE POOL
  AR 0
  SIZE           : 51
  LEASES         : 0

  RANGE                                   FIRST                               LAST
  MAC                         02:00:0a:00:00:96                  02:00:0a:00:00:c8
  IP                                 10.0.0.150                         10.0.0.200
Check the onevnet command help or the reference guide for more options to list the virtual networks.
Virtual Network Tips
You may have some used IPs in a VNET so you do not want them to be assigned. You can add as many ARs as you need to implement these address gaps. Alternatively you can put address on hold to prevent them to be assigned.
ARs can be of SIZE = 1 to define single addresses lease scheme.
ARs does not need to be of the same type or belong to the same IP network. To accommodate this use case you can overwrite context attributes in the AR, for example adding attributes like NETWORK_MASK or DNS in the AR definition.
Super-netting, you can even combine ARs overwriting the physical attributes, e.g.
BRIDGEorVLAN_ID. This way a Virtual Network can be a logical super-net, e.g. DMZ, that can be implemented through multiple VLANs each using a different hypervisor bridge.There are no need to plan all your IP assignment plan beforehand, ARs can be added and modified after the Virtual Network is created, see below.
Orphan Virtual Networks (i.e Virtual Networks not referenced by any template) can be shown with
onevnet orphanscommand.
Updating a Virtual Network
After creating a Virtual Network, you can use the onevnet update command to update its attributes. The name of the Virtual Network can be changed with onevnet rename command.
The update operation will trigger driver action to live update the network configuration for all virtual machines with leases in the virtual network. The attributes that can be live-updated depends on the driver configured for the Virtual Network, see the following table:
Network Driver |
Live-update Attributes |
|---|---|
OpenvSwitch OpenvSwitch VXLAN |
|
bridge |
|
fw |
|
802.1Q vxlan |
|
Important
QoS attribues (INBOUND and OUTBOUND) can be updated for single VMs with onevm nic-update.
Important
For SR-IOV based NICs you can update all the attributes that can be set for this type of interfaces
As the network is updated for each VM and host, you can check the progress of the update in Virtual Network details:
UPDATED_VMS, list of VM IDs already updated.
UPDATING_VMS, list of VM IDs that are being updated (driver action in execution).
OUTDATED_VMS, list of VM IDs with outdated virtual network configuration.
ERROR_VMSlists of VM IDs where the update operation failed.
In case of driver action failure, the Virtual Network will switch to UPDATE_FAILURE state. In that case you can use onevnet recover --retry to re-launch the driver actions for failed VMs. Or manually fix the network and call onevnet recover --success.
Note
Please consider that for Virtual Networks with lot of leases it may take some time to propagate changes to all host and VMs.
Managing Address Ranges
Addresses are structured in Address Ranges (AR). Address Ranges can be dynamically added or removed from a Virtual Network. In this way, you can easily add new addresses to an existing Virtual Network if the current addresses are exhausted.
Adding and Removing Address Ranges
A new AR can be added using exactly the same definition parameters as described above. For example the following command will add a new AR of 20 IP addresses:
onevnet addar Private --ip 10.0.0.200 --size 20
In the same way you can remove an AR:
onevnet rmar Private 2
Updating Address Ranges
You can update the following attributes of an AR:
SIZE, assigned addresses cannot fall outside of the range.IPv6 prefix:
GLOBAL_PREFIXandULA_PREFIXAny custom attribute that may override the Virtual Network defaults.
The following command shows how to update an AR using the CLI, an interactive editor session will be stated:
onevnet updatear Private 0
Hold and Release Leases
Addresses can be temporarily be marked as hold. They are still part of the network, but they will not be assigned to any virtual machine.
To do so, use the onevnet hold and onevnet release commands. By default, the address will be put on hold in all ARs containing it; if you need to hold the IP of a specific AR you can specified it with the ‘-a <AR_ID>’ option.
#Hold IP 10.0.0.120 in all ARs
$ onevnet hold "Private Network" 10.0.0.120

#Hold IP 10.0.0.123 in AR 0
$ onevnet hold 0 10.0.0.123 -a 0
You see the list of leases on hold with the onevnet show command, they’ll show up as used by virtual machine -1, ‘V: -1’
Using Virtual Networks
Once the Virtual Networks are setup, they can be made available to users based on access rights and ownership. The preferred way to do so is through Virtual Data Center abstraction. By default, all Virtual Networks are automatically available to the group users.
Virtual Network can be used by VMs in two different ways:
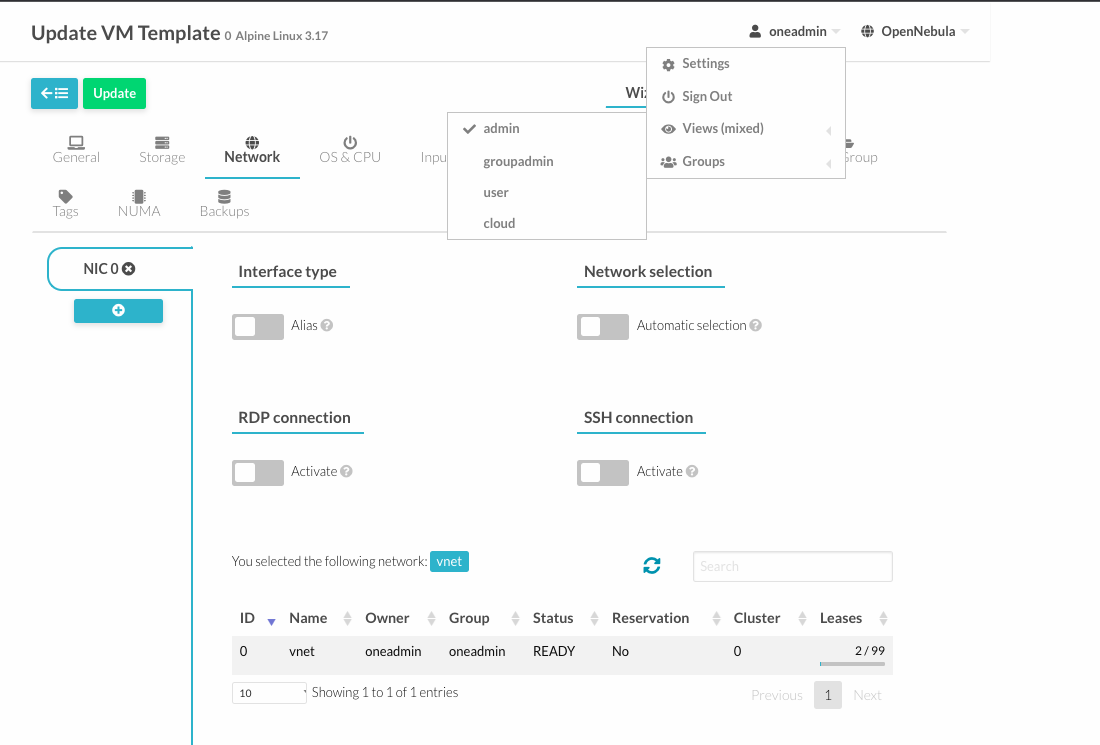
Manual selection: NICs in the VMs are attached to a specific Virtual Network.
Automatic selection: Virtual networks are scheduled like other resources needed by the VM (like hosts or datastores).
Manual Attach a Virtual Machine to a Virtual Network
To attach a Virtual Machine to a Virtual Network simply specify its name or ID in the NIC attribute. For example, to define VM with a network interface connected to the Private Virtual Network just include in the template:
NIC = [ NETWORK = "Private" ]
Equivalently you can use the network ID as:
NIC = [ NETWORK_ID = 0 ]
The Virtual Machine will also get a free address from any of the address ranges of the network. You can also request a specific address just by adding the IP or MAC to NIC. For example to put a Virtual Machine in the network Private and request 10.0.0.153 use:
NIC = [ NETWORK = "Network", IP = 10.0.0.153 ]
Warning
Note that if OpenNebula is not able to obtain a lease from a network the submission will fail.
Warning
Users can only attach VMs or make reservations from Virtual Networks with USE rights on it. See the Managing Permissions documentation for more information.
Automatic Attach a Virtual Machine to a Virtual Network
You can delay the network selection for each NIC in the VM to the deployment phase. In this case the Scheduler will pick the Virtual Network among the available networks in the host selected to deploy the VM.
This strategy is useful to prepare generic VM templates that can be deployed in multiple OpenNebula clusters.
To set the automatic selection mode, simply add the attribute NETWORK_MODE = "auto" into the NIC attribute.
NIC = [ NETWORK_MODE = "auto" ]
To do this via Sunstone you need to make sure the sunstone view you are using has the parameter automatic_selection_vnet set to true.
Also you can add SCHED_REQUIREMENTS and SCHED_RANK when this mode is activated. This will let you specify which networks can be used for a specific NIC (SCHED_REQUIREMENTS) and what are you preferences (SCHED_RANK) to select a network among the suitable ones.
NIC = [ NETWORK_MODE = "auto",
        SCHED_REQUIREMENTS = "TRAFFIC_TYPE = \"public\" & INBOUND_AVG_BW<1500",
        SCHED_RANK = "-USED_LEASES" ]
In this case the scheduler will look for any Virtual Network in the selected cluster with a custom tag TRAFFIC_TYPE to be equal to public and INBOUND_AVG_BW less than 1500. Among all the networks that satisfy these requirements the scheduler will select that with most free leases.
Attach a NIC Alias to a Virtual Machine
To attach a NIC alias to a VM you need to refer the parent NIC by its NAME attribute:
NIC = [ NETWORK = "public", NAME = "test" ]
Important
Names in the form NIC<number> are reserved. OpenNebula will rename them to _NIC<number>.
Then you can attach an alias using a NIC_ALIAS attribute:
NIC_ALIAS = [ NETWORK = "private", PARENT = "test" ]
If the nic NAME is empty, it will be generated automatically in the form NIC${NIC_ID}. This name can be also used to create an alias, e.g. NIC_ALIAS = [ NETWORK = "private", PARENT = "NIC0" ]
Note
You can also use the onevm command using the option --alias alias so that NIC will be attached as an alias, instead of as a NIC.
Important
Any attribute supported by a NIC attribute can be also used in an alias except for NETWORK_MODE. A NIC_ALIAS network cannot be automatically selected.
Important
The Security Groups and IP/MAC spoofing filters from the NIC network will be applied to the NIC_ALIAS. Those ones belonging to the NIC_ALIAS network won’t apply.
Configuring the Virtual Machine Network
Hypervisors will set the MAC address for the NIC of the Virtual Machines, but not the IP address. The IP configuration inside the guest is performed by the contextualization process, check the contextualization guide to learn how to prepare your Virtual Machines to automatically configure the network
Note
Alternatively a custom external service can configure the Virtual Machine network (e.g. your own DHCP server in a separate virtual machine)
Recovering the Virtual Network
- In case the Virtual Network is not in
READYstate, useonevnet recoverto fix the Virtual Network. The command accepts the following flags: --failureDriver action doesn’t completed succesfully, move the Virtual Network toERRORstate.--successUser manually fixed the issue, move the Virtual Network toREADYstate.--deleteThe Virtual Network can’t be fixed, delete it.--retryRetry the last driver action. Allowed only inUPDATE_FAILUREstate
Using Sunstone to Manage Virtual Networks
You can also manage your Virtual Networks using Sunstone. Select the Networks tab, and there, you will be able to create, enable, and operate your Virtual Networks in a user friendly way.