Running Kubernetes Clusters
In previous tutorials of this Quick Start Guide, we:
Installed an OpenNebula Front-end using miniONE,
deployed a Metal Edge Cluster on AWS, and
deployed a Virtual Machine with WordPress on that Metal Edge Cluster.
At this point, we are ready to deploy something more complex on our Metal Edge Cluster: an enterprise-grade, multi-master Kubernetes cluster based on SUSE Rancher’s RKE2 Kubernetes distribution. Like the WordPress VM, the Kubernetes cluster is available in the OpenNebula Public Marketplace. You can find it as the multi-VM appliance Service OneKE, the OpenNebula Kubernetes Edition.
To deploy the Kubernetes cluster, we’ll follow these high-level steps:
Download the OneKE Service from the OpenNebula Marketplace.
Instantiate a private network on the Edge Cluster.
Instantiate the Kubernetes Service.
Deploy an application on Kubernetes.
Important
As mentioned above, we’ll use the infrastructure created in previous tutorials of this Quick Start Guide, namely our OpenNebula Front-end and our Metal Edge Cluster, both deployed on AWS. To complete this tutorial, you will need the Front-end and the Edge Cluster up and running.
This tutorial includes a preliminary section to avoid known problems related to a datastore parameter in AWS, and a Known Issues section at the end for troubleshooting.
In this tutorial we’ll perform a basic install of the Kubernetes cluster. The OneKE appliance offers options such as High Availability, Longhorn storage, load balancing and CNI plugins, which are out of the scope of this guide. For the full documentation of the OneKE appliance, please see the OpenNebula Apps Documentation.
A Preliminary Step: Remove REPLICA_HOST
It’s a known issue in AWS Edge Clusters that the REPLICA_HOST parameter in the template for the cluster’s datastore may cause QCOW2 image corruption, which causes VMs to boot incorrectly. To avoid the possibility of sporadic VM boot failures, remove the REPLICA_HOST parameter from the datastore template.
Follow these steps:
Log in to Sunstone as user
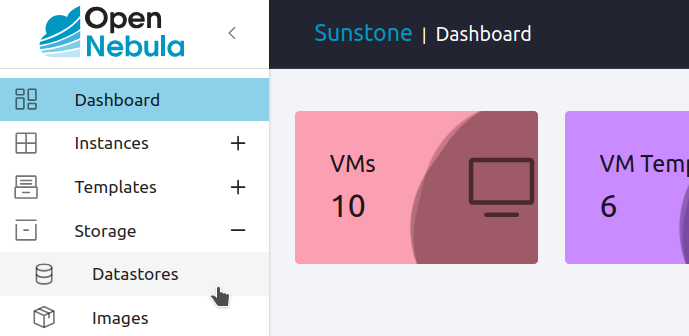
oneadmin.Open the left-hand pane (by hovering your mouse over the icons on the left), then select Storage -> Datastores.
Select the system datastore for the AWS cluster. (If you began this Quick Start Guide on a clean install, it will probably display ID
100.)
Sunstone will display the Info panel for the datastore. Scroll down to the Attributes section and find the
REPLICA_HOSTattribute. Hover your mouse to the right, to display the Copy/Edit/Delete iconsfor the attribute value:

Click the Delete icon
.
When Sunstone requests to confirm the action, click Yes.
You have deleted the REPLICA_HOST parameter from the datastore. In the next step we’ll download the OneKE appliance.
Step 1. Download the OneKE Service from the OpenNebula Marketplace
The OpenNebula Public Marketplace is a repository of Virtual Machines and appliances which are curated, tested and certified by OpenNebula.
The Kubernetes cluster is packaged in a multi-VM service appliance listed as Service OneKE <version>. To download it, follow the same steps as when downloading the WordPress VM:
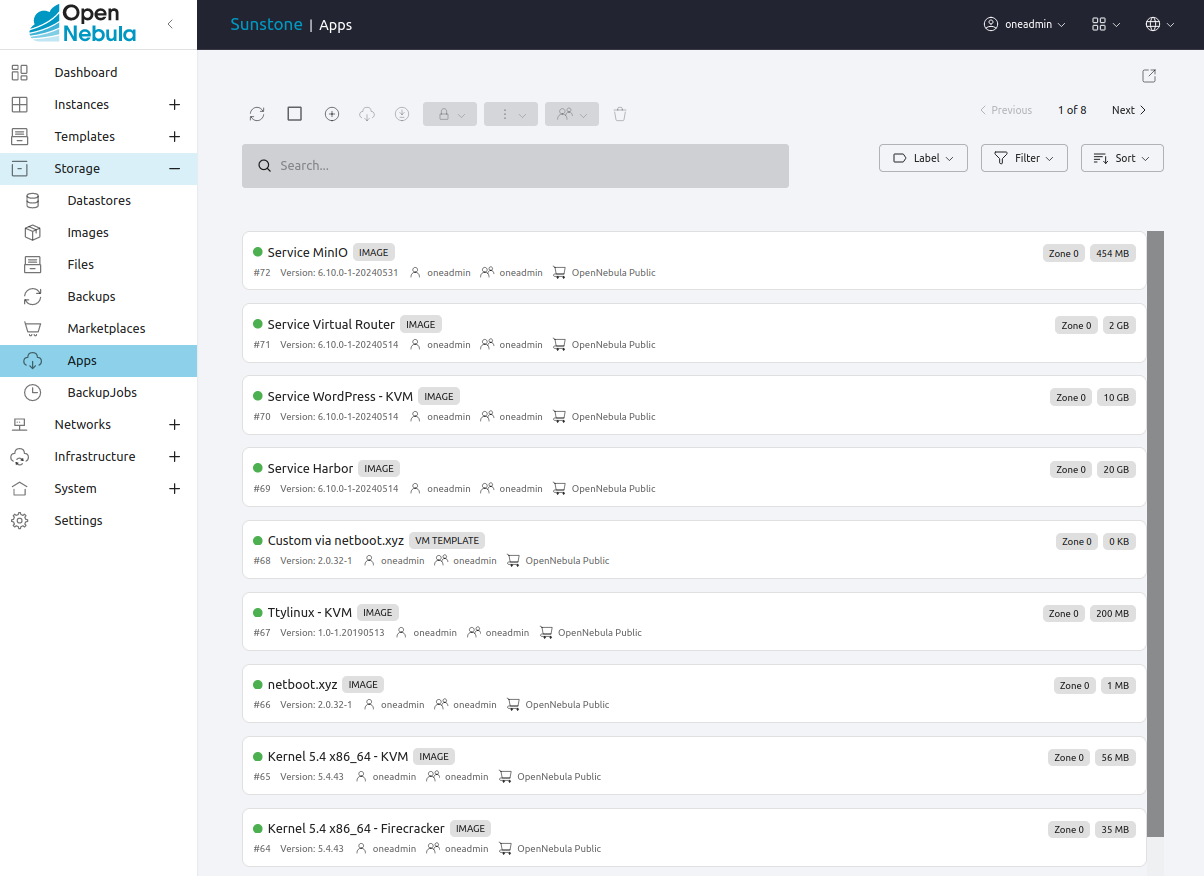
Open the left-hand pane, then select Storage -> Apps. Sunstone will display the Apps screen, showing the first page of apps that are available for download.
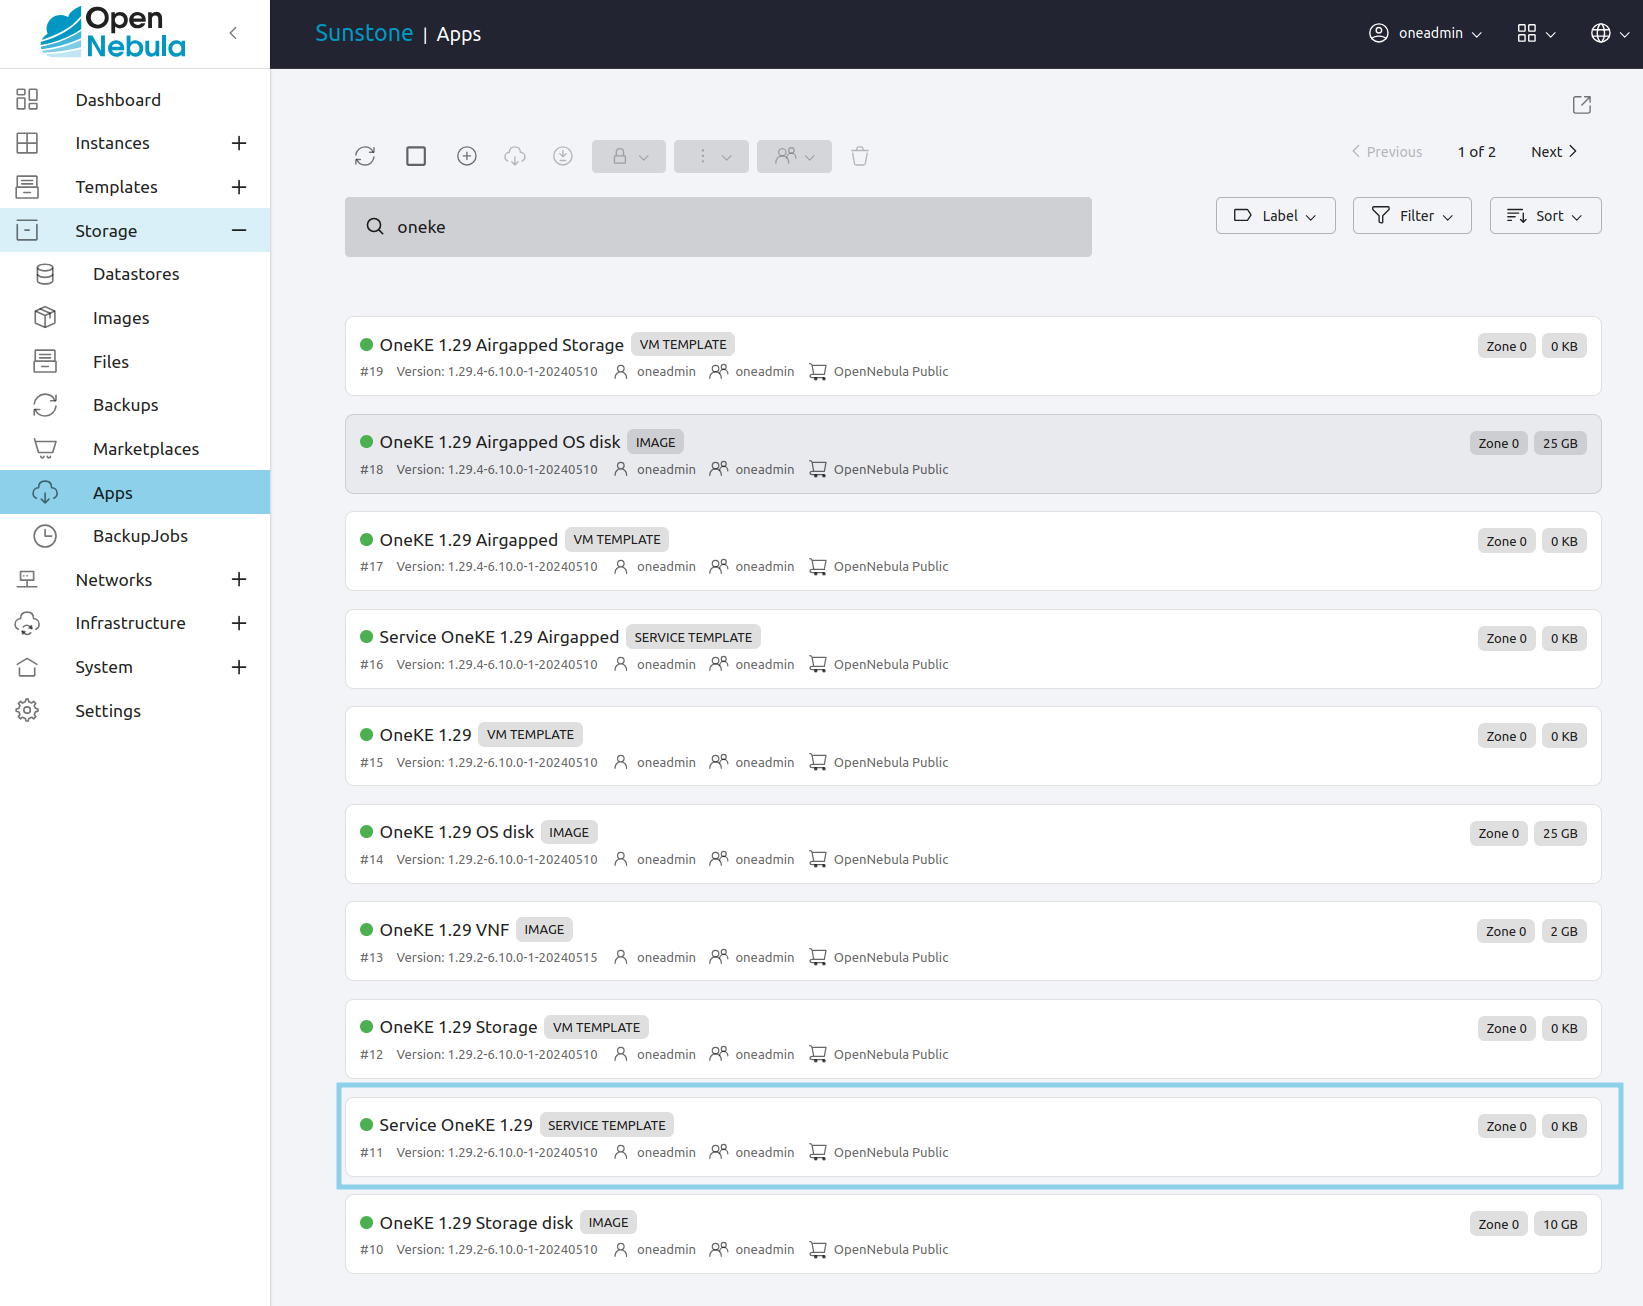
In the search field at the top, type oneke to filter by name. Then, select Service OneKE <version number> with the highest version number, in this case Service OneKE 1.29 highlighted below.
Click the Import into Datastore  icon.
icon.
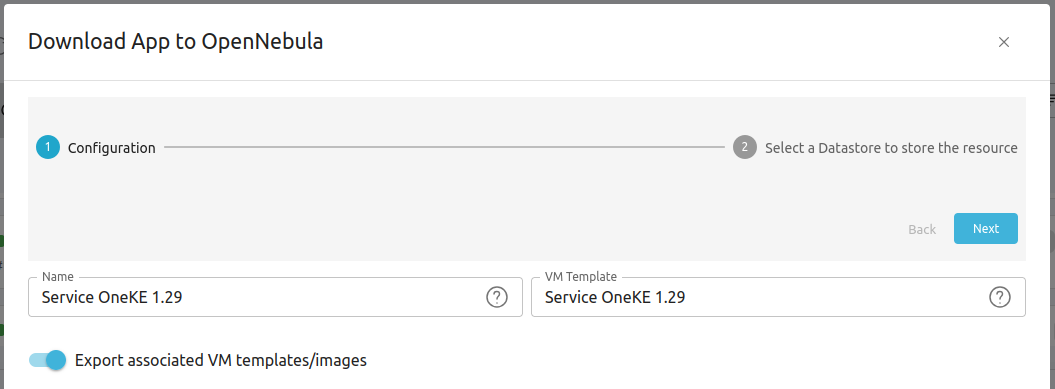
As with the WordPress appliance, Sunstone displays the Download App to OpenNebula wizard. In the first screen of the wizard, click Next.
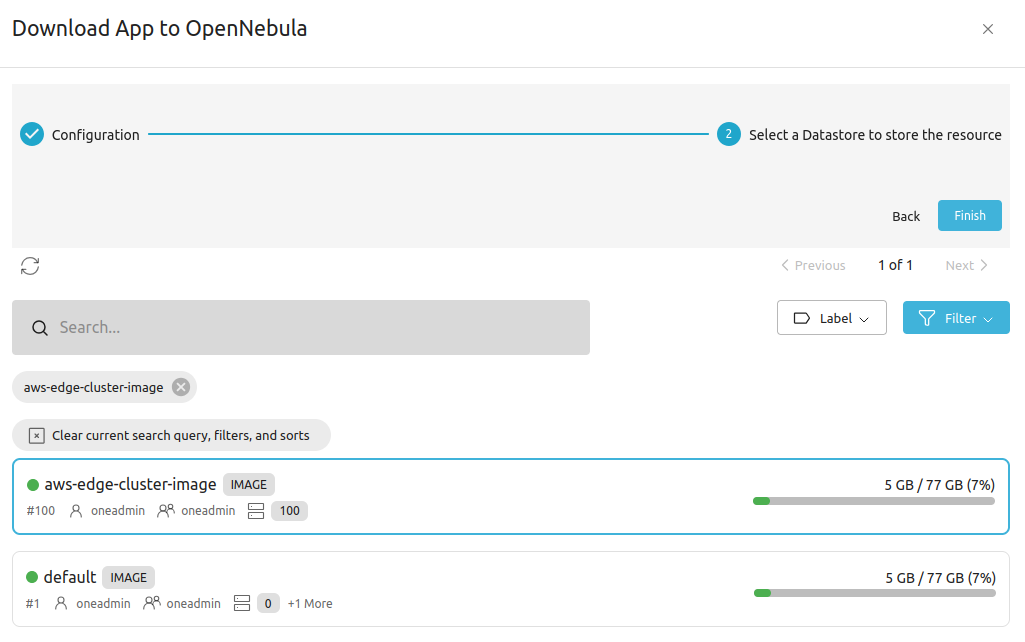
In the second screen you will need to select a datastore for the appliance. Select the aws-edge-cluster-image datastore.
Click Finish. Sunstone will display the appliance template and download the appliance in the background. Wait for the appliance State to switch from LOCKED to READY. The appliance comprises a 25GB download, so this may take several minutes.
Step 2. Instantiate a Private Network on the Edge Cluster
During Provisioning an Edge Cluster, OpenNebula automatically created a network template for the Edge Cluster. In this step we will instantiate it and assign a range of IPs to it.
In Sunstone, open the left-hand pane, then select Network -> Network Templates.
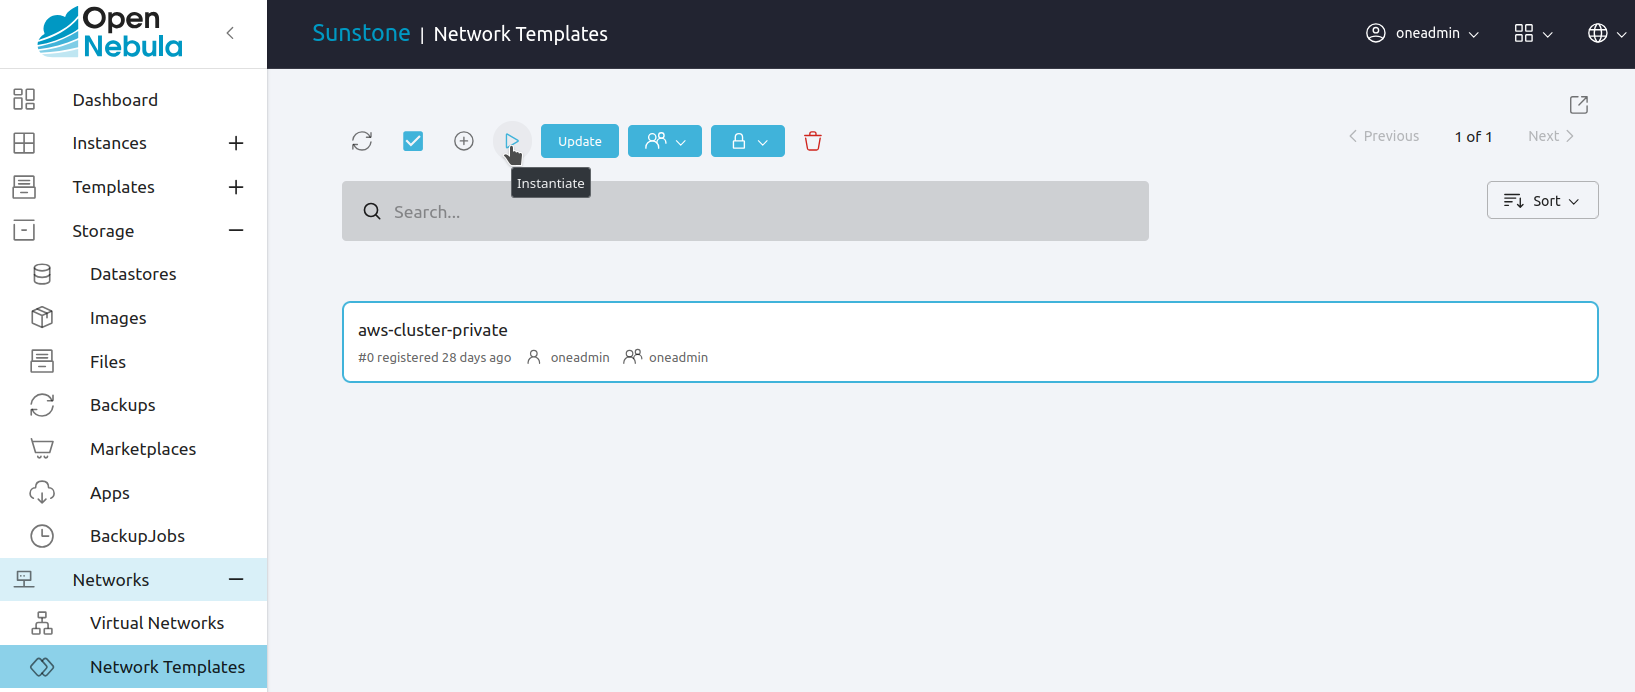
Select the aws-edge-cluster-private Virtual Network template, then click the Instantiate  icon at the top.
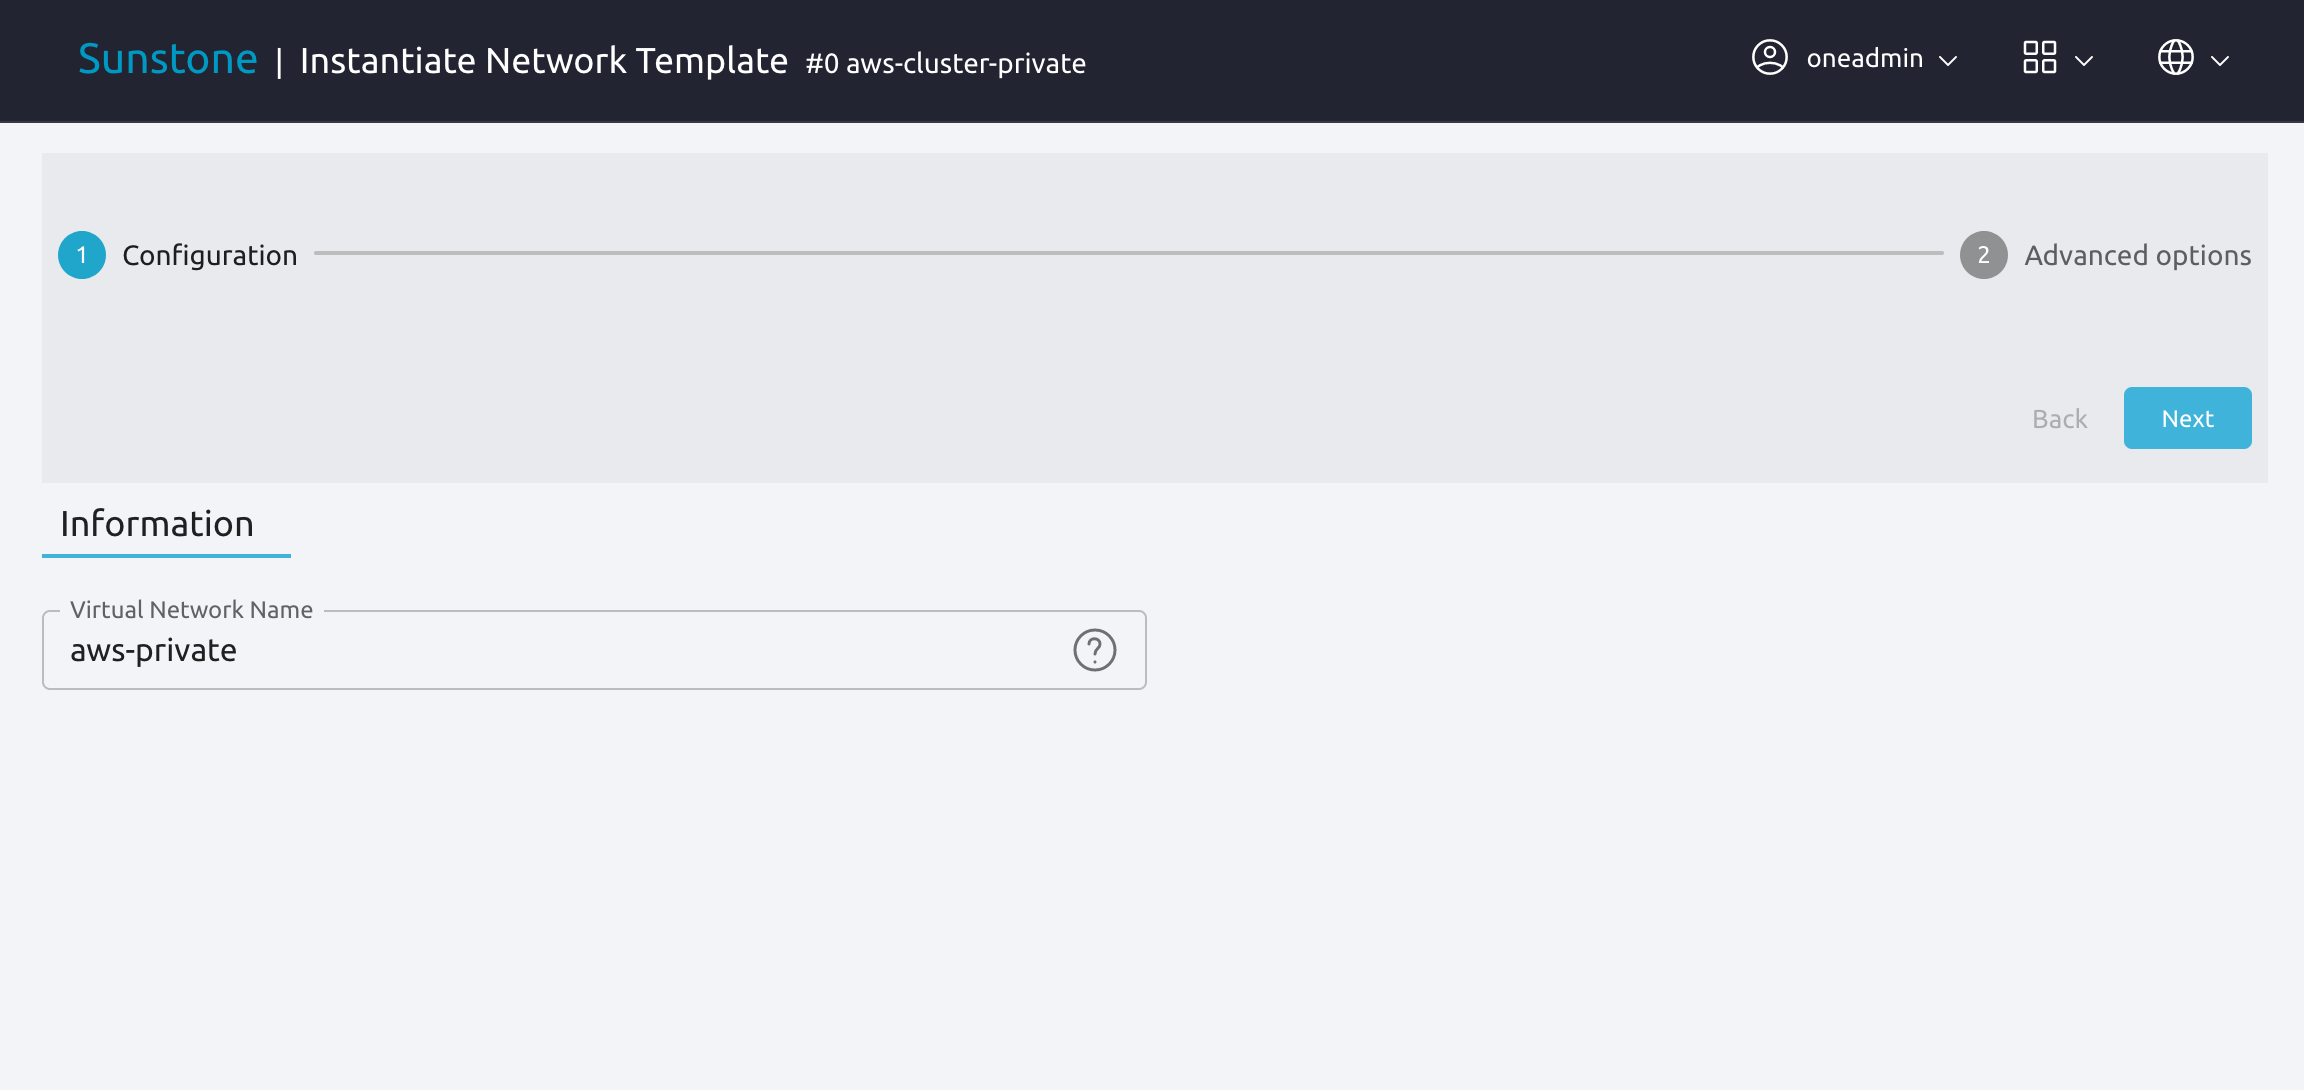
Sunstone displays the Instantiate Network Template wizard. In the first screen, choose a name for the network, e.g. aws-private.
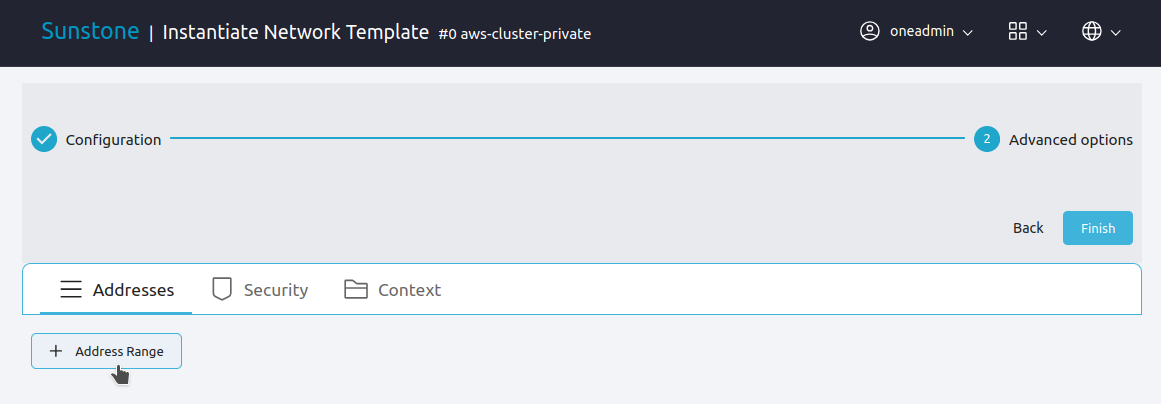
Click Next. In the next screen, click the Address Range box to select an IP address range for the network.
Sunstone displays the Address Range dialog box. Here you can define an address range by selecting the first address and the size of the address range. Select a range of private IPv4 addresses, for example 172.20.0.1. In this example we’ll set a size of 100.
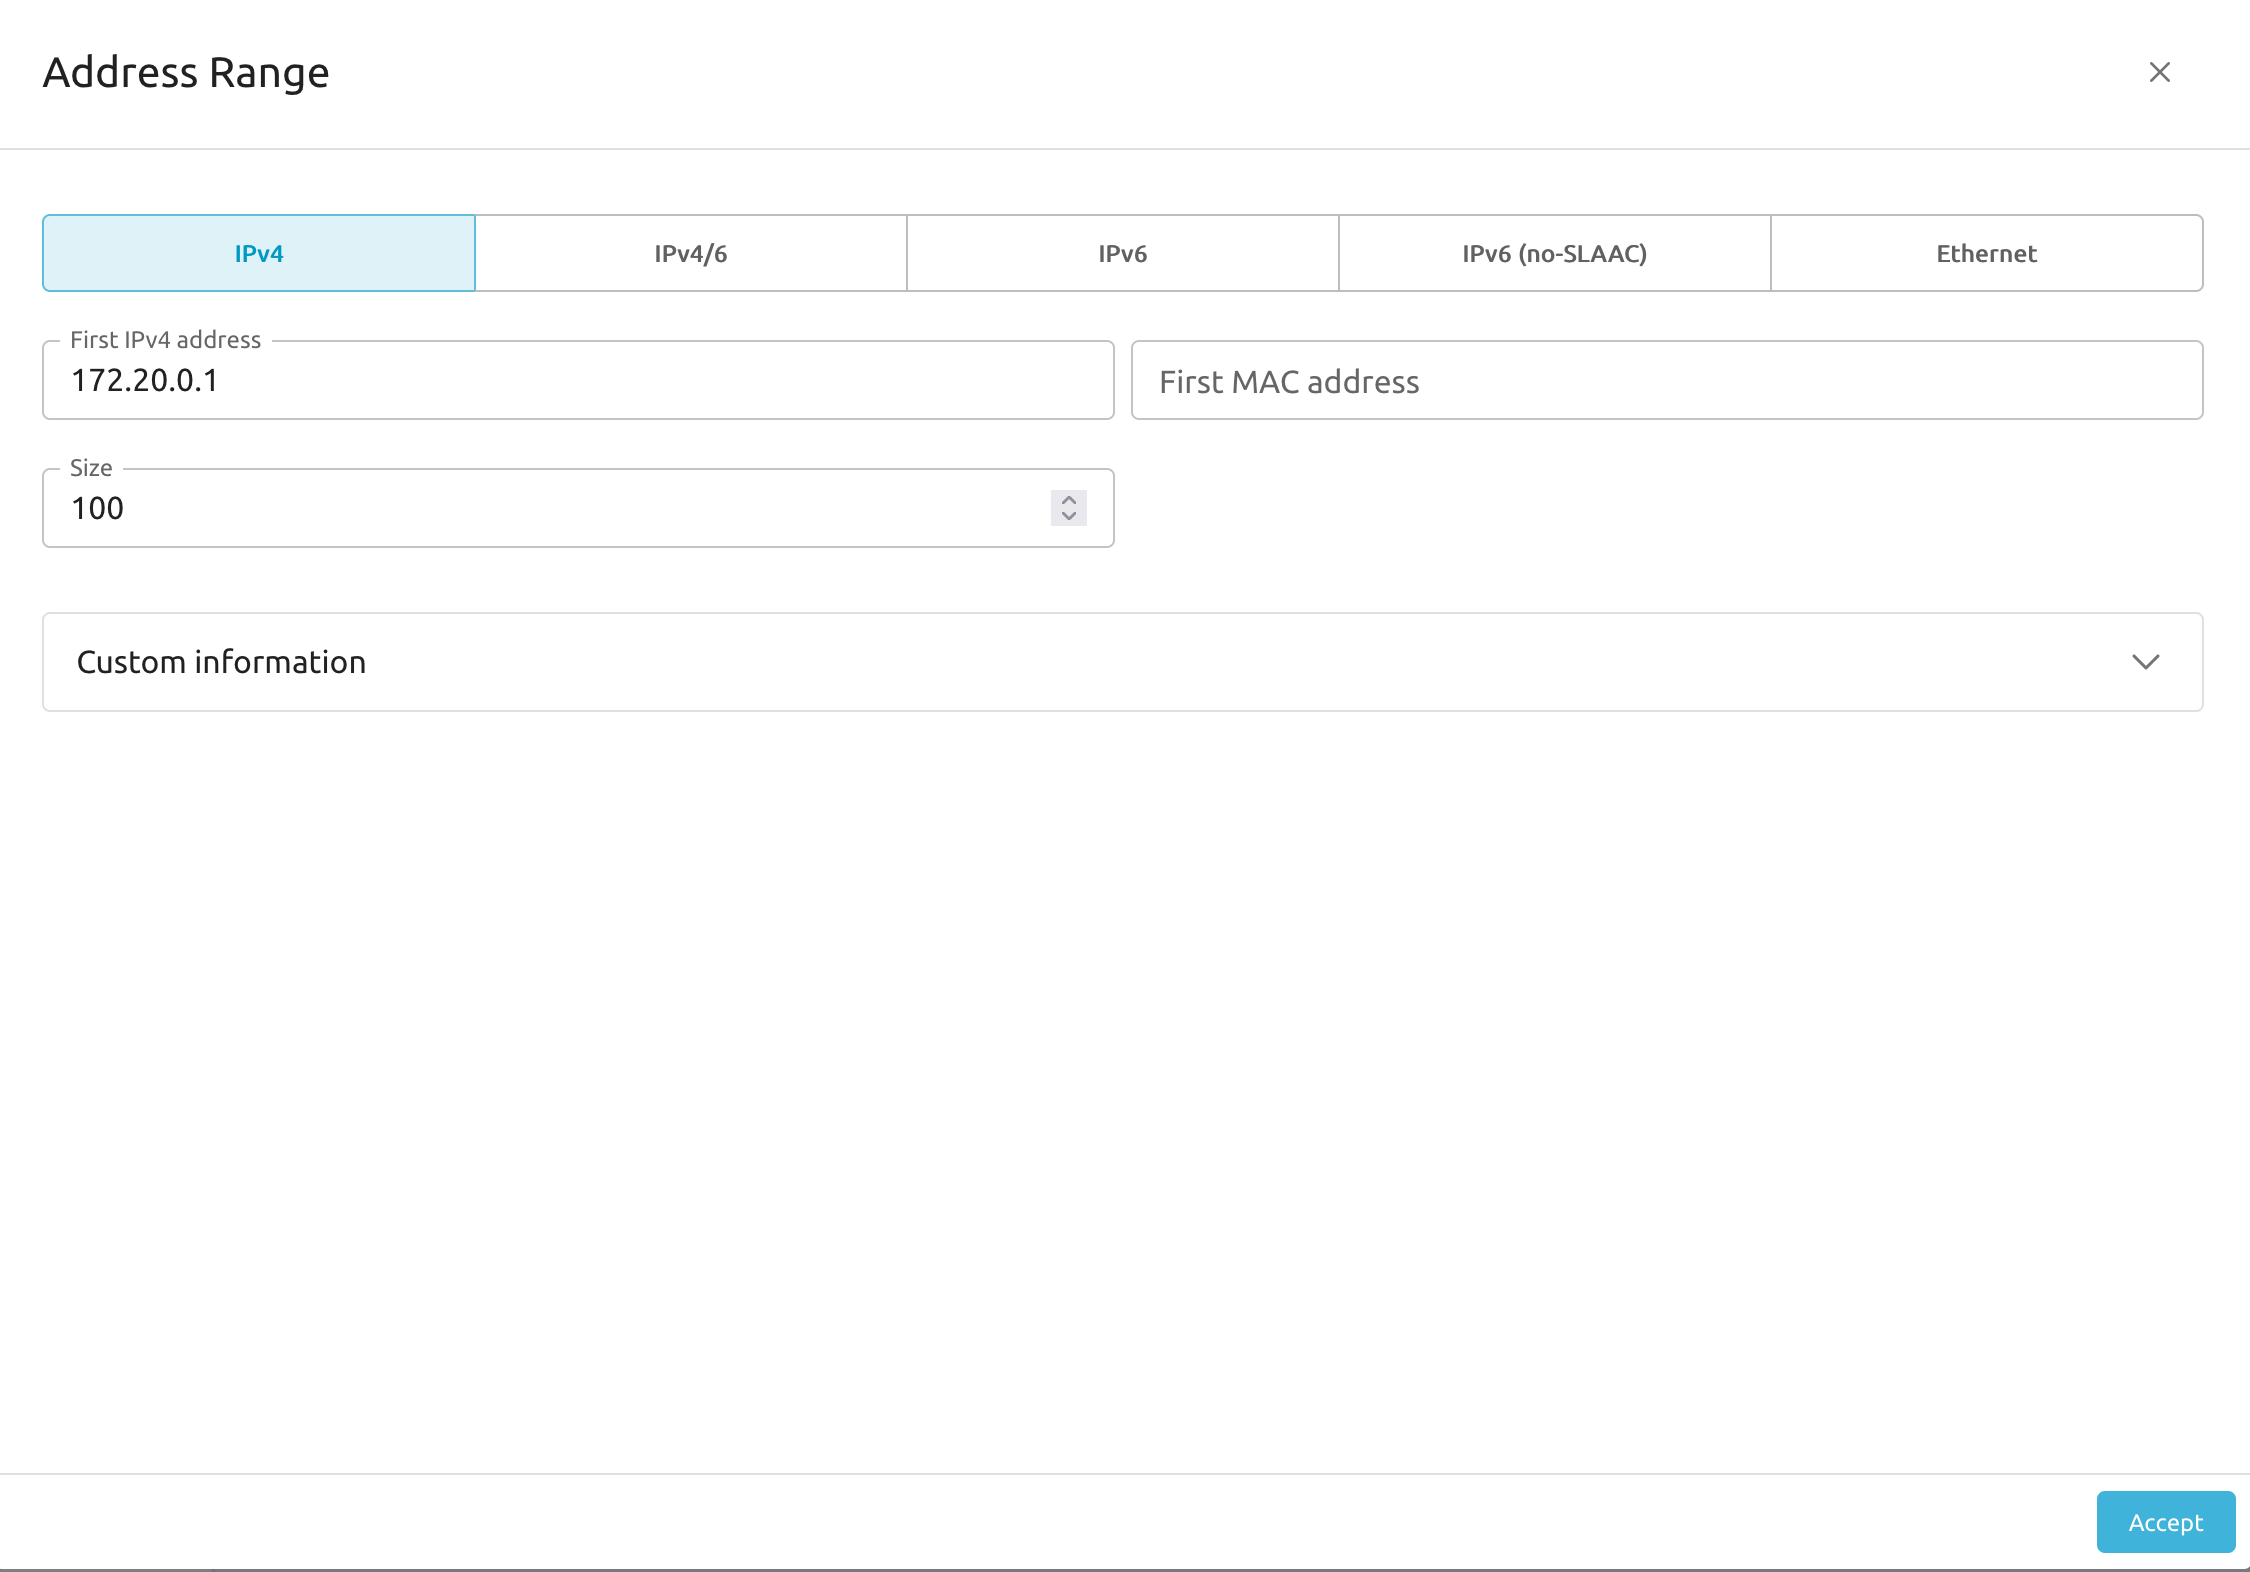
Click Accept.
Lastly, you will need to add a DNS server for the network. Select the Context tab, then the DNS input field. Type the address for the DNS server, such as 8.8.8.8 or 1.1.1.1.
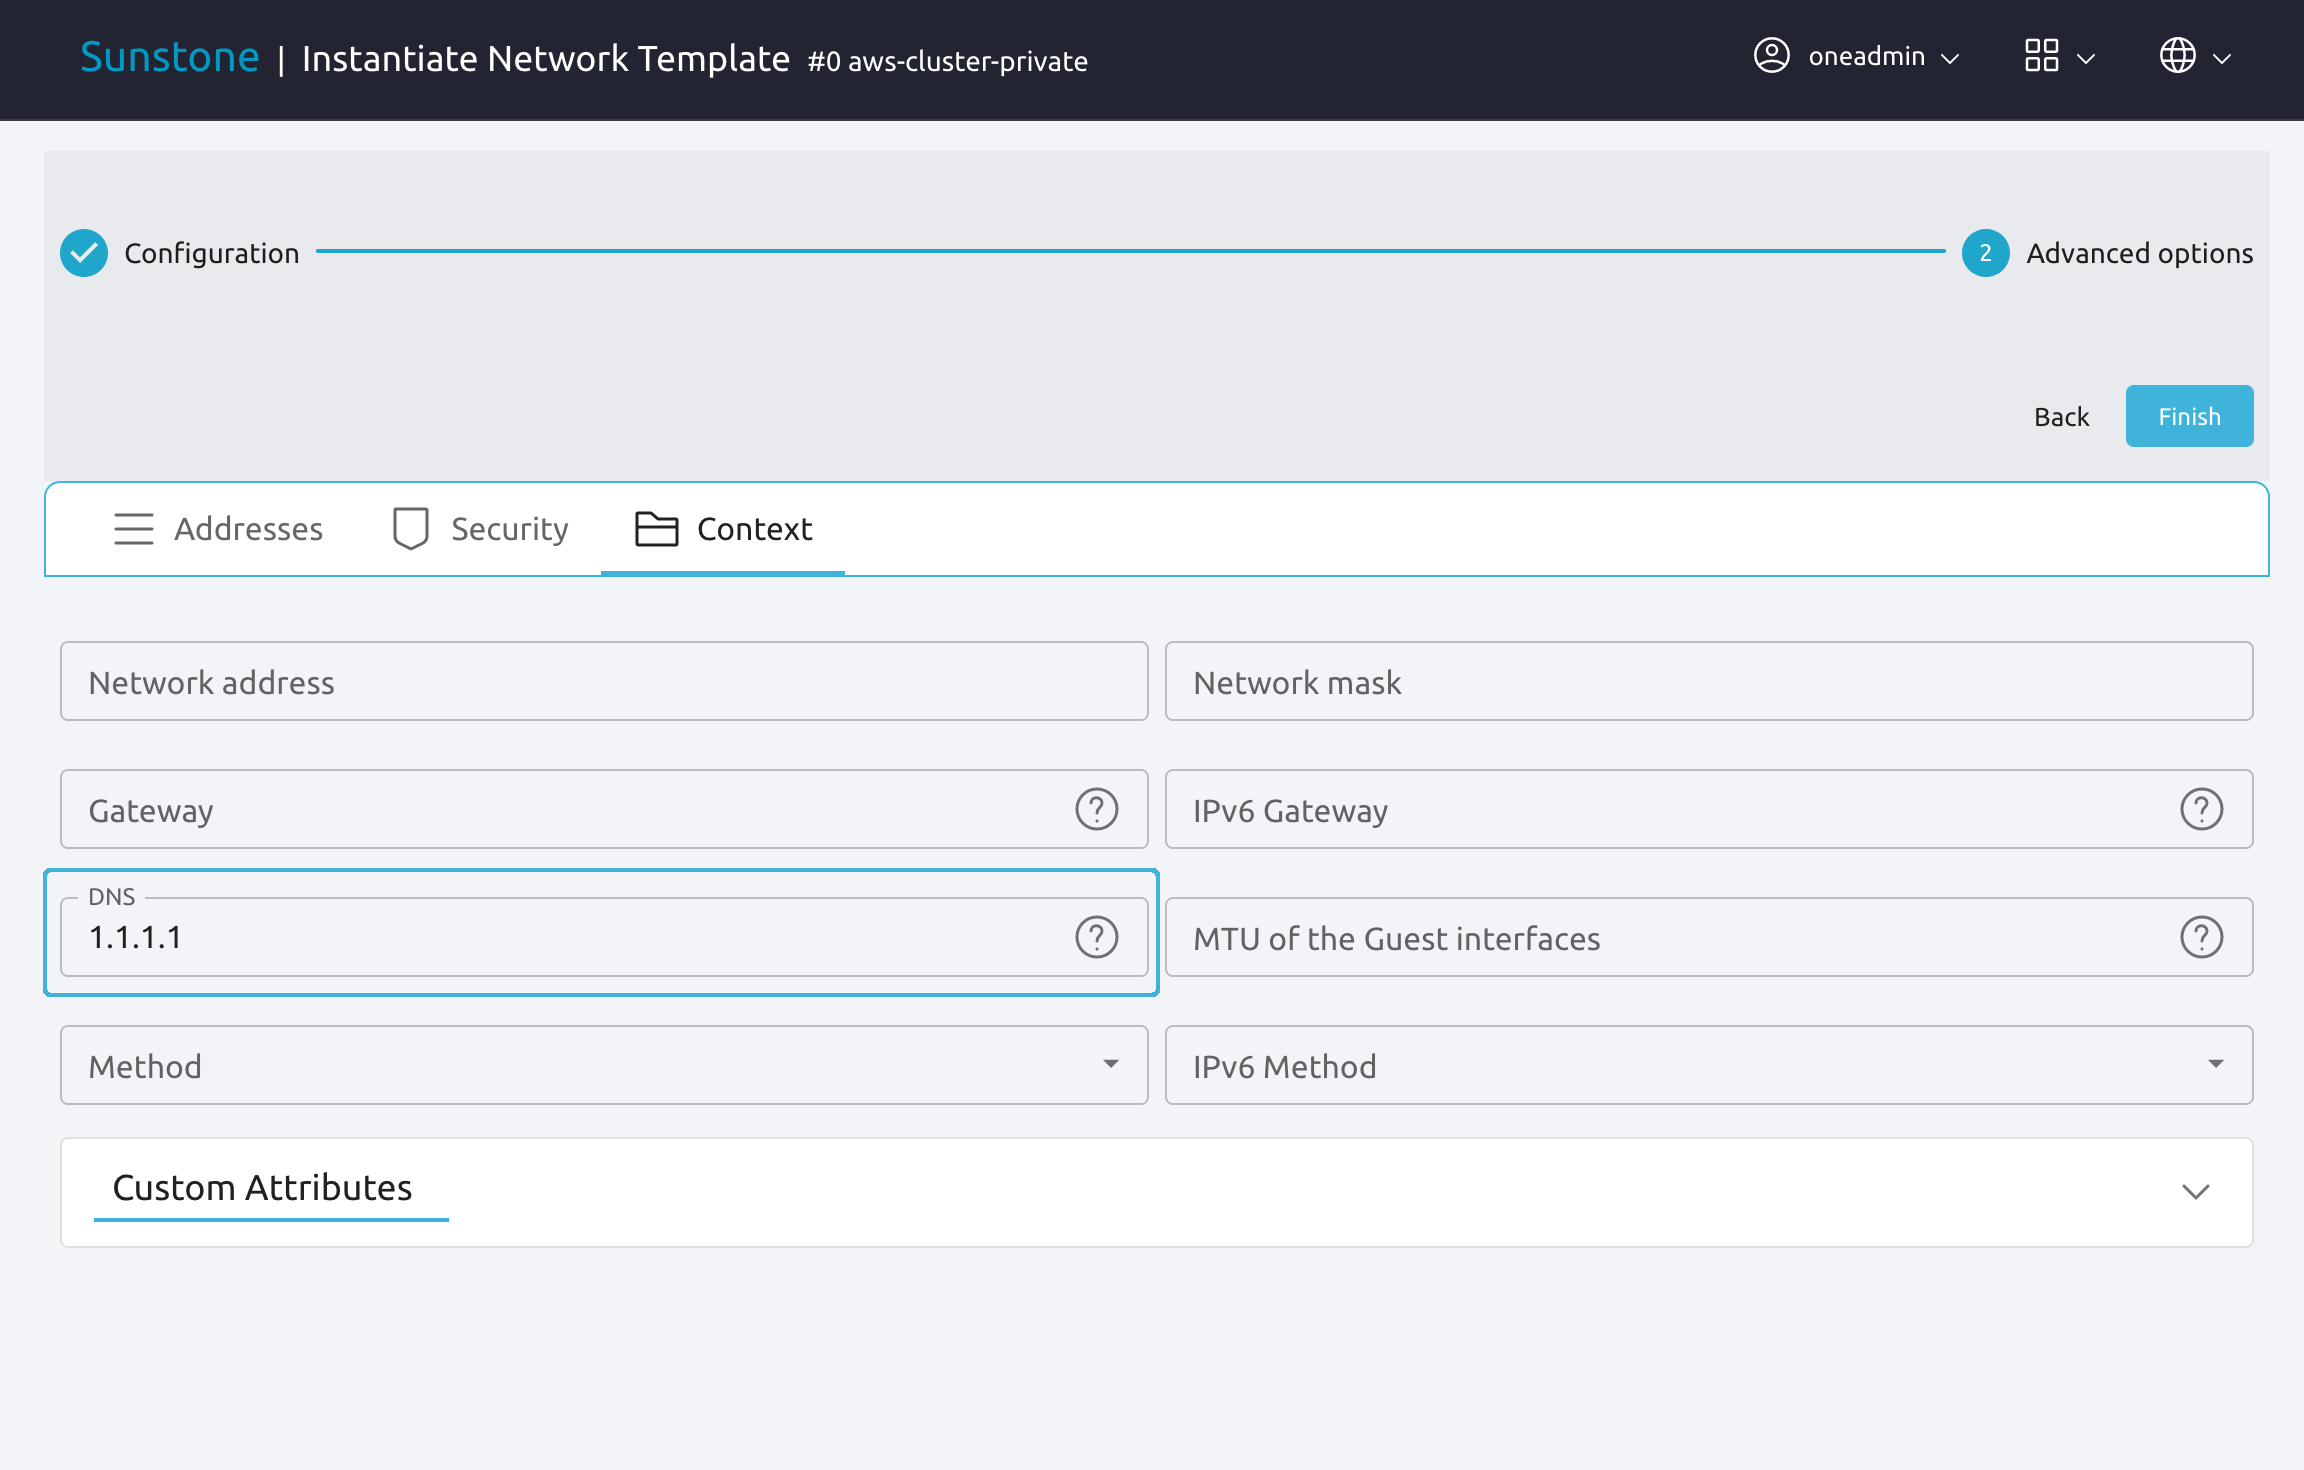
Click Finish.
At this point, you have instantiated a private network for the Edge Cluster where Kubernetes will be deployed, and are ready to instantiate the Kubernetes Service.
Step 3. Instantiate the Kubernetes Service
In the left-hand pane, select Templates -> Service Templates.
Select Service OneKE 1.29, then click the Instantiate icon  .
.
Sunstone displays the Instantiate Service Template wizard. In the first screen you can give your service a name and specify the number of instances to instantiate. In this example we’ll use OneKE 1.29 and start a single instance.
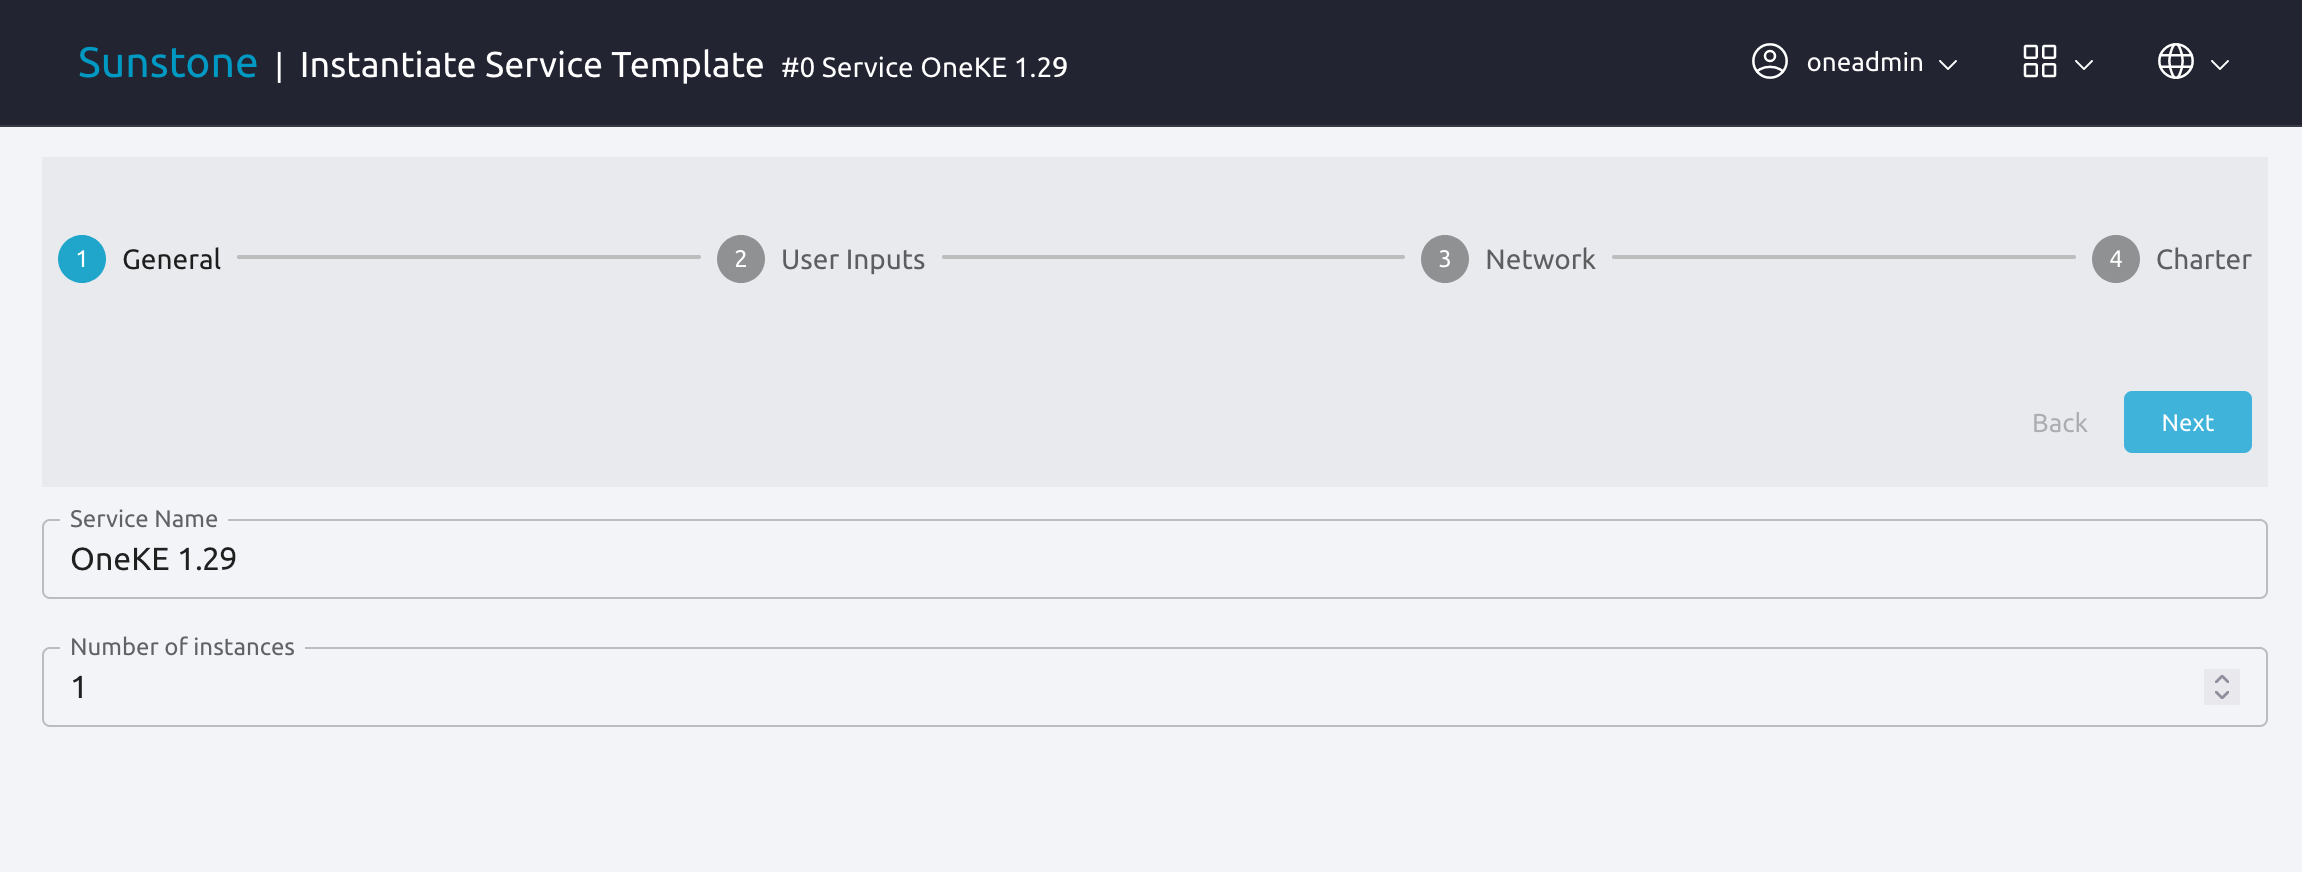
Click Next to go to the next screen, User Inputs.
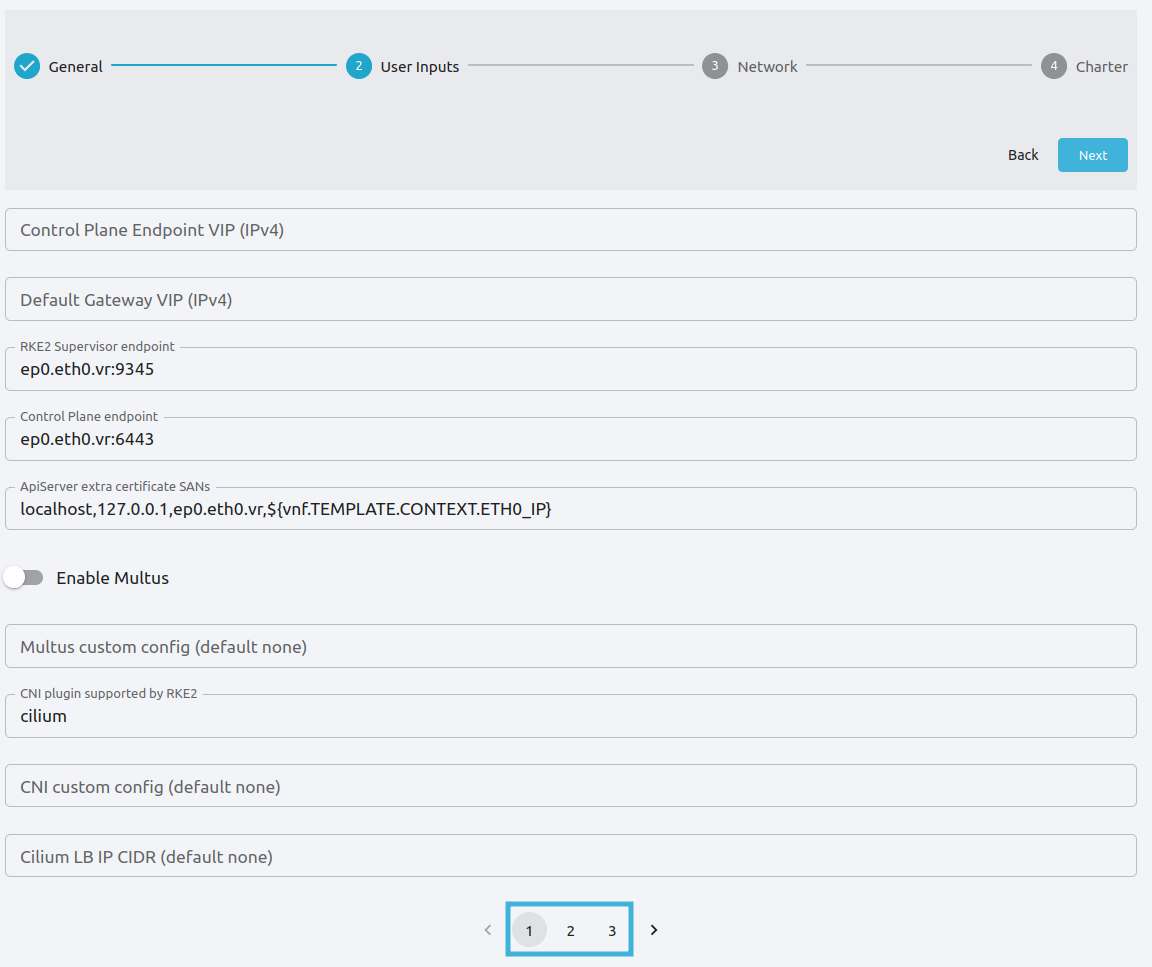
Here you can define parameters for the cluster, including a custom domain, plugins, VNF routers, storage options and others. There are three User Inputs pages in total; you can browse them by clicking the page numbers at the bottom of each page, highlighted below.
Optional: Add a Custom Domain
To enable access with the kubectl command from outside the cluster, you can add a custom domain for the Kubernetes SANs. Enter your custom domain in the ApiServer extra certificate SANs field, as shown below.
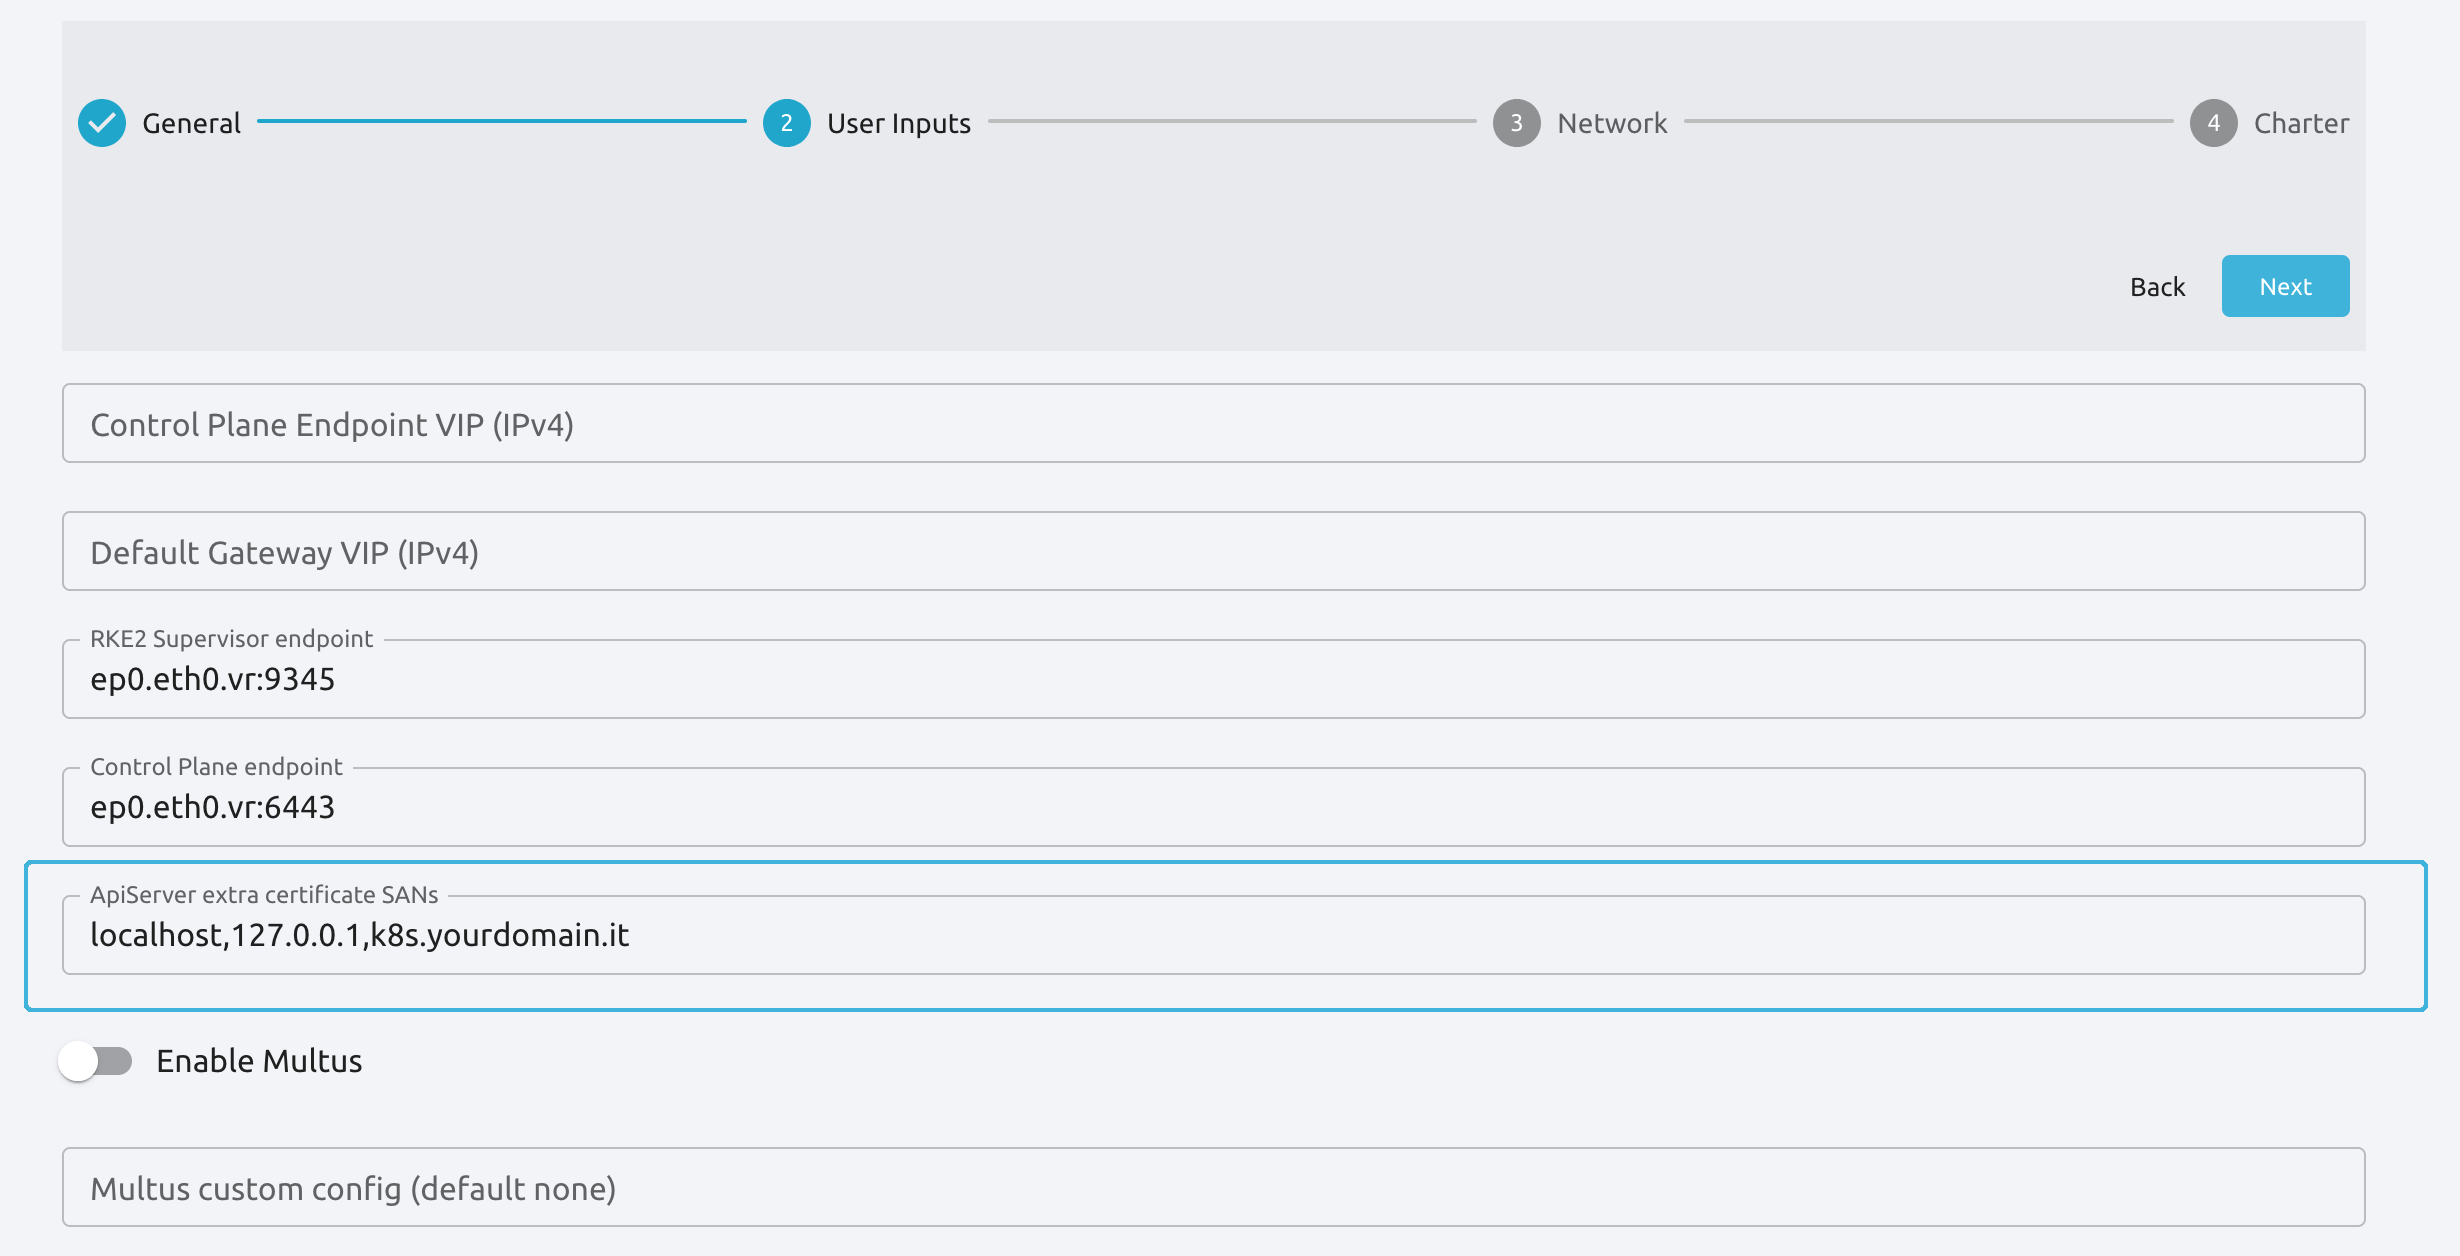
You can use a public DNS server or add the custom domain to your local /etc/hosts file, for example:
127.0.0.1 localhost
1.2.3.4 k8s.yourdomain.it
Important
When using a custom SAN, to access the cluster using a kubeconfig file you will need to modify the variable clusters[0].cluster.server in the file to include the name of the cluster, e.g. server: https://k8s.yourdomain.it:6443. The path of the kubeconfig file is set in the KUBECONFIG variable in the Kubernetes master node.
To define the variable in the kubeconfig file, follow these high-level steps:
Log in to the Kubernetes master node (see Step 4 below).
Find the kubeconfig file by checking the value of the
KUBECONFIGvariable, e.g. by runningecho $KUBECONFIG.Edit the file and modify the value of
clusters[0].cluster.serverwith your domain name, e.g.server: https://k8s.yourdomain.it:6443.
Enable Traefik/HaProxy
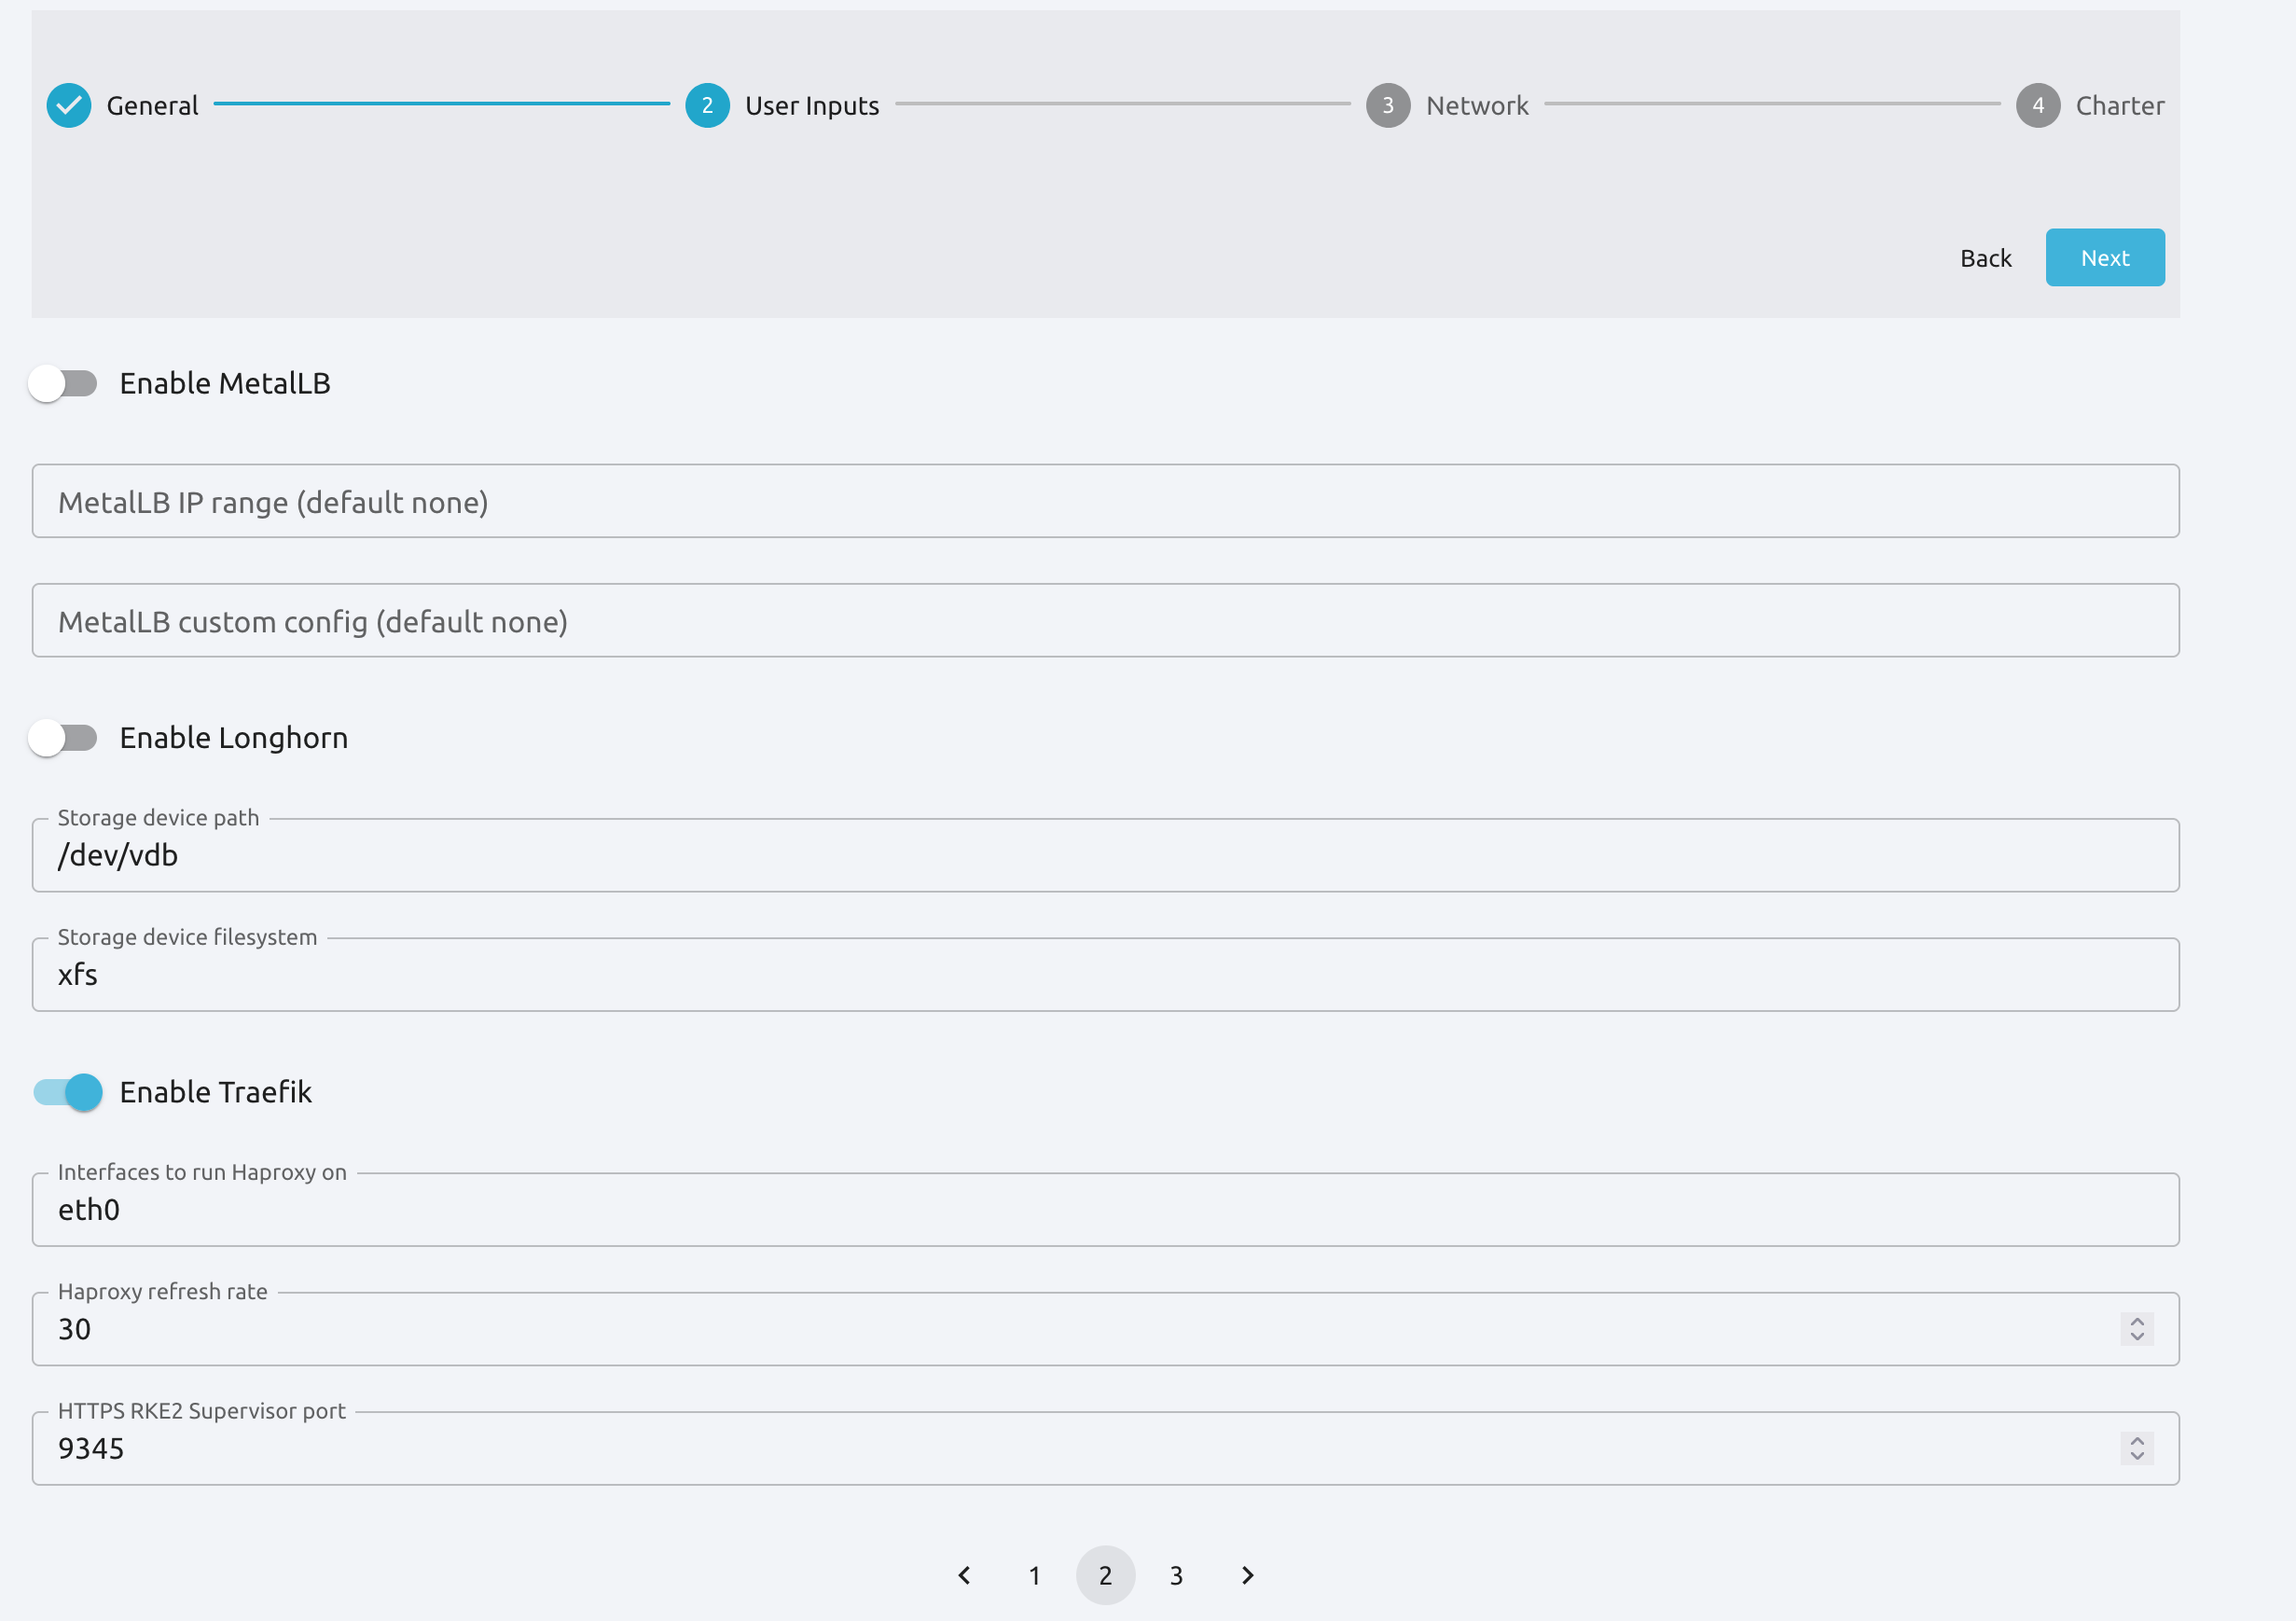
To expose an example application on the public network, you will need to enable OneKE’s Traefik solution for ingress traffic. In User Inputs, go to Page 2, then click the Enable Traefik switch.
Enable Additional Network Options
Click 3 at the bottom of the page to go to the third User Inputs screen.
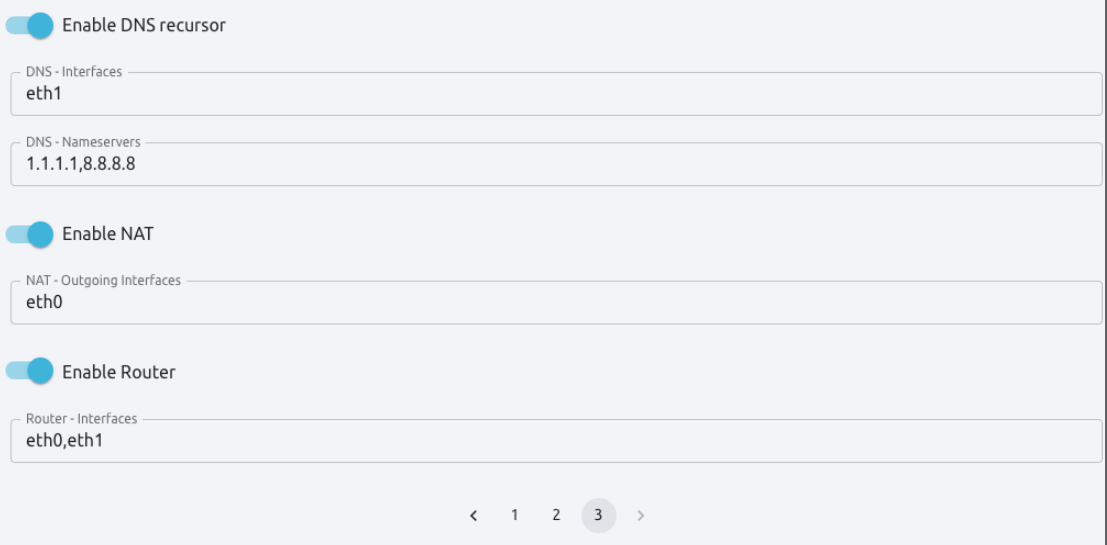
In this screen, activate the following toggle switches:
Enable DNS recursor
Enable NAT
Enable Router
Click Next to go to the next screen, Network.
Select the Public and Private Networks
The Kubernetes cluster needs access to the private and the public network defined for the Edge Cluster. First we’ll select the public network.
Set the Network ID drop-down menu to Public, and the Network Type drop-down menu to Existing.
Check that the Network ID drop-down menu displays Public, then select the metal-aws-edge-cluster-public network.
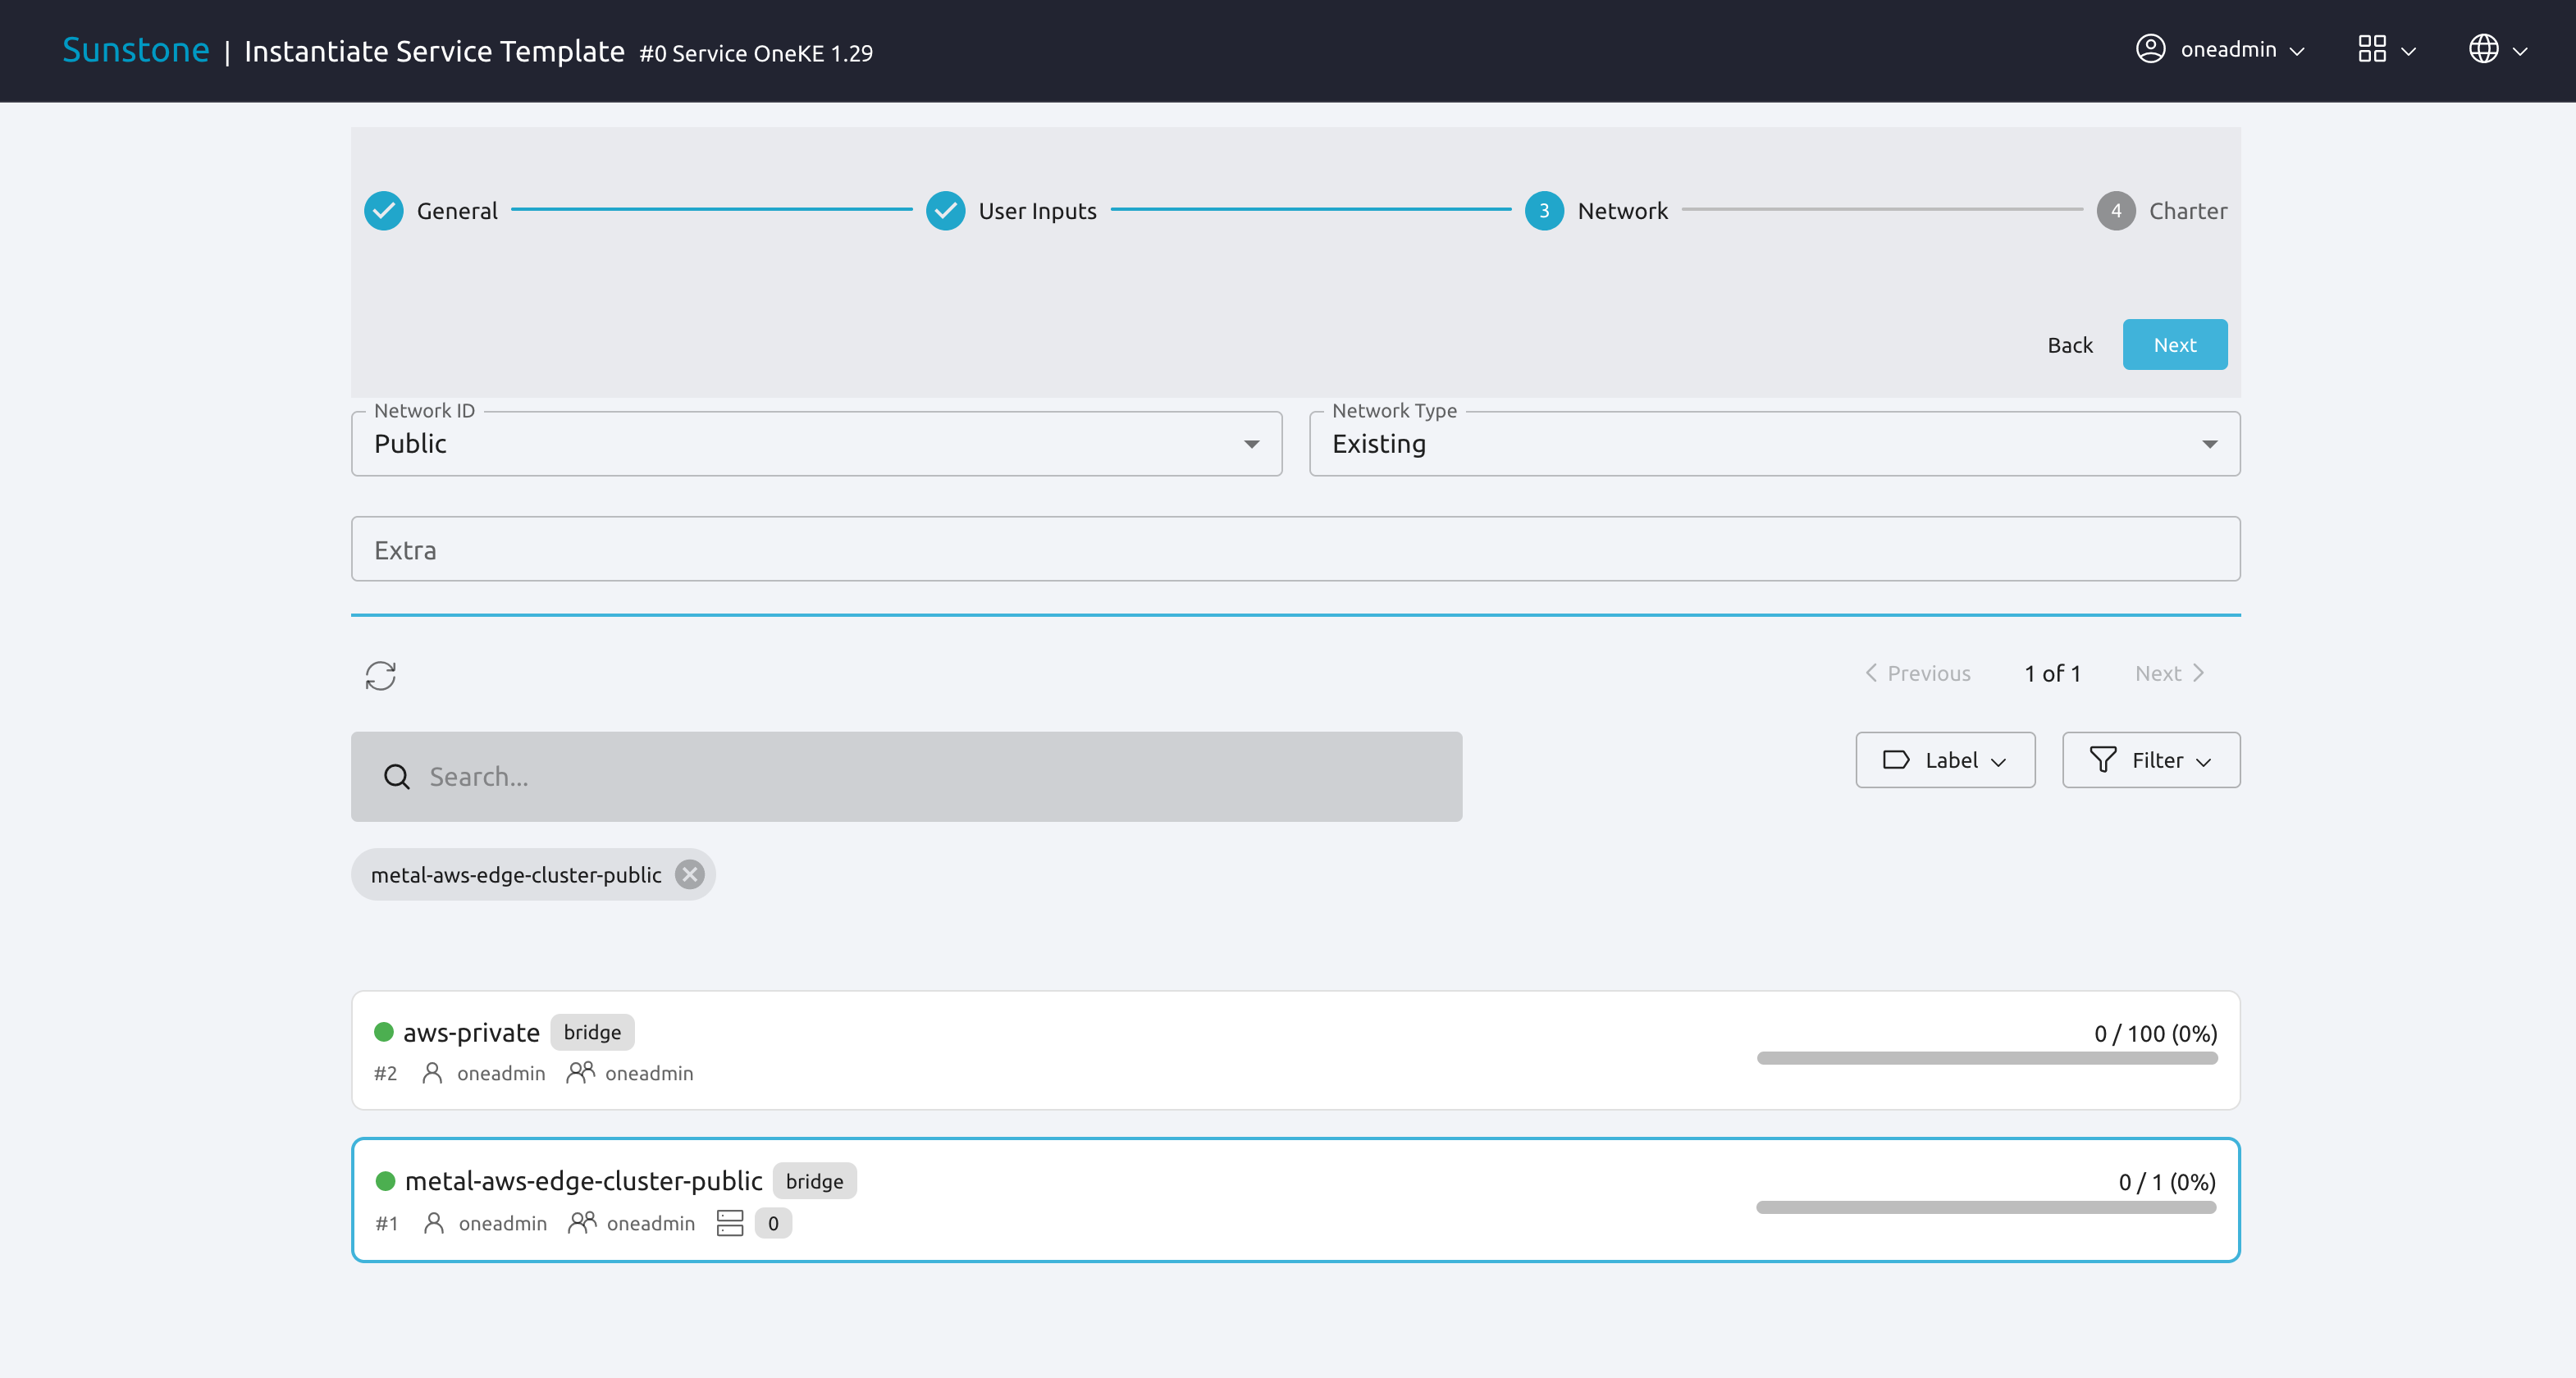
To select the private network, change the Network ID drop-down to Private, then select aws-private.
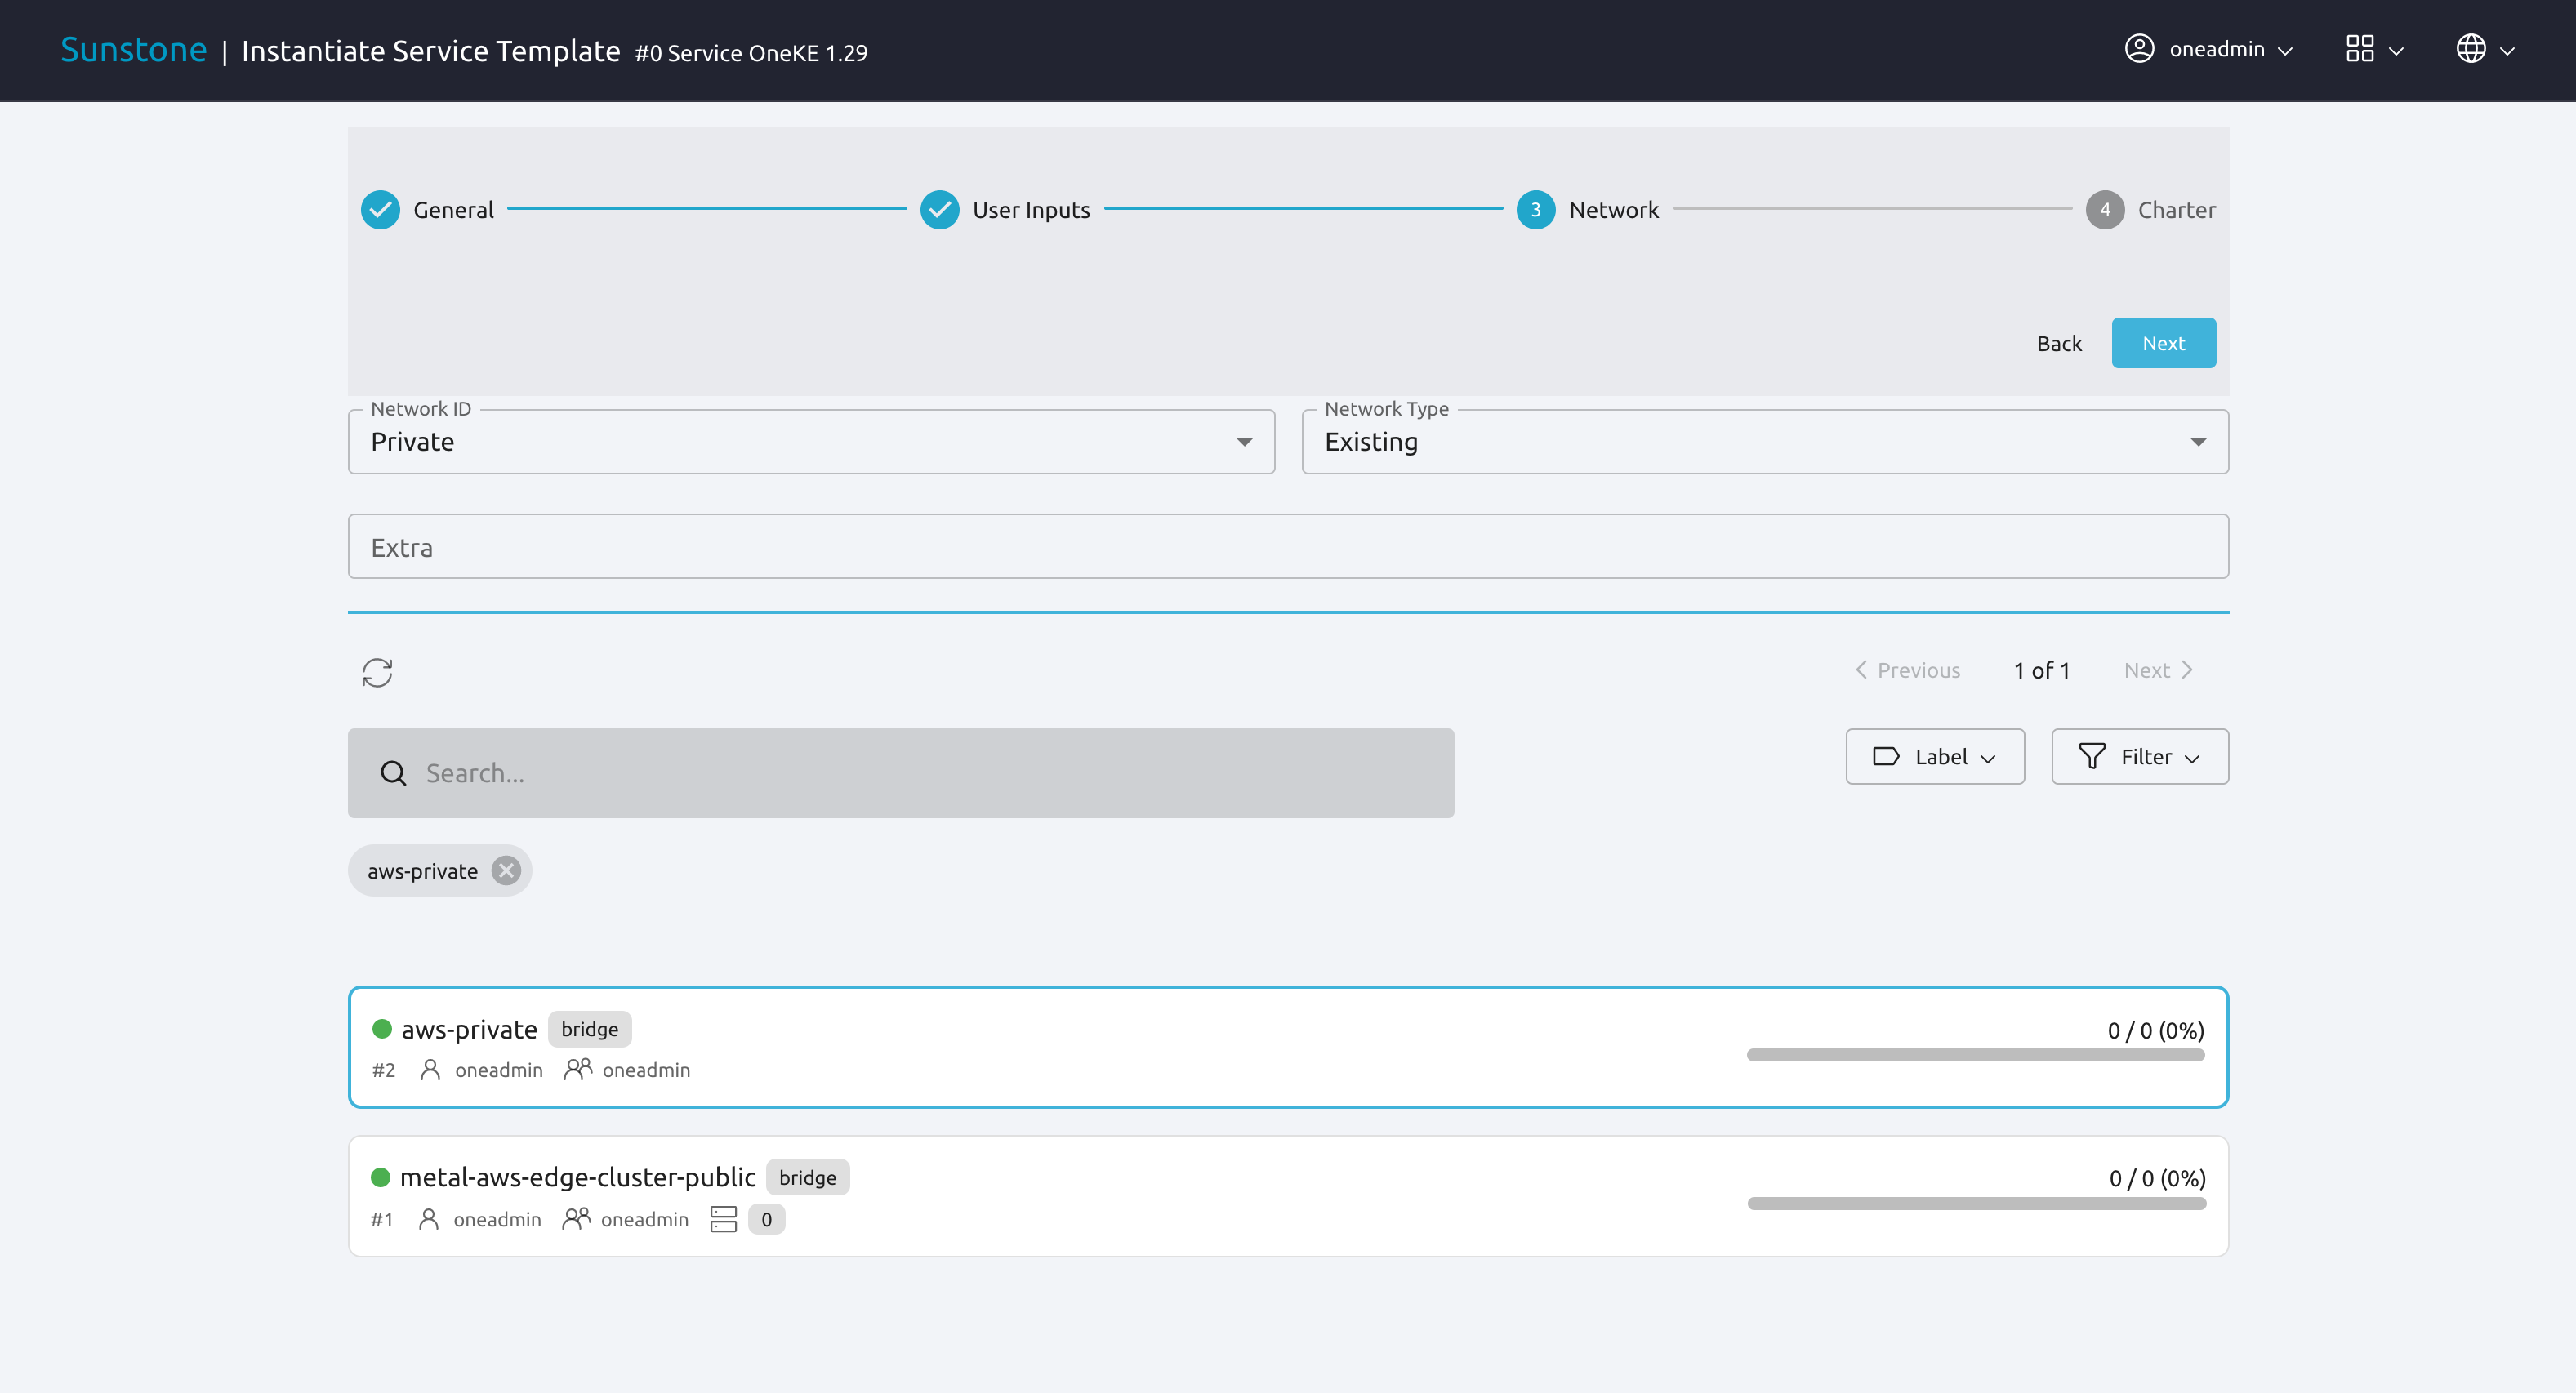
Once the public and private networks for the cluster are specified, the Kubernetes service template is ready to be instantiated. Click Next to go to the final screen of the wizard.
In the final screen, click Finish.
The OpenNebula Front-end will deploy the Kubernetes service to the Edge Cluster. Wait for the cluster State to switch to READY.
Verify the Cluster Deployment
To verify that the Kubernetes cluster and its VMs have correctly deployed, you can either use the Sunstone UI, or run the onevm command on the Front-end node.
To verify in the Sunstone GUI, open the left-hand pane, then Select Instances -> Services. You should see the OneKE service up and running, with its running VMs visible in the Roles tab.
To verify the deployment using the command line, log in to the Front-end node as user oneadmin, then run oneflow list. In the command output, check that the State is RUNNING, as shown below.
[oneadmin@FN]$ oneflow list
ID USER     GROUP    NAME                                 STARTTIME STAT
3 oneadmin oneadmin Service OneKE 1.29              04/29 08:18:17 RUNNING
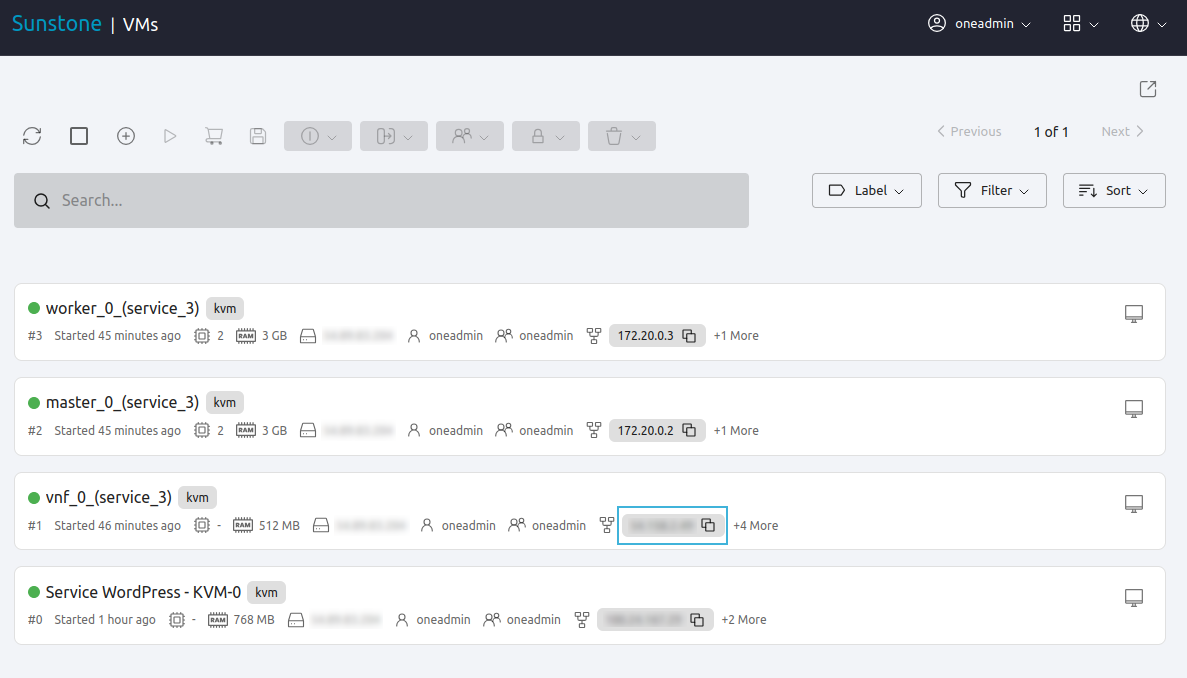
To verify that the VMs for the cluster were correctly deployed, you can use the onevm list command. In the example below, the command lists the VMs for the cluster (and, in this case, the WordPress VM deployed in the previous tutorial):
[oneadmin@FN]$ onevm list
ID USER     GROUP    NAME                                            STAT  CPU     MEM HOST                                          TIME
 3 oneadmin oneadmin worker_0_(service_3)                            runn    2      3G <cluster_public_IP>                       0d 00h31
 2 oneadmin oneadmin master_0_(service_3)                            runn    2      3G <cluster_public_IP>                       0d 00h31
 1 oneadmin oneadmin vnf_0_(service_3)                               runn    1    512M <cluster_public_IP>                       0d 00h31
 0 oneadmin oneadmin Service WordPress - KVM-0                       runn    1    768M <cluster_public_IP>                       0d 01h22
At this point you have successfully instantiated the Kubernetes cluster. Before deploying an application, you need to find out the public IP address of the VNF node, since we will use it later to connect to the master Kubernetes node.
Check the IP Address for the VNF Node
To check the VNF node IP in Sunstone, in the left-hand pane go to Instances -> VMs, then check the information displayed under vnf_0_(service_<ID>). The IP is displayed on the right, highlighted in the image below (note that all public IPs have been blurred in the image):
Alternatively, to check on the command line, log in to the Front-end and run:
onevm show -j <VNF_VM_ID>|jq -r .VM.TEMPLATE.NIC[0].EXTERNAL_IP
Replace <VNF_VM_ID> with the ID of the VNF VM as listed by the onevm list command (ID 1 in the example above).
If you do not see all VMs listed, or if the OneKE Service is stuck in DEPLOYING, see Known Issues below.
Tip
Once the OneFlow service has deployed, you can add more worker nodes. In Sunstone:
Go to Instances -> Services.
Select the OneKE service.
Select the Roles tab.
Click Worker, then the green Scale button.
Note
The VNC icon  displayed by Sunstone does not work for accessing the VMs on Edge Clusters, since this access method is considered insecure and is disabled by OpenNebula.
Step 4. Deploy an Application
To deploy an application, we will first connect to the master Kubernetes node via SSH.
For connecting to the master Kubernetes node, you need to know the public address (AWS elastic IP) of the VNF node, as described above.
Once you know the correct IP, from the Front-end node connect to the master Kubernetes node with the below command (replace “1.2.3.4” with the public IP address of the VNF node):
ssh -A -J root@1.2.3.4 root@172.20.0.2
In this example, 172.20.0.2 is the private IP address of the Kubernetes master node (the second address in the private network).
Tip
If you don’t use ssh-agent then you may skip the -A flag in the above command. You will need to copy your private ssh key (used to connect to VNF) into the VNF node itself, at the location ~/.ssh/id_rsa. Make sure that the file permissions are correct, i.e. 0600 (or u=rw,go=). For example:
ssh root@1.2.3.4 install -m u=rwx,go= -d /root/.ssh/ # make sure ~/.ssh/ exists
scp ~/.ssh/id_rsa root@1.2.3.4:/root/.ssh/           # copy the key
ssh root@1.2.3.4 chmod u=rw,go= /root/.ssh/id_rsa    # make sure the key is secured
Once you have connected to the Kubernetes master node, check if kubectl is working, by running kubectl get nodes:
kubectl get nodes
NAME STATUS ROLES AGE VERSION
oneke-ip-172-20-0-2 Ready control-plane,etcd,master 18m v1.29.4+rke2r1
oneke-ip-172-20-0-3 Ready <none> 16m v1.29.4+rke2r1
Now we are ready to deploy an application on the cluster. To deploy nginx:
kubectl run nginx --image=nginx --port 80
pod/nginx created
After a few seconds, you should be able to see the nginx pod running:
kubectl get pods
NAME    READY   STATUS    RESTARTS   AGE
nginx   1/1     Running   0          86s
In order to access the application, we need to create a Service and IngressRoute objects that expose the application.
Accessing the nginx Application
On the Kubernetes master node, create a file called expose-nginx.yaml with the following contents:
---
apiVersion: v1
kind: Service
metadata:
  name: nginx
spec:
  selector:
    run: nginx
  ports:
    - name: http
      protocol: TCP
      port: 80
      targetPort: 80
---
# In Traefik < 3.0.0 it used to be "apiVersion: traefik.containo.us/v1alpha1".
apiVersion: traefik.io/v1alpha1
kind: IngressRoute
metadata:
  name: nginx
spec:
  entryPoints: [web]
  routes:
    - kind: Rule
      match: Path(`/`)
      services:
        - kind: Service
          name: nginx
          port: 80
          scheme: http
Apply the manifest using kubectl:
kubectl apply -f expose-nginx.yaml
service/nginx created
ingressroute.traefik.containo.us/nginx created
To access the application, point your browser to the public IP of the VNF node in plain HTTP:
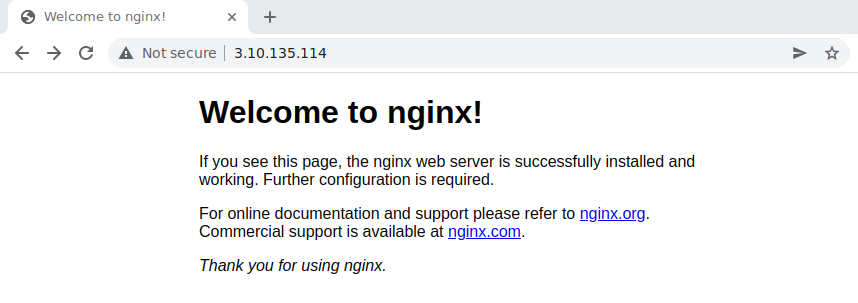
Congratulations! You have successfully deployed a fully functional Kubernetes cluster at the edge, and have completed the Quick Start Guide.
For more information including additional features for the OneKE Appliance, please refer to the OpenNebula Apps Documentation.
Known Issues
OneFlow Service is Stuck in DEPLOYING
An error in network configuration, or any major failure (such as network timeouts or performance problems) can cause the OneKE service to lock up due to a communications outage between it and the Front-end node. The OneKE service will lock if any of the VMs belonging to it does not report READY=YES to OneGate within the default time.
If one or more of the VMs in the Kubernetes cluster never leave the DEPLOYING state, you can troubleshoot OneFlow communications by inspecting the file /var/log/one/oneflow.log on the Front-end node. Look for a line like the following:
[E]: [LCM] [one.document.info] User couldn't be authenticated, aborting call.
The line above means that provisioning the service exceeded the allowed time. In this case it is not possible to recover the broken VM instance; it must be recreated.
Before attempting to recreate the instance, ensure that your environment has a good connection to the public Internet and does not suffer from any impairments in performance.
To recreate the VM instance, you must first terminate the OneKE service. A service stuck in DEPLOYING cannot be terminated by the delete operation. To terminate it, you need to run the following command:
oneflow recover --delete <service_ID>
Then, re-instantiate the service from the Sunstone UI: in the left-hand pane, Service Templates -> OneKE 1.29, then click the Instantiate icon.
Lack of Connectivity to the OneGate Server
Another possible cause for VMs in the Kubernetes cluster failing to run is lack of contact between the VNF node in the cluster and the OneGate server on the Front-end.
As described in Quick Start Using miniONE on AWS, the AWS instance where the Front-end is running must allow incoming connections for port 5030. If you do not want to open the port for all addresses, check the public IP address of the VNF node (the AWS Elastic IP, see above), and create an inbound rule in the AWS security groups for that IP.
In cases of lack of connectivity with the OneGate server, the /var/log/one/oneflow.log file on the Front-end will display messages like the following:
[EM] Timeout reached for VM [0] to report
In this scenario only the VNF node is successfully deployed, but no Kubernetes nodes.
To troubleshoot, follow these steps:
Find out the IP address of the VNF node, as described above.
Log in to the VNF node via ssh as root.
Check if the VNF node is able to contact the OneGate server on the Front-end node, by running this command:
onegate vm showA successful response should look like:
[root@VNF]$ onegate vm show
 VM 0
 NAME             : vnf_0_(service_3)
And a failure gives a timeout message:
[root@VNF]$ onegate vm show
Timeout while connected to server (Failed to open TCP connection to <AWS elastic IP of FN>:5030 (execution expired)).
Server: <AWS elastic IP of FN>:5030
In this case, the VNF node cannot communicate with the OneGate service on the Front-end node. Possible causes include:
Wrong Front-end node for the AWS IP: The VNF node may be trying to connect to the OneGate server on the wrong IP address. In the VNF node, the IP address for the Front-end node is defined by the value of
ONEGATE_ENDPOINT, in the scripts found in the/run/one-contextdirectory. You can check the value with:grep -r ONEGATE /run/one-context*If the value of
ONEGATE_ENDPOINTdoes not match the IP address where OneGate is listening on the Front-end node, edit the parameter with the correct IP address. Then, terminate the OneKE service from the Front-end (see above) and re-deploy.
Filtered incoming connections: On the Front-end node, the OneGate server listens on port 5030, so you must ensure that this port accepts incoming connections. If necessary, create an inbound rule in the AWS security groups for the elastic IP of the VNF node.
One or more VMs Fail to Report Ready
Another possible cause for failure of the OneKE Service to leave the DEPLOYING state is that a temporary network glitch or other variation in performance prevented one or more of the VMs in the service to report READY to the OneGate service. In this case, it is possible that you see all of the VMs in the service up and running, but the OneKE service is stuck in DEPLOYING.
For example on the Front-end, the output of onevm list shows all VMs running:
onevm list
ID USER GROUP NAME STAT CPU MEM HOST TIME
3 oneadmin oneadmin worker_0_(service_3) runn 2 3G <public IP> 0d 01h02
2 oneadmin oneadmin master_0_(service_3) runn 2 3G <public IP> 0d 01h02
1 oneadmin oneadmin vnf_0_(service_3) runn 1 512M <public IP> 0d 01h03
0 oneadmin oneadmin Service WordPress - KVM-0 runn 1 768M <public IP> 0d 01h53
Yet oneflow list shows:
ID USER     GROUP    NAME                                                                   STARTTIME STAT
 3 oneadmin oneadmin OneKE 1.29                                                        08/30 12:30:07 DEPLOYING
In this case you can manually instruct the VMs to report READY to the OneGate server. Follow these steps:
From the Front-end node, log in to the VNF node by running:
ssh root@<VNF IP>(To find out the IP address of the VNF node, see above.)
For each VM in the OneKE service, run the following command:
onegate vm update <ID> --data "READY=YES"For example,
onegate vm update 2 --data "READY=YES".Then, you can check the status of the service with
onegate vm show:onegate service show SERVICE 3 NAME : OneKE 1.29 STATE : RUNNING ROLE vnf VM 1 NAME : vnf_0_(service_3) ROLE master VM 2 NAME : master_0_(service_3) ROLE worker VM 3 NAME : worker_0_(service_3) ROLE storageOn the Front-end, run
oneflow listagain to verify that the service reportsRUNNING:[oneadmin@FN]$ oneflow list ID USER GROUP NAME STARTTIME STAT 3 oneadmin oneadmin OneKE 1.29 08/30 12:35:21 RUNNING
One or more VMs is Ready, but unreachable
In a similar situation as above when onevm list` shows all VMs running, but the service is still in DEPLOYING state, but the VM is not reachable through SSH (e.g. to run the onegate vm update command).
- In this case, we can try to scale down and up the role of the problematic VM from the Front-end UI:
Go to Services in the Front-end UI and select the OneKE Service
In the Roles tab choose the problematic VM’s role (e.g. worker)
Scale the role to 0
Wait until shutdown of the VM, the scaling and cooldown period of the service finishes
Scale the role to 1
Verify if the problem is solved and the
oneflow listreports theRUNNINGstate
