Deploy OpenNebula Front-end on VMware
In this guide, we’ll go through a Front-end OpenNebula environment deployment, where all the OpenNebula services needed to use, manage and run the cloud will be deployed through an OVA and collocated on the single VM running on a vCenter instance. Afterwards, you can follow the Operations and Usage basics guides of this same Quick Start to launch edge clusters based on open source hypervisors.
vOneCloud is a virtual appliance for vSphere that builds on top of your vCenter an OpenNebula cloud for development, testing or product evaluation in five minutes. In a nutshell, it is an OVA file with a configured AlmaLinux and OpenNebula installation. vOneCloud is free to download and use and can be also used for small-size production deployments.
vOneCloud ships with the following components under the hood:
AlmaLinux |
8 |
OpenNebula |
6.8 (release notes) |
MariaDB |
Default version shipped in AlmaLinux 8 |
Phusion Passenger |
Default version shipped in AlmaLinux 8 (used to run Sunstone) |
vOneCloud comes with a Control Console, a text-based wizard accessible through the vCenter console to the vOneCloud appliance. It is available by opening the vOneCloud appliance console in vCenter. It requires no authentication since only the vCenter administrator will be able to open the vOneCloud console. It can be used to configure the network, root password and change the password of the OpenNebula oneadmin user.
Requirements
Note
In order to follow the Running Kubernetes Clusters with your vOneCloud instance, you will need a publicly accessible IP address so the deployed services can report to the OneGate server. See OneGate Configuration for more details.
The following components are needed to use the vOneCloud appliance:
Component |
Observations |
vCenter 7.0 |
|
ESX 7.0 |
|
Firefox (> 3.5) and Chrome |
Other browsers, including Safari, are not supported and may not work well. |
vOneCloud ships with a default of 2 vCPUs, 16 GiB of RAM and 100GB of disk size, and as such it has been certified for infrastructures of the following dimensions:
Up to 1.000 VMs in total
Up to 100 users, the limit being 10 users accessing the system simultaneously
Take into account that vOneCloud is shipped for evaluation purposes.
Accounts
vOneCloud ships with several pre-created user accounts which will be described in this section:
Account |
Interface |
Role |
Description |
|---|---|---|---|
root |
linux |
Appliance administrator |
This user can log into the appliance (local login, no SSH). |
oneadmin |
linux |
Service user |
Used to run all OpenNebula services. |
oneadmin |
OpenNebula Sunstone |
Cloud administrator |
Cloud administrator. Run any task in OpenNebula, including creating other users. |
Download and Deploy
vOneCloud can be downloaded by completing the form here.
The OVA file can be imported into an existing vCenter infrastructure. It is based on AlmaLinux 8 with VMware tools enabled.
Follow the next steps to deploy a fully functional OpenNebula cloud.
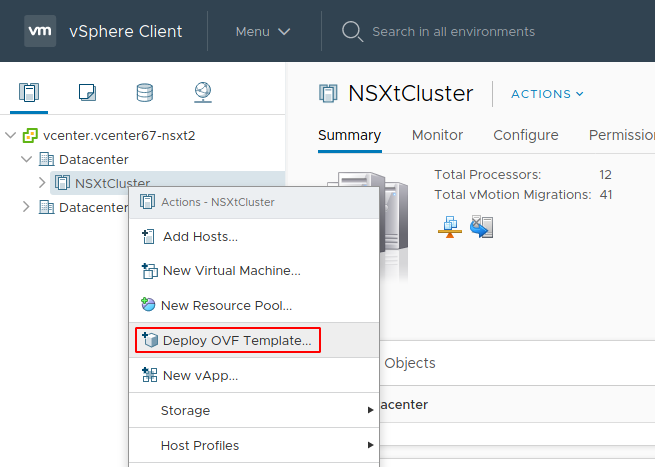
Step 1. Deploying the OVA
Log in to your vCenter installation and select the appropriate datacenter and cluster where you want to deploy the appliance. Select Deploy OVF Template.
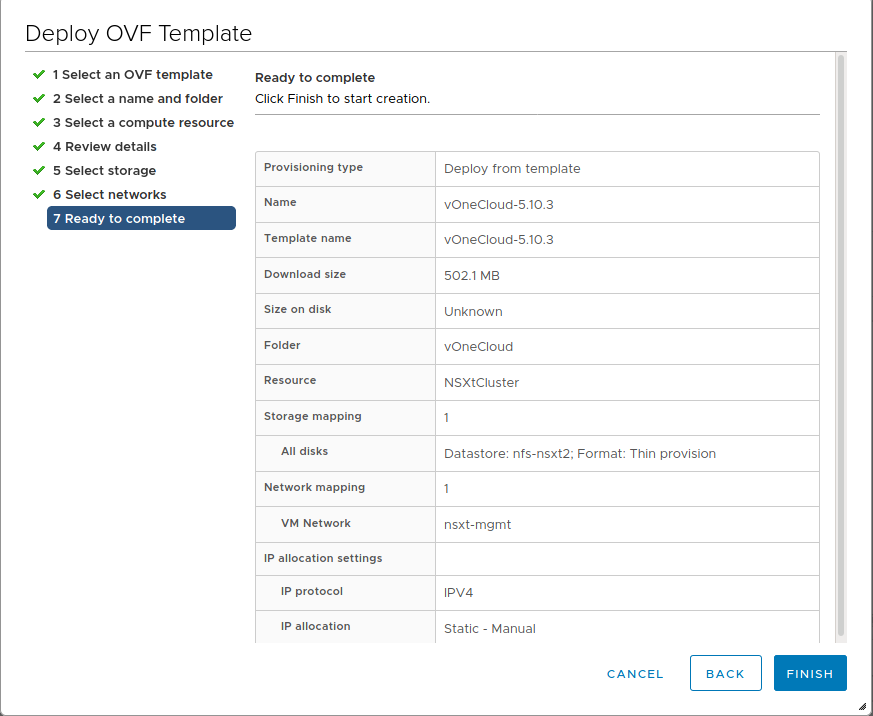
Browse to the download path of the OVA that can be downloaded from the link above.
Select the name, folder, and a compute resource where you want vOneCloud to be deployed. Also, you’ll need to select the datastore in which to copy the OVA.
Select the network. You will need to choose a network that has access to the ESX hosts.
Review the settings selection and click finish. Wait for the Virtual Machine Template to appear in the cluster.
After importing the vOneCloud OVA it needs to be cloned into a Virtual Machine. Before powering it on, the vOneCloud Virtual Machine can be edited to, for instance, add a new network interface, increase the amount of RAM, the available CPUs for performance, etc. Now you can power on the Virtual Machine.
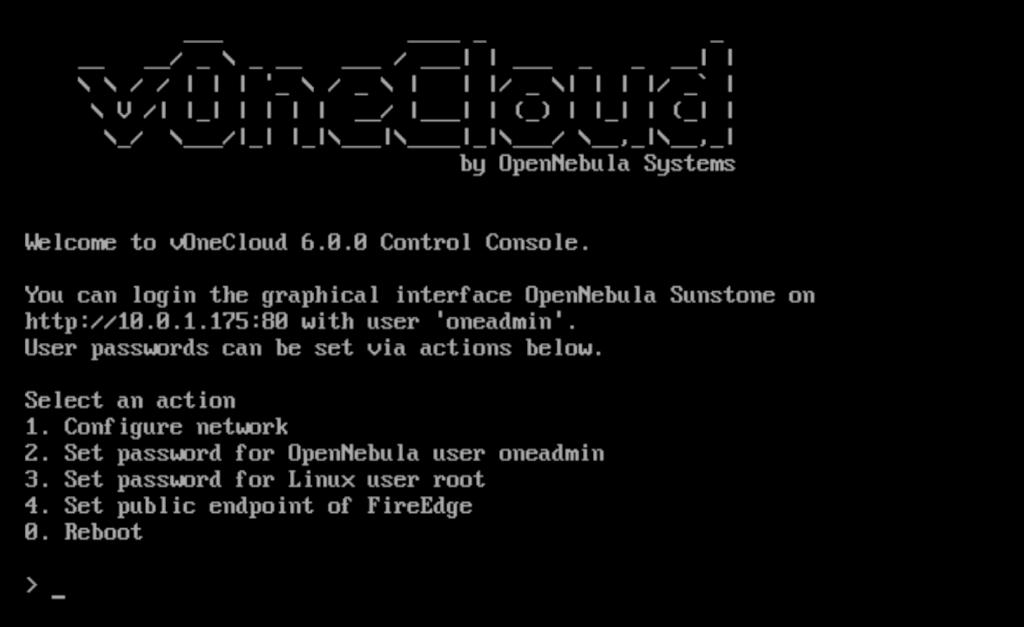
Step 2. vOneCloud Control Console - Initial Configuration
When the VM boots up you will see in the VM console in vCenter the vOneCloud Control Console, showing this wizard:
If you are presented instead with the following:

You are being presented with the wrong tty. You will need to press Ctrl+Alt+F1 to access the Control Console.
In this wizard you first need to configure the network. If you are using DHCP you can simply skip to the next item.
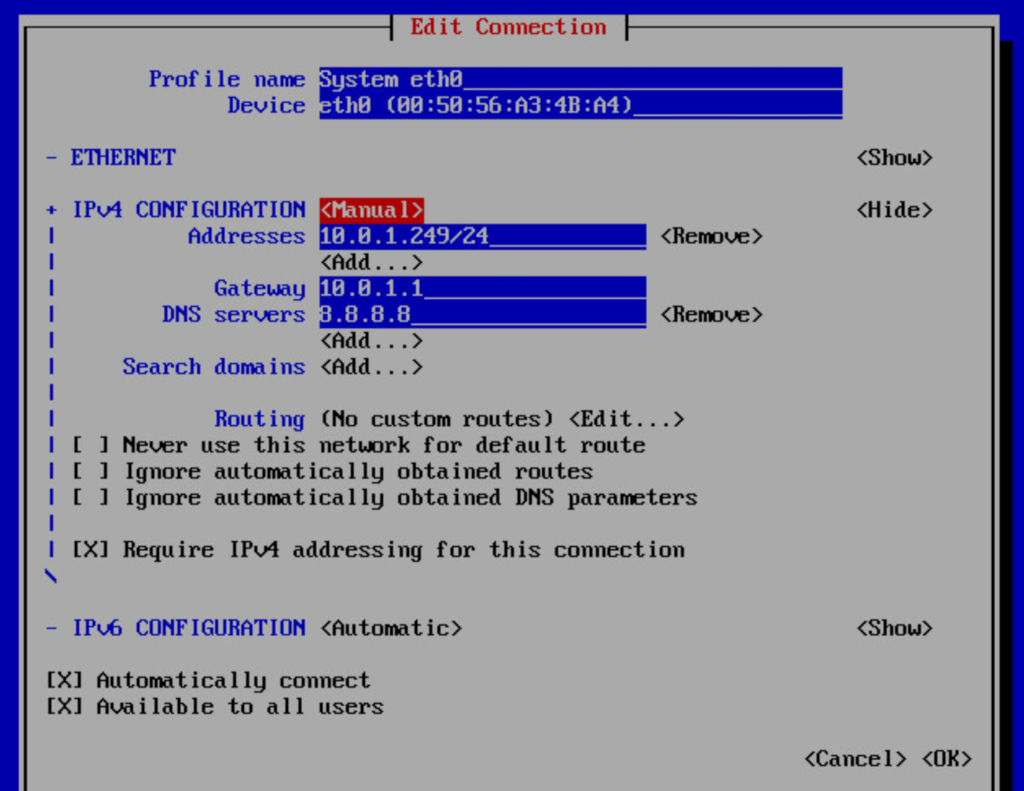
If you are using a static network configuration, answer yes and you will need to use a ncurses interface to:
“Edit a connection”
Select “System eth0”
Change IPv4 CONFIGURATION from <Automatic> to <Manual> and select “Show”
Input the desired IP address/24 in Addresses
Input Gateway and DNS Servers
Select OK and then quit the dialog
Here’s an example of static network configuration on the available network interface on the 10.0.1.x class C network, with a gateway in 10.0.1.1 and using 8.8.8.8 as the DNS server:
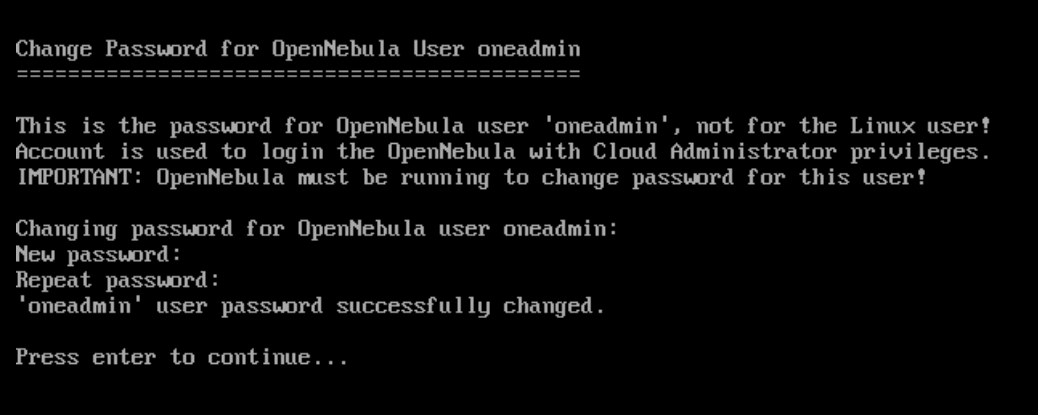
The second action needed is to set the oneadmin account password. You will need this to log in to OpenNebula. Check the Accounts section to learn more about vOneCloud roles and users.
In the third step, you need to define a root password. You won’t be using this very often, so write it down somewhere safe. It’s your master password to the appliance.
This password can be used to access the OpenNebula command line interface; for that, you need to SSH to vOneCloud using the root account and password. In OS X and Linux environments, simply use ssh to log in to the root account of vOneCloud’s IP. For Windows environments you can use software like PuTTY or even SFTP clients like WinSCP. Alternatively, open the console of the vOneCloud VM in vCenter and change the tty (Ctrl + Alt + F2).
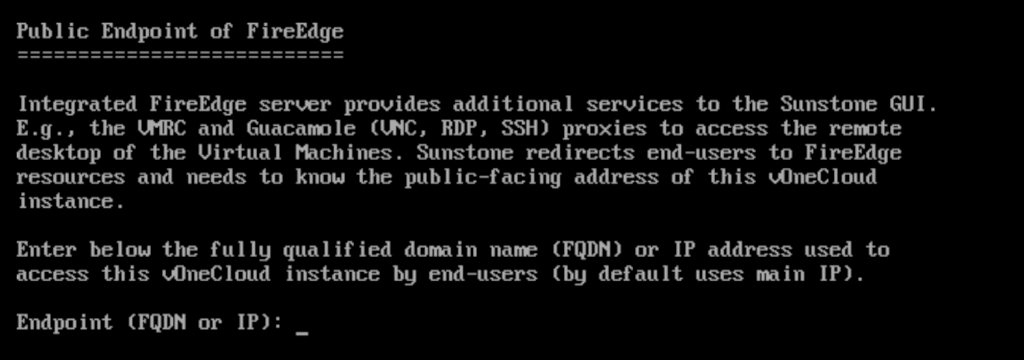
As the last step, you need to configure a public-facing address that will be used to access your vOneCloud instance by end-users. Enter the fully qualified domain name, hostname valid within your network, or the IP address.
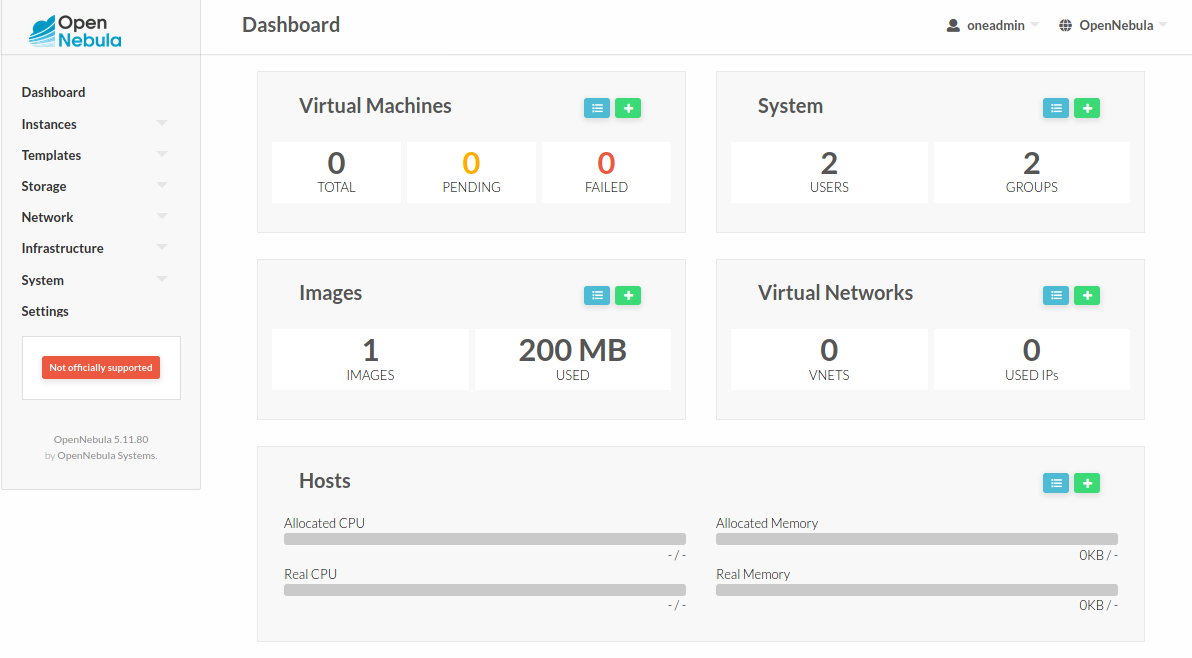
Step 3. Check access to the Sunstone GUI
After opening the Sunstone interface (http://<appliance_ip> with oneadmin credentials), you are now ready to add computing clusters to OpenNebula and start launching your first Virtual Machines!
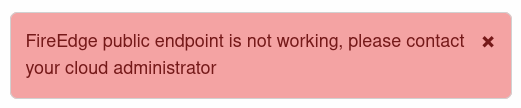
If Sunstone greets you with an error while connecting to the public FireEdge endpoint, return to Control Center in the previous step and configure a valid endpoint:
Next Steps
If you want to try out instead OpenNebula public resource infrastructure provisioning, we recommend following the Operations Guide from Quick Start after finishing this guide to add computing power to your shiny new OpenNebula cloud.