Tutorial: Automated Cloud Deployment with Local Storage
Overview
In this tutorial, we’ll use OneDeploy to automatically deploy a simple OpenNebula cloud, with one Front-end and two Hosts using local storage. In this configuration the virtual disk images are transferred from the Front-end to the Hypervisors’ local storage using the SSH protocol.
This sample architecture uses a basic network configuration, a flat (bridged) network, where each VM’s IP is part of the same network as the Hypervisors.

Throughout the tutorial we’ll use three server machines, please be sure to replace these references to your own IP addresses:
OpenNebula Front-end: 172.20.0.2
Hypervisor (Host) 1: 172.20.0.3
Hypervisor (Host) 2: 172.20.0.4
We’ll follow these high-level steps:
Set up the Ansible control node (for example, install Ansible if necessary).
Download the Ansible playbooks.
Modify the playbooks to your needs, e.g. set the OpenNebula version, define the virtual network for the hosts, storage options, etc.
Run the playbooks.
Verify the installation.
Important
This tutorial was designed and tested using Ubuntu 24.04 and 22.04 for all servers involved (i.e. OpenNebula Front-end and Hypervisor nodes) using a virtual environment with Hatch . For information on other installation methods and OSes, please refer to the OneDeploy Wiki.
Requirements
The cloud hosts (i.e. the OpenNebula Front-end and Hypervisors) must meet the following requirements:
Ubuntu 22.04 or 24.04 with Netplan >=0.105
Passwordless SSH login, as root, from the Front-end node to the Hypervisor nodes
The user that will perform the installation needs to be able to sudo to the root account
A range of free IPs in the same network connecting the Front-end and Hypervisors
Installing OneDeploy in the Front-end
First, in the Front-end we’ll install two packages for Python:
pip, the Python package installerHatch, a Python project manager
To install the packages, run:
sudo apt install python3-pip pipx
Once the packages are installed, clone the one-deploy repository:
git clone https://github.com/OpenNebula/one-deploy.git
Install hatch:
pipx install hatch
pipx ensurepath
source ~/.bashrc
Go to the one-deploy directory:
cd one-deploy
Install the necessary components for the installation, by running:
make requirements
Hatch will create two virtual environments and install the necessary components:
front-end:~/one-deploy$ make requirements
hatch env create default
hatch env run -e default -- ansible-galaxy collection install --requirements-file /home/frontend/one-deploy/requirements.yml
To list the available environments, run:
hatch env show
Hatch should display the newly-created environments, default and ceph (which isolates the ceph-ansible dependencies in a different virtual environment):
front-end:~/one-deploy$ hatch env show
            Standalone
┏━━━━━━━━━┳━━━━━━━━━┳━━━━━━━━━━━━━━━━━━━┓
┃ Name    ┃ Type    ┃ Dependencies      ┃
┡━━━━━━━━━╇━━━━━━━━━╇━━━━━━━━━━━━━━━━━━━┩
│ default │ virtual │ ansible-core<2.17 │
│         │         │ ansible-lint      │
│         │         │ molecule          │
│         │         │ netaddr           │
│         │         │ pyone             │
├─────────┼─────────┼───────────────────┤
│ ceph    │ virtual │ ansible-core<2.16 │
│         │         │ molecule          │
│         │         │ netaddr           │
│         │         │ pyone             │
│         │         │ setuptools        │
└─────────┴─────────┴───────────────────┘
Now you can switch to the default virtual environment:
hatch shell
After switching to the virtual environment, the string (one-deploy) is included in your terminal prompt:
front-end:~/one-deploy$ hatch shell
source "/home/frontend/.local/share/hatch/env/virtual/one-deploy/RdxhOVxs/one-deploy/bin/activate"
(one-deploy) frontend:~/one-deploy$
Configuring Cloud Parameters
Create a directory, which for this tutorial we’ll call my-one, and go to this directory:
mkdir my-one
cd my-one
In this directory we’ll create and edit two files:
example.yml- Contains the definitions for the OpenNebula installation
ancible.cfg- Ansible configuration file
Below are sample contents for example.yml. You will probably need to modify parameters for the OpenNebula installation, such as the IP addresses for the Front-end and virtualization nodes.
---
all:
  vars:
    ansible_user: root
    one_version: '6.10'
    one_pass: opennebulapass
    vn:
      admin_net:
        managed: true
        template:
          VN_MAD: bridge
          PHYDEV: eth0
          BRIDGE: br0
          AR:
            TYPE: IP4
            IP: 172.20.0.100
            SIZE: 48
          NETWORK_ADDRESS: 172.20.0.0
          NETWORK_MASK: 255.255.255.0
          GATEWAY: 172.20.0.1
          DNS: 1.1.1.1

frontend:
  hosts:
    f1: { ansible_host: 172.20.0.2 }

node:
  hosts:
    n1: { ansible_host: 172.20.0.3 }
    n2: { ansible_host: 172.20.0.4 }
The table below lists some of the parameters, please update them to your setup:
Parameter |
Description |
|---|---|
|
The OpenNebula version to install. |
|
Password for the OpenNebula user |
|
Parameters for the OpenNebula virtual network ( |
|
The physical interface on the servers that will attach to the virtual network. |
|
Address range (first |
|
Default gateway for the network. |
|
DNS server of the network. |
|
|
In this example, the Front-end will be installed on the server with IP 172.20.0.2, and the two Hypervisors on 0.3 and 0.4, respectively. The virtual network will be bridged through the eth0 interface of the hypervisors, and VMs will get IP addresses within the range 172.20.0.100 - 172.20.0.147, using 172.20.0.1 as the default gateway.
Below are the contents of the ansible.cfg file:
[defaults]
inventory=./example.yml
gathering=explicit
host_key_checking=false
display_skipped_hosts=true
retry_files_enabled=false
any_errors_fatal=true
stdout_callback=yaml
timeout=30
collections_paths=/home/user/one-deploy/ansible_collections

[ssh_connection]
pipelining=true
ssh_args=-q -o ControlMaster=auto -o ControlPersist=60s

[privilege_escalation]
become      = true
become_user = root
Note that you will need to replace the contents of collections_paths with the correct path to your one-deploy directory.
Verifying Connectivity Between Nodes
After configuring parameters for your cloud, it’s a good idea to ensure that the required connectivity between nodes is working.
To verify connectivity, run this command:
ansible -i example.yml all -m ping -b
Example command and output:
(one-deploy) front-end:~/one-deploy$ ansible -i example.yml all -m ping -b
f1 | SUCCESS => {
    "ansible_facts": {
        "discovered_interpreter_python": "/usr/bin/python3"
    },
    "changed": false,
    "ping": "pong"
}
n2 | SUCCESS => {
    "ansible_facts": {
        "discovered_interpreter_python": "/usr/bin/python3"
    },
    "changed": false,
    "ping": "pong"
}
n1 | SUCCESS => {
    "ansible_facts": {
        "discovered_interpreter_python": "/usr/bin/python3"
    },
    "changed": false,
    "ping": "pong"
}
If any host is unreachable, or if access via SSH is not properly configured, you will see output like the following:
n2 | UNREACHABLE! => {
    "changed": false,
    "msg": "Data could not be sent to remote host \"172.20.0.3\". Make sure this host can be reached over ssh: ",
    "unreachable": true
}
Running the Playbooks
Once you have edited the files, it’s time to run the Ansible playbooks.
First, ensure you are in the Hatch environment by verifying that your terminal prompt begins with (one-deploy).
To run the playbooks, in the my-one directory, run this command:
ansible-playbook -v opennebula.deploy.main
The Ansible playbooks should run and perform the installation. Installation may take several minutes, depending on your network connection speed.
Sample installation output:
(one-deploy) front-end:~/my-one$ ansible-playbook -v opennebula.deploy.main
Using /home/basedeployer/my-one/ansible.cfg as config file
running playbook inside collection opennebula.deploy
[WARNING]: Could not match supplied host pattern, ignoring: bastion

PLAY [bastion] *******************************************************************************************
skipping: no hosts matched
[WARNING]: Could not match supplied host pattern, ignoring: grafana
[WARNING]: Could not match supplied host pattern, ignoring: mons
[WARNING]: Could not match supplied host pattern, ignoring: mgrs
[WARNING]: Could not match supplied host pattern, ignoring: osds

PLAY [frontend,node,grafana,mons,mgrs,osds] **************************************************************

TASK [opennebula.deploy.helper/python3 : Bootstrap python3 intepreter] ***********************************
skipping: [f1] => changed=false
  attempts: 1
  msg: /usr/bin/python3 exists, matching creates option
skipping: [n2] => changed=false
  attempts: 1
  msg: /usr/bin/python3 exists, matching creates option
skipping: [n1] => changed=false
  attempts: 1
  msg: /usr/bin/python3 exists, matching creates option

...

TASK [opennebula.deploy.prometheus/server : Enable / Start / Restart Alertmanager service (NOW)] *********
skipping: [f1] => changed=false
  false_condition: features.prometheus | bool is true
  skip_reason: Conditional result was False

PLAY [grafana] *******************************************************************************************
skipping: no hosts matched

PLAY RECAP ***********************************************************************************************
f1                         : ok=84   changed=33   unreachable=0    failed=0    skipped=75   rescued=0    ignored=0
n1                         : ok=37   changed=12   unreachable=0    failed=0    skipped=57   rescued=0    ignored=0
n2                         : ok=37   changed=12   unreachable=0    failed=0    skipped=48   rescued=0    ignored=0
After the command completes, your new OpenNebula cloud should be up and running.
Verifying the Installation
On the Front-end, you can check that the OpenNebula services are running:
systemctl status opennebula.service
For example:
systemctl status opennebula.service
● opennebula.service - OpenNebula Cloud Controller Daemon
     Loaded: loaded (/usr/lib/systemd/system/opennebula.service; enabled; preset: enabled)
     Active: active (running) since Mon 2024-08-12 14:44:25 UTC; 1 day 6h ago
   Main PID: 7023 (oned)
      Tasks: 74 (limit: 9290)
     Memory: 503.9M (peak: 582.2M)
        CPU: 4min 13.617s
     CGroup: /system.slice/opennebula.service
             ├─7023 /usr/bin/oned -f
             ├─7050 ruby /usr/lib/one/mads/one_hm.rb -p 2101 -l 2102 -b 127.0.0.1
             ├─7074 ruby /usr/lib/one/mads/one_vmm_exec.rb -t 15 -r 0 kvm -p
             ├─7091 ruby /usr/lib/one/mads/one_vmm_exec.rb -t 15 -r 0 lxc
             ├─7108 ruby /usr/lib/one/mads/one_vmm_exec.rb -t 15 -r 0 kvm
             ├─7127 ruby /usr/lib/one/mads/one_tm.rb -t 15 -d dummy,lvm,shared,fs_lvm,fs_lvm_ssh,qcow2,ss>
             ├─7150 ruby /usr/lib/one/mads/one_auth_mad.rb --authn ssh,x509,ldap,server_cipher,server_x509
             ├─7165 ruby /usr/lib/one/mads/one_datastore.rb -t 15 -d dummy,fs,lvm,ceph,dev,iscsi_libvirt,>
             ├─7182 ruby /usr/lib/one/mads/one_market.rb -t 15 -m http,s3,one,linuxcontainers
             ├─7199 ruby /usr/lib/one/mads/one_ipam.rb -t 1 -i dummy,aws,equinix,vultr
             ├─7213 /usr/lib/one/mads/onemonitord "-c monitord.conf"
             ├─7230 ruby /usr/lib/one/mads/one_im_exec.rb -r 3 -t 15 -w 90 kvm
             ├─7243 ruby /usr/lib/one/mads/one_im_exec.rb -r 3 -t 15 -w 90 lxc
             └─7256 ruby /usr/lib/one/mads/one_im_exec.rb -r 3 -t 15 -w 90 qemu
Next we’ll verify that the cloud resources are up. First, become the oneadmin user by running:
sudo -i -u oneadmin
As user oneadmin, to verify the hosts run:
onehost list
Output should be similar to the following:
oneadmin@front-end:~$ onehost list
  ID NAME                                        CLUSTER    TVM      ALLOCATED_CPU      ALLOCATED_MEM STAT
   1 172.20.0.4                                  default      0       0 / 100 (0%)     0K / 1.9G (0%) on
   0 172.20.0.3                                  default      0       0 / 100 (0%)     0K / 1.9G (0%) on
The two servers that we specified in the example.yml file are running as OpenNebula Hypervisor nodes. Ensure that the last column, STAT, displays on and not err.
To check the datastores, run:
onedatastore list
Output should be similar to the following:
oneadmin@front-end:~$ onedatastore list
  ID NAME                                               SIZE AVA CLUSTERS IMAGES TYPE DS      TM      STAT
   2 files                                             57.1G 94% 0             0 fil  fs      ssh     on
   1 default                                           57.1G 94% 0             0 img  fs      ssh     on
   0 system                                                - -   0             0 sys  -       ssh     on
Again, verify that the last column, STAT, displays on and not err.
Finally, verify the virtual network created as part of the deployment (in this case admin_net) by running:
onevnet list
For example:
oneadmin@front-end:~$ onevnet list
  ID USER     GROUP    NAME                        CLUSTERS   BRIDGE          STATE       LEASES OUTD ERRO
   0 oneadmin oneadmin admin_net                   0          br0             rdy              3    0    0
The STATE column should display rdy.
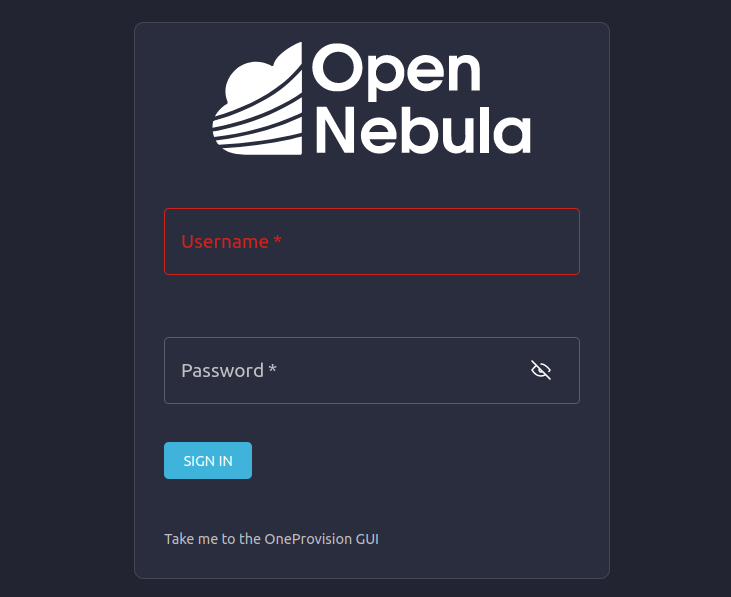
Next we can connect to the Sunstone UI on the Front-end. On any machine with connectivity to the Front-end node, point your browser to <Front-end IP>:2616, in this case http://172.20.0.2:2616. You should be greeted with the Sunstone login screen:
You can log in as user oneadmin, with the password provided as the one_pass parameter in the example.yml file (in this example, opennebulapass).
At this point, we have verified that the complete OpenNebula cloud is up and running. Next we’ll test the Hypervisor nodes by creating and deploying a test VM.
Creating a Test VM
To create a test VM, first we’ll download an adequate image, in this case an Alpine Linux from the OpenNebula Marketplace. Run this command:
onemarketapp export -d default 'Alpine Linux 3.17' alpine.
The image will be downloaded and assigned ID 0:
oneadmin@front-end:~$ onemarketapp export -d default 'Alpine Linux 3.17' alpine
IMAGE
    ID: 0
VMTEMPLATE
    ID: 0
Verify that the image is ready to be instantiated, by running:
oneimage list
oneadmin@front-end:~$ oneimage list
  ID USER     GROUP    NAME                                          DATASTORE     SIZE TYPE PER STAT RVMS
   0 oneadmin oneadmin alpine                                        default       256M OS    No rdy     0
Ensure that the STAT column displays rdy.
To create a test VM based on the Alpine image and attach it to the admin_net network, run:
onetemplate instantiate --nic admin_net alpine
The command should return the ID of the VM, in this case 0:
oneadmin@front-end:~$  onetemplate instantiate --nic admin_net alpine
VM ID: 0
Wait a few moments for the VM to reach its running state. To verify that it is running, run:
onevm list
oneadmin@front-end:~$ onevm list
  ID USER     GROUP    NAME                                 STAT  CPU     MEM HOST                           TIME
   0 oneadmin oneadmin alpine-0                             runn    1    128M 172.20.0.3                  0d 0h28
Ensure that the STAT column displays runn.
Finally, verify that the VM is reachable on the network. Being the first VM that was deployed, this test VM will use the first IP available on the network, in this case 172.20.0.100. (Note that in the output of the command above, the IP listed is that of the Hypervisor where the VM runs, not the VM.)
To test connectivity with the VM, you can run:
ping -c 3 172.20.0.100
oneadmin@front-end:~$ ping -c 3 172.20.0.100
PING 172.20.0.100 (172.20.0.100) 56(84) bytes of data.
64 bytes from 172.20.0.100: icmp_seq=1 ttl=64 time=0.203 ms
64 bytes from 172.20.0.100: icmp_seq=2 ttl=64 time=0.404 ms
64 bytes from 172.20.0.100: icmp_seq=3 ttl=64 time=0.304 ms

--- 172.20.0.100 ping statistics ---
3 packets transmitted, 3 received, 0% packet loss, time 2024ms
rtt min/avg/max/mdev = 0.203/0.303/0.404/0.082 m
The VM is up and running. At this point, you have deployed a complete, fully functional OpenNebula cloud.
Summary of the Installation
The installation in this tutorial follows the most basic OpenNebula cloud configuration, creating a virtual network on a range of IPs already available on the physical network. Each VM in the cloud connects to this virtual network using the main interface on the Hypervisor node where the VM is running.
You can also use automated deployment with more advanced network configurations, such as VXLAN/EVPN or Virtual IPs (VIPs) for High-Availability. For details on these and other configuration options, please refer to the OneDeploy Wiki.
Next Steps
The Ansible playbooks available in OneDeploy offer a full range of configuration options for your cloud. You can expand on the basic example provided in this tutorial by modifying the variables in the playbooks to define your configuration for Ceph storage, airgapped installations, HA and federated Front-ends, and other options. For details please refer to the OneDepoy repository and Wiki.