Running Virtual Machines
Important
This guide assumes that you have deployed the OpenNebula front-end following the Deployment Basics guide and a metal Edge Cluster with KVM hypervisor following the Provisining an Edge Cluster guide.
OpenNebula Systems maintains a curated set of Virtual Machines in the public marketplace. We are going to use the WordPress appliance to try out our brand new cloud.
We are going to assume the Edge Cluster naming schema “metal-kvm-aws-cluster”.
Step 1. Download the image from the Marketplace
Log in to Sunstone as oneadmin. Go to the Storage --> Apps tab and search for WordPress. Select it and click on the icon with the cloud and the down arrow inside (two positions to the left from the green “+”).

Now you need to select a datastore. For efficiency, and taking into account we are only going to run this appliaction in the OpenNebula cluster created in “Operations Basics”, select the aws-cluster-Images Datastore.
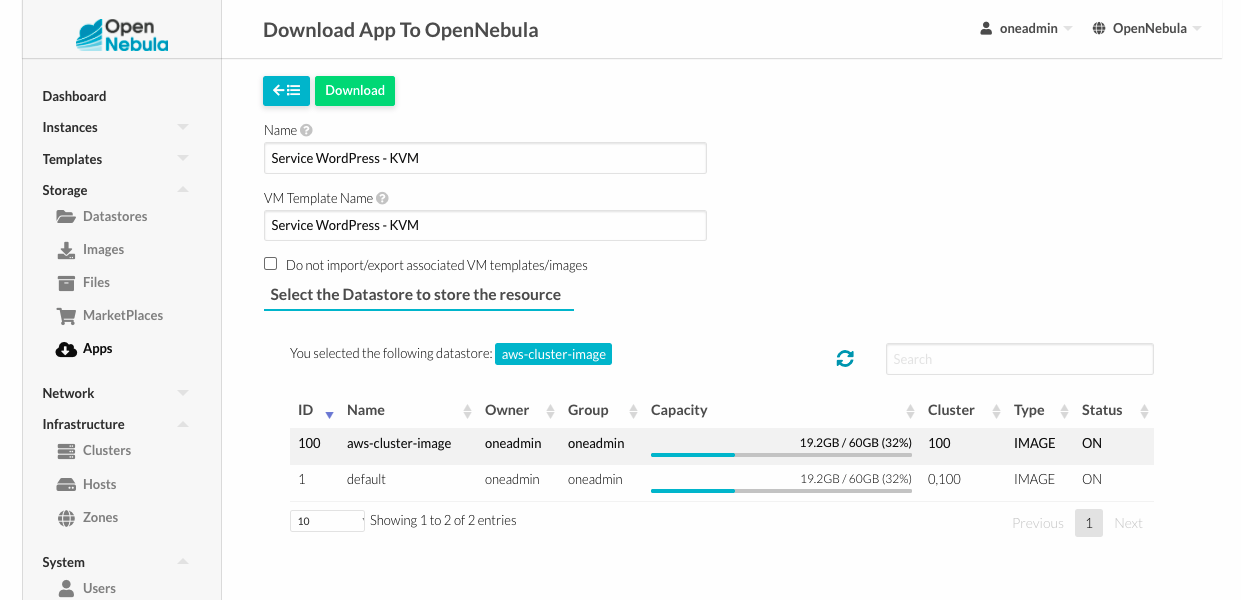
The appliance will be ready when the image in Storage --> Images moves to READY from its LOCKED state.
Step 2. Instantiate the VM
Proceed to the Templates --> VMs tab and select the “Service WordPress - KVM” VM Template (that should one of two available, along with the default CentOS 7 pulled from the Marketplace by miniONE). Click on Instantiate.
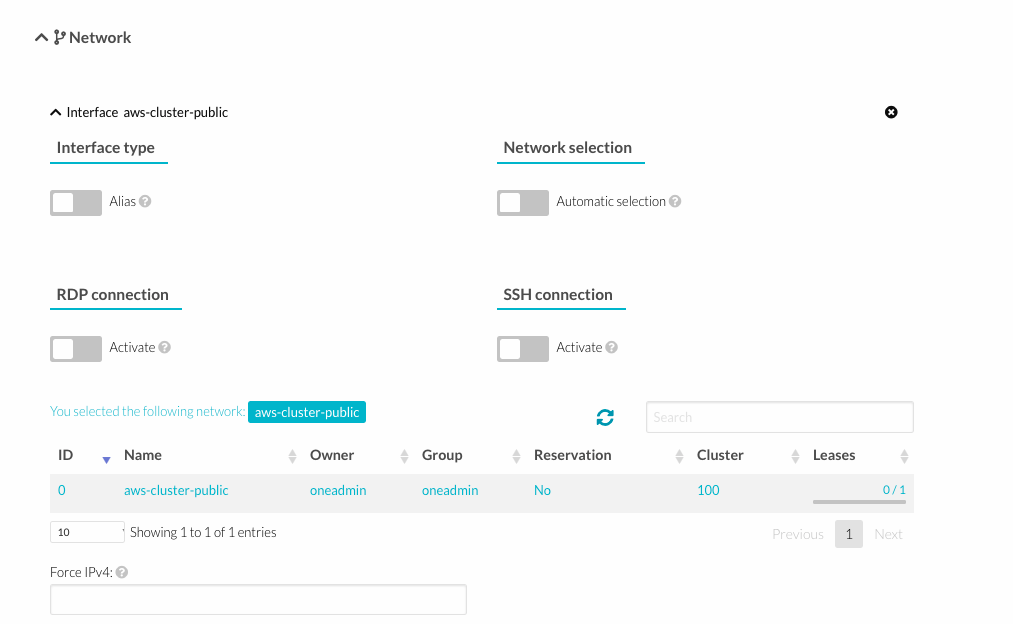
Feel free to modify the capacity and input data to configure the WordPress service. A required step is clicking on Network and selecting the aws-cluster-public network.
Now proceed to Instances --> VMs and wait for the only VM there to get into RUNNING state.
Note
Even though Sunstone shows the VNC console button, VNC access to Containers or VMs running in Edge Clusters has been deemed insecure and as such OpenNebula filters this traffic. This means that the VNC access won’t work for VMs running in Edge Clusters.
Step 3. Connect to WordPress
Select the public IP of the VM, which is highlighted in bold. You should only have one bold IP in that VM. Simply enter that in a new tab in your browser and you’ll be greeted by the famous five minute WordPress installation process! That’s it, you have a working OpenNebula cloud. Congrats!
