Fine-tuning AI Models on NVIDIA Slurm
This tutorial deploys the OpenNebula OneSlurm service and runs a fine-tuning job as an LDAP user. The Slurm cluster is created first. After the Controller and Worker VMs are running, the user stages the model, dataset, virtual environment, training script, and output in the shared /scratch NFS mount.
We will complete the following high-level steps:
- Deploy the
Service OneSlurmappliance from the OpenNebula Marketplace. - Enable LDAP identity for Slurm users.
- Mount shared NFS scratch storage on the Controller and Workers.
- Create or use an LDAP user and prepare the user’s scratch workspace.
- Submit a GPU fine-tuning job from the Slurm Controller.
Before Starting
Before starting this tutorial, complete the AI Factory deployment with either on-premises resources or cloud resources. Use the guide that matches your available resources:
You also need:
- OneFlow enabled.
- OneGate enabled and reachable from the Slurm Controller and Worker VMs.
- A Virtual Network for the OneSlurm
Servicenetwork. - A GPU attached to the Slurm Worker VM template.
- An NFS export for shared scratch storage, for example
10.125.0.1:/srv/nfs/slurm/scratch. - A worker runtime that includes Python build tooling. For the example below, the user creates a Python 3.13 virtual environment in
/scratchwithuv.
Check OneGate on the OpenNebula Front-end:
systemctl status opennebula-gate
The OneSlurm service benefits from an NFS for operational convenience, allowing data to be easily shared between the controller and workers. If you do not have an NFS server available, you can create one locally:
Install the NFS server:
apt update
apt install -y nfs-kernel-server
Then create
/scratchand/homedirectories, register and activate them. Replace<NETWORK_IP>with the appropriate IP and subnet for your network configuration (for example10.0.1.0):mkdir -p /srv/nfs/slurm/scratch mkdir -p /srv/nfs/slurm/home cat >> /etc/exports <<'EOF' /srv/nfs/slurm/scratch <NETWORK_IP>/24(rw,sync,no_subtree_check,no_root_squash) /srv/nfs/slurm/home <NETWORK_IP>/24(rw,sync,no_subtree_check,no_root_squash) EOF exportfs -ra systemctl enable --now nfs-server exportfs -vWhen prompted during the instantiation of the OneSlurm service, enter the appropriate IP for your Front-end server (or whatever server you choose for the NFS, e.g.
10.0.1.18):ONEAPP_SLURM_NFS_SCRATCH = <FRONTEND_IP>:/srv/nfs/slurm/scratch ONEAPP_SLURM_NFS_HOME = <FRONTEND_IP>:/srv/nfs/slurm/home
Step 1: Import the OneSlurm Service
Import Service OneSlurm from the OpenNebula Marketplace. This downloads the service definition, Controller and Worker VM templates, and disk images:
onemarketapp export 'Service OneSlurm' 'Service OneSlurm' --datastore default
The command imports two VM templates and one service template. In the examples below, replace the template IDs with the IDs imported in your cloud.
Step 2: Review the Worker Template
Before instantiating the service, review the Worker VM template. Set CPU, memory, and GPU resources appropriately for your workload.
For this tutorial, use at least:
- Memory: 16384 MB
- Physical CPU: 2
- One NVIDIA GPU or GPU PCI profile
In Sunstone:
- Go to Templates -> VM Templates
- Select the imported Service Slurm Worker template and click Update
- Adjust CPU and memory in General
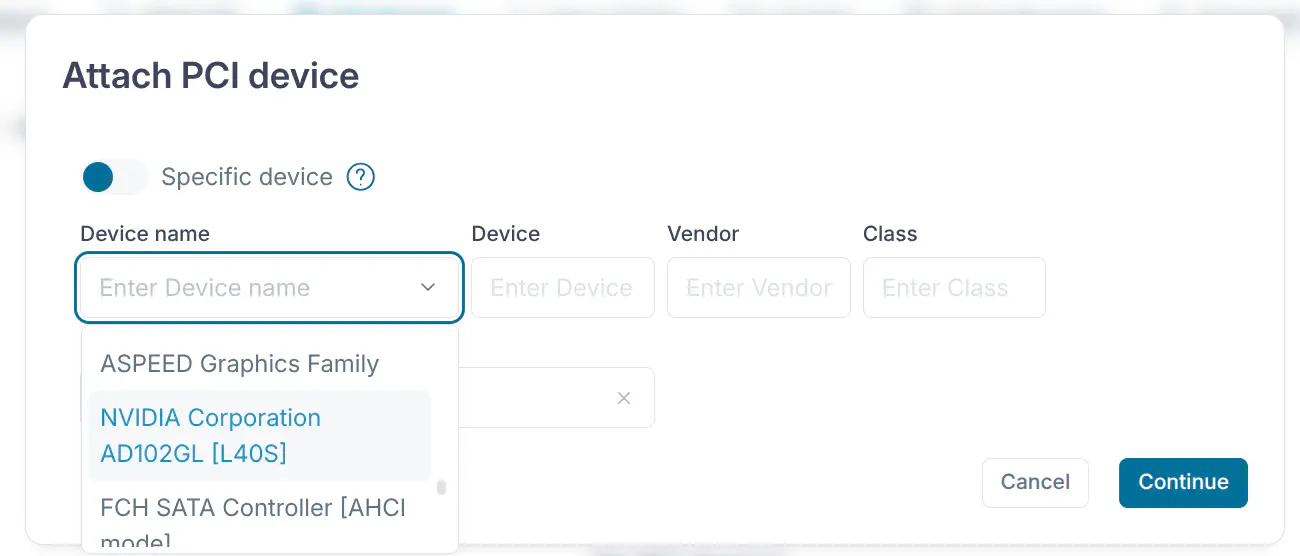
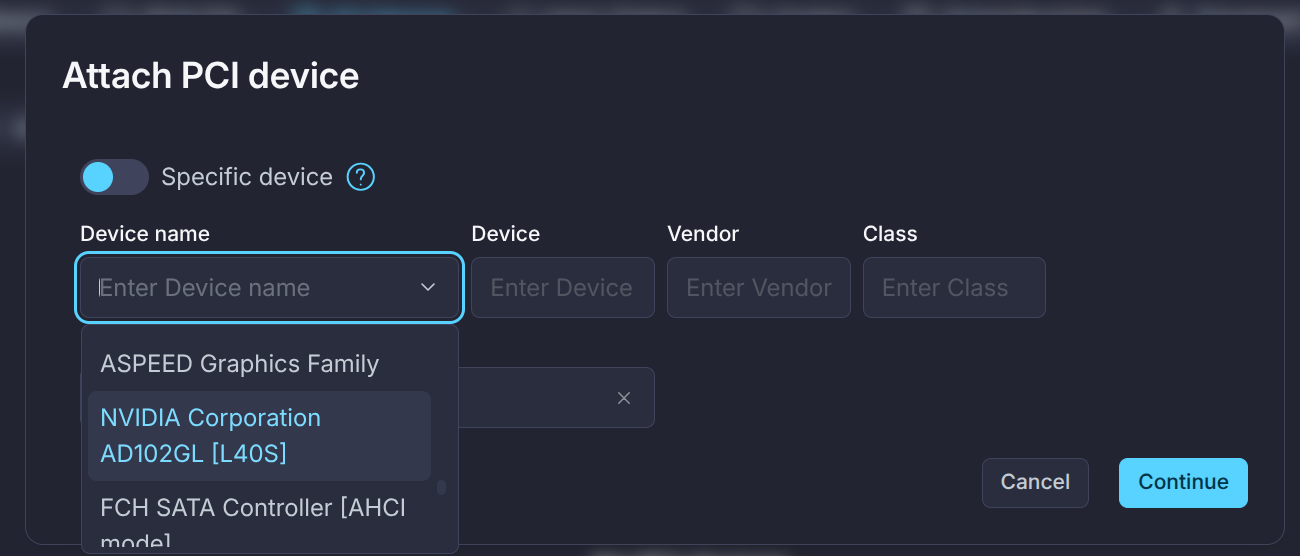
- Attach the GPU in PCI Devices
Step 3: Instantiate the OneSlurm Service
Instantiate the imported service template:
oneflow-template instantiate 'Service OneSlurm'
When prompted:
- Select the OpenNebula virtual network for
Service - Enable local LDAP with
ONEAPP_LDAP_ENABLE=YES, or provideONEAPP_LDAP_URLandONEAPP_LDAP_DOMAINfor an external LDAP service - Set
ONEAPP_LDAP_DOMAIN, for exampleslurm.local - Set
ONEAPP_LDAP_ADMIN_USER, for exampleadmin - Set
ONEAPP_LDAP_ADMIN_PASSWORD - Set
ONEAPP_SLURM_NFS_SCRATCHto the NFS export used for/scratch, for example10.125.0.1:/srv/nfs/slurm/scratch - Optionally set
ONEAPP_SLURM_NFS_HOMEto an NFS export used for/home - Leave InfiniBand disabled unless your Workers have passthrough InfiniBand devices and the fabric is already configured
OneFlow waits to deploy Workers until the Controller publishes READY=YES through OneGate. The Controller also publishes the Munge key and LDAP metadata, so you do not need to copy a Munge key or Controller IP address into the Worker user inputs.
Wait until the service reaches RUNNING:
oneflow list
Then check the Controller and Worker VMs:
onevm list -f NAME~'service_<SERVICE_ID>' -l NAME,STAT
Step 4: Verify Slurm, LDAP, and Scratch
SSH into the Slurm Controller:
onevm ssh <SLURM_CONTROLLER_VM_ID>
Verify the Worker is registered with Slurm:
scontrol show nodes
sinfo
Verify the GPU is visible to the Worker through Slurm:
srun -N1 -n1 --gres=gpu:1 nvidia-smi -L
Verify the NFS scratch mount:
findmnt /scratch
If you enabled local LDAP, the Controller runs OpenLDAP and the Controller and Workers use SSSD. If you use external LDAP, create or verify the user in that external directory instead of the local Controller LDAP server.
Step 5: Create an LDAP User
Skip this step if you are using an external LDAP service and already have a POSIX user for Slurm jobs.
On the Slurm Controller, create a local LDAP user. The example creates user aiuser with UID and GID 20000. Choose values that do not collide with existing users or groups.
BASE_DN="dc=slurm,dc=local"
USER_NAME="aiuser"
USER_ID="20000"
GROUP_ID="20000"
USER_PASSWORD="ChangeMe-Replace"
PASSWORD_HASH="$(slappasswd -s "${USER_PASSWORD}")"

cat > /tmp/aiuser.ldif <<EOF
dn: cn=aiusers,ou=Groups,${BASE_DN}
objectClass: top
objectClass: posixGroup
cn: aiusers
gidNumber: ${GROUP_ID}
memberUid: ${USER_NAME}

dn: uid=${USER_NAME},ou=People,${BASE_DN}
objectClass: top
objectClass: inetOrgPerson
objectClass: posixAccount
objectClass: shadowAccount
cn: AI User
sn: User
uid: ${USER_NAME}
uidNumber: ${USER_ID}
gidNumber: ${GROUP_ID}
homeDirectory: /home/${USER_NAME}
loginShell: /bin/bash
userPassword: ${PASSWORD_HASH}
EOF

ldapadd -Y EXTERNAL -H ldapi:/// -f /tmp/aiuser.ldif
Confirm that SSSD can resolve the user:
getent passwd aiuser
getent group aiusers
If /home is backed by NFS, create the user’s home directory on the mounted filesystem:
mkdir -p /home/aiuser
chown aiuser:aiusers /home/aiuser
chmod 700 /home/aiuser
Create the user’s scratch workspace:
mkdir -p /scratch/aiuser
chown aiuser:aiusers /scratch/aiuser
chmod 700 /scratch/aiuser
Check that the user resolves on a Worker too:
srun -N1 -n1 getent passwd aiuser
Step 6: Download the Model in Scratch
Log in as the LDAP user on the Controller:
su - aiuser
Prepare the scratch directory and Python environment:
export AI_DIR="/scratch/${USER}/ai_model"
export TMPDIR="/scratch/${USER}/tmp"
export PIP_CACHE_DIR="/scratch/${USER}/pip-cache"
export HF_HOME="/scratch/${USER}/huggingface"
export HF_HUB_CACHE="${HF_HOME}/hub"
export HF_DATASETS_CACHE="${HF_HOME}/datasets"

mkdir -p "${AI_DIR}"/{model,output} "${TMPDIR}" "${PIP_CACHE_DIR}" "${HF_HOME}" "${HF_HUB_CACHE}" "${HF_DATASETS_CACHE}"

curl -LsSf https://astral.sh/uv/install.sh | sh
export PATH="${HOME}/.local/bin:${PATH}"

uv venv "${AI_DIR}/venv" --python 3.13
source "${AI_DIR}/venv/bin/activate"
uv pip install torch transformers unsloth datasets huggingface_hub
Download the base model in /scratch:
hf download Qwen/Qwen2.5-0.5B-Instruct \
  --local-dir "${AI_DIR}/model"
The hf download command stores the local model files under ${AI_DIR}/model.
Step 7: Create the Fine-tuning Script
Still as the LDAP user, create the fine-tuning script in scratch:
cat > "${AI_DIR}/demo_finetune.py" <<'PYEOF'
#!/usr/bin/env python3
import os

import unsloth
from unsloth import FastLanguageModel
from datasets import load_dataset
from trl import SFTConfig, SFTTrainer

AI_DIR = os.environ.get("AI_DIR", f"/scratch/{os.environ['USER']}/ai_model")
MODEL_PATH = os.path.join(AI_DIR, "model")
OUTPUT_DIR = os.path.join(AI_DIR, "output")
DATASET_CACHE = os.environ.get("HF_DATASETS_CACHE", os.path.join(AI_DIR, "cache", "datasets"))

dataset = load_dataset(
    "yahma/alpaca-cleaned",
    split="train[:64]",
    cache_dir=DATASET_CACHE,
)

def fmt(example):
    return {
        "text": (
            "### Instruction:\n{instruction}\n\n"
            "### Input:\n{input}\n\n"
            "### Response:\n{output}"
        ).format(**example)
    }

dataset = dataset.map(fmt, remove_columns=dataset.column_names)

model, tokenizer = FastLanguageModel.from_pretrained(
    MODEL_PATH,
    max_seq_length=2048,
    dtype=None,
    load_in_4bit=True,
    local_files_only=True,
)

model = FastLanguageModel.get_peft_model(
    model,
    r=8,
    target_modules=[
        "q_proj", "k_proj", "v_proj", "o_proj",
        "gate_proj", "up_proj", "down_proj",
    ],
    lora_alpha=16,
    lora_dropout=0,
    bias="none",
    use_gradient_checkpointing="unsloth",
)

trainer = SFTTrainer(
    model=model,
    processing_class=tokenizer,
    train_dataset=dataset,
    args=SFTConfig(
        output_dir=OUTPUT_DIR,
        dataset_text_field="text",
        max_length=2048,
        dataset_num_proc=1,
        packing=False,
        per_device_train_batch_size=2,
        gradient_accumulation_steps=2,
        max_steps=10,
        learning_rate=2e-4,
        bf16=True,
        report_to="none",
    ),
)

os.makedirs(OUTPUT_DIR, exist_ok=True)
trainer.train()
model.save_pretrained_merged(OUTPUT_DIR, tokenizer, save_method="merged_16bit")
tokenizer.save_pretrained(OUTPUT_DIR)
print("Saved to", OUTPUT_DIR)
PYEOF

chmod +x "${AI_DIR}/demo_finetune.py"
Step 8: Run the Fine-tuning Job
Create the batch script from the Slurm Controller as the LDAP user:
cat > "${AI_DIR}/demo_finetune.sbatch" <<EOF
#!/bin/bash
#SBATCH --job-name=demo_finetune
#SBATCH --nodes=1
#SBATCH --ntasks=1
#SBATCH --gres=gpu:1
#SBATCH --chdir=${AI_DIR}
#SBATCH --output=${AI_DIR}/demo_finetune.out
#SBATCH --error=${AI_DIR}/demo_finetune.err

set -euo pipefail

export AI_DIR="${AI_DIR}"
export TMPDIR="${TMPDIR}"
export PIP_CACHE_DIR="${PIP_CACHE_DIR}"
export HF_HOME="${HF_HOME}"
export HF_HUB_CACHE="${HF_HUB_CACHE}"
export HF_DATASETS_CACHE="${HF_DATASETS_CACHE}"

"${AI_DIR}/venv/bin/python" "${AI_DIR}/demo_finetune.py"
EOF
Submit the job with sbatch. The shell returns immediately after Slurm accepts the job:
JOB_ID="$(sbatch --parsable "${AI_DIR}/demo_finetune.sbatch")"
Check the job state:
squeue -j "${JOB_ID}"
Follow the output while the job runs:
tail -f "${AI_DIR}/demo_finetune.out"
When the job finishes, the merged model and tokenizer are saved under:
ls -la "${AI_DIR}/output"
Next Steps
Before continuing with other AI Factory guides, undeploy the Slurm service if you no longer need it:
oneflow delete <SERVICE_ID>
We recommend continuing with the following AI Factory guides:
GIVE FEEDBACK
Was this resource helpful?
Glad to hear it
Sorry to hear that