Managing Virtual Machine Resources and Storage
This guide describes how to change VM devices, capacity, and configuration; manage snapshots and saved copies; and place or migrate VMs between Hosts and Datastores. Use the onevm command or Sunstone for these operations.
For creating instances, lifecycle controls, scheduled actions, and permissions, see Managing Virtual Machine Instances. Before changing a VM, check the operation’s required VM state and the relevant driver limitations. For consoles and guest command execution, see Accessing Virtual Machines.
Hot-plugging Disks
To attach or detach disks on running VMs, use onevm disk-attach or onevm disk-detach. For example, to attach the Image named storage to a running VM, run:
onevm disk-attach one-5 --image storage
To detach a disk from a running VM, find its disk ID with onevm show --all, then run onevm disk-detach <VM_ID> <DISK_ID>:
onevm show one-5 --all
...
DISK=[
  DISK_ID="1",
...
  ]
...
onevm disk-detach one-5 1
Hot-plugging NICs
You can hot-plug network interfaces to VMs in the RUNNING or POWEROFF states. Specify the Virtual Network for the new interface:
onevm show 2
VIRTUAL MACHINE 2 INFORMATION
ID                  : 2
NAME                : centos-server
STATE               : ACTIVE
LCM_STATE           : RUNNING

...

VM NICS
ID NETWORK      VLAN BRIDGE   IP              MAC
 0 net_172        no vbr0     172.16.1.201    02:00:ac:10:0

...
onevm nic-attach 2 --network net_172
After the operation, run onevm show again. You should see two NICs, with IDs 0 and 1:
onevm show 2
VIRTUAL MACHINE 2 INFORMATION
ID                  : 2
NAME                : centos-server
STATE               : ACTIVE
LCM_STATE           : RUNNING

...


VM NICS
ID NETWORK      VLAN BRIDGE   IP              MAC
 0 net_172        no vbr0     172.16.1.201    02:00:ac:10:00:c9
                              fe80::400:acff:fe10:c9
 1 net_172        no vbr0     172.16.1.202    02:00:ac:10:00:ca
                              fe80::400:acff:fe10:ca
...
You can also attach PCI and SR-IOV interfaces, including while the VM is running. Select the device by its address, ID, vendor, or class:
onevm nic-attach 2 --network net_172 --pci '00:06.1'
PCI hotplug support and guest addresses depend on the VM’s machine type and PCI topology. For KVM q35 VMs, configure the PCIe topology before starting the VM; see Q35_ROOT_PORTS and Q35_NUMA_PCIE in the KVM driver defaults.
To detach a NIC, specify its ID. For example, to detach interface 1 (MAC 02:00:ac:10:00:ca), run:
onevm nic-detach 2 1
Updating NICs
To update NIC QoS attributes, use onevm nic-update <VM_ID> <NIC_ID> [file]. If the VM is running, the driver updates the network parameters while the VM runs.
Create update_nic.txt with this content:
NIC = [
    INBOUND_AVG_BW = "512",
    INBOUND_PEAK_BW = "1024"
]
Review the file and apply the configuration:
cat update_nic.txt
onevm nic-update 0 0 update_nic.txt
If the file argument is omitted, the existing NIC configuration will be opened in an editor.
Hot-plugging Security Groups
You can attach or detach Security Groups while a VM is running. Specify the VM, NIC, and Security Group. For example, to attach a Security Group, run:
onevm sg-attach centos-server 0 101
To detach the Security Group, run:
onevm sg-detach centos-server 0 101
In Sunstone, you can attach or detach Security Groups on a running or powered-off VM. Open the Network tab, select the NIC, open its ellipsis menu, then select Security Groups:
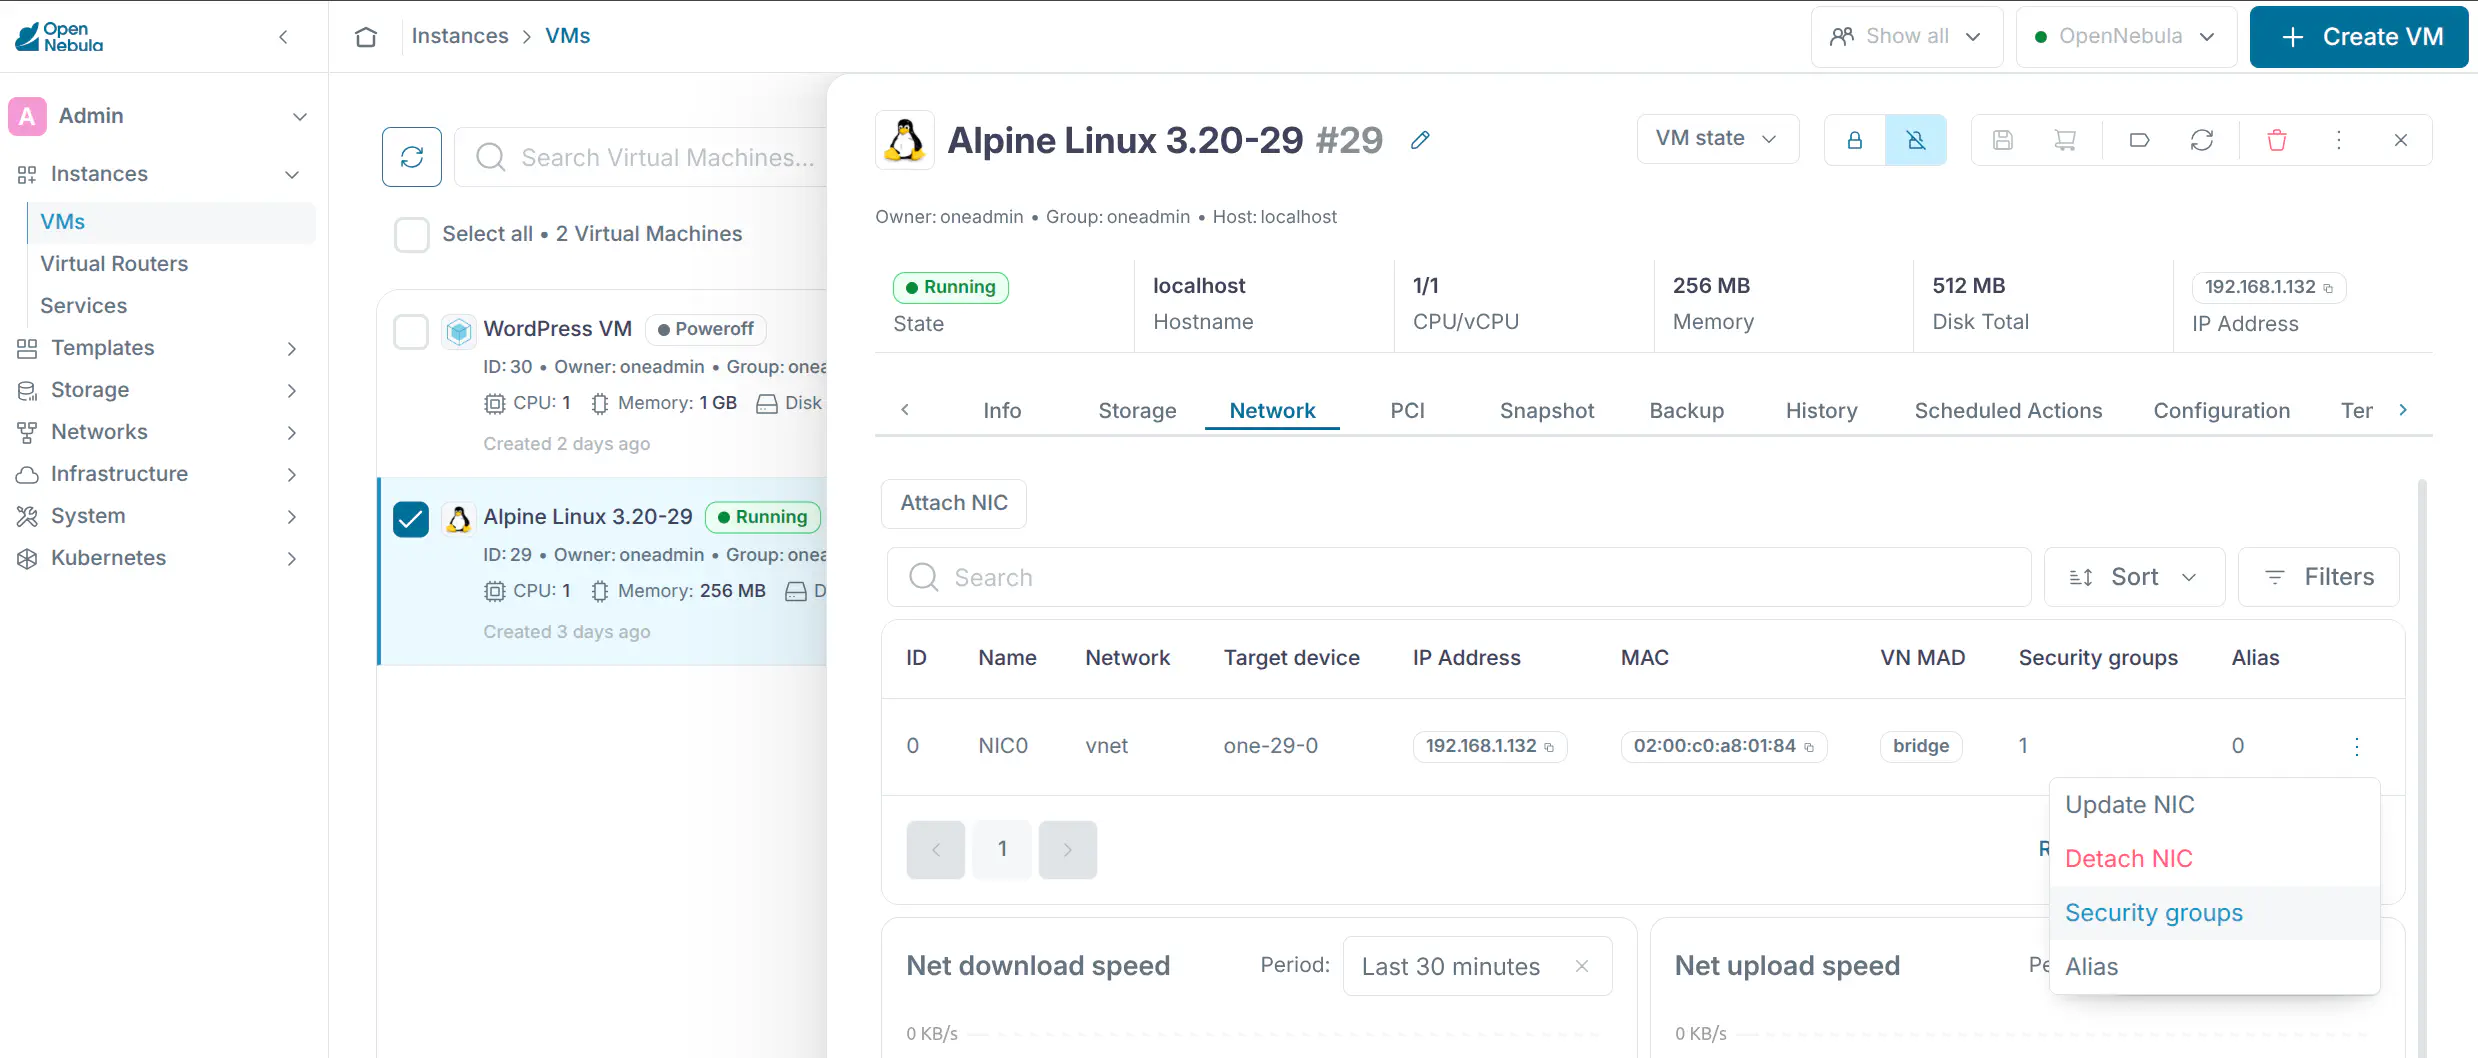
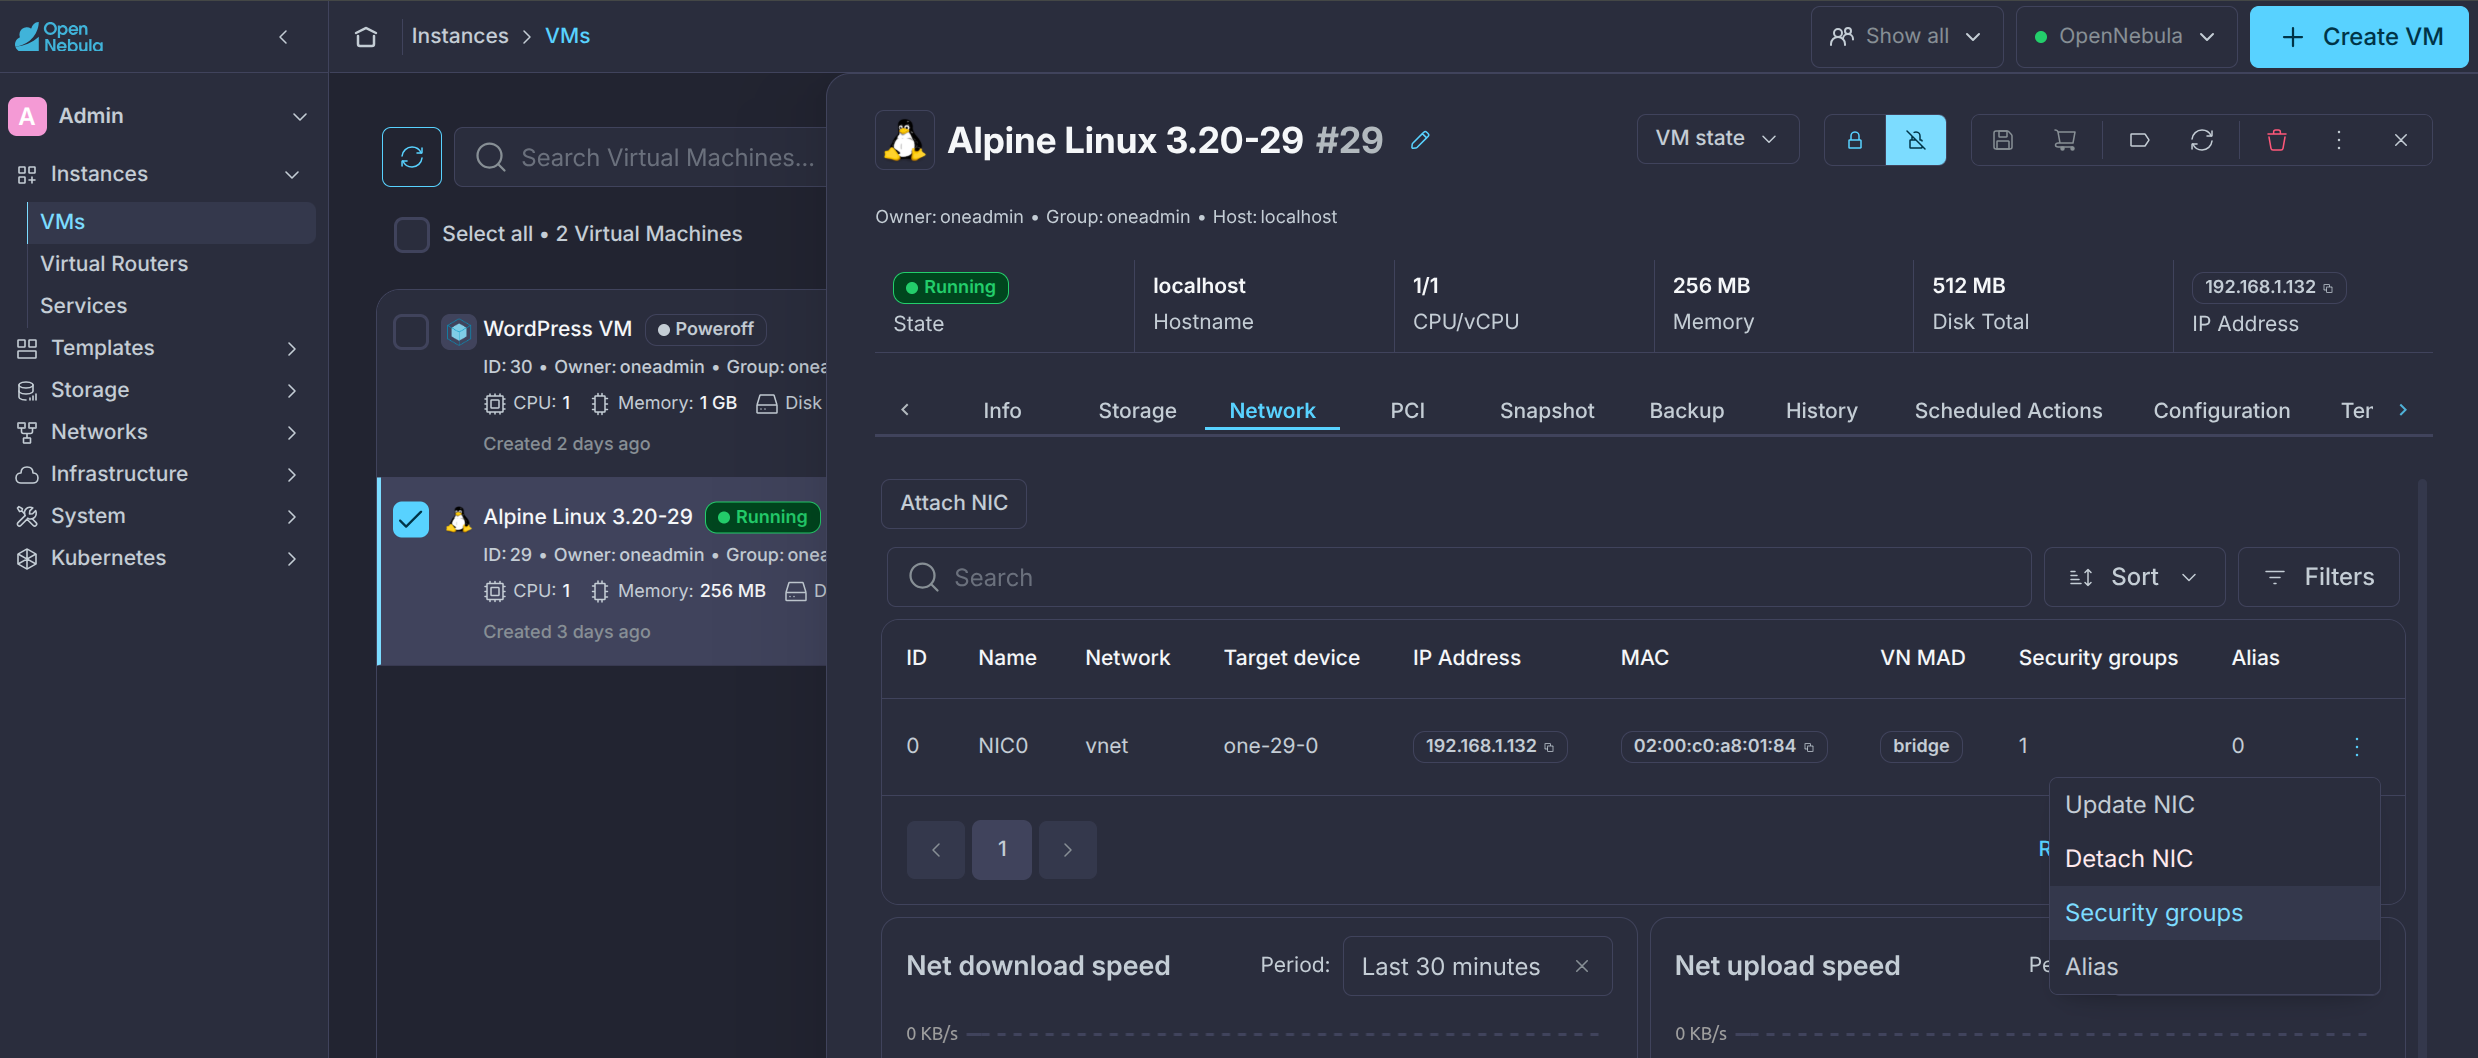
To attach a new Security Group, click Add Security Group in the Security Groups dialog, then select an available group.
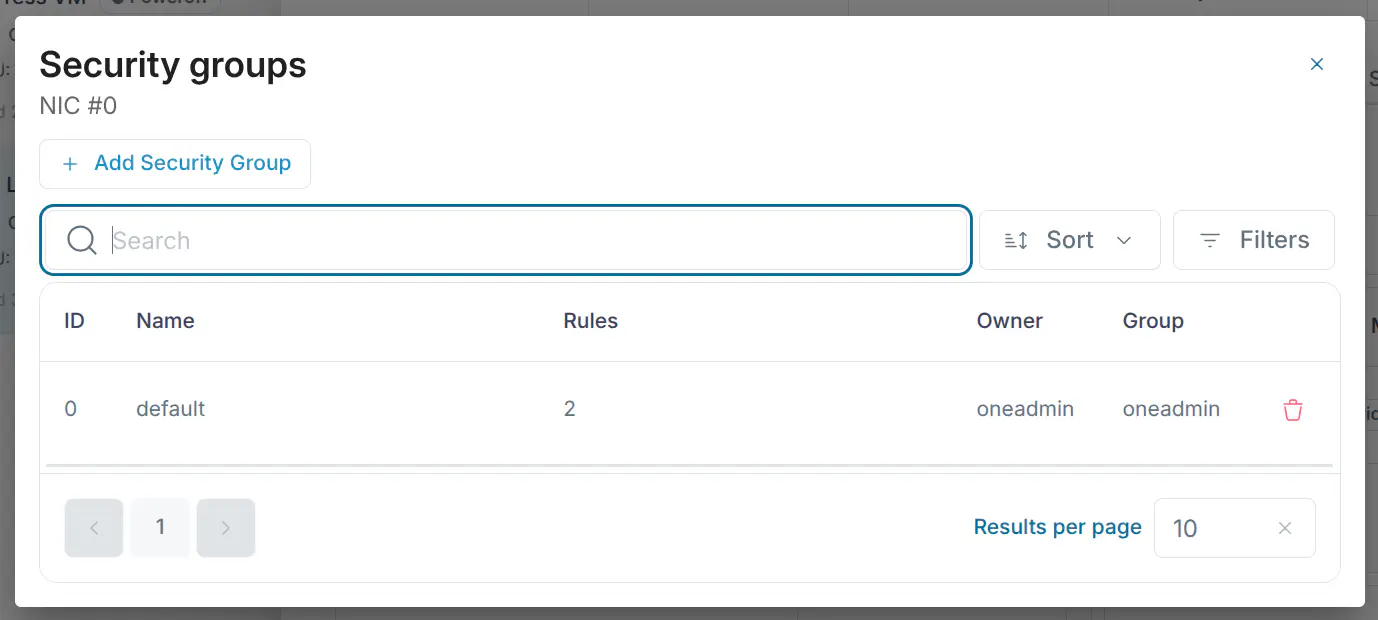
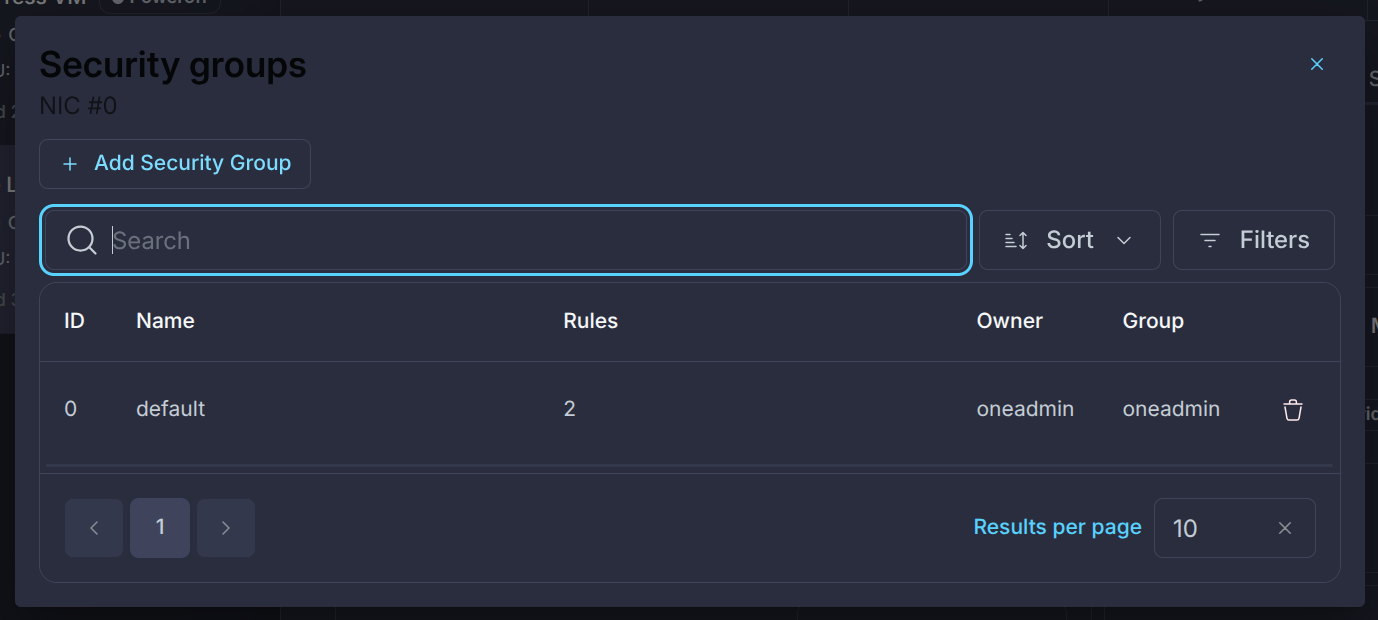
To detach a Security Group, click Trash next to the group, then confirm the action.
Attaching and Detaching PCI Devices
You can attach or detach PCI devices when the VM is in the POWEROFF or UNDEPLOYED state. For example:
onevm pci-attach alpine01 --pci_class 0c03 --pci_device 0015 --pci_vendor 1912
onevm pci-detach alpine01 0
Resizing VM Capacity
You can resize a VM’s virtual CPUs, memory, and allocated CPU capacity. Resize a VM in the PENDING, HOLD, CLONING, CLONING_FAILURE, POWEROFF, or UNDEPLOYED state, or with some limitations in the RUNNING state.
To increase a VM’s resources, use this procedure:
- Prepare the VM for shutdown. For example, stop any services that require a manual shutdown.
- Power off the VM and wait until it reaches the
POWEROFFstate. - Resize the VM.
- Resume the VM with the new capacity.
This procedure preserves resources assigned by OpenNebula, such as IP leases.
For example, power off the VM:
onevm poweroff web_vm
Poweroff is asynchronous. Use onevm show web_vm to check the state and wait until it is POWEROFF. Then resize the VM and resume it after the resize succeeds:
onevm resize web_vm --memory 2G --vcpu 2
onevm resume web_vm
Resizing a Running VM
To resize a VM in the RUNNING state, configure the required driver-specific VM Template attributes before starting the VM. For details, see KVM Live Resize.
echo 1 > /sys/devices/system/cpu/cpu<ID>/online, replacing <ID> with its CPU number.Resizing VM Disks
To increase a VM disk’s size at instantiation, set its SIZE attribute to a value larger than the source Image. Then:
- OpenNebula increases the disk container’s size before launching the VM.
- With the Context Packages installed, supported guests can grow the filesystem at boot to use the new size. This depends on the guest OS, filesystem layout, and Context Package.
To override a disk’s size when instantiating a VM Template, run:
onetemplate instantiate <template> --disk u2104:size=2048 # Resize the VM disk to 2 GiB if the source Image is smaller
To resize an existing VM disk, run this command when the VM is in the RUNNING, POWEROFF, or UNDEPLOYED state:
onevm disk-resize <VM_ID> <DISK_ID> <SIZE> # <SIZE> must be greater than current disk size
This grows the virtual disk. Expand the guest filesystem to use the additional space. Automatic expansion depends on the guest OS, filesystem layout, and Context Package. Start a powered-off or undeployed guest before its Contextualization Service can run. If automatic expansion is unavailable, expand the filesystem manually with the guest OS tools.
/ manually. Filesystems with other mount points can be expanded by the Contextualization Service.Updating the Virtual Machine Configuration
To change a VM’s configuration after creating it, use onevm updateconf. This command supports these VM Template attributes:
| Attribute | Sub-attributes |
|---|---|
OS | ARCH, MACHINE, KERNEL, INITRD, BOOTLOADER, BOOT,KERNEL_CMD, ROOT, SD_DISK_BUS, UUID, FIRMWARE, FIRMWARE_FORMAT |
FEATURES | ACPI, PAE, APIC, LOCALTIME, HYPERV, GUEST_AGENT,VIRTIO_SCSI_QUEUES, VIRTIO_BLK_QUEUES, IOTHREADS, GIC, RAS,MIGRATE_AUTO_CONVERGE, MIGRATE_COMPRESSED |
INPUT | TYPE, BUS |
GRAPHICS | TYPE, LISTEN, PASSWD, KEYMAP, COMMAND |
VIDEO | TYPE, IOMMU, ATS, VRAM, RESOLUTION |
RAW | DATA, TYPE, VALIDATE |
CPU_MODEL | MODEL, FEATURES |
BACKUP_CONFIG | FS_FREEZE, KEEP_LAST, BACKUP_VOLATILE, MODE,INCREMENT_MODE, DISK_IDS, INTERACTIVE |
CONTEXT | Any value, except ETH* by default. Variable substitution applies. |
Manual overrides of generated ETH* network context require CONTEXT_ALLOW_ETH_UPDATES=YES in oned.conf; the default is NO. Prefer updating the NIC configuration to keep it consistent with the generated network context.
For descriptions of these attributes, see the Virtual Machine Template reference. For all available methods, see the VM Update Methods Reference.
RUNNING VMs depends on the hypervisor. Check the limitations of your virtualization driver.RUNNING state, changes to CONTEXT and BACKUP_CONFIG take effect immediately. Other values may require a VM restart. If a live context update fails, try triggering the action again.Virtual Machine System Snapshots
Snapshotting might not be available for every supported hypervisor. Before using it, check the limitations of your virtualization driver.
A system snapshot contains the current disk and memory state. You can create, delete, and restore snapshots for running VMs.
onevm snapshot-create 4 "just in case"

onevm show 4
...
SNAPSHOTS
  ID         TIME NAME                                           HYPERVISOR_ID
   0  02/21 16:05 just in case                                   onesnap-0
onevm snapshot-revert 4 0 --verbose
VM 4: snapshot reverted
qcow2 driver.Virtual Machine Disk Snapshots
Disk snapshots support two types of operations:
disk-snapshot-create,disk-snapshot-revert,disk-snapshot-delete, anddisk-snapshot-rename: Create, restore, delete, or rename disk snapshots during the VM lifecycle.disk-saveas: Export a VM disk or an existing snapshot to an Image in an OpenNebula Datastore. This is a live action.
Managing Disk Snapshots
Use disk snapshots to create checkpoints of a disk’s state. Depending on the storage backend, snapshots use one of these structures:
- Tree: Every snapshot has a parent, except for the first snapshot, whose parent is
-1. The active snapshot, which you last created or restored, becomes the parent of the next snapshot. Deletion rules depend on the storage backend and itsALLOW_ORPHANSmode. - Flat: Snapshots have no parent/child relationship and can be freely removed.
To manage disk snapshots, use these commands:
disk-snapshot-create <VM_ID> <DISK_ID> <name>: Create a snapshot of the specified disk.disk-snapshot-revert <VM_ID> <DISK_ID> <SNAPSHOT_ID>: Restore the disk to the specified snapshot. Snapshots are immutable, so restoring the same snapshot always returns the disk to the state captured when you created it.disk-snapshot-delete <VM_ID> <DISK_ID> <SNAPSHOT_ID>: Delete a snapshot subject to the storage backend’s constraints. WithALLOW_ORPHANS=MIXED, the snapshot must have no children and must not be active. WithALLOW_ORPHANS=NO, you can also delete active leaf snapshots and some snapshots with a single child, but cannot delete snapshot0of a persistent disk.
You can run disk-snapshot-create when the VM is in the RUNNING state if the drivers support it, or in POWEROFF or SUSPENDED. To run disk-snapshot-revert, the VM must be in POWEROFF. These KVM storage combinations support live snapshots:
- KVM (
VM_MAD=kvm) withqcow2Datastores (TM_MAD=qcow2): OpenNebula asks the hypervisor to runvirsh snapshot-create. - KVM (
VM_MAD=kvm) with Ceph Datastores (TM_MAD=ceph): OpenNebula creates Ceph snapshots in the current volume.
With either combination, you can enable QEMU Guest Agent to freeze the filesystem while creating the snapshot.
disk-snapshot-create, suspend or power off the VM before creating the snapshot. Check the corresponding virtualization and storage driver guides for support and limitations. Reverting a disk snapshot always requires the VM to be powered off.For the driver actions used for live and non-live snapshots, see the Storage Driver guide.
DISK/CACHE and the installed storage driver, libvirt, and QEMU versions. Use a cache mode supported by that combination; CACHE=writethrough alone does not establish snapshot compatibility.Persistent Images and Disk Snapshots
These actions support both persistent and non-persistent Images. For persistent Images, OpenNebula preserves snapshots after VM termination when the storage driver supports it and PERSISTENT_SNAPSHOTS is enabled. Other VMs using that Image can then use the snapshots. The fs_lvm_ssh driver sets PERSISTENT_SNAPSHOTS=NO by default. For more information, see Snapshots in the Images guide.
Saving a VM Disk to an Image (disk-saveas)
To save a VM disk to a new Image, use disk-saveas when the VM is in the RUNNING, POWEROFF, SUSPENDED, UNDEPLOYED, or STOPPED state. This live operation starts immediately. By default, it uses the current disk state. To use an existing disk snapshot instead, add --snapshot <SNAPSHOT_ID>.
disk-saveas on a RUNNING VM, unmount the disk if possible, or sync or quiesce it.Cloning a Virtual Machine
You can copy a VM Template or VM instance to a new VM Template. This copy preserves changes to the VM disks after you terminate the instance. The new Template is private and appears only in its owner’s list.
To create a persistent private copy of a VM, use either method:
- Instantiate a VM Template with the to persistent option.
- Save an existing VM instance with
onevm save.
Instantiating to Persistent
When you instantiate to persistent, OpenNebula clones the Template recursively, creates a private persistent clone of each disk Image, and instantiates the new Template.
To instantiate to persistent, use --persistent:
onetemplate instantiate web_vm --persistent --name my_vm
VM ID: 31
onetemplate list
  ID USER            GROUP           NAME                                REGTIME
   7 oneadmin        oneadmin        web_vm                       05/12 14:53:11
   8 oneadmin        oneadmin        my_vm                        05/12 14:53:38
oneimage list
  ID USER       GROUP      NAME            DATASTORE     SIZE TYPE PER STAT RVMS
   7 oneadmin   oneadmin   web-img         default       200M OS   Yes used    1
   8 oneadmin   oneadmin   my_vm-disk-0    default       200M OS   Yes used    1
To instantiate multiple persistent VMs, use both -m N and --name. You must provide --name when -m is greater than 1. Include %i in the name to choose where to insert the VM index (0 through N-1):
onetemplate instantiate web_vm -m 2 --persistent --hold --name 'test'
VM ID: 0
VM ID: 1
onetemplate instantiate web_vm -m 2 --persistent --hold --name '%i-test'
VM ID: 2
VM ID: 3
onevm list
  ID USER         GROUP        NAME       STAT     CPU      MEM     HOST      TIME
   3 oneadmin     oneadmin     1-test     hold       1     768M           0d 00h00
   2 oneadmin     oneadmin     0-test     hold       1     768M           0d 00h00
   1 oneadmin     oneadmin     test-1     hold       1     768M           0d 00h00
   0 oneadmin     oneadmin     test-0     hold       1     768M           0d 00h00
In Sunstone, enable Persistent next to Create. Include %i in the name to choose where to insert the VM index (0 through N-1).
Volatile disks cannot be persistent. When you terminate the VM, their contents are lost. The cloned VM Template contains the definition of an empty volatile disk.
Saving a VM Instance
To save a VM that you did not create as persistent, power it off first, then use onevm save before terminating it.
This action clones the VM’s source Template and replaces its disks with copies of the current VM disks; see the disk-saveas action. If you resized the VM, the new Template uses its current capacity. To make the cloned Images persistent, add --persistent. The action also copies the VM instance’s NICs to preserve any attach or detach changes.
onevm save web_vm copy_of_web_vm --persistent
Template ID: 26
Keep these onevm save limitations in mind:
- The action uses the VM’s source Template. If you updated it after instantiating the VM, the action uses the updated contents.
- Volatile disks cannot be saved, and their contents are lost. The cloned VM Template contains the definition of an empty volatile disk.
- The action retains disk and NIC configuration attributes except for generated allocation details, such as disk targets, IP addresses, and MAC addresses. Saved Image-backed disks reference their Images by ID.
Placing and Migrating VMs
Use these administrator commands to choose a Host, request rescheduling, or migrate a VM. For disk transfers between System Datastores, see Migrating VM Storage Between Datastores. For recovery of a VM in UNKNOWN, see Advanced Operations for Administrators.
Scheduling
resched: Set the VM’s reschedule flag. In the next monitoring cycle, the Scheduler migrates the VM to a Host that better matches its requirements and rank restrictions. Depending on the Scheduler configuration, it can use live migration. For more information, see Scheduling.unresched: Clear the VM’s reschedule flag to cancel rescheduling.
Deployment
deploy <VM_ID> <HOST_ID> [<SYSTEM_DATASTORE_ID>]: Start an existing VM on a specific Host.VM_IDidentifies the VM,HOST_IDidentifies the destination Host, and the optionalSYSTEM_DATASTORE_IDidentifies the destination System Datastore.migrate --live: Transfer a running VM to another Host, or migrate its storage to another System Datastore on the current Host when the driver supports live datastore migration. The Host and System Datastore cannot both be changed in one live migration.migrate: Migrate the VM to the target Host and, optionally, another System Datastore. A running VM is saved and restored; a VM already powered off or suspended retains its state.
By default, these operations do not check the target Host’s capacity. Use --enforce to prevent overcommitting it.
Migrating VM Storage Between Datastores
Use datastore migration to move VM disk images and associated files between System Datastores. You can migrate storage for maintenance, balance disk I/O across storage tiers, evacuate hardware for decommissioning, or move a VM to a Host in another Cluster.
Depending on the state of the VM and the capabilities of the underlying storage drivers, OpenNebula supports two primary methods:
Cold Storage Migration: A running VM is saved or powered off before its files are moved. VMs already in
POWEROFForSUSPENDEDcan also be migrated and retain their state afterward.Live Storage Migration: Performed while the VM is
RUNNING. OpenNebula coordinates with the hypervisor to migrate the VM storage while the workload continues running.
Basic Syntax
To migrate VM disks to another System Datastore, specify its ID when running onevm migrate:
onevm migrate [--live] <VM_ID> <TARGET_HOST_ID> <TARGET_DATASTORE_ID>
If the target Host is the same as the current one, only the datastore changes. If you also change the Host, both the Host and the datastore are migrated simultaneously, although changing both is only supported for offline migrations.
Cold and live migrations cannot cross different TM_MAD drivers, such as ceph and lvm.
Performing Cold Storage Migration
For a running VM, cold migration saves the execution state before transferring the VM files, then restores it after the transfer. OpenNebula uses the Transfer Manager to move the files from the source datastore to the destination datastore.
onevm migrate <VM_ID> <HOST_ID> <TARGET_DATASTORE_ID>
You can also use --poff or --poff-hard to power off the VM during migration:
onevm migrate <VM_ID> <HOST_ID> <TARGET_DATASTORE_ID> --poff
The Transfer Manager handles the file operations, including moving disk images and updating symlinks, through the TM_MAD scripts. For a VM that was running, OpenNebula restores the saved state, or boots the VM if --poff or --poff-hard was used. A VM that was already in POWEROFF or SUSPENDED remains in that state; use onevm resume when you want to start it.
VMs in UNDEPLOYED cannot use onevm migrate. Use onevm deploy with the VM ID, destination Host ID, and destination System Datastore ID instead:
onevm deploy <VM_ID> <HOST_ID> <TARGET_DATASTORE_ID>
Performing Live Storage Migration
Live storage migration moves VM disks while the VM remains in RUNNING. OpenNebula coordinates with KVM to mirror disk writes to the new destination in real time.
onevm migrate --live <VM_ID> <HOST_ID> <TARGET_DATASTORE_ID>
Live datastore migration uses virsh blockcopy on the same Host. OpenNebula copies read-only disks in raw format, such as CD-ROM images, then uses libvirt’s change-media command to update their paths.
Live datastore migration has the following limitations:
- You cannot change both the Host and the System Datastore simultaneously. Perform these operations separately.
- Disk snapshots require the target System Datastore to support snapshot migration (
DS_MIGRATE_SNAP="YES"). If the VM has disk snapshots and the driver does not support migrating them, OpenNebula rejects the migration. The defaultshared,qcow2,ssh, andlocaldrivers support this capability.
Migrating Between Clusters
To migrate a VM between Hosts in different Clusters, make its resources available to the destination Cluster:
- Every Image Datastore used by the VM’s disks must belong to the destination Cluster.
- Every Virtual Network used by the VM must belong to the destination Cluster, including networks attached through PCI NICs. NICs using
NETWORK_MODE="DUMMY"are excluded from this requirement. - If the VM kernel or initrd is provided by an OpenNebula File Datastore, that datastore must also belong to the destination Cluster.
- The System Datastore used after migration must be available to the destination Cluster. If you retain the current System Datastore, it must include the destination Cluster. If you select another System Datastore, it must use the same transfer driver (
TM_MAD) and support datastore migration and any existing disk snapshots. - Live migration between Clusters requires the VM’s current System Datastore to be available to both the source and destination Clusters. The Host and System Datastore cannot both be changed in the same live migration operation.
A System Datastore with no Cluster associations is available to all Clusters for these checks.
GIVE FEEDBACK
Was this resource helpful?
Glad to hear it
Sorry to hear that