Fine-Tuning AI Models on NVIDIA Slurm
In this tutorial, we will install and configure the OpenNebula Slurm appliance and run a fine-tuning example script.
We will complete the following high-level steps:
- Install the Slurm appliances (controller and workers) from the OpenNebula marketplace.
- Configure the Slurm worker template with an example fine-tuning job script.
- Submit a fine-tuning job from the Slurm controller with a single command.
Before Starting
Before starting this tutorial, you must complete the AI-factory deployment with either on-premise resources or cloud resources. Please complete one of the following guides relevant to your available resources:
You need a running OneGate server (reachable by the Slurm Controller VM) so the controller can share the Munge key with workers. To check the status of OneGate, on your OpenNebula Front-end machine run (using sudo if necessary):
systemctl status opennebula-gate
You must also have access to the Sunstone user interface.
Step 1: Deploy the Slurm Controller
Import the Slurm Controller appliance from the OpenNebula Marketplace on the Front-end. This downloads the VM template and disk image:
onemarketapp export 'Service Slurm Controller' SlurmController --datastore defaultAdjust the Slurm Controller template as needed (CPU, memory, disk size, network). Resource needs depend on cluster size (number of workers and jobs).
Instantiate the Slurm Controller. When instantiating the controller, connect it to an appropriate Virtual Network with free leases:
onetemplate instantiate SlurmController --nic admin_netWait for the controller to be ready: SSH into the new SlurmController VM. The terminal will show configuration progress. When finished, you should see: “All set and ready to serve 8)”.
onevm ssh <SLURM_CONTROLLER_VM_ID>Get the controller Munge key and IP address. This key must be shared with all worker nodes for Slurm authentication:
onevm show <SLURM_CONTROLLER_VM_ID> | grep MUNGERecord the IP of the Slurm controller:
onevm show <SLURM_CONTROLLER_VM_ID> | grep ETH0_IP=Save a note of the Munge key (base64) and the Slurm Controller IP address; you will need both when deploying workers.
Step 2: Deploy the Slurm Worker
Import the Slurm Worker appliance from the OpenNebula Marketplace.
onemarketapp export 'Service Slurm Worker' SlurmWorker --datastore defaultAdjust the SlurmWorker template:
- In the Sunstone interface go to Templates -> VM Templates
- Select the SlurmWorker template and click Update
- In the General parameters page set the following parameters:
- Memory: 16384 (MB)
- Physical CPU: 2
- Click Next to move onto the Advanced options
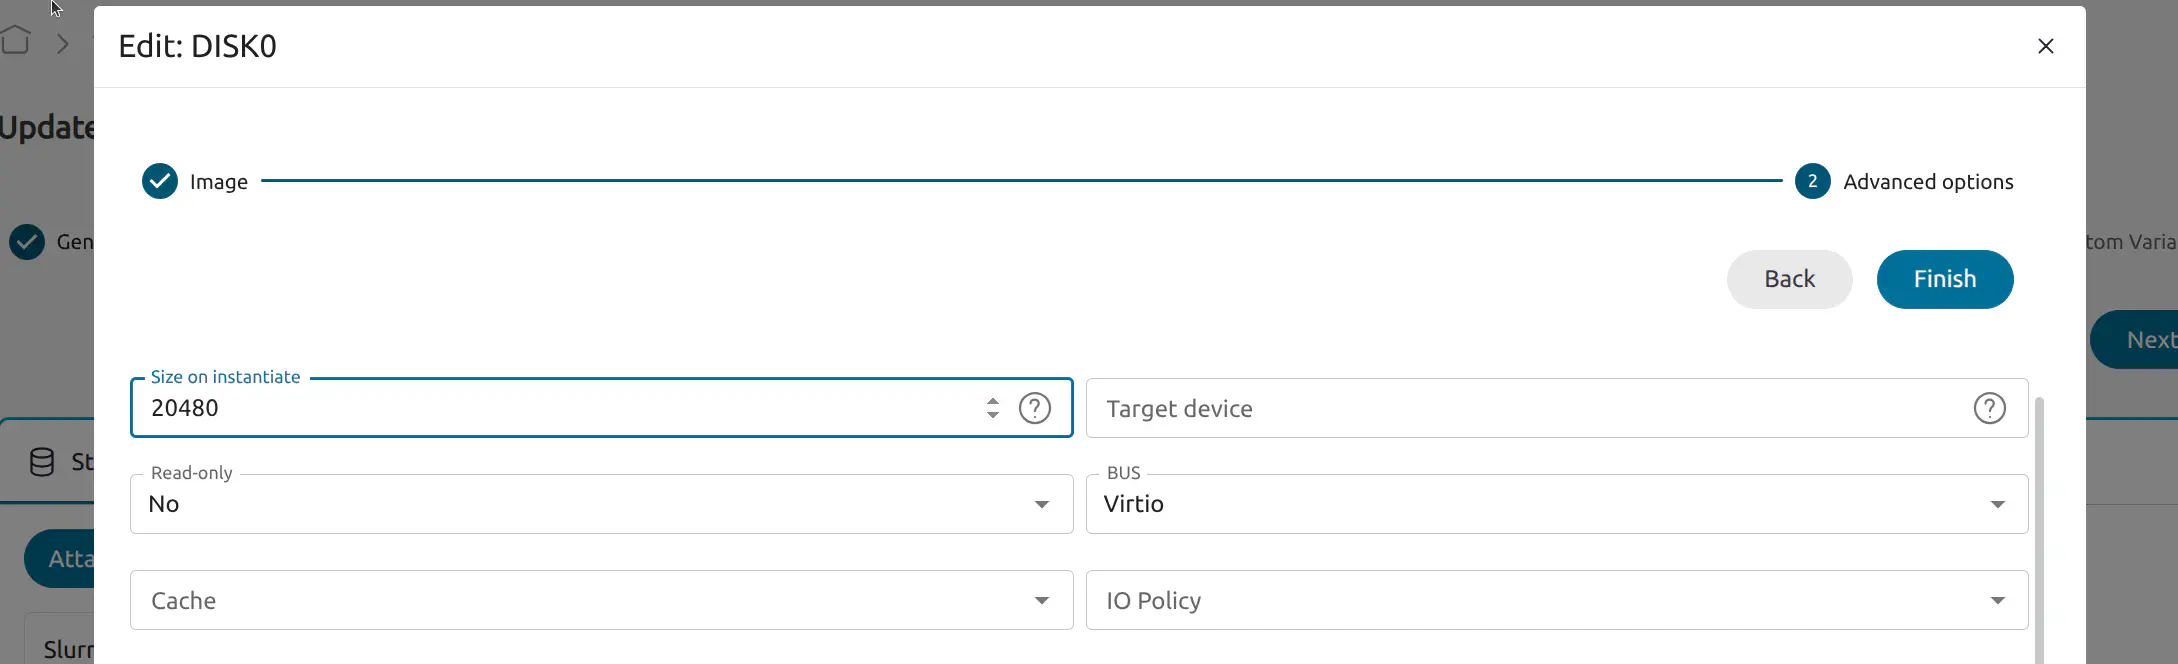
- In the Storage tab edit the SlurmWorker disk by clicking the pen icon:
- Click Next to move to Advanced options, set Size on instantiate to 20480
- In the PCI Devices tab select Attach PCI device. Choose the your device in the Device name dropdown:
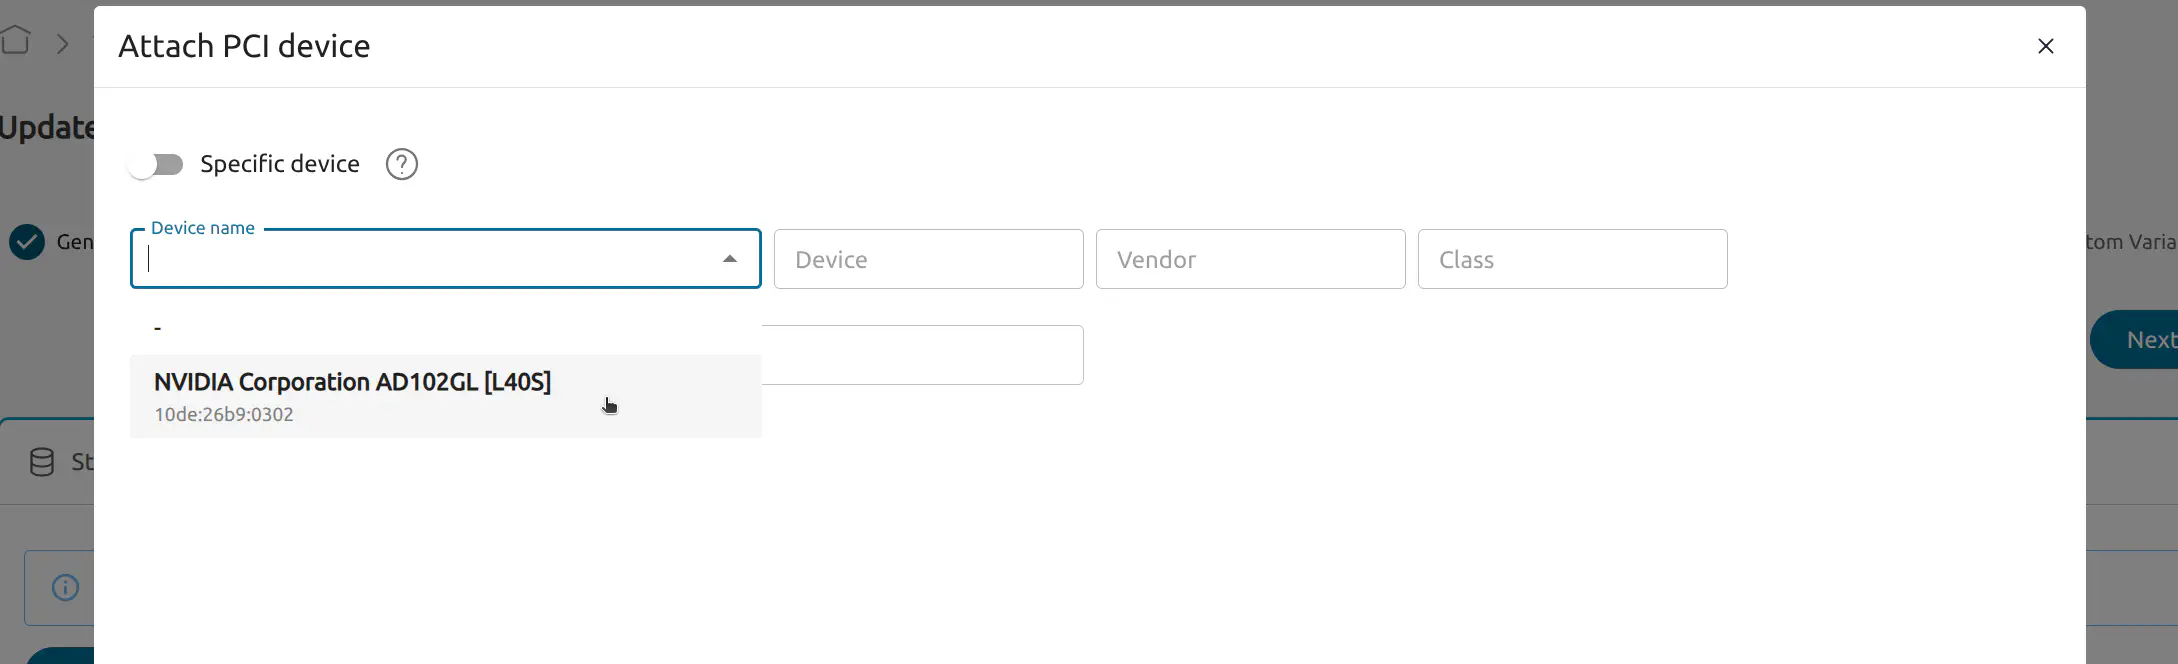
Click Next to the Custom Variables page and then select Finish.
In the Context tab, copy the following script into the Start script field. This script downloads a model from Hugging Face and installs associated resources then creates a script to run the fine-tuning job:
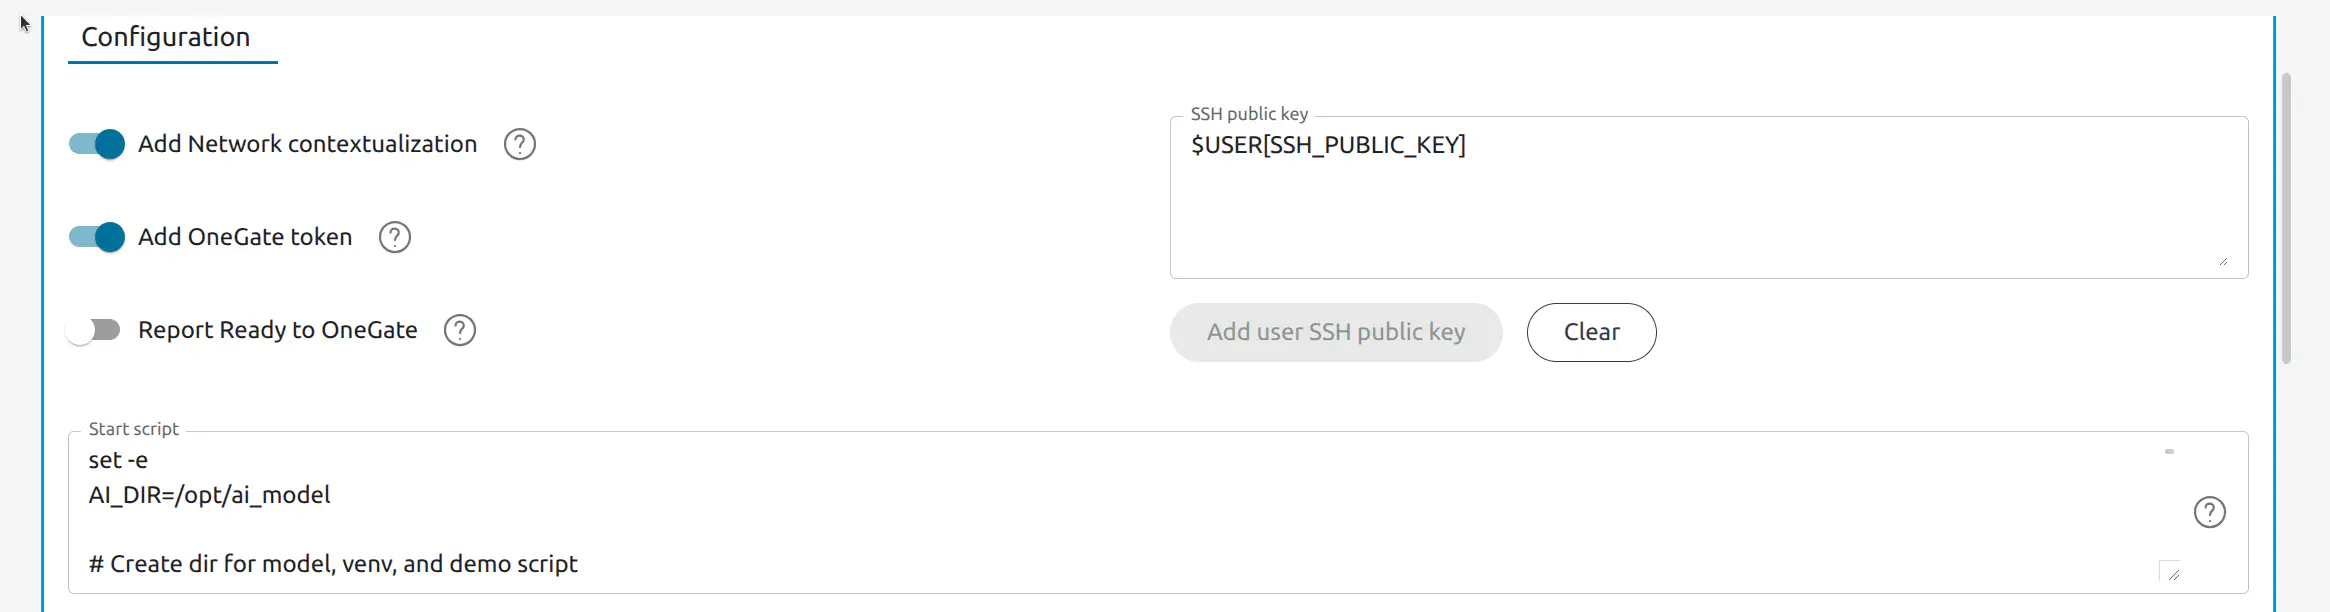
Start Script:
set -e
AI_DIR=/opt/ai_model

# Create dir for model, venv, and demo script
mkdir -p "$AI_DIR"

# System packages: NVIDIA driver + Python build deps and venv
apt update && apt install -y nvidia-driver-570 python3-pip python3-venv python3-dev build-essential
pip3 install --break-system-packages huggingface_hub
python3 -c "from huggingface_hub import snapshot_download; snapshot_download(repo_id='Qwen/Qwen2.5-1.5B-Instruct', local_dir='$AI_DIR')"
python3 -m venv "$AI_DIR/venv"
"$AI_DIR/venv/bin/pip" install --upgrade pip
"$AI_DIR/venv/bin/pip" install "numpy<2.4.0"
"$AI_DIR/venv/bin/pip" install unsloth datasets trl transformers

# Write Unsloth demo fine-tuning script
cat > "$AI_DIR/demo_finetune.py" << 'PYEOF'
#!/usr/bin/env python3
import os
from datasets import Dataset
from unsloth import FastLanguageModel
from trl import SFTTrainer
from transformers import TrainingArguments

MODEL_PATH = "/opt/ai_model"
OUTPUT_DIR = os.path.join(MODEL_PATH, "output")

alpaca = [
    {"instruction": "What is 2+2?", "input": "", "output": "4."},
    {"instruction": "Say hello in one word.", "input": "", "output": "Hello."},
    {"instruction": "Complete: The sky is", "input": "", "output": " blue."},
]

def fmt(e):
    return {"text": "### Instruction:\n{instruction}\n\n### Input:\n{input}\n\n### Response:\n{output}".format(**e)}

dataset = Dataset.from_list(alpaca)
dataset = dataset.map(fmt, remove_columns=dataset.column_names)

model, tokenizer = FastLanguageModel.from_pretrained(MODEL_PATH, max_seq_length=2048, dtype=None, load_in_4bit=True, local_files_only=True)
model = FastLanguageModel.get_peft_model(model, r=8, target_modules=["q_proj", "k_proj", "v_proj", "o_proj", "gate_proj", "up_proj", "down_proj"], lora_alpha=16, lora_dropout=0, bias="none", use_gradient_checkpointing="unsloth")

trainer = SFTTrainer(model=model, tokenizer=tokenizer, train_dataset=dataset, dataset_text_field="text", max_seq_length=2048, dataset_num_proc=1, packing=False, args=TrainingArguments(per_device_train_batch_size=2, gradient_accumulation_steps=2, max_steps=10, learning_rate=2e-4, bf16=True, output_dir=OUTPUT_DIR, report_to="none"))
os.makedirs(OUTPUT_DIR, exist_ok=True)
trainer.train()
model.save_pretrained_merged(OUTPUT_DIR, tokenizer, save_method="merged_16bit")
tokenizer.save_pretrained(OUTPUT_DIR)
print("Saved to", OUTPUT_DIR)
PYEOF

chmod +x "$AI_DIR/demo_finetune.py"
Instantiate the Slurm Worker via the OpenNebula Sunstone web interface:
- Go to Templates -> VM Templates
- Select the the SlurmWorker template
- Select instantiate:
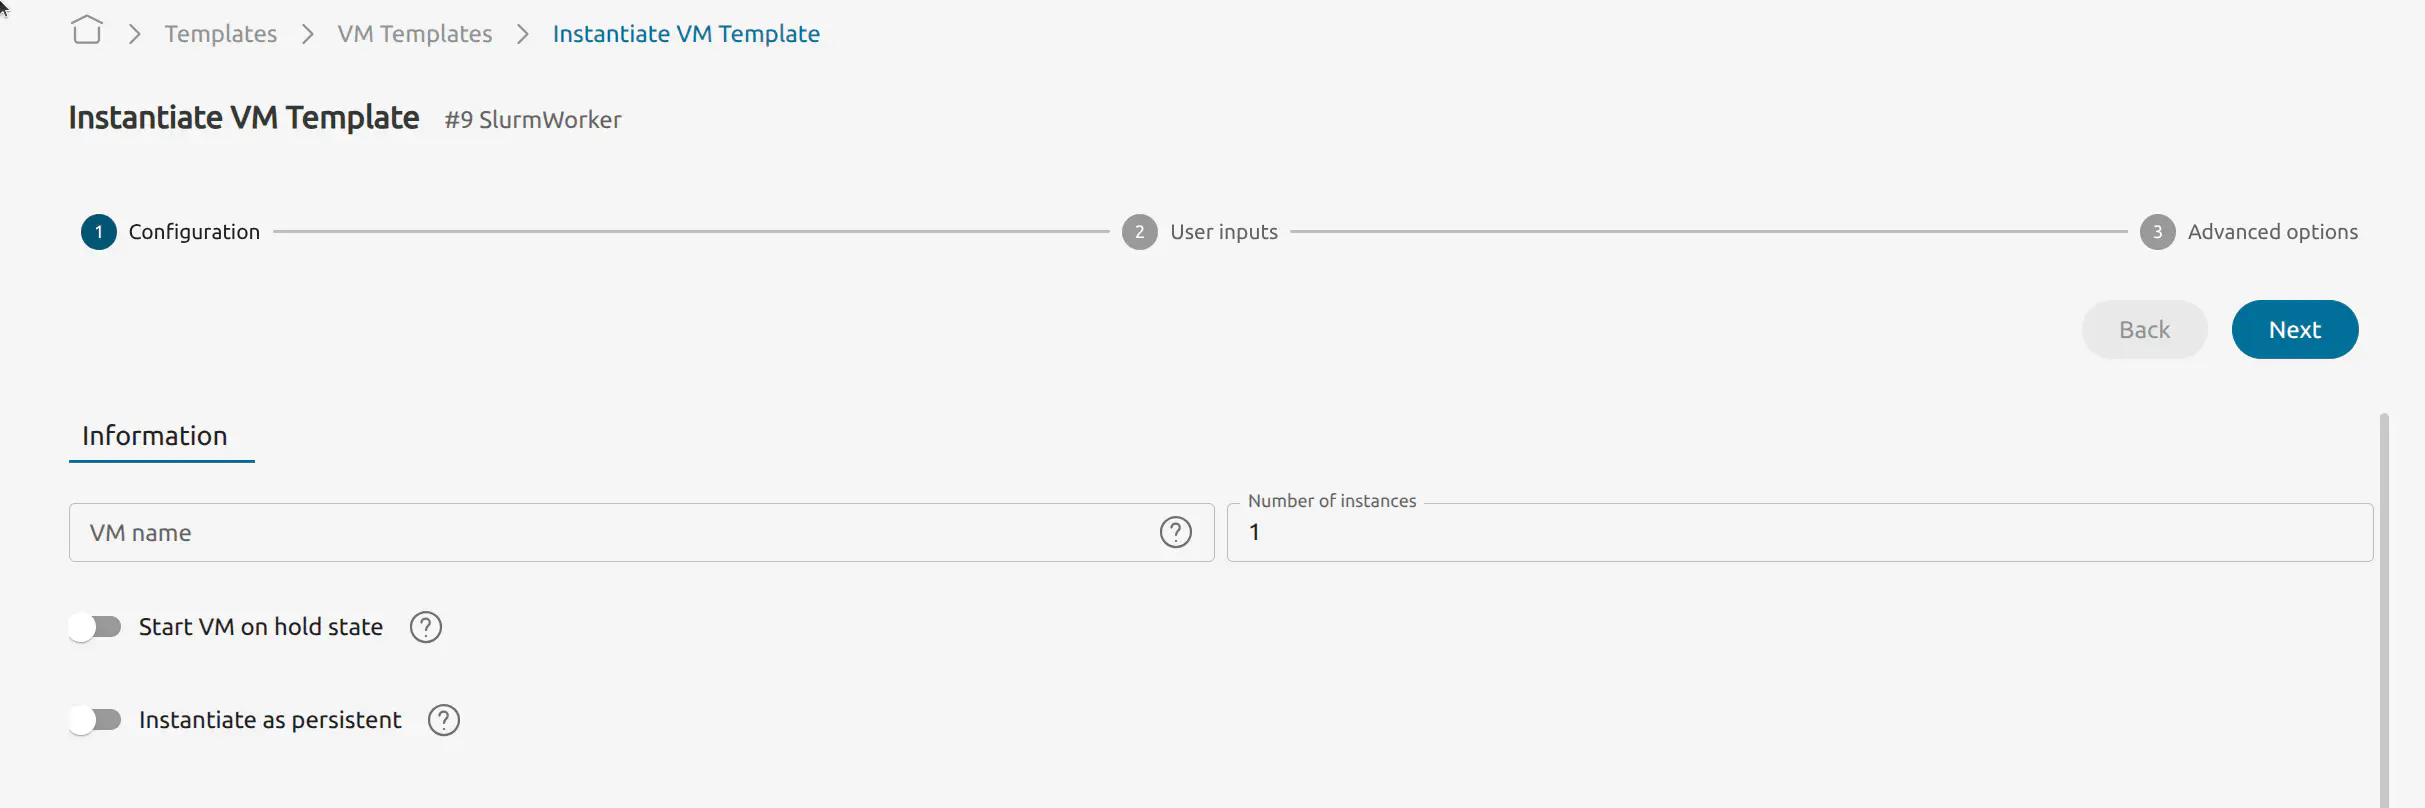
Set the number of instances to 1
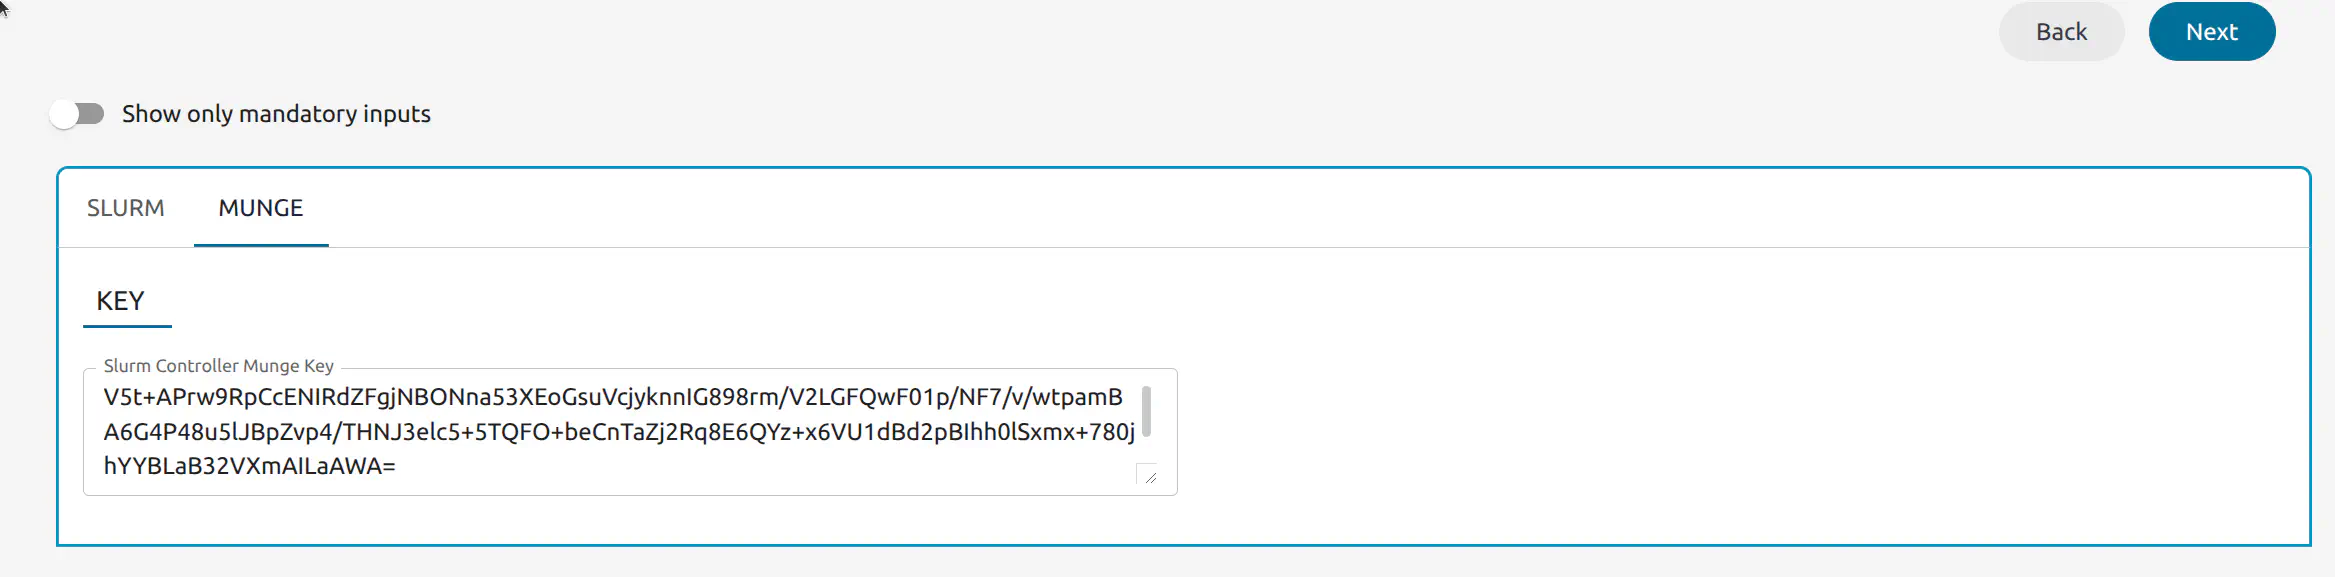
Click Next. When prompted, enter:
- Slurm Controller IP address (the VM you deployed in Step 1). Ensure workers can reach this IP
- Slurm Controller Munge key (base64) that you recorded earlier (everything inside the quotation marks)
Click Next to Advanced options, select the Network tab and select Attach NIC:
- Choose admin_net or an alternative available Virtual Network.
After a few minutes, verify that the worker has joined the cluster. SSH into the Slurm Controller VM:
Find the Slurm Controler VM ID:
onevm listUse
onevm sshto connect:onevm ssh <SLURM_CONTROLLER_VM_ID>On the Slurm Controller VM command line run:
scontrol show nodesYou should see output similar to the following:
NodeName=slurm-one-worker-1 CoresPerSocket=1
CPUAlloc=0 CPUEfctv=1 CPUTot=1 CPULoad=0.00
AvailableFeatures=one
ActiveFeatures=one
Gres=(null)
NodeAddr=10.0.1.101 NodeHostName=slurm-one-worker-1
RealMemory=15988 AllocMem=0 FreeMem=N/A Sockets=1 Boards=1
State=IDLE+DYNAMIC_NORM+NOT_RESPONDING ThreadsPerCore=1 TmpDisk=0 Weight=1 Owner=N/A MCS_label=N/A
Partitions=all
BootTime=None SlurmdStartTime=None
LastBusyTime=2026-03-02T12:09:33 ResumeAfterTime=None
CfgTRES=cpu=1,mem=15988M,billing=1
AllocTRES=
CapWatts=n/a
CurrentWatts=0 AveWatts=0
ExtSensorsJoules=n/a ExtSensorsWatts=0 ExtSensorsTemp=n/a
Run the Finetuning Job from the Slurm Controller
On the Slurm Controller VM run the following command to launch the fine-tuning job:
srun --job-name=demo_finetune -N1 -n1 /opt/ai_model/venv/bin/python /opt/ai_model/demo_finetune.py
If this command returns an error, you may need to wait longer for the startup script to finish. Try again after 5 minutes. To save output to a file, append > demo_finetune.out 2>&1.
On the command line, you should see something similar to the following output:
🦥 Unsloth: Will patch your computer to enable 2x faster free finetuning.
🦥 Unsloth Zoo will now patch everything to make training faster!
Map: 100%|██████████| 3/3 [00:00<00:00, 1822.82 examples/s]
Unsloth 2026.2.1 patched 28 layers with 28 QKV layers, 28 O layers and 28 MLP layers.
num_proc must be <= 3. Reducing num_proc to 3 for dataset of size 3.
[datasets.arrow_dataset|WARNING]num_proc must be <= 3. Reducing num_proc to 3 for dataset of size 3.
==((====))==  Unsloth 2026.2.1: Fast Qwen2 patching. Transformers: 4.57.6.
   \\   /|    NVIDIA L40S. Num GPUs = 1. Max memory: 44.402 GB. Platform: Linux.
O^O/ \_/ \    Torch: 2.10.0+cu128. CUDA: 8.9. CUDA Toolkit: 12.8. Triton: 3.6.0
\        /    Bfloat16 = TRUE. FA [Xformers = 0.0.35. FA2 = False]
 "-____-"     Free license: http://github.com/unslothai/unsloth
Unsloth: Fast downloading is enabled - ignore downloading bars which are red colored!
Unsloth: Tokenizing ["text"] (num_proc=3): 100%|██████████| 3/3 [00:01<00:00,  2.22 examples/s]
==((====))==  Unsloth - 2x faster free finetuning | Num GPUs used = 1
   \\   /|    Num examples = 3 | Num Epochs = 10 | Total steps = 10
O^O/ \_/ \    Batch size per device = 2 | Gradient accumulation steps = 2
\        /    Data Parallel GPUs = 1 | Total batch size (2 x 2 x 1) = 4
 "-____-"     Trainable parameters = 9,232,384 of 1,552,946,688 (0.59% trained)
100%|██████████| 10/10 [00:14<00:00,  1.43s/it]
{'train_runtime': 14.3497, 'train_samples_per_second': 2.788, 'train_steps_per_second': 0.697, 'train_loss': 1.904597854614258, 'epoch': 10.0}
Detected local model directory: /opt/ai_model
Found HuggingFace hub cache directory: /root/.cache/huggingface/hub
Unsloth: Preparing safetensor model files: 100%|██████████| 1/1 [00:01<00:00,  1.43s/it]
Copied model.safetensors from local model directory
Unsloth: Merging weights into 16bit: 100%|██████████| 1/1 [00:04<00:00,  4.50s/it]
Unsloth: Merge process complete. Saved to `/opt/ai_model/output`
Saved to /opt/ai_model/output
Next Steps
After finishing this tutorial and running a job on a Slurm worker, we recommend to continue with the following AI Factory guides:
GIVE FEEDBACK
Was this resource helpful?
Glad to hear it
Sorry to hear that