Deploy OpenNebula on AWS with miniONE
Categories:
Overview
In this tutorial, we’ll install an OpenNebula Front-end and a KVM hypervisor node in under ten minutes, using miniONE, the installation script provided by OpenNebula.
We’ll install our OpenNebula Front-end on AWS, on a bare-metal server for best performance.
miniONE is a simple Bash script. It automatically downloads, installs and configures an OpenNebula Front-end and all necessary components to manage and run virtual machines.
Like the installation described in Deploy OpenNebula On-premises with miniONE in this tutorial miniONE will automatically install and configure the following resources:
- A KVM Host on the local machine
- A virtualization Cluster to which the Host belongs to
- Datastores for storing files and Virtual Machine images
- A virtual network for the Virtual Machines
- A Virtual Machine image, automatically downloaded from the OpenNebula Public Marketplace
After the installation, you will have a Front-end node with a local KVM hypervisor ready to run Virtual Machines.
To install an OpenNebula Front-end using miniONE, we’ll need to complete the following high-level steps:
- Prepare the AWS VM where we’ll install miniONE.
- Download and run the miniONE script.
- Verify the installation.
The cloud environment installed by miniONE is mainly intended for evaluation, development and testing. However, it can also serve as a base for larger short-lived deployments.
 Note
Note
To complete this tutorial, you will need to log in to a remote Linux machine via SSH. If you follow this tutorial on a Windows machine, you will need to use an SSH client application such as PuTTY. Tip
Tip
For a list of options supported by the script, run bash minione -h. The script supports several types of installations (such as installing a Front-end and a KVM hypervisor node) which are not covered in this tutorial.Step 1. Prepare the VM in AWS
In order to SSH into the EC2 VM, you need to pass the correct user and PEM file (you can create one and download it prior to launching the instance). You’ll then be connecting to your Front-end using a command similar to:
ssh <public IP of the VM> -l ubuntu -i <PEM file>
As a first step, if you don’t already have one, create an account in AWS. AWS publishes a complete guide: How do I create and activate a new AWS account?
After you have created your account, you’ll need to obtain the access_key and secret_key of a user with the necessary permissions to manage instances. The relevant AWS guide is Configure tool authentication with AWS.
Next, you need to choose the region where you want to deploy the new resources. You can check the available regions in AWS’s documentation: Regions, Availability Zones, and Local Zones.
To run the miniONE script on AWS, you will need to instantiate a machine with a supported operating system and the latest software updates, and without any customizations.
You can deploy miniONE on a virtual machine or a bare-metal server. In this tutorial we’ll use bare metal to take full advantage of the server’s hardware resources.
Pre-requisites
- Supported operating systems:
- RHEL/AlmaLinux 8 or 9
- Debian 11 or 12
- Ubuntu 22.04 or 24.04
Minimum hardware:
- 4 GiB RAM (16 GiB recommended for deploying a Kubernetes cluster)
- 20 GiB free disk space (80 GiB recommended for adding VM images)
- Configuration:
- Access to the privileged user (root) account
- A public IP address
- An SSH server running on port 22
- Open ports:
- 22 (SSH)
- 80 (for the Sunstone GUI)
Example AWS Machine Image and Instance Type
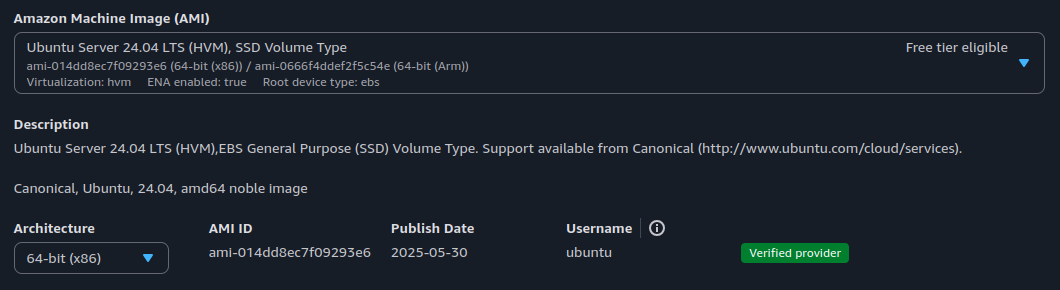
To quickly deploy a suitable VM, you can browse the AWS AMI Catalog and select Ubuntu Server 24.04 LTS (HVM), SSD Volume Type:
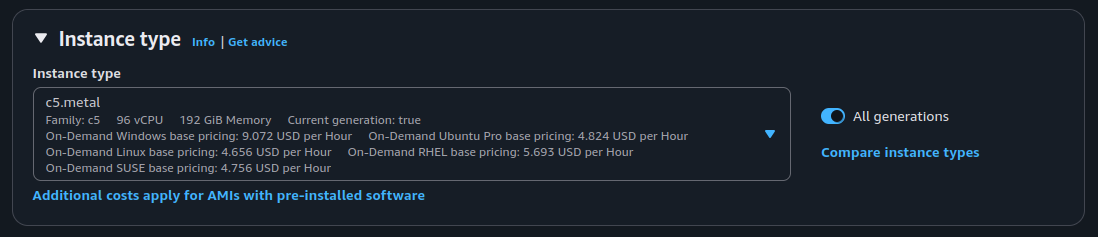
For this tutorial we’ll deploy on a bare-metal server of instance type c5.metal:
Below are examples of successfully-tested configurations:
- Region: Frankfurt
- Operating System: Ubuntu Server 24.04 LTS (HVM) or 22.04 LTS
- Tier:
c5.metalort2.medium(without KVM) - Open ports: 22, 80
- Storage: 80 GB SSD
When configuring the VM, ensure to assign enough storage (by editing the Storage tab), since by default the VM is only assigned 8GB.
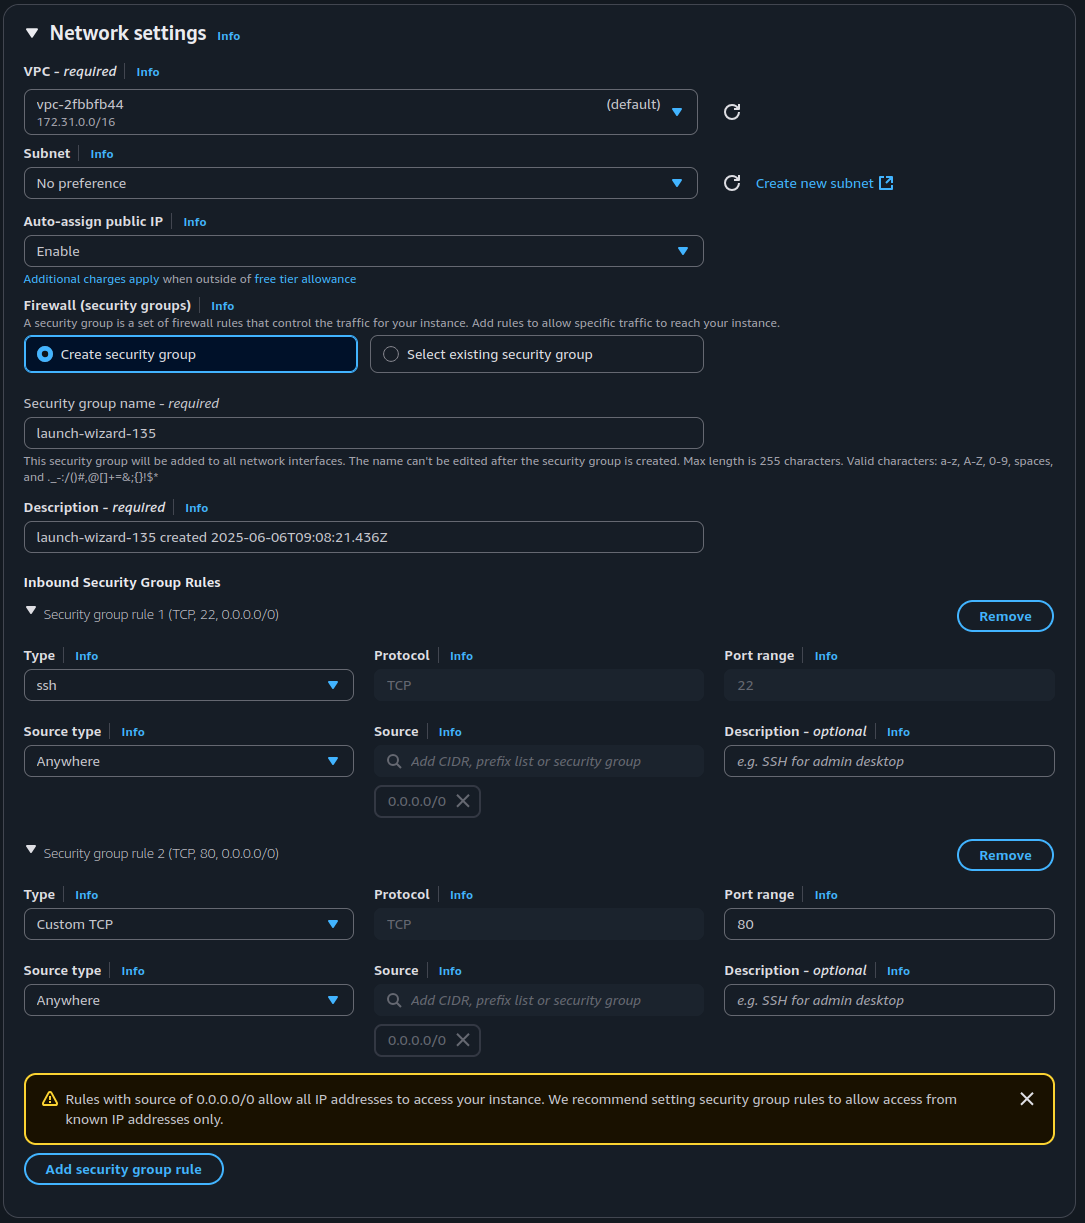
Likewise, ensure that the ports mentioned above are open for incoming connections. To do this, in the AWS Launch an instance screen, scroll down to the Network settings tab and click Edit. Then, click Add security group rule to add the required ports. The image below shows an example of complete network settings:
When configuration is finished, launch an instance of the VM. (See Amazon’s tutorial if you have any doubts.) Once the VM is up and running we’ll need to log in to it, by following the steps below.
Step 1.1. Log in to the EC2 VM
To log in to your EC2 VM using SSH, you will need to generate a key pair (public and private key) for your Amazon EC2 instance. You will use your private key to log in to your EC2 VM.
You can generate a key pair from within Amazon EC2 itself. You can download the private key as a PEM file, and use this file to connect to your EC2 VM using SSH.
For complete instructions on creating key pairs and connecting to your Linux instance, see the AWS documentation: Create a key pair for your Amazon EC2 instance and Connect to your Linux instance from Linux or macOS using SSH.
After downloading the PEM file, make sure to set its file permissions to read-only, for the user only. On Linux, you can set these permissions with chmod 400 <PEM file>, for example chmod 400 ~/.ssh/aws_pemfile.pem.
To log in to your EC2 VM, use ssh as user ubuntu, specifying the PEM file you downloaded, by running this command:
ssh <public IP of the VM> -l ubuntu -i <PEM file>
For example:
ssh <IP> -l ubuntu -i ~/.ssh/aws_pemfile.pem
 Warning
Ensure you have set the appropriate permissions for the PEM file, or for security reasons SSH will refuse to connect.Step 1.2. Update the VM Operating System
Once you have logged in to the VM as user ubuntu, use the sudo command to become the root user (no password is required):
sudo -i
Then, update the system to its latest software packages by running the following command:
apt update && apt upgrade
After updating, you will probably need to restart the VM to run the latest kernel. Check the output of the apt upgrade command for lines similar to the following:
Pending kernel upgrade!
Running kernel version:
  6.8.0-1012-aws
Diagnostics:
  The currently running kernel version is not the expected kernel version 6.8.0-1014-aws.
In this example, you need to restart the VM in order to upgrade to kernel 6.8.0-1014-aws. To restart the VM, run:
shutdown -r now
You will be immediately logged out of the VM as it restarts. Wait a few moments for the VM to finish rebooting, then log in again using the same procedure as before. After logging back into the VM, you can check the running kernel version with:
uname -a
For example, in this case:
$ uname -a
Linux ip-172-31-3-252 6.8.0-1014-aws #15-Ubuntu SMP Thu Aug  8 19:13:06 UTC 2024 x86_64 x86_64 x86_64 GNU/Linux
Your AWS VM is now ready. In the next steps, we’ll download the miniONE script, upload it to the VM, and run the installation.
Step 2: Download and install miniONE
You can download miniONE from the GitHub repository.
To quickly download miniONE, run:
wget 'https://github.com/OpenNebula/minione/releases/latest/download/minione'
This should download the latest version to your current directory.
Step 2.1. Copy the miniONE script to the AWS VM
After downloading miniONE, you will need to copy it to your AWS VM.
On Linux and Mac:
If you’re on Linux, you can copy it with the
scpcommand, providing the same user and PEM file as when logging in via SSH. For example, the command below copies the miniONE script to theubuntuuser’s home directory:scp -i <path to PEM file> <path to minione script> ubuntu@<public IP of the VM>:~On Windows:
You can use either of two methods:
- The GUI tool WinSCP, which allows you to copy files by drag-and-drop
- The command-line tool PuTTY Secure Copy, which emulates the Unix
scptool.
For both methods you will need to provide the private key file for authentication.
Step 2.2. Run the miniONE script on the AWS VM
After copying the miniONE script to the VM, log in to the VM (as described above).
Use the sudo command to become the root user:
sudo -i
If necessary, use the cd command to navigate to the folder where you copied the miniONE script. For example, if you copied it to the home directory of user ubuntu run:
cd ~ubuntu
Next, ensure that the minione file has execute permissions, by running:
chmod +x minione
To install miniONE, run as root:
./minione
The miniONE script will begin the installation, logging output to the terminal. Installation may take about a minute. When it’s finished, miniONE shows a report with connection parameters and login credentials:
### Report
OpenNebula 7.0 was installed
Sunstone is running on:
  http://[omitted]/
FireEdge is running on:
  http://[omitted]
Use following to login:
  user: oneadmin
  password: lCmPUb5Gwk
Once installation is finished, ensure that the local KVM Host is in sync, by following these steps:
Switch to the oneadmin user:
su - oneadmin
Sync the KVM Host with:
onehost rync --force
Verify that the host is in sync:
onehost list
In the output, the STAT column on the right should display on:
  ID NAME                                                            CLUSTER    TVM      ALLOCATED_CPU      ALLOCATED_MEM STAT
   0 localhost                                                       default      0      0 / 9600 (0%)   0K / 188.5G (0%) on
At this point, you have successfully installed miniONE. OpenNebula services should be running, and the system should be ready for your first login.
Important
In this configuration, Sunstone exposes its HTTP endpoint on a public network interface. miniONE is an evaluation tool, and this configuration should not be used in production environments.Step 3: Verify the Installation
We will verify the installation by logging in to OpenNebula’s Edge Sunstone GUI.
Note
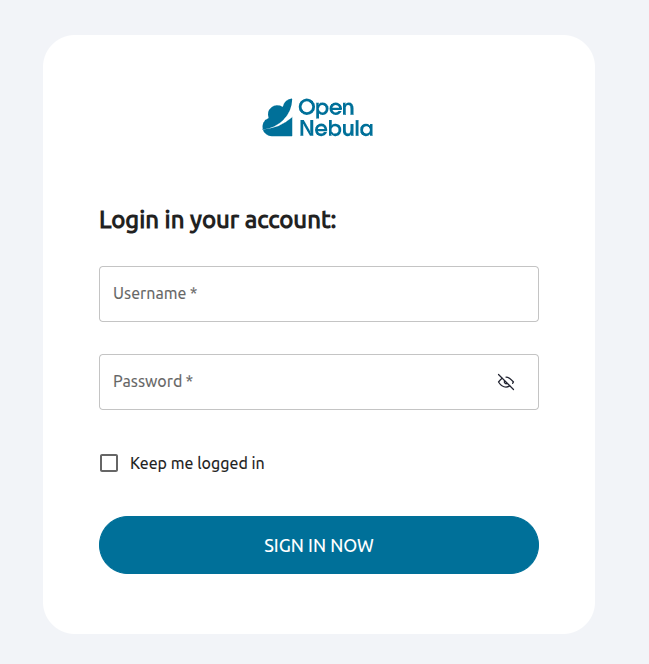
When running miniONE within an AWS instance, the reported IP may be a private address that’s not reachable over the Internet. Use the instance’s public IP address to connect to the Sunstone GUI.Point your browser to the public IP showed in miniONE’s report. You should be greeted with the Sunstone login screen:
In the Username input field, type oneadmin. For Password, enter the password provided by miniONE, then press Enter or click SIGN IN NOW.
The screen should display the Sunstone Dashboard:
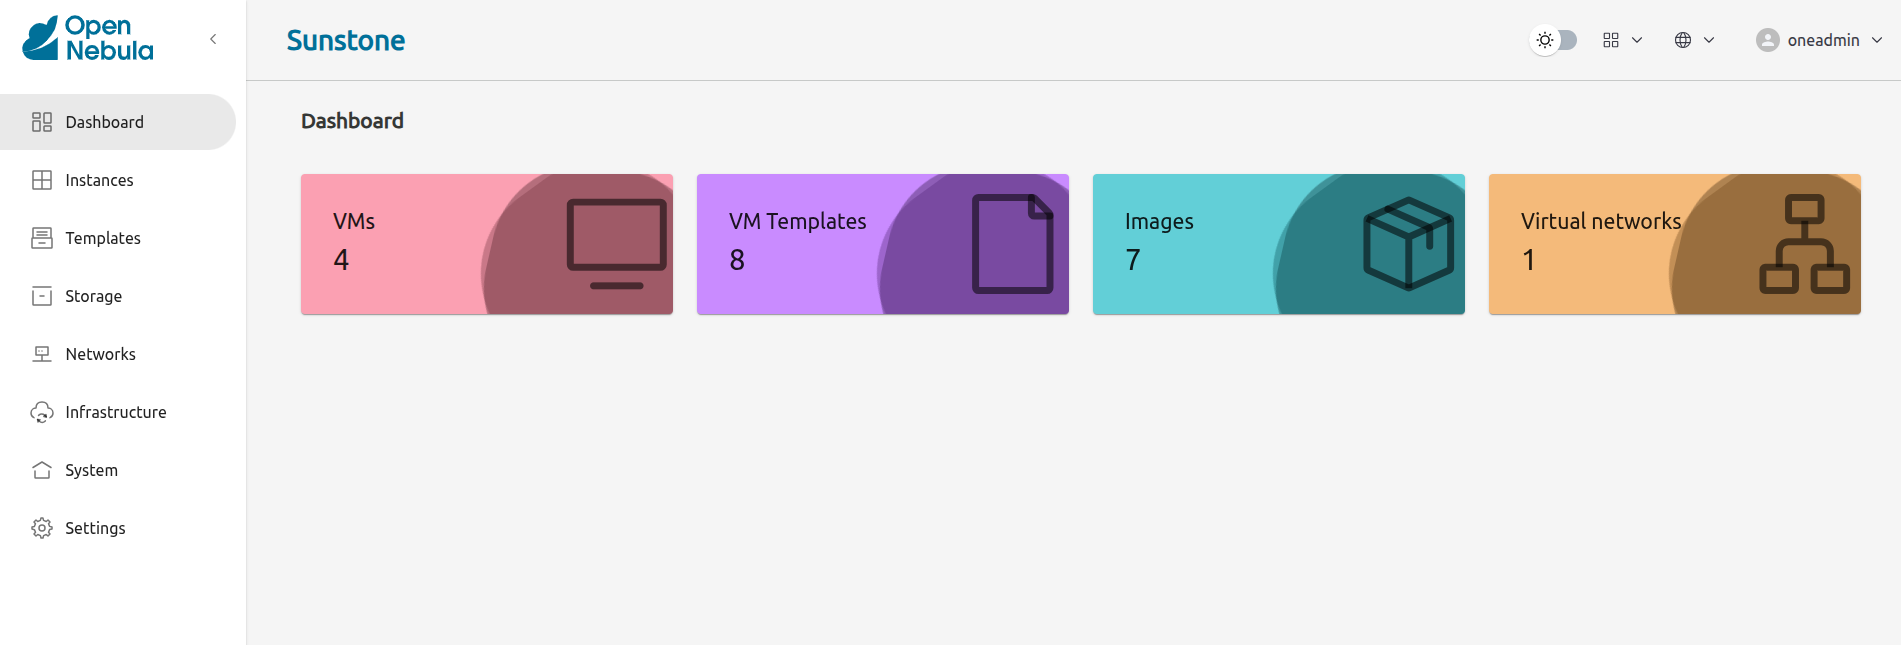
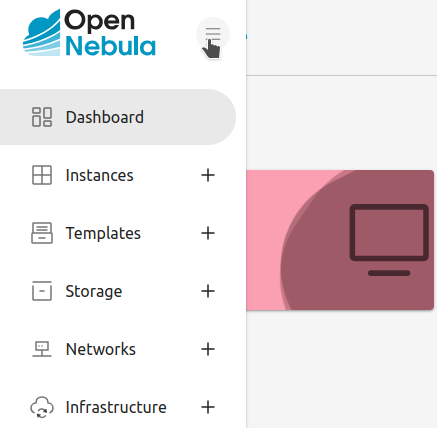
This is the default view for cloud administrators. From this view in Sunstone, you have complete control over your OpenNebula infrastructure. (The Cloud View interface is much simpler, intended for end users.) To explore what you can do in the GUI, open the left-hand panel by clicking on the hamburger icon on the top left:
Congratulations — you have deployed an OpenNebula Front-end node, which is ready to provision resources on cloud infrastructure.
Next Steps
During installation, miniONE downloaded the template for a Virtual Machine with Alpine Linux 3.20 preinstalled. You can quickly deploy this VM to the KVM hypervisor on your AWS instance, following the instructions in Deploying a Virtual Machine Locally.
Additionally, we recommend checking Validate the miniONE Environment, which describes how to explore the resources installed with miniONE, and how to download and run appliances from the OpenNebula Marketplace.
Finally, you can use your OpenNebula installation to Run a Kubernetes Cluster on OpenNebula with minimal steps – first downloading the OneKE Service from the OpenNebula Public Marketplace, then deploying a full-fledged K8s cluster with a test application.
We value your feedback
Was this information helpful?
Glad to hear it
Sorry to hear that