Virtual Machine Images
An OpenNebula Image represents a VM disk. Images can have multiple formats (e.g., filesystem or block device) and can store OS installations, data filesystems, images, or kernels. In this guide you’ll learn about different Image types, and how to manage and use them.
In OpenNenbula there are two main places where VM disk images are stored:
- Marketplaces, which are shared locations across multiple OpenNebula clouds. They can be public or for private use. Marketplaces store Marketplace Applications (or Appliances), that includes the application definition together with the disk images.
- Datastores, which are the local storage areas of a cloud. They typically refer to storage clusters or hypervisor disks and are mainly devoted to store disk images.
Types and Persistency
OpenNebula uses three different Image types to represent VM disks. A VM can use multiple Image types simultaneously:
- Operating System (
OS): Main disk, the VM will start from this Image. Every VM must include an OS Image. - CD-ROM ISO (
CDROM): These Images are read-only data. Only one Image of this type can be used in a VM. - Data Disk (
DATABLOCK): A generic disk to store data. These Images can contain existing data, e.g., a database, or can be formatted as an empty drive.
Additionally, file Images represent plain files that can be used as:
- OS kernel (
KERNEL): used as kernel for the Guest OS to start the VM. - RAM disk (
RAMDISK): loaded by initrd at boot time. - Generic file (
CONTEXT): a plain file to be included in the context CD-ROM. Once started, the VM will have access to this file.
 Note
Note
KERNEL, RAMDISK, and CONTEXT file Images can be registered only in Files & Kernels Datastore. Some of the operations described in this guide do not apply to them, in particular: clone and persistent.Images of the previous types can also operate in two modes:
- Persistent, the modifications you make to persistent images will be preserved after terminating the VM. There can be only one VM using a persistent Image at any given time.
- Non-Persistent, the modifications will not be preserved after terminating the VM. Non-persistent Images can be used by multiple VMs at the same time as each one will work on its own copy.
States and Life-cycle
The Images in your cloud will be moving through different states to represent the actions you perform and their status. The following table summarizes the Image states and their meaning:
| State | Short state | OpenNebula State Names | Meaning |
|---|---|---|---|
| Locked | lock | LOCKED | Image is being copied or created. VMs that use the Image will wait for the operation to finish |
LOCKED_USED | |||
LOCKED_USED_PERS | |||
| Ready | rdy | READY | Image ready to be used. |
| Used | used | USED | Image used by at least one VM. |
USED_PERS | |||
| Disabled | disa | DISABLED | Image disabled by the owner, it cannot be used by new VMs. |
| Error | err | ERROR | Error state, an operation failed. See the Image information with oneimage show for an error message. |
| Deleting | dele | DELETE | Image is being deleted from the Datastore. |
| Cloning | clon | CLONE | Image is being cloned. |
Creating Images
You have multiple options when creating a new Image in OpenNebula, from using your existing disk Images to downloading them from Public Marketplaces. In this section you will learn how to use the oneimage command to create an Image.
No matter the method you use to create your Images, there is a set of common options that will be useful in any case. The following table summarizes the main options that we will use:
| Parameter | Description |
|---|---|
--name name | Name of the new Image |
--datastore name | ID | Name/ID of the Datastore to store the new Image |
--description description | Description for the new Image (Optional) |
--type type | Type of the new Image: OS, CDROM, DATABLOCK, KERNEL, RAMDISK, CONTEXT |
--persistent | Set the Image to persistent mode |
--prefix prefix | Device/bus to expose the disk to guest OS (e.g. hd, sd or vd) |
--target target | Device the disk will be attached to |
--path path | Path/URL of the Image |
--source source | Source to be used. Useful for non file-based Images |
--size size | Size in MB. Used for DATABLOCK type or to resize the Image on boot |
Using Your Existing Disk Files
You can use your existing virtual disks in OpenNebula. Simply pick a name for your Image, grab the path where the disk is stored in the Front-end, and choose the Datastore where you want to create the Image. The command will be similar to (by default OS Images are created):
$ oneimage create --datastore default --name Ubuntu --path /home/cloud/images/ubuntu-desktop/disk.0.qcow2 \
  --description "Ubuntu desktop for developers."
For OS Images, you need to install the OpenNebula context packages for your target guest OS before using them. There are no additional steps if you are creating a data disk.
Note
You can use gz compressed Image files when registering them in OpenNebula. Important
Sunstone will allow you to upload disk Images from your desktop.If you need to set a complex number of options when creating the Image, you can also pass all of them in a file. We call these files Templates. This is how the Template for the previous example looks:
$ cat ubuntu_img.one
NAME          = "Ubuntu"
PATH          = "/home/cloud/images/ubuntu-desktop/disk.0.qcow2"
DESCRIPTION   = "Ubuntu desktop for developers."
Then simply pass the Template file to the oneimage create command:
$ oneimage create ubuntu_img.one --datastore default
ID: 0
The complete reference of attributes for the Image template is here.
Formatted Data Volumes
You can also create plain data disks to define user storage or scratch areas in your VMs. In this case you need to define the size and the format for the disk (either raw or qcow2). You may also instruct OpenNebula to create a file system in the Image. For example to create a 10G qcow2 disk use:
$ oneimage create --size 10240 --name db-disk --format qcow2 --datastore default
ID: 2
You can even create a filesystem in the new Image so it is ready-to-use by the VMs:
$ oneimage create --size 10240 --name fs-vol --format qcow2 --fs ext4 --datastore default
ID: 3
Using Marketplaces
OpenNebula leverages the applications created by several popular Marketplaces, like Linuxcontainers.org. These are great places to grab a working installation of an OS/application ready to use in your Cloud. The OpenNebula project also prepares contextualized OS installations of popular distributions and applications, you can check the list in the OpenNebula Marketplace.
Installing the Guest OS
Finally, you can boot a VM from an ISO installation Image and install the OS. Please refer to the Guest OS installation guide for more information.
LUKS-encrypted Images
Note
LUKS-encrypted Images can be used only on KVM-based hypervisors.There are two possible scenarios:
- Convert existing non-encrypted image into LUKS-encrypted one;
- Build LUKS-encrypted OS image from scratch.
Both are covered below.
Convert Existing Non-encrypted Image into a LUKS-encrypted one
All the commands below within this section need to be done as oneadmin user.
Generate a secret key to be used for encrypting LUKS image and save it into a file (e.g., passphrase.luks):
$ openssl rand -base64 10|tr -d '=' > passphrase.luks
Set 600 permissions on that file:
$ chmod 600 passphrase.luks
Check a path to an Image already registered in OpenNebula which needs to be encrypted:
$ oneimage show 0|grep -i source|cut -d ':' -f2
/var/lib/one//datastores/1/2f7afcdd0f5c7644a8f82ec57f3ede54
Get information about the virtual size of the Image:
$ qemu-img info /var/lib/one//datastores/1/2f7afcdd0f5c7644a8f82ec57f3ede54 2>/dev/null | egrep -i "virtual size"
virtual size: 256 MiB (268435456 bytes)
Create an empty LUKS-encrypted Image with the same size as the existing OS Image which needs to be encrypted:
$ qemu-img create --object secret,id=sec0,file=passphrase.luks -o key-secret=sec0 -f luks /tmp/alpine-3.17.luks 256M
Convert existing OS Image into a LUKS-encrypted one:
$ qemu-img convert --target-image-opts --object secret,id=sec0,file=passphrase.luks -f qcow2 /var/lib/one//datastores/1/2f7afcdd0f5c7644a8f82ec57f3ede54 -n driver=luks,file.filename=/tmp/alpine-3.17.luks,key-secret=sec0
Register converted LUKS-encrypted Image in OpenNebula:
$ oneimage create --name alpine-3.17_luks --path /tmp/alpine-3.17.luks -d default --prefix vd
Generate a UUID and save it into environment variable for future use:
$ UUID=$(uuidgen); echo $UUID
Create a secret.xml file by issuing
$ cat > secret.xml <<EOF
<secret ephemeral='no' private='yes'>
   <uuid>$UUID</uuid>
      <description>luks key</description>
</secret>
EOF
Set 600 permissions for secret.xml file:
$ chmod 600 secret.xml
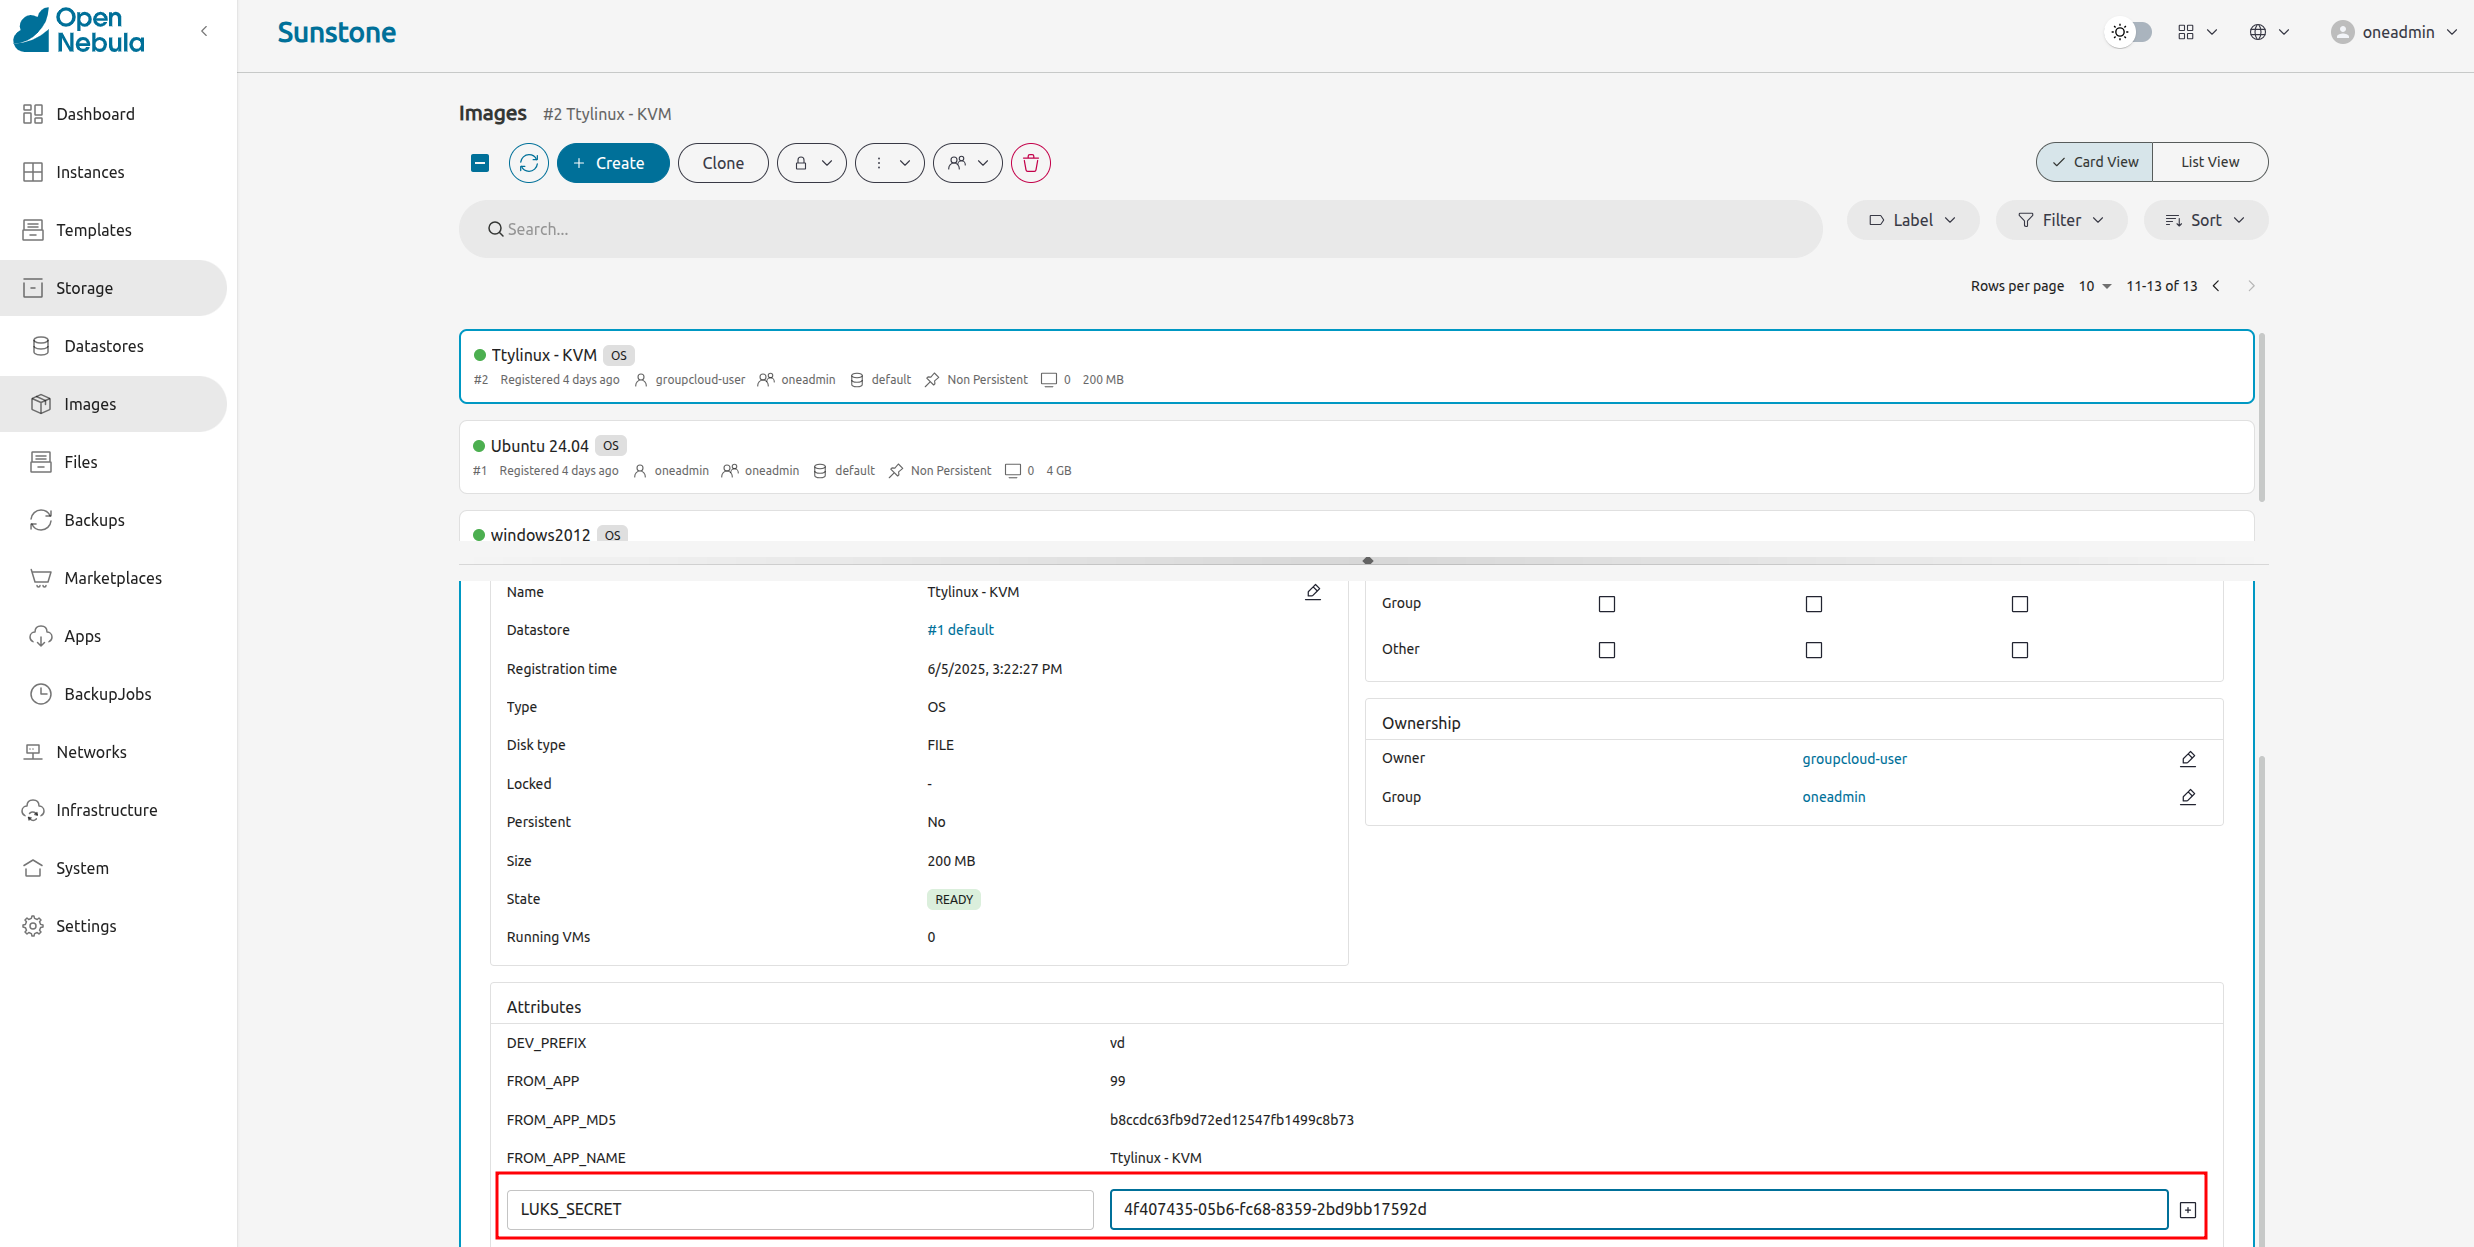
Now you need to open LUKS-encrypted Image properties in Sunstone interface and add new attribute called LUKS_SECRET in the “Attributes” section on the “Info” tab. Paste the UUID generated earlier as a value for that attribute. Click on “+” button located on the right side of the row with the new attribute and its value.
Copy passphrase.luks and secret.xml files on all your hypervisor nodes and execute the following commands on all of them as oneadmin user:
$ virsh -c qemu:///system secret-define secret.xml

$ virsh -c qemu:///system secret-set-value $(sed -n 's:.*<uuid>\(.*\)</uuid>.*:\1:p' secret.xml) --file passphrase.luks --plain
Create a VM Template with LUKS-encrypted disk and instantiate the VM. If everything worked as it should then the VM should be booted successfully.
Build LUKS-encrypted OS Image from Scratch
Generate a secret key to be used for encrypting LUKS image and save it into a file (e.g., passphrase.luks):
$ openssl rand -base64 10|tr -d '=' > passphrase.luks
Set 600 permissions on that file:
$ chmod 600 passphrase.luks
Create an encrypted volume using raw format, for example:
$ qemu-img create --object secret,id=sec0,file=passphrase.luks -o key-secret=sec0 -f luks /tmp/luks.vol 5G
Register that Image in the OpenNebula:
$ oneimage create --name luks-image --path /tmp/luks.vol -d default --prefix vd --persistent
Generate a UUID and save it into environment variable for future use:
$ UUID=$(uuidgen); echo $UUID
Create a secret.xml file by issuing
$ cat > secret.xml <<EOF
<secret ephemeral='no' private='yes'>
   <uuid>$UUID</uuid>
      <description>luks key</description>
</secret>
EOF
Set 600 permissions for secret.xml file:
$ chmod 600 secret.xml
Now you need to open LUKS-encrypted Image properties in Sunstone interface and add new attribute called LUKS_SECRET in the “Attributes” section on the “Info” tab. Paste the UUID generated earlier as a value for that attribute. Click on “+” button located on the right side of the row with new attribute and its value (see screenshot).
Copy passphrase.luks and secret.xml files on all your hypervisor nodes and execute the following commands on all of them as oneadmin user:
$ virsh -c qemu:///system secret-define secret.xml

$ virsh -c qemu:///system secret-set-value $(sed -n 's:.*<uuid>\(.*\)</uuid>.*:\1:p' secret.xml) --file passphrase.luks --plain
Register OS installation ISO-image in the OpenNebula.
Create a VM template and add both Images (LUKS-encrypted and ISO ones) into it. Instantiate the VM from that Template.
Install OS on the LUKS-encrypted image. Terminate the VM. All changes made on the LUKS-encrypted disk are saved because it is persistent. You need to make that Image non-persistent in case it has to be used for the instantiation of multiple VMs. Update the VM Template by removing the ISO disk and save changes. Instantiate the VM from that Template with the LUKS-encrypted disk. If everything worked as it should then the VM should be booted successfully.
Managing Images
Listing Images
You can use the oneimage list command to check the available Images in the Datastores.
$ oneimage list
  ID USER       GROUP      NAME            DATASTORE     SIZE TYPE PER STAT RVMS
   0 oneadmin   oneadmin   ttylinux-vd     default       200M OS    No used    8
   1 johndoe    users      my-ubuntu-disk- default       200M OS   Yes used    1
   2 alice      testgroup  customized-ubun default       200M OS   Yes used    1
To get complete information about an Image, use oneimage show, or list Images continuously with oneimage top.
Note
Orphan Images (i.e., Images not referenced by any VM Template) can be shown with the oneimage orphans command.Cloning Images
Existing Images can be cloned to a new one. This is useful to make a backup of an Image before you modify it or to get a private persistent copy of an Image shared by other users. To clone an Image execute
$ oneimage clone Ubuntu new_image
You can optionally clone the Image to a different Datastore. The new Datastore must use the same DS_MAD driver.
$ oneimage clone Ubuntu new_image --datastore new_img_ds
Sharing Images with other Users
Users can share their Images with other users in their group or with all the users in OpenNebula. Full details are described in the Managing Permissions guide. Here below you can see a quick example: to share the Image 0 with users in your group grant the USE right bit for GROUP:
$ oneimage show 0
...
PERMISSIONS
OWNER          : um-
GROUP          : ---
OTHER          : ---

$ oneimage chmod 0 640

$ oneimage show 0
...
PERMISSIONS
OWNER          : um-
GROUP          : u--
OTHER          : ---
Changing the Persistent Mode
Use the oneimage persistent and oneimage nonpersistent commands to make your Images persistent or non-persistent. For example:
$ oneimage persistent Ubuntu

$ oneimage list
  ID USER     GROUP    NAME         DATASTORE     SIZE TYPE PER STAT  RVMS
   0 oneadmin oneadmin Ubuntu       default        10G   OS Yes  rdy     0

$ oneimage nonpersistent 0

$ oneimage list
  ID USER     GROUP    NAME         DATASTORE     SIZE TYPE PER STAT  RVMS
   0 oneadmin oneadmin Ubuntu       default        10G   OS  No  rdy     0
Managing Image Snapshots
Persistent Images can have snapshots if they are created during the life-cycle of the VM that uses them. The following operations allow the user to manage these snapshots directly:
oneimage snapshot-revert <image_id> <snapshot_id>: The active state of the Image is overwritten by the specified snapshot. Note that this operation discards any unsaved data of the disk state.oneimage snapshot-delete <image_id> <snapshot_id>: Deletes a snapshot. This operation is only allowed if the snapshot is not the active snapshot and if it has no children.oneimage snapshot-flatten <image_id> <snapshot_id>: This operation effectively converts the Image to an Image without snapshots. The saved disk state of the Image is the state of the specified snapshot. It’s an operation similar to runningsnapshot-revertand then deleting all the snapshots.
Important
Images with snapshots cannot be cloned or made non-persistent. To run either of these operations the user would need to flatten the Image first.How to Use Images in Virtual Machines
A VM uses an Image including it in its template as a DISK. A Disk can refer to Images either by name (IMAGE) or ID (IMAGE_ID). If you are using Image names it is a good idea to scope the name to its owner (IMAGE_UNAME or IMAGE_UID) to prevent collisions.
For example, the following Template defines a VM with two disks, the first one is based on Image with ID 7 while the second uses the Image Ubuntu from oneadmin user.
CPU    = 1
MEMORY = 1024

DISK = [ IMAGE_ID   = 7 ]

DISK = [ IMAGE       = "Ubuntu",
         IMAGE_UNAME = "oneadmin" ]

NIC    = [ NETWORK_ID = 1 ]
Check the virtual machine user guide and the virtual machine template documentation for a more complete explanation.
Save Disk Changes to an Image
Once the VM is deployed and changes are made to its disks, you can save those changes in two different ways:
- Disk snapshots, a snapshot of the disk state is saved, you can later revert to this saved state.
- Disk save as, the disk is copied to a new Image in the datastore. The disk must be in a consistent state during the
save_asoperation (e.g., by unmounting the disk from the VM).
A detailed description of this process is described in section Virtual Machine Instances
How to Use File Images in Virtual Machines
Kernels and RAM disks
KERNEL and RAMDISK type Images can be used in the KERNEL_DS and INITRD_DS attributes of OS definition in the VM template. Here is an example of a VM section that uses the Image with name kernel5.10 as kernel and Image ID 23 as RAM disk:
OS = [ KERNEL_DS  = "$FILE[IMAGE=kernel5.10]",
       INITRD_DS  = "$FILE[IMAGE_ID=23]",
       ROOT       = "sda1",
       KERNEL_CMD = "ro console=tty1" ]
For a complete description check the VM Template reference guide.
Generic files
The contextualization cdrom can include CONTEXT type Images, so the VM can access them at boot time. For example, a VM section that includes the Image (file) with name webpageDB and Image ID 34 would be:
CONTEXT = [
  FILES_DS   = "$FILE[IMAGE_ID=34] $FILE[IMAGE=webpageDB]",
]
Using Sunstone to Manage Images
You can also manage your Images using the Sunstone GUI. Select the Images tab to manage and check information about your Images in a user-friendly way. By default this tab is available in the admin view but not in the cloud or groupadmin views.
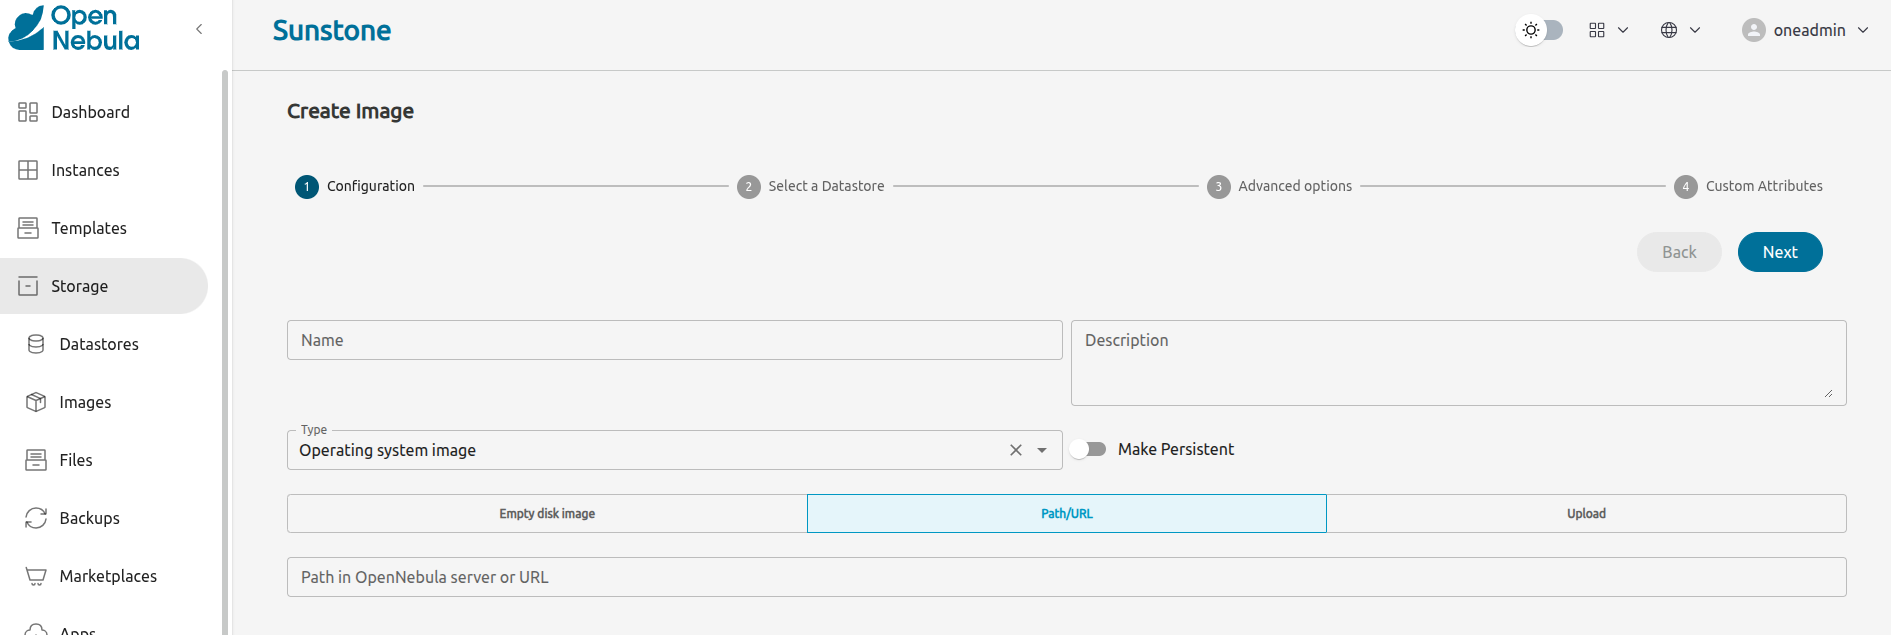
Uploading Images from Sunstone
When creating Images you can upload them to the Datastore via the client browser. The process copies the Image from the client desktop to a temporal location and creates the Image from it (as described above).
Note
Note that when file sizes become big (normally over 1GB), and depending on your hardware, it may take a long time to complete the copying. Since the upload request needs to stay pending until copying is successful (so it can delete the temp file safely), there might be Ajax timeouts and/or lack of response from the server. This may cause errors or trigger re-uploads (which re-initiate the loading progress bar).We value your feedback
Was this information helpful?
Glad to hear it
Sorry to hear that