Sunstone
Overview
Sunstone is the new generation OpenNebula web interface, fully featured for VM and VM Template management and with other sections ready covering most functionality for end users.
This interface is delivered by the FireEdge server, and is its main interface, meaning that it will redirect to Sunstone when contacted in the http://<OPENNEBULA-FRONTEND>:2616/ address.
Configuration
To configure Sunstone, there are several options to consider and they are described in the FireEdge Configuration guide.
Usage
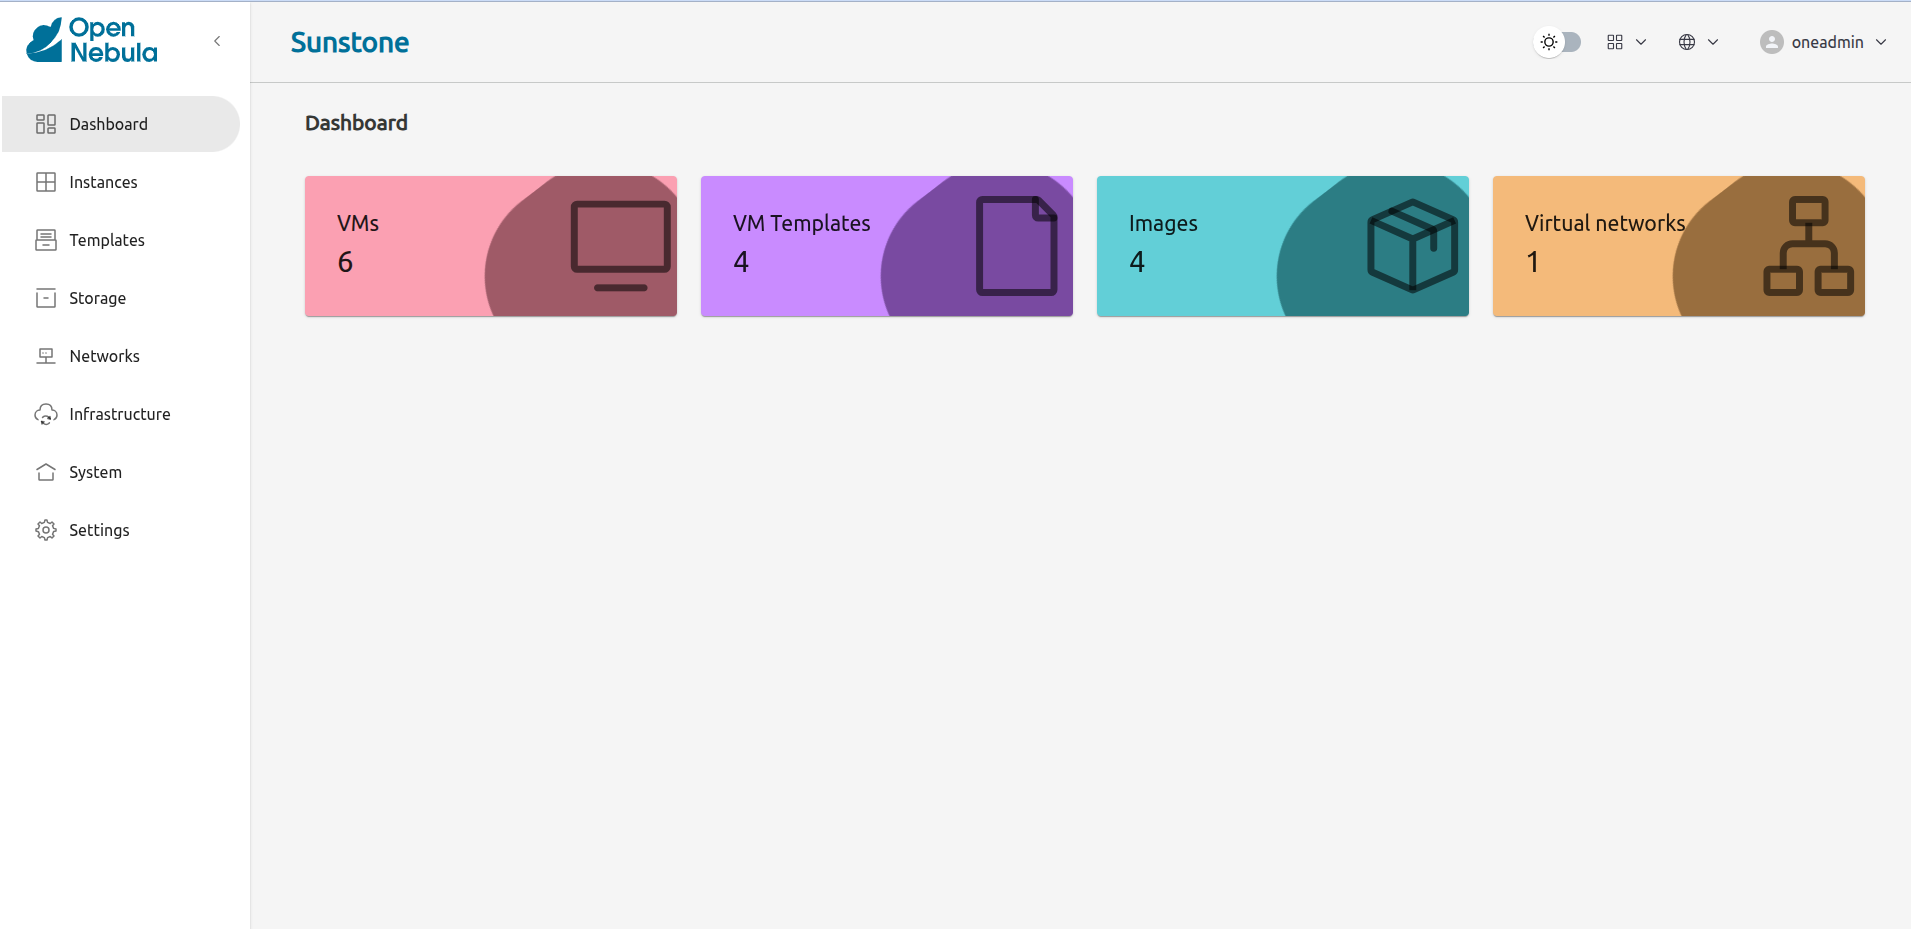
This completely fresh user experience is available by accessing http://<OPENNEBULA-FRONTEND>:2616. On the left menu, users can find the available tabs to manage resources, as described in the Sections part of this guide.
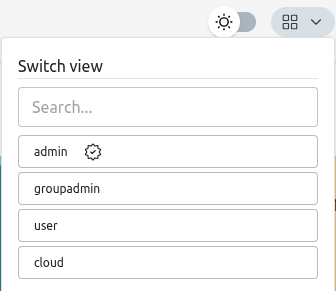
Sunstone users can change their current view from the top-right dropdown menu:
They can also configure several options from the settings tab.
Sections
The available Sunstone sections and their tabs are described in the following subsections. All the tabs described below can be deactivated in the Sunstone views
Instances
- VMs Tab: Users can see all their Virtual Machines and perform managing actions such as changing permissions, attaching disks, attaching networks, taking snapshots, adding scheduled actions, remote console connections, and more. From this tab, users can also instantiate a new Virtual Machine. Some VM actions can be through multiple VMs, such as:
suspend,stop,power-off,reboot,resume,undeploy, and more. - Virtual Routers Tab: Admins can see all their virtual routers and perform different kinds of managing actions. From this tab, admins can also instantiate new virtual routers.
- Services Tab: Admins can see all their services and perform different kinds of managing actions. From this tab, admins can also instantiate new services.
Templates
- VM Template Tab: Users can see all their Templates and perform updates and clones. From this tab, users can also instantiate a Virtual Machine. Also, users can perform some managing operations over the templates, such as: change permissions, share and unshare, lock and unlock, and more.
- Service Template Tab: Admins can see all their Service Templates, create new ones, and update existing templates. From this tab, admins can also instantiate services directly and perform different kinds of managing operations.
- Virtual Routers Template Tab: Admins can see all their Virtual Routers Templates, create new ones, and update existing templates. From this tab, admins can also instantiate virtual routers directly and perform different kinds of managing operations.
- VM Groups Tab: Admins can access all the VM groups defined in the OpenNebula instance and perform managing operations such as updating, enabling/disabling, and more. Also, admins can create new VM groups from this tab.
Storage
- Datastores Tab: Users can see all their
FILE,IMAGE, andSYSTEMdatastores. Also, users can perform some managing actions, such as changing permissions, enabling and disabling, and more. From this tab, users can create a new Datastore of one of the types described before. - Images Tab: Users can see all their
OS,CDROM, andDATABLOCKimages. Also, users can perform some managing actions, such as changing permissions, locking and unlocking, and more. From this tab, users can instantiate a new Image of one of the types described before. - Files Tab: Users can see all their
KERNEL,RAMDISK, andCONTEXTimages. Also, users can perform some managing actions, such as changing permissions, enabling and disabling, and more. From this tab, users can instantiate a new Image of one of the types described before. - Backups Tab: Users can see all their
BACKUPimages. Also, users can perform some managing actions, such as changing permissions and restoring. - Marketplace Tab: Users can see all their Marketplaces. Also, users can perform some managing actions, such as create and update a Marketplace, changing permissions and restoring, and more.
- Marketplace Apps Tab: Users can see all the apps from their active Marketplaces, download and create templates from them, or download them locally on their computers.
- BackupJobs Tab: Users can see all their backup jobs. Also, users can perform some managing actions, such as create, start, and cancel a backup job, changing permissions and restoring, and more.
Networks
- Virtual Networks Tab: Users can see all their Virtual Networks and perform managing operations such as updating, reserving, changing permissions, and more. Also, users can create a new Virtual Network from this tab.
- Virtual Networks Template Tab: Users can see all their Virtual Networks Templates and perform updates. From this tab, users can also instantiate a Virtual Network from a template. Also, users can perform some managing operations over the templates, such as: change permissions, lock and unlock, and more.
- Security Groups Tab: Users can see all their Security Groups and perform managing operations such as updating, cloning, committing, changing permissions, and more. Also, users can create a new Security Group from this tab.
Infrastructure
- Providers Tab: Users can see all their Providers and can create and edit them.
- Provisions Tab: Users can see all their Provisions and can create and edit them.
- Clusters Tab: Users can see all their Clusters and perform managing operations such as updating and deleting.
- Hosts Tab: Users can see all their Hosts and perform managing operations such as enabling, disabling, and more. Also, users can create a new Host from this tab.
- Zone Tab: Users can see all their Zones and see all the information about a Zone.
System
- VDCs Tab: Users can see all their VDCs and can update, rename, and view the resources associated with them, and more. Also, users can create a new VDC from this tab.
- Users Tab: Admins can access all the users defined in the OpenNebula instance and perform managing operations such as updating, enabling/disabling, setting quotas, and more. Also, admins can create new Users from this tab.
- Groups Tab: Admins can access all the groups defined in the OpenNebula instance and perform managing operations such as updating, setting quotas, and more. Also, admins can create new Groups from this tab.
- ACL Tab: Admins can access all the ACL rules defined in the OpenNebula instance and perform create and delete operations.
Settings
From this section, users can define multiple configuration options for themselves that will be saved inside the user template, such as:
- Schema (default = System): change the Sunstone Theme to dark, light, or matching with the system.
- Language (default = English US): select the language that they want to use for the UI.
- View: allows users to change the user view.
- Default endpoint: allows users to change the Sunstone endpoint when using federation.
- SSH Public key: allows users to specify a public SSH key that they can use on the VMs.
- Disable the dashboard animations. By default they are enabled.
- Disable the information on full screen. By default they are disabled.
- Change password: allows users to change their password.
- Labels: allows users to manage their labels.
- SSH Public key: allows users to specify a public SSH key that they can use on the VMs.
- SSH Private key: allows users to specify a private SSH key that they can use when establishing connections with their VMs.
- SSH Private key passphrase: if the private SSH key is encrypted, the user must specify the password.
- Login token: allows the creation of a new token for the user.
- Two Factor Authentication: allows users to register an app to perform Two Factor Authentication.
 Note
Note
All the configurations set in this section will be in the user template.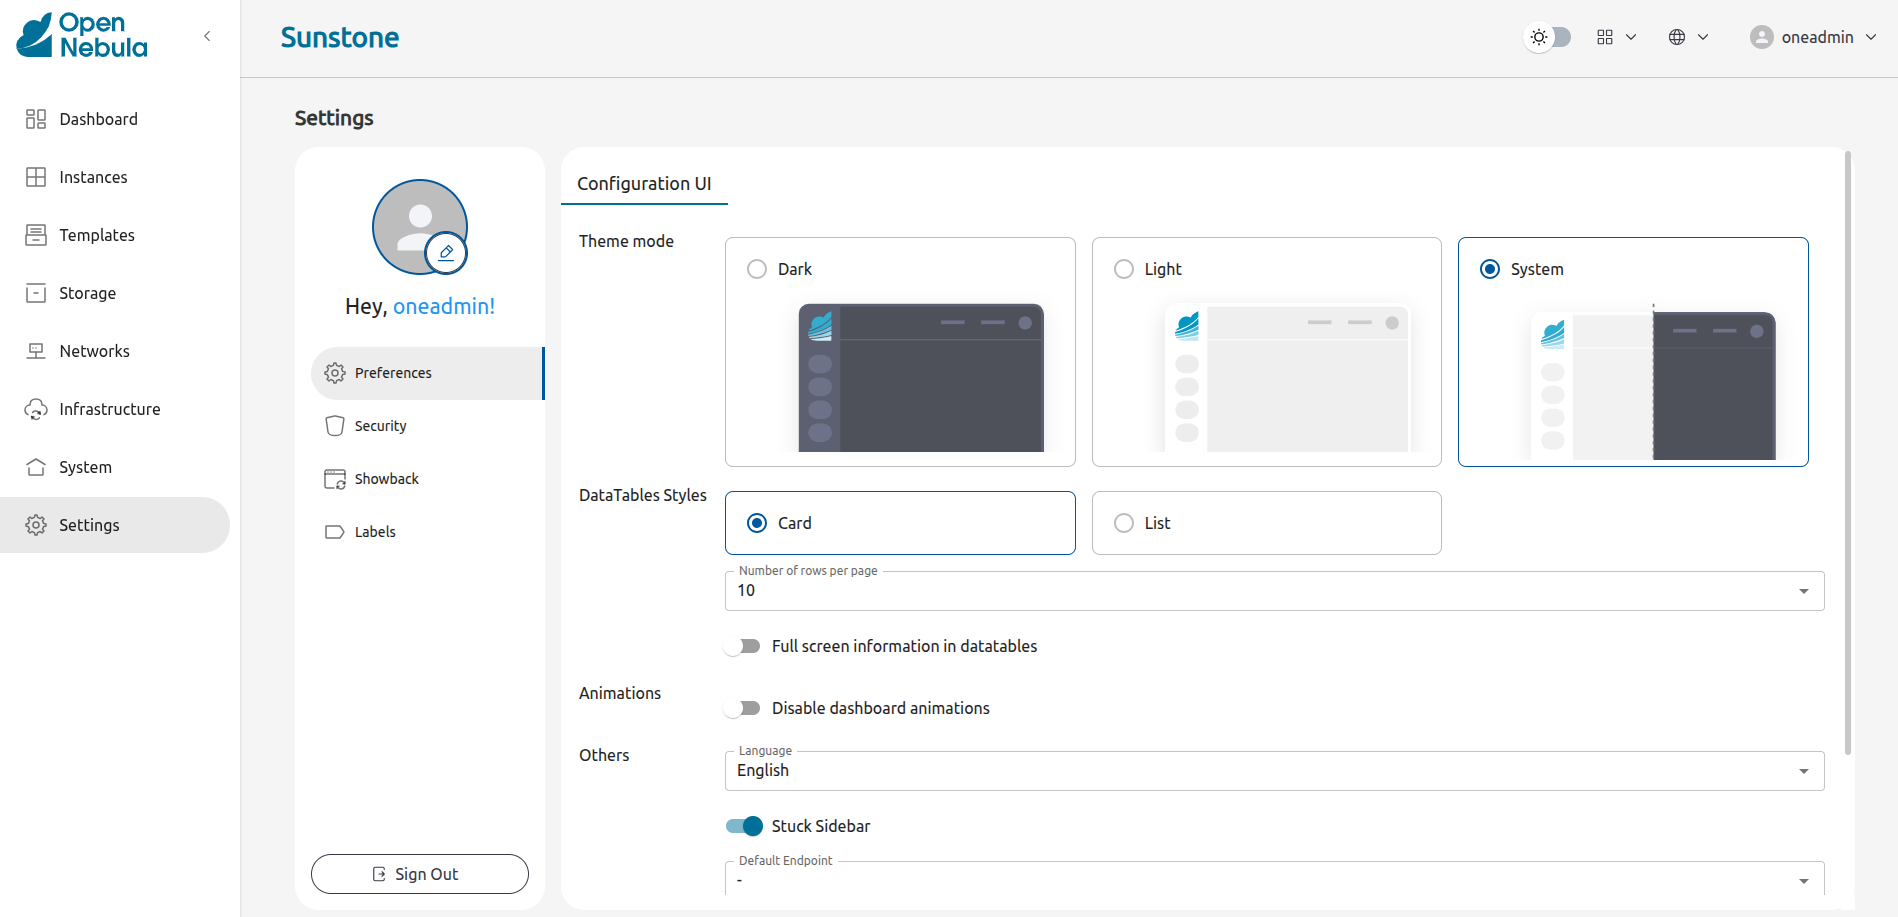
Views
Using the Sunstone views, you can provide a simplified UI aimed at end users of an OpenNebula cloud. Sunstone Views are fully customizable, so you can easily enable or disable specific information tabs or action buttons. You can define multiple views for different user groups. Each view defines a set of UI components, so each user accesses and views the relevant parts of the cloud for their role. Default views:
Each view is in an individual directory, admin, user, groupadmin, and cloud that OpenNebula proposes by default, as described in the next section.
Default Views
Admin View
This view provides complete control of the Virtual Machines, Templates, and Marketplace apps. Details can be configured in the /etc/one/fireedge/sunstone/views/admin/ directory.
User View
Based on the Admin View. It is an advanced user view intended for users with fewer privileges than an admin user, allowing them to manage Virtual Machines and Templates. Users will not be able to manage or retrieve the Hosts and clusters of the cloud. Details can be configured in the /etc/one/fireedge/sunstone/views/user/ directory.

Groupadmin View
This view is like a limited version of the cloud administrator view to be used by the administrators of a group. Details can be configured in the /etc/one/fireedge/sunstone/views/groupadmin/ directory. More details on Group admin view
Cloud View
This is a simplified view intended for cloud consumers that just require a portal where they can provision new VMs easily. Details can be configured in the /etc/one/fireedge/sunstone/views/cloud/ directory. More details on Cloud view
Defining a New View
The views definitions are placed in the /etc/one/fireedge/sunstone/views directory. Each view is defined by a folder (named as the view) with the necessary configuration files inside.
/etc/one/fireedge/sunstone/views
...
|-- admin/
|   |-- backup-tab.yaml           <--- the Backup tab configuration file
|   |-- cluster-tab.yaml          <--- the Cluster tab configuration file (not installed by default)
|   |-- datastore-tab.yaml        <--- the Datastore tab configuration file
|   |-- file-tab.yaml             <--- the File tab configuration file
|   |-- group-tab.yaml            <--- the Group tab configuration file
|   |-- host-tab.yaml             <--- the Host tab configuration file
|   |-- image-tab.yaml            <--- the Image tab configuration file
|   |-- marketplace-app-tab.yaml  <--- the Marketplace App tab configuration file
|   |-- sec-group-tab.yaml        <--- the Security Group tab configuration file
|   |-- user-tab.yaml             <--- the User tab configuration file
|   |-- vdc-tab.yaml              <--- the VDC tab configuration file
|   |-- vm-tab.yaml               <--- the VM tab configuration file
|   |-- vm-template-tab.yaml      <--- the VM Template tab configuration file
|   |-- vm-group-tab.yaml         <--- the VM Group tab configuration file
|   |-- vnet-tab.yaml             <--- the Virtual Network tab configuration file
|-- sunstone-server.conf
|-- sunstone-views.yaml           <--- the FireEdge Sunstone views main configuration
`-- user/
    ...
    |-- vm-tab.yaml               <--- the VM tab configuration file
    `-- vm-template-tab.yaml      <--- the VM Template tab configuration file
...
The easiest way to create a custom view is to copy the admin or user folder and modify its content as needed. After that, add the new view into /etc/one/fireedge/sunstone/views/sunstone-views.yaml.
View Customization
On Sunstone each view is defined by a folder that has the YAML files for the configured tabs. The content for those files is divided into sections that are described in the following sections.
In the following tables, the description field contains the expected behavior when it is set to true.
Note
The attributes can be modified only if they come in the YAML file by default. If an attribute is not present, it has the same behavior as when it is set to false.Actions
The attributes described here indicate which buttons are visible to operate over the resources. The following attributes must be nested in an actions tag.
| Attribute | Description |
|---|---|
backup | Users will be able to create a Virtual Machine backup. |
change_cluster | Users will be able to change the resource cluster. |
chgrp | Users will be able to change the resource group. |
chown | Users will be able to change the resource owner. |
clone | Users will be able to clone the resource. |
commit | Users will be able to commit the security group changes. |
create_app_dialog | Users will be able to create a new marketplace app from the resource. |
create_dialog | Users will be able to create a new resource. |
delete | Users will be able to delete the resource. |
deploy | Users will be able to manually deploy Virtual Machines. |
disable | Users will be able to disable the resource. |
dockerfile_dialog | Users will be able to create an image from dockerfile. |
download | Users will be able to download apps from the marketplace into their computers. |
edit_labels | Users will be able to edit the resource labels. |
enable | Users will be able to enable the resource. |
export | Users will be able to export apps from the marketplace into a datastore. |
hold | Users will be able to set to hold Virtual Machines. |
instantiate_dialog | Users will be able to instantiate the resource. |
lock | Users will be able to lock the resource. |
migrate | Users will be able to migrate a Virtual Machine to a different host and datastore. |
migrate_live | Users will be able to live migrate a Virtual Machine to a different host and datastore. |
migrate_poff | Users will be able to migrate a Virtual Machine in poweroff to a different host and datastore. |
migrate_poff_hard | Users will be able to migrate a Virtual Machine in poweroff (hard way) to a different host and datastore. |
nonpersistent | Users will be able to set an image as non-persistent. |
offline | Users will be able to set a host as offline. |
persistent | Users will be able to set an image as persistent. |
poweroff | Users will be able to poweroff Virtual Machines. |
poweroff_hard | Users will be able to poweroff Virtual Machines (hard way). |
rdp | Users will be able to establish an RDP connection. |
reboot | Users will be able to reboot Virtual Machines. |
reboot_hard | Users will be able to reboot Virtual Machines (hard way). |
recover | Users will be able to recover Virtual Machines. |
release | Users will be able to release Virtual Machines. |
resched | Users will be able to reschedule Virtual Machines. |
reserve_dialog | Users will be able to reserve addresses from a Virtual Network. |
restore | Users will be able to restore a backup image. |
resume | Users will be able to resume Virtual Machines. |
save_as_template | Users will be able to save a Virtual Machine as a VM Template. |
share | Users will be able to share VM Templates. |
ssh | Users will be able to establish a SSH connection. |
stop | Users will be able to stop Virtual Machines. |
suspend | Users will be able to suspend Virtual Machines. |
terminate | Users will be able to terminate Virtual Machines. |
terminate_hard | Users will be able to terminate Virtual Machines (hard way). |
undeploy | Users will be able to undeploy Virtual Machines. |
undeploy_hard | Users will be able to undeploy Virtual Machines (hard way). |
unlock | Users will be able to unlock the resource. |
update_dialog | Users will be able to update the resource. |
unresched | Users will be able to un-reschedule Virtual Machines. |
unshare | Users will be able to unshare VM Templates. |
vnc | Users will be able to establish a VNC connection. |
Filters
The attributes described here indicate which filters are visible to select resources. The following attributes must be nested in a filters tag.
| Attribute | Description |
|---|---|
group | Filtering by the resource group will be enabled. |
hostname | Filtering by the resource hostname will be enabled. |
ips | Filtering by the resource IPs will be enabled. |
label | Filtering by the resource labels will be enabled. |
locked | Filtering by the resource lock state will be enabled. |
marketplace | Filtering by the marketplace will be enabled. |
owner | Filtering by the resource owner will be enabled. |
state | Filtering by the resource state will be enabled. |
type | Filtering by the resource type will be enabled. |
vn_mad | Filtering by the Virtual Network driver will be enabled. |
vrouter | Filtering based on if the resource is for vRouters will be enabled. |
zone | Filtering by the resource zone will be enabled. |
Info Tabs
The attributes described here indicate the available actions on each info tab on the resource. The following attributes must be nested in an info-tabs and the corresponding tab.
| Attribute | Description |
|---|---|
actions | Describes a list of available actions on this tab that can be disabled. |
attributes_panel | Describes the behavior for the attributes panel in the resourceinfo tab. |
capacity_panel | Describes the behavior for the capacity panel in the resource info tab. |
enabled | This tab will be shown in the resource info. |
information_panel | Describes the behavior for the information panel in the resourceinfo tab. |
lxc_panel | Describes the behavior for the LXC panel in the resource info tab. |
monitoring_panel | Describes the behavior for the monitoring panel in the resourceinfo tab. |
nsx_panel | Describes the behavior for the NSX panel in the resource info tab. |
ownership_panel | Describes the behavior for the ownership panel in the resourceinfo tab. |
permissions_panel | Describes the behavior for the permissions panel in the resourceinfo tab. |
qos_panel | Describes the behavior for the QoS panel in the resource info tab. |
rules_panel | Describes the behavior for the rules panel in the resource info tab. |
The available actions in the info tabs are described in the following table.
| Action | Description |
|---|---|
add | Users will be able to add information to that panel. |
add_ar | Users will be able to add an address range. |
add_secgroup | Users will be able to add a security group. |
attach_disk | Users will be able to attach disks. |
attach_nic | Users will be able to attach NICs. |
attach_secgroup | Users will be able to attach security groups to NICs. |
charter_create | Users will be able to create charters. |
chgrp | Users will be able to change the resource group. |
chmod | Users will be able to change the resource permissions. |
chown | Users will be able to change the resource owner. |
copy | Users will be able to copy the information available in that panel. |
delete | Users will be able to delete the information available in that panel. |
delete_ar | Users will be able to delete an address range. |
delete_secgroup | Users will be able to delete a security group. |
detach_disk | Users will be able to detach disks. |
detach_nic | Users will be able to detach NICs. |
detach_secgroup | Users will be able to detach security groups to NICs. |
disk_saveas | Users will be able to save disks as an image. |
edit | Users will be able to edit the information available in that panel. |
hold_lease | Users will be able to hold a lease. |
release_lease | Users will be able to release a lease. |
rename | Users will be able to rename the resource. |
resize_capacity | Users will be able to perform capacity resize. |
resize_disk | Users will be able to perform disk resize. |
sched_action_create | Users will be able to create scheduled actions. |
sched_action_delete | Users will be able to delete scheduled actions. |
sched_action_update | Users will be able to update scheduled actions. |
snapshot_create | Users will be able to create snapshots. |
snapshot_delete | Users will be able to delete snapshots. |
snapshot_disk_create | Users will be able to create disk snapshots. |
snapshot_disk_delete | Users will be able to delete disk snapshots. |
snapshot_disk_rename | Users will be able to rename disk snapshots. |
snapshot_disk_revert | Users will be able to revert disk snapshots. |
snapshot_revert | Users will be able to revert snapshots. |
update_ar | Users will be able to update an address range. |
update_configuration | Users will be able to update the configurations. |
update_nic | Users will be able to update the NICs. |
Features
The attributes described here indicate which features are used for the resources. The following attributes must be nested in a features tag.
| Attribute | Description |
|---|---|
hide_cpu | Users won’t be able to change the CPU settings. |
cpu_factor | Users won’t be able to scale the CPU. |
Dialogs
The attributes described here indicate the available actions on each dialog on the resource.
| Attribute | Description |
|---|---|
backup | Backup section will be displayed. |
booting | Booting section will be displayed. |
capacity | Capacity section will be displayed. |
context | Context section will be displayed. |
information | Information section will be displayed. |
input_output | Input/Output section will be displayed. |
network | Network section will be displayed. |
numa | Numa section will be displayed. |
ownership | Ownership section will be displayed. |
placement | Placement section will be displayed. |
sched_action | Scheduled Actions section will be displayed. |
showback | Showback section will be displayed. |
storage | Storage section will be displayed. |
vm_group | VM groups section will be displayed. |
Remote connections
OpenNebula VNC remote connection.
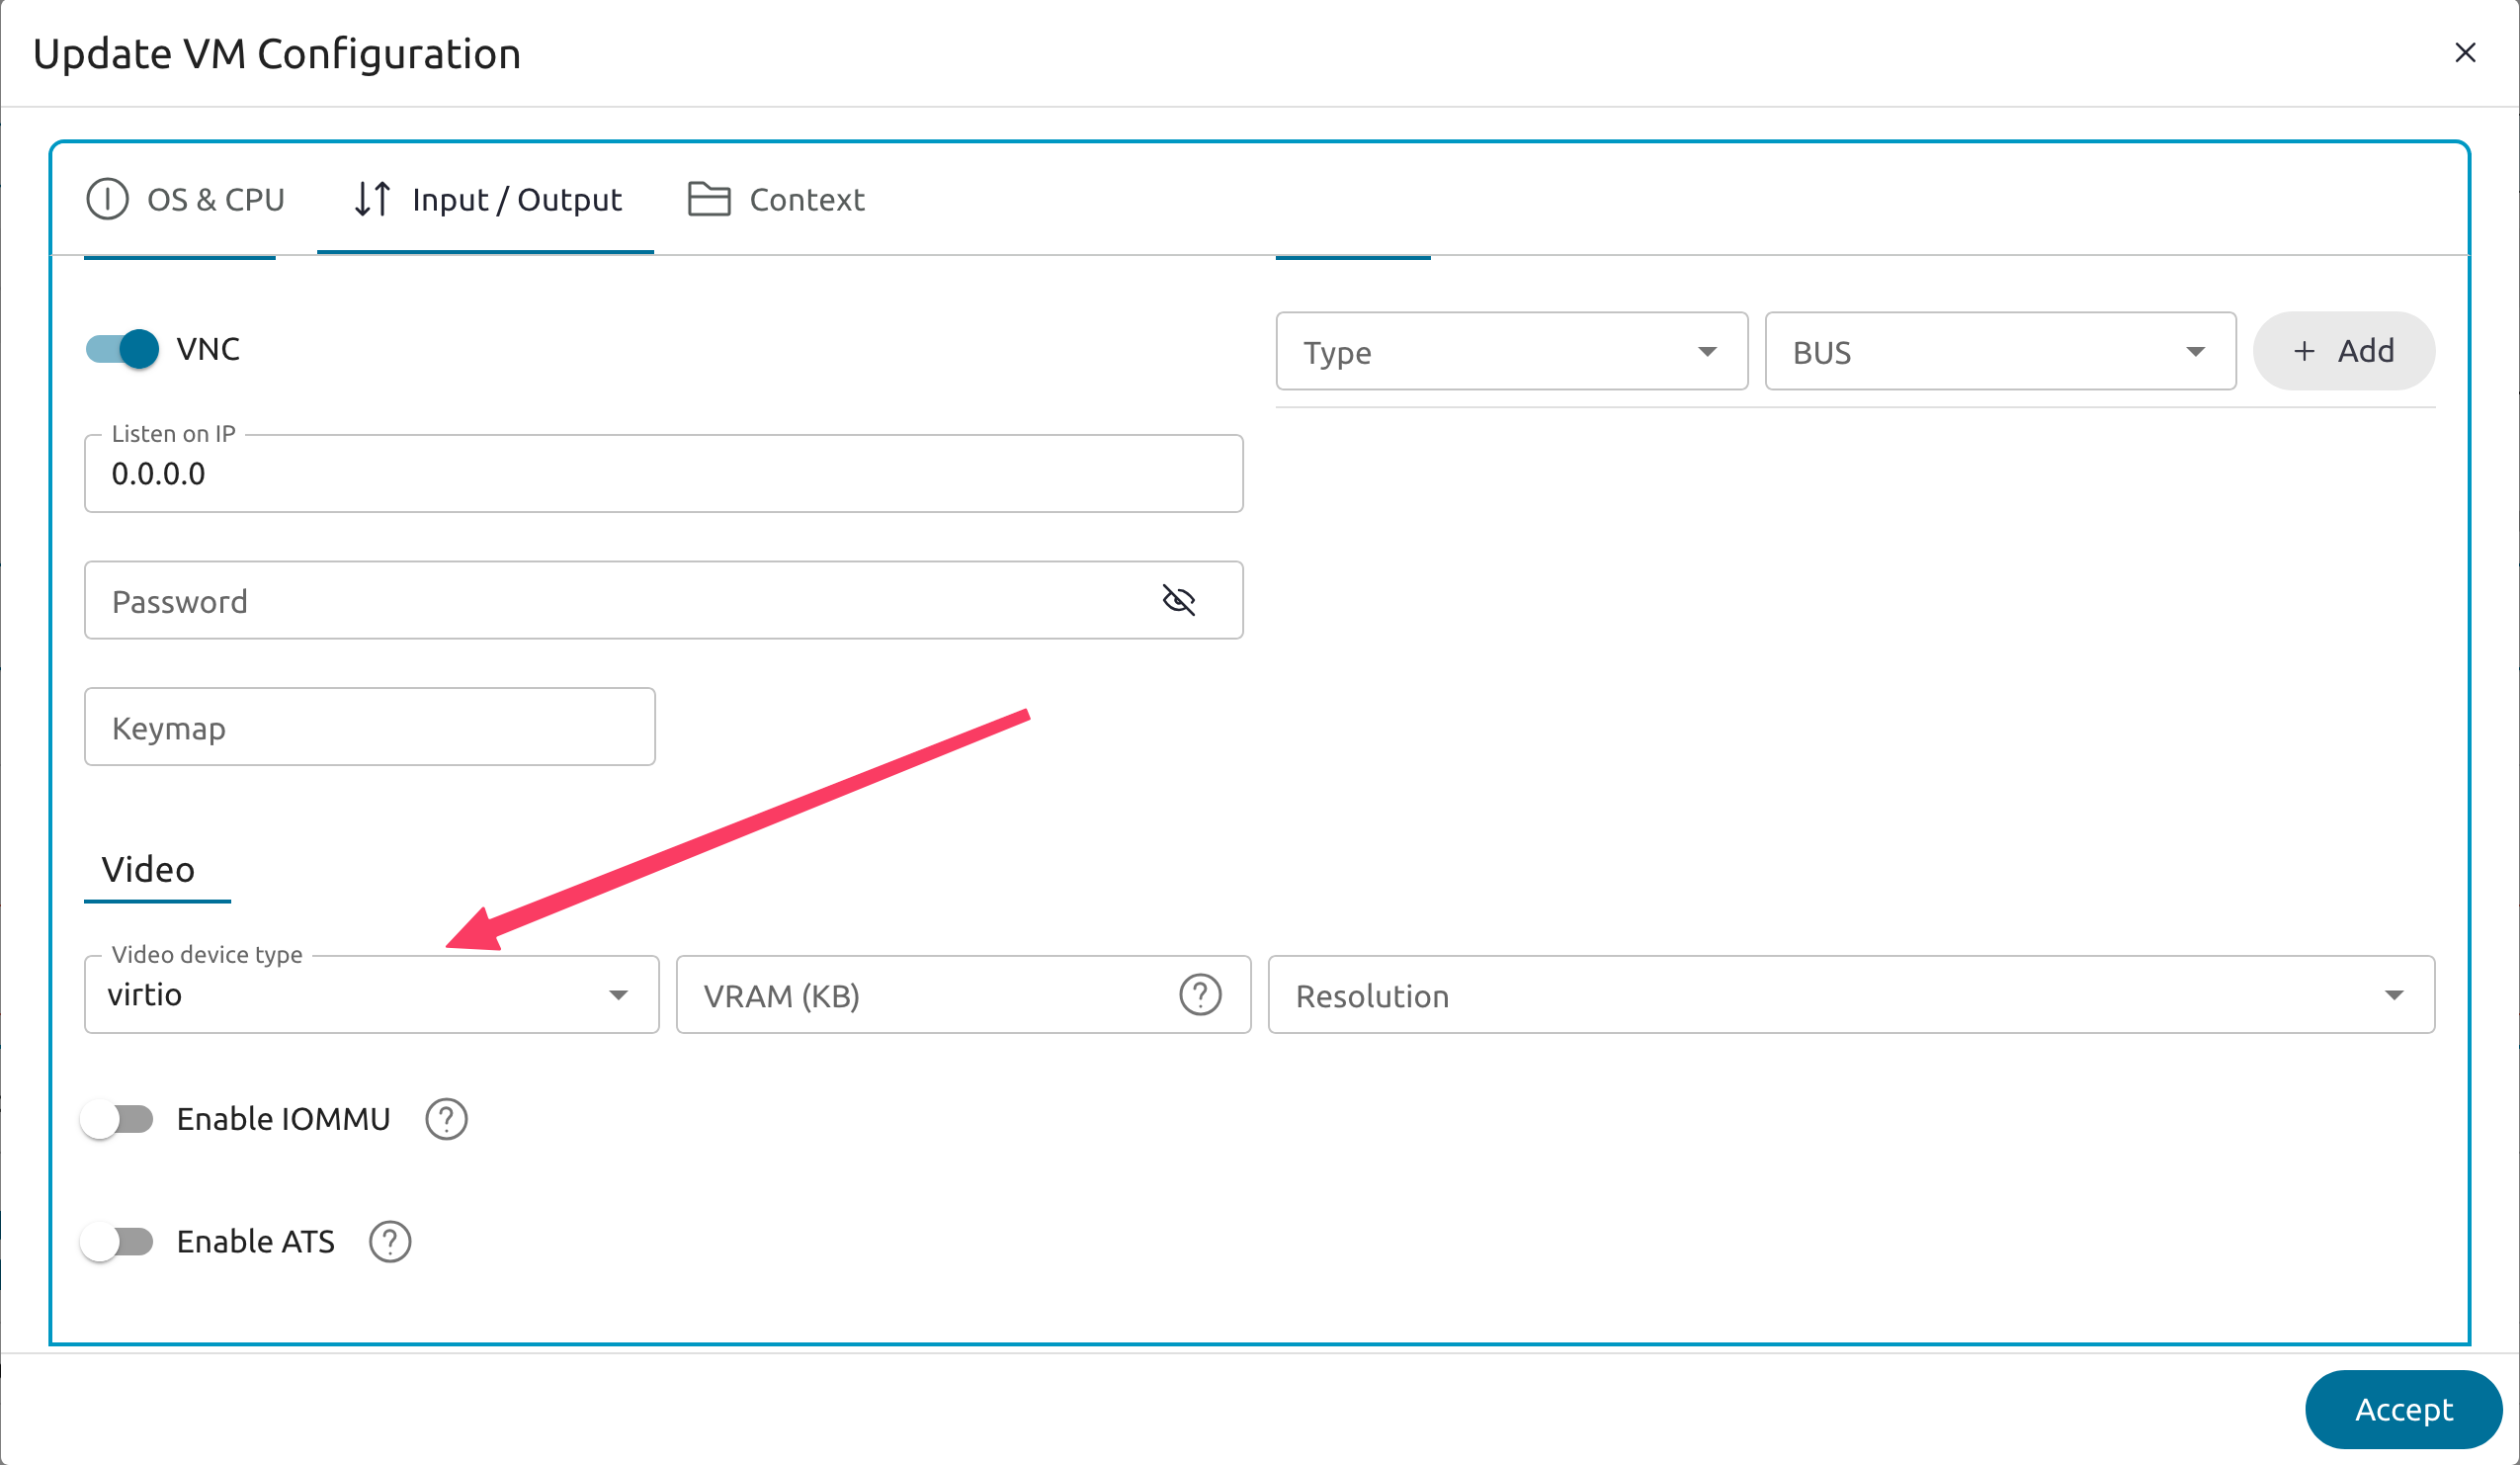
Sunstone allows direct connections to VMs using VNC. It admits parameters such as configuring the Host and port for remote connections, configuring the keyboard layout (needed for qemu KVM Hosts), and setting a connection password.
To set these VNC connection configurations we must:
- Go to the VM template configuration and click on create or update an existing one.
- Go to the “Advanced options” step and click on Input/Output.
- Under the “Graphics” section there are all the VNC configurations.
Note
In case the VNC client is blurry or has any kind of visual tearing, try switching to the virtio video device type instead. This can be done by selecting the VM and going to the Configuration tab.
Note
Due to hypervisor limitations it is not possible to share the clipboard with the VM. For this we recommend the use of RDP or SSH.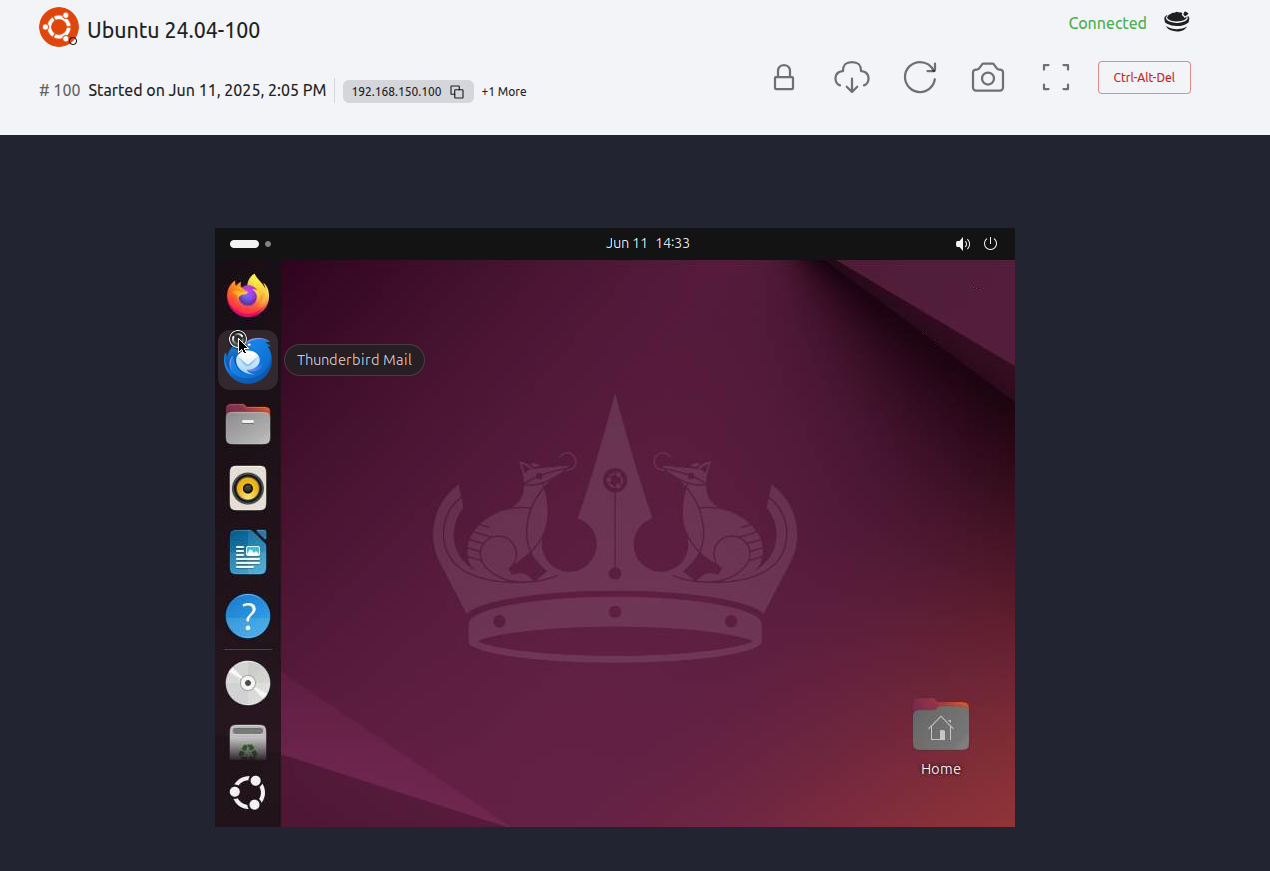
Actions in VNC console
At the top of the console you can find the buttons for the following actions:
- Full Screen: Set the console to full screen mode.
- Screenshot: Take a screenshot from the VNC console.
- Reconnect: Reconnect the VNC console.
- Lock/Unlock: Lock/Unlock the use of the keyboard and mouse.
Note
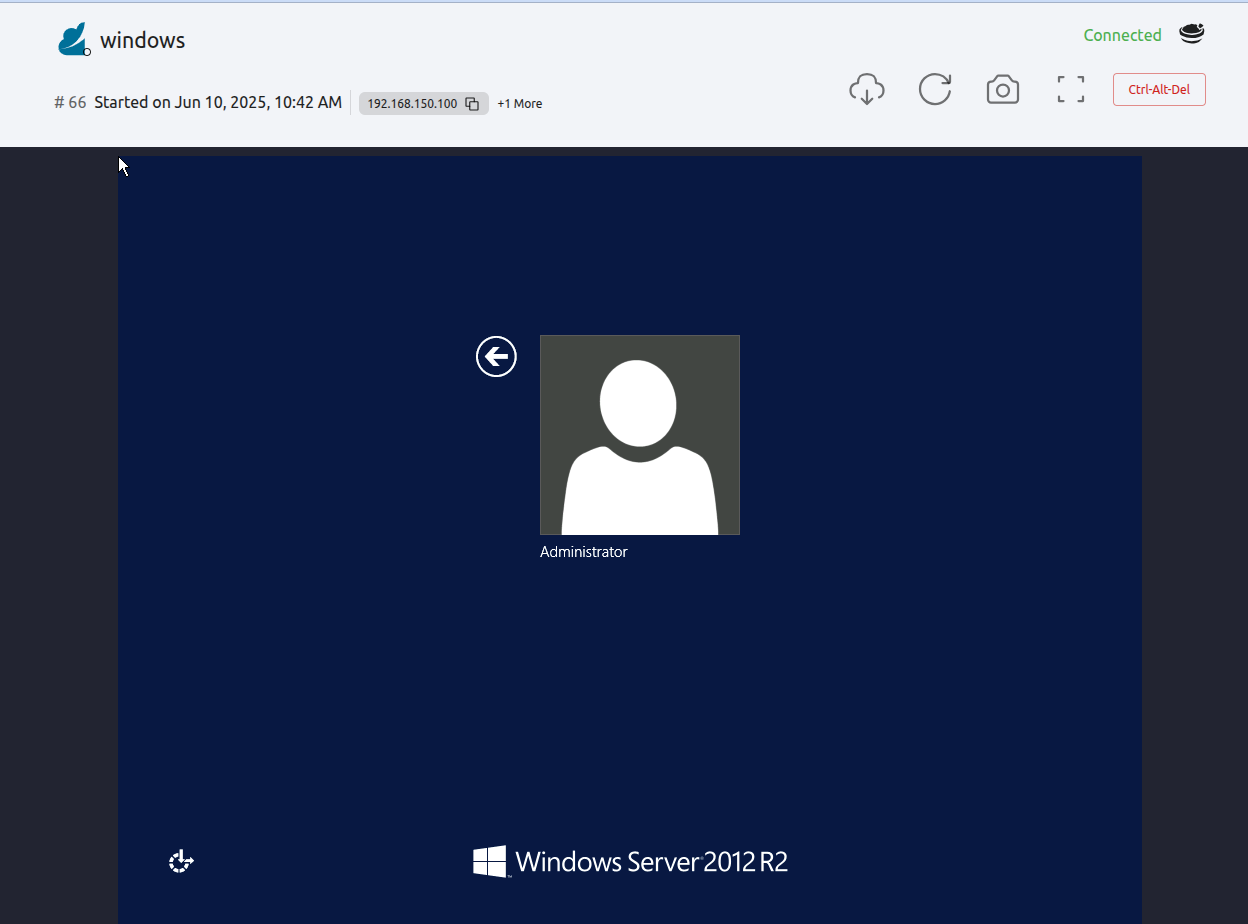
Sunstone does not connect directly to the VNC port, located in the VM template. Sunstone creates an SSH tunnel to the VNC port on any available port.OpenNebula RDP remote connection.
Sunstone also admits direct connections using RDP. This kind of connection is bound to a network interface, meaning that to enable it you must follow the following steps:
- Go to the VM template tab and click on create or update an existing one.
- Go to the “Advanced options” step.
- Click on “Network”.
- Click on attach nic or update an existing one.
- Go to the “Advanced options” step and enable the RDP connection and all the desired configuration parameters for the connection.
Note
To enable them on a running VM, you must follow steps 3 to 5 once you click the VM you want. Note
For RDP connections to work, a service such as XRPD is required on the VM to which you want to connect. Also, depending on the configuration of your RDP service, the following parameters can be added in the context of the VM:
| Attribute | Description |
|---|---|
RDP_SECURITY | You can change the type of security that the opennebula-guacd service will use (it must be the same as the one configured in the RDP service of the VM). By default it uses rdp. |
RDP_PORT | You can change the port that the opennebula-guacd service will use. By default it uses port 3389. |
Actions in RDP console
At the top of the console you can find the buttons for the following actions:
- Full Screen: Set the console to full screen mode.
- Screenshot: Take a screenshot from the VNC console.
- Reconnect: Reconnect the VNC console.
- Download connection file: Download the connection file for use with Microsoft Remote Desktop. Note
In order to be able to connect from an external application, you must have access to the IP address that appears in the file.
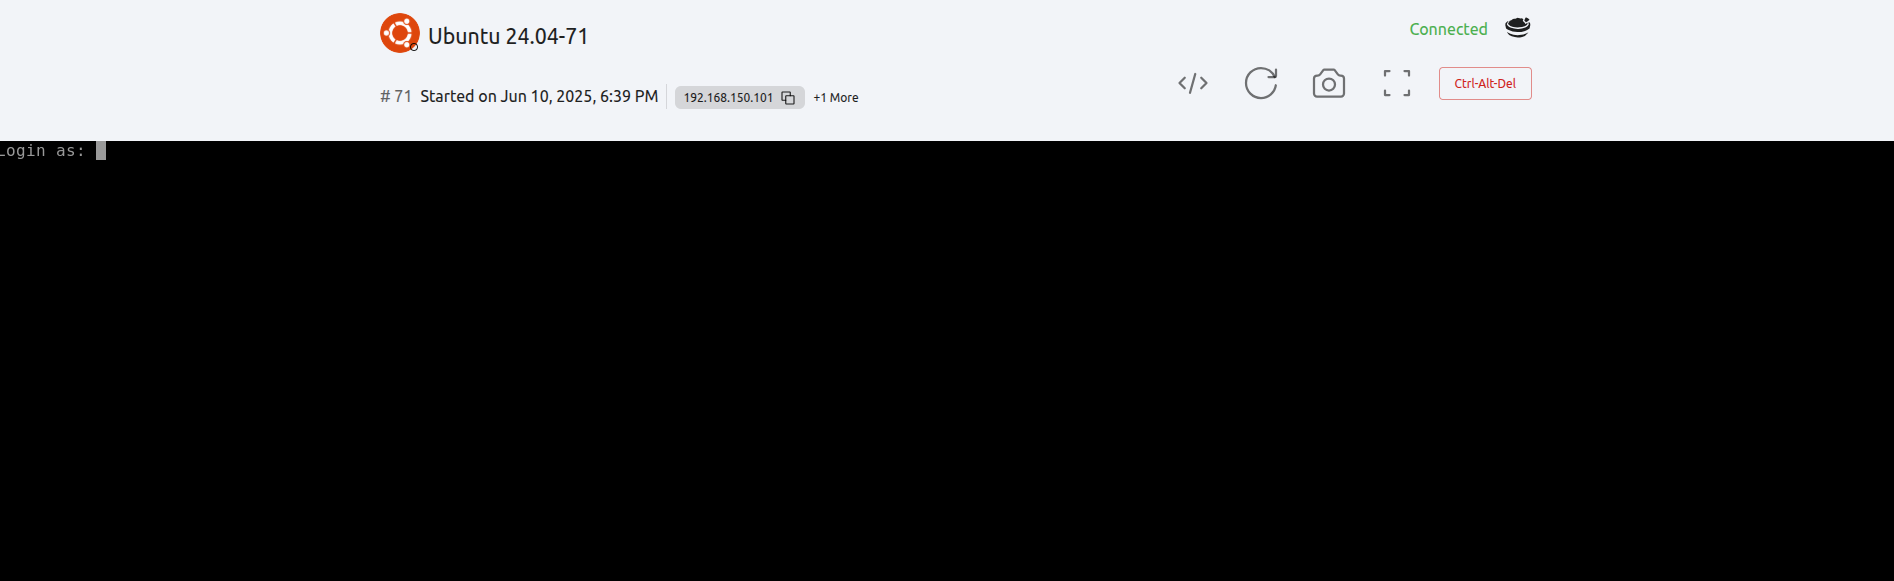
OpenNebula SSH remote connection.
Sunstone also allows direct connections using SSH. This kind of connection is bound to a network interface, meaning that to enable it you must follow the following steps:
- Go to the VM template tab and click on create or update an existing one.
- Go to the “Advanced options” step.
- Click on “Network”.
- Click on attach nic or update an existing one.
- Go to the “Advanced options” step and enable the SSH connection.
Note
To enable them on a running VM, you must follow steps 3 to 5 once you click the VM you want. Note
To make the connection by this means, it must be done with username and password. it is not possible to send the SSH key.Actions in SSH console
At the top of the console you can find the buttons for the following actions:
Full Screen: Set the console to full screen mode.
Screenshot: Take a screenshot from the VNC console.
Reconnect: Reconnect the VNC console.
- Configurations:
- SSH Command: Reconnect the console by executing the command placed
Schema: Changes the color scheme to be used for the terminal session. It consists of a series of name-value pairs separated by semicolons. Each name-value pair is separated by a colon and assigns a value to a color in the terminal emulator palette. For example:
foreground: rgb:00/00/ff;
background: rgb:ff/ff/ff;
color9: rgb:80/00/80
Possible color names are:
- foreground: Set the default foreground color.
- background: Set the default background color.
- colorN: Set the color at index N on the Xterm 256-color palette. For example, color9 refers to the red color.
- rgb:RR/GG/BB: Use the specified color in RGB format, with each component in hexadecimal. For example:
rgb:ff/00/00- colorN: Use the color currently assigned to indexNon the Xterm 256-color palette.
For backward compatibility, it will also accept four special values as the color scheme parameter:
- rgb:RR/GG/BB: Use the specified color in RGB format, with each component in hexadecimal. For example:
- black-white: Black text over a white background.
- gray-black: Gray text over a black background. This is the default color scheme.
- green-black: Green text over a black background.
- white-black: White text over a black background.
Font Name: The name of the font to use. This parameter is optional. If not specified, the default of “mono-space” will be used instead.
Font Size: The size of the font to use, in points. This parameter is optional. If not specified, the default of 12 will be used instead.
Download connection file: Download the connection file for use with TigerVNC Viewer.
NoteIn order to be able to connect from an external application, you must have access to the IP address that appears in the file.
We value your feedback
Was this information helpful?
Glad to hear it
Sorry to hear that