Run a Kubernetes Cluster on OpenNebula
Categories:
Overview
In this tutorial, you will deploy a Kubernetes cluster on a bare metal server using the OpenNebula OneKE appliance. The OneKE appliance helps you set up a functioning Kubernetes cluster with minimal effort and configuration and deploy applications on it.
To follow this tutorial, you must first complete the miniONE installation with either on-prem resources meeting the relevant hardware requirements or an AWS c5.metal instance:
After successfully completing the miniONE installation you will complete the following steps in this tutorial to launch a Kubernetes cluster using the OneKE appliance:
- Download the OneKE Kubernetes appliance from the OpenNebula Public Marketplace
- Instantiate a private network using miniONE
- Deploy the OneKE Kubernetes cluster on the KVM Host installed by miniONE
- Validate the cluster by deploying a simple test application on the cluster
Step 1. Download the OneKE Service from the OpenNebula Marketplace
The OpenNebula Public Marketplace is a repository of Virtual Machines and appliances which are curated, tested and certified by OpenNebula.
In the left-hand menu select Storage -> Apps. Sunstone will display the Apps screen, showing the first page of apps that are available for download. In the search field at the top, type service oneke 1.31 to filter by name. Then, select Service OneKE 1.31 (not Service OneKE 1.31 Airgapped):

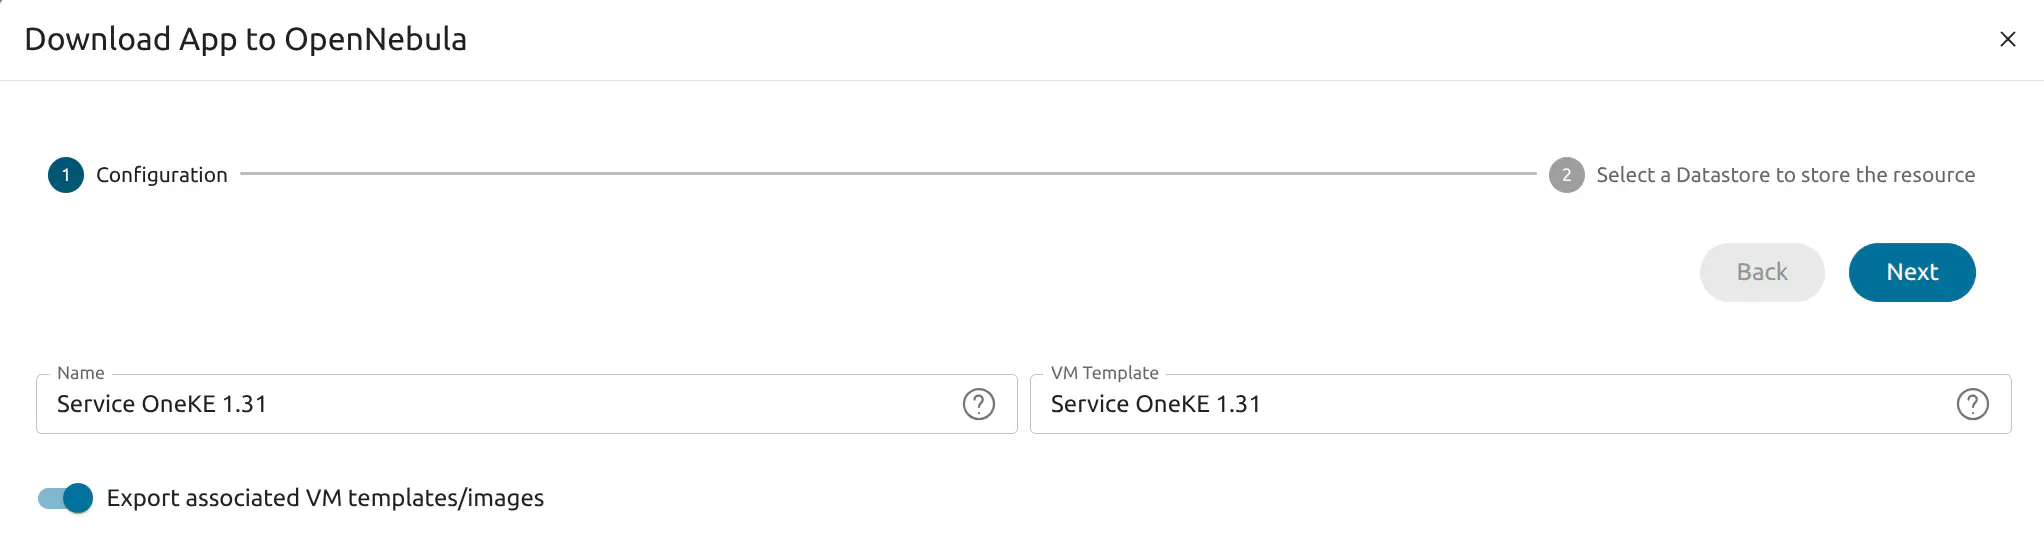
Click the Import button. Sunstone displays the Download App to OpenNebula wizard. In the first screen of the wizard, click Next.
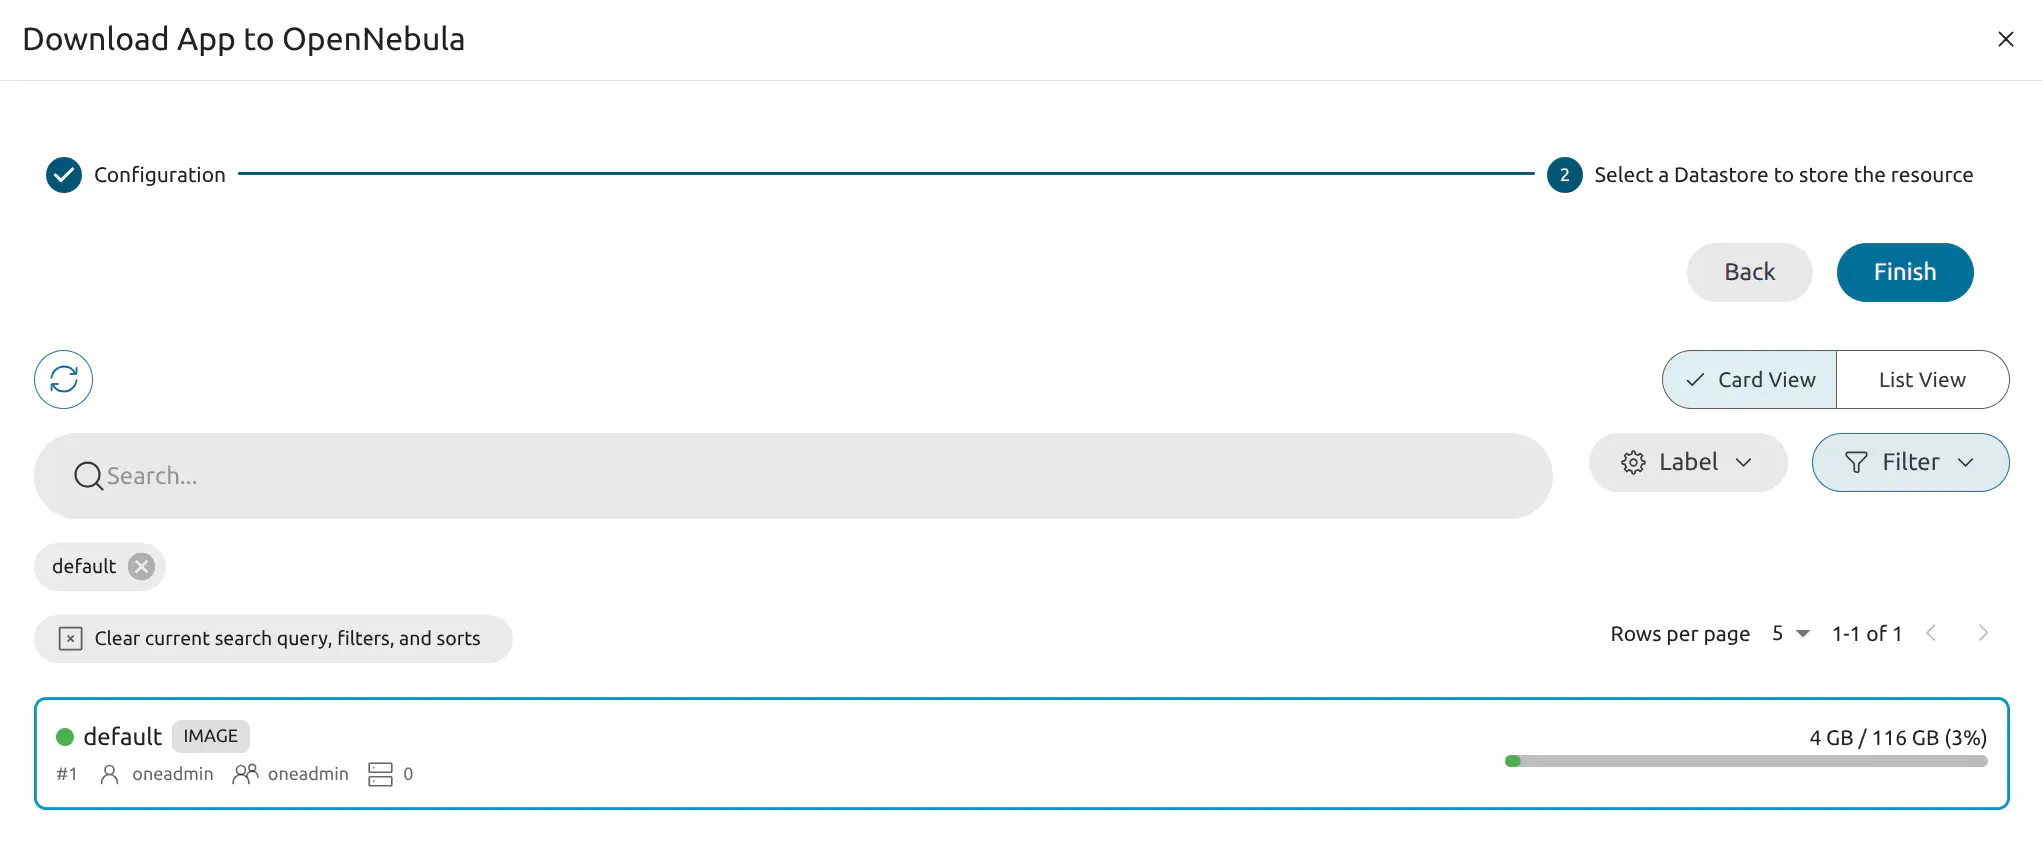
In the second screen select the default datastore for the appliance:
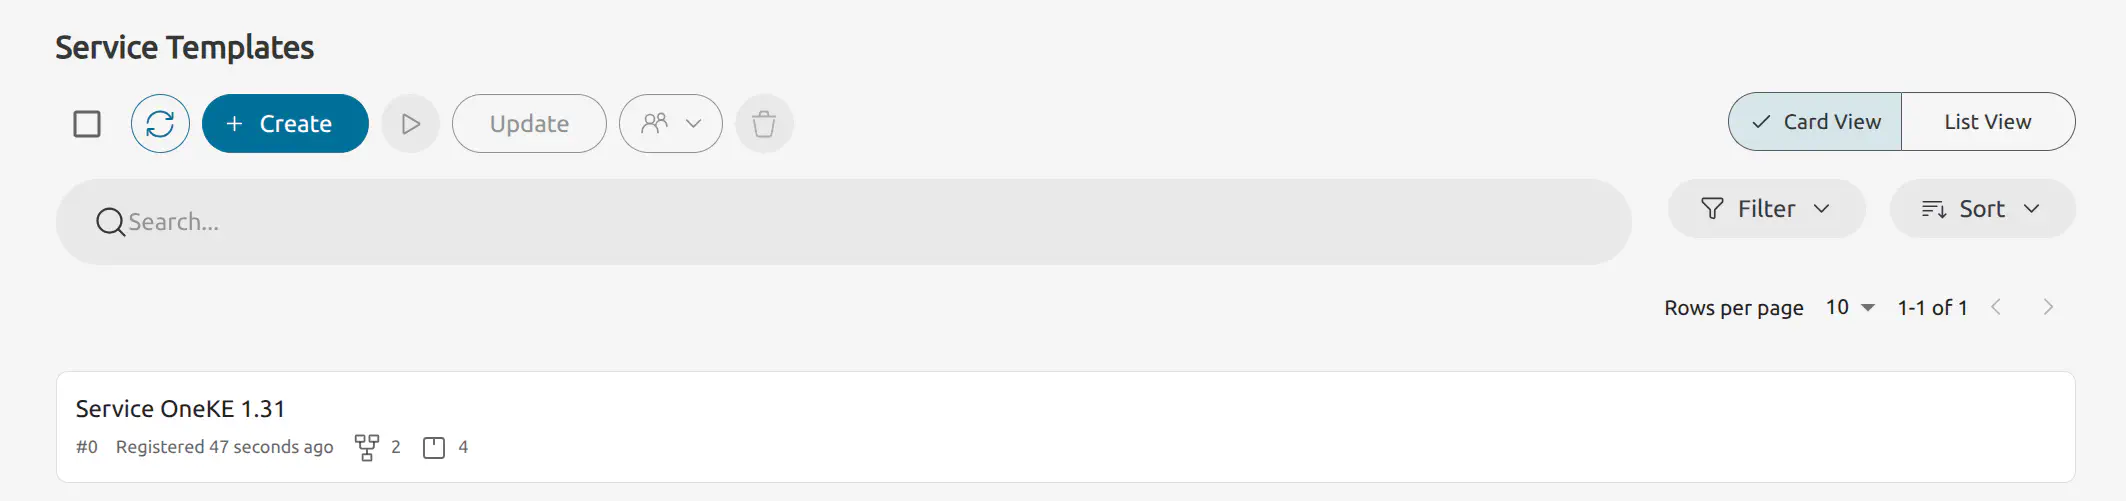
Click Finish. Sunstone will import the appliance template and display a message at bottom right. To see the imported template, in the left-hand menu select Templates -> Service Templates:
Step 2. Instantiate a Private Network on the Cloud Cluster
In this step we will create a new Virtual Network and assign a range of private IPs to it. The OneKE service uses this network for internal communication.
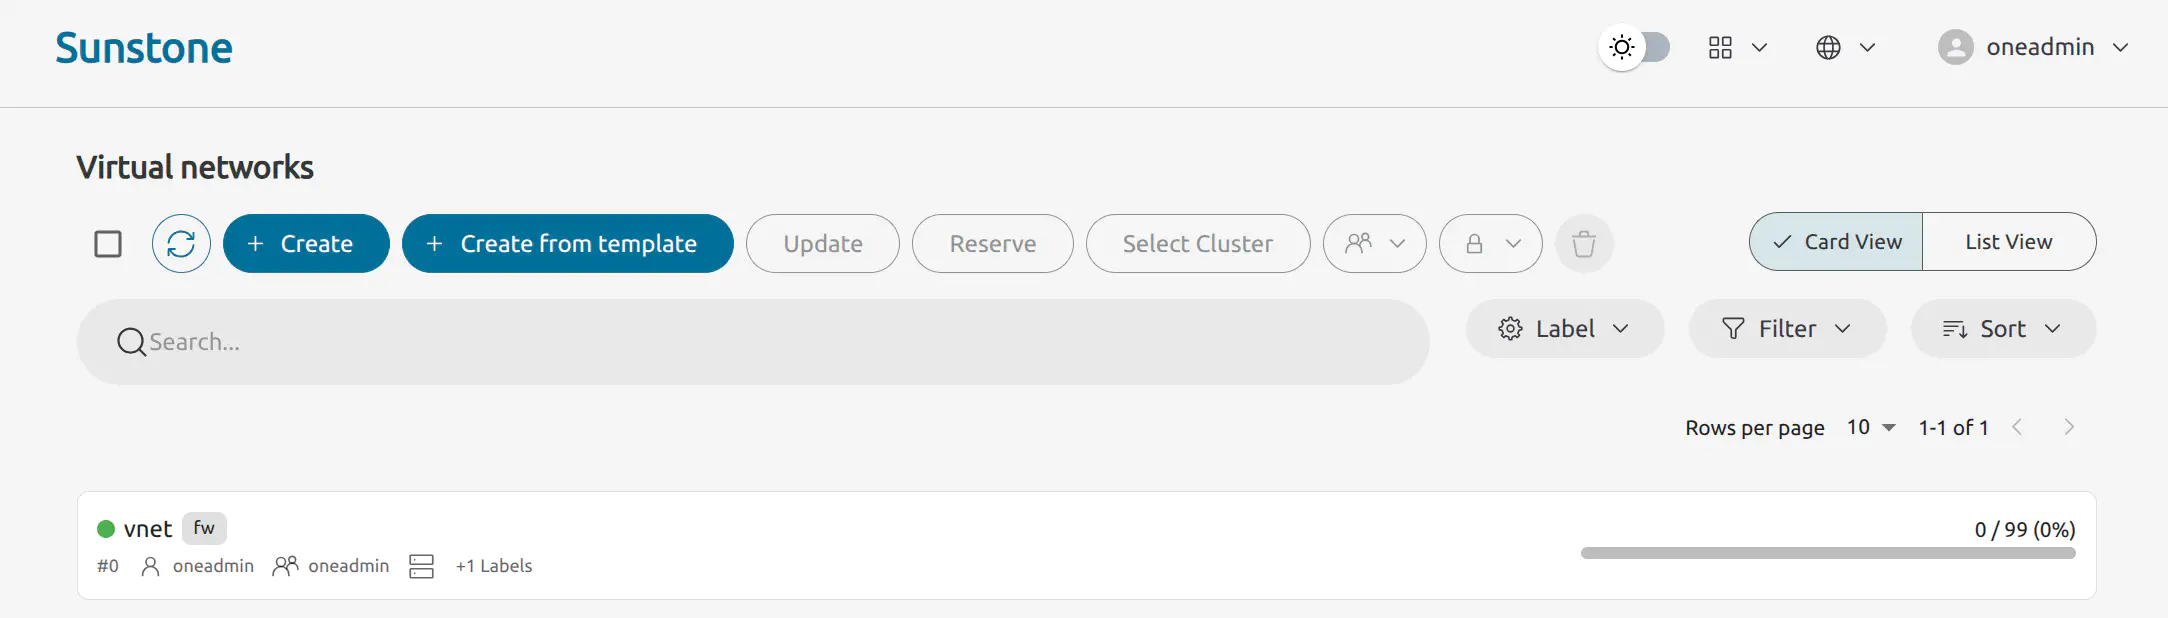
In Sunstone, open the left-hand pane, then select Networks -> Virtual Networks. Sunstone displays the Virtual networks page showing the network automatically created by miniONE:
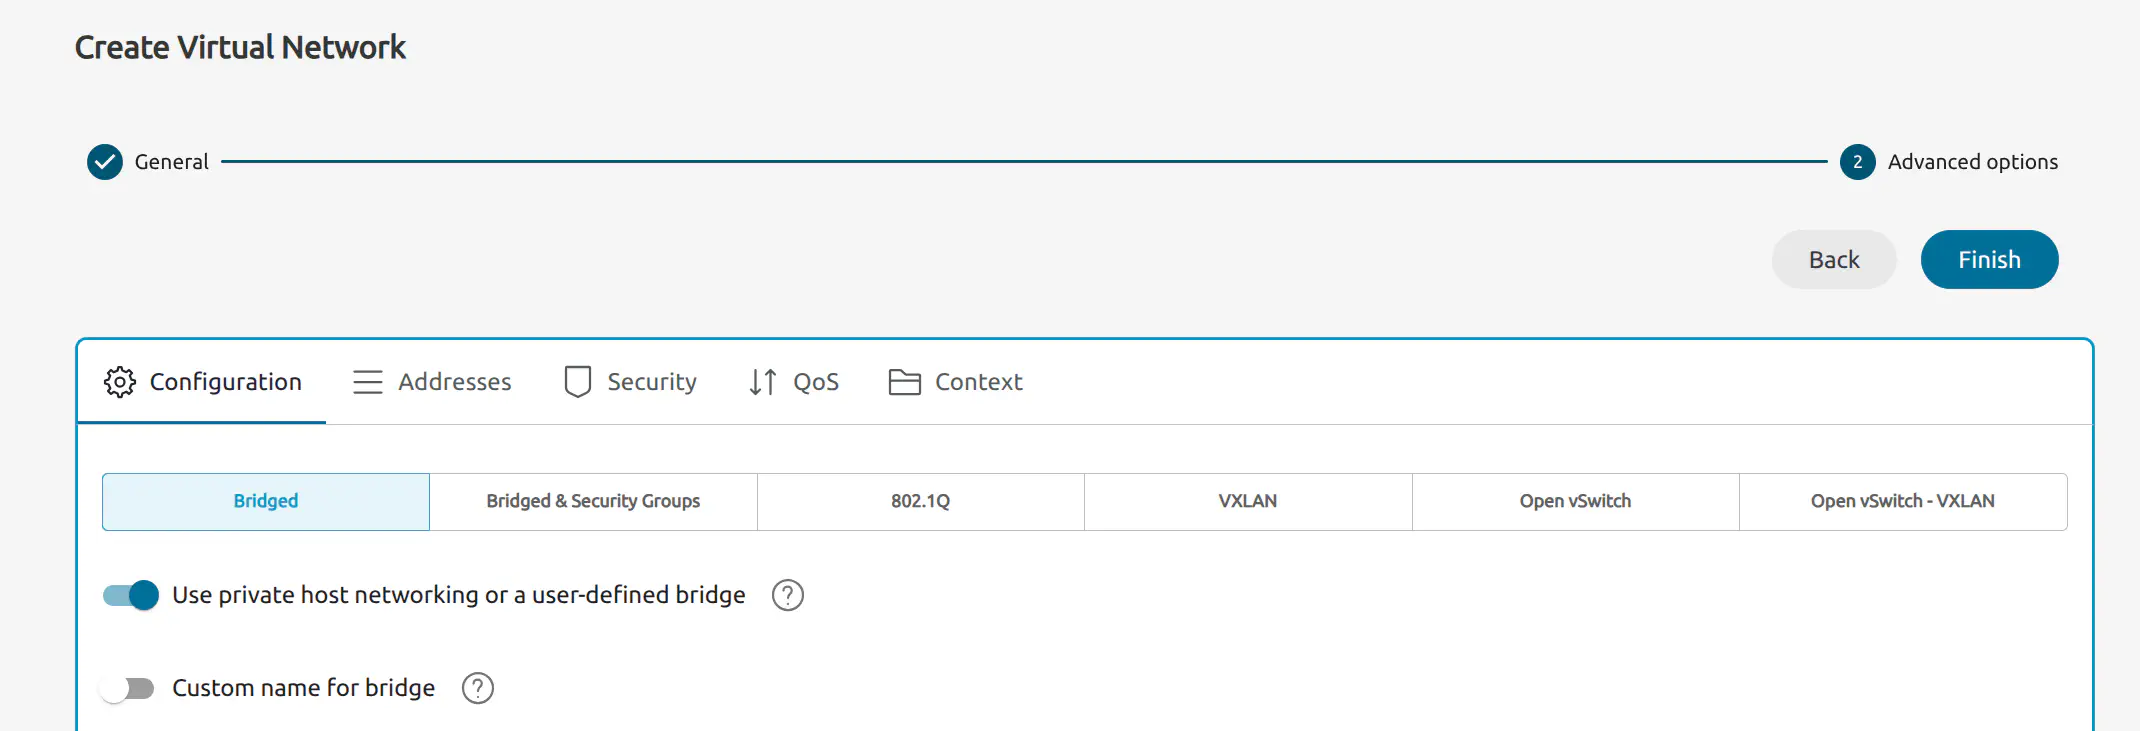
Click the Create button at the top. Sunstone will display the Create Virtual Network screen. Enter a name for the network – for this example we will use privnet. Then, click Next.
In the next screen, activate the Use private host networking or a user-defined bridge toggle:
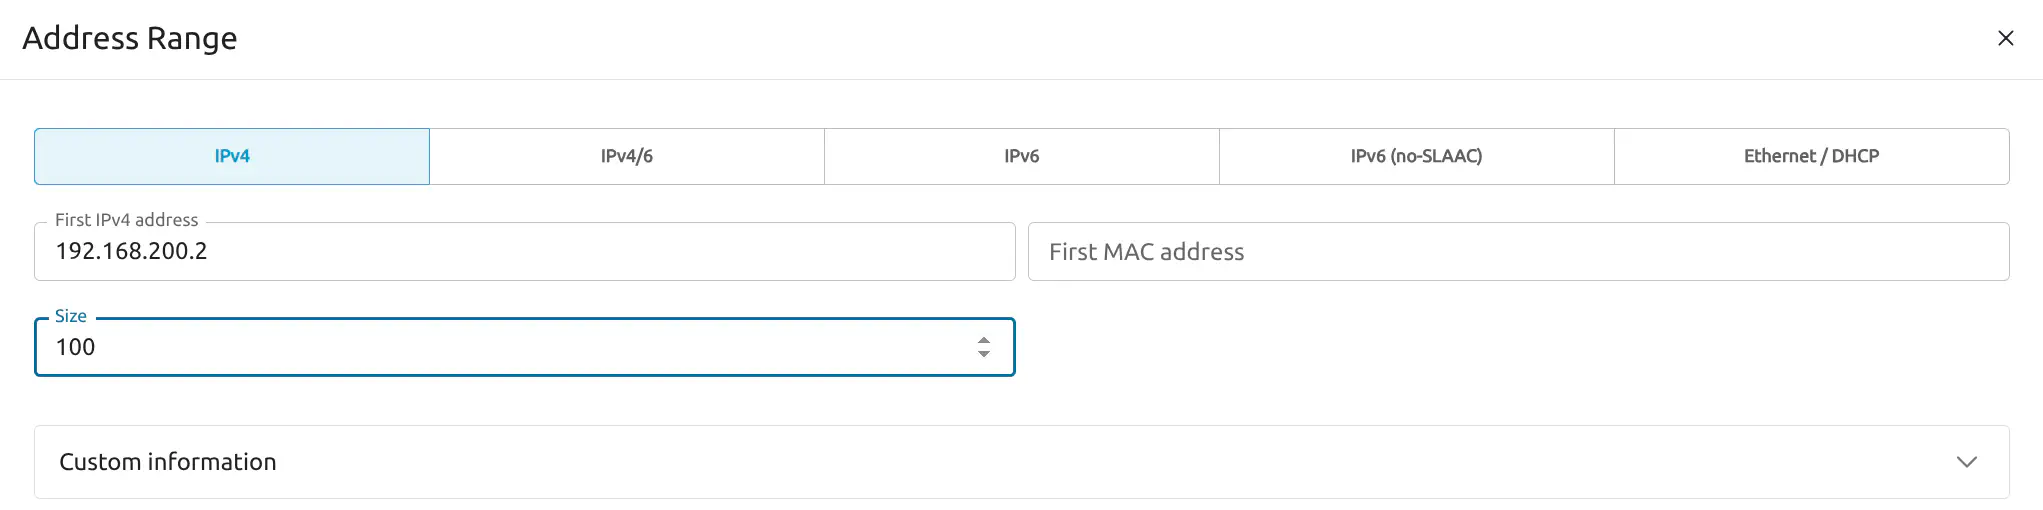
Next, click the Addresses tab and select + Address Range to add a new address range. For this example, enter 192.168.200.2 for the base network address, and set the network size to 100.
Click Finish. You will now see a new network item named privnet in the Virtual networks page.

Step 3. Instantiate the Kubernetes Service
In the left-hand pane, select Templates -> Service Templates. Select the Service OneKE 1.31 item, then click the Instantiate icon .
Sunstone now displays the Instantiate Service Template wizard. Leave the default name Service OneKE 1.31 and start a single instance.
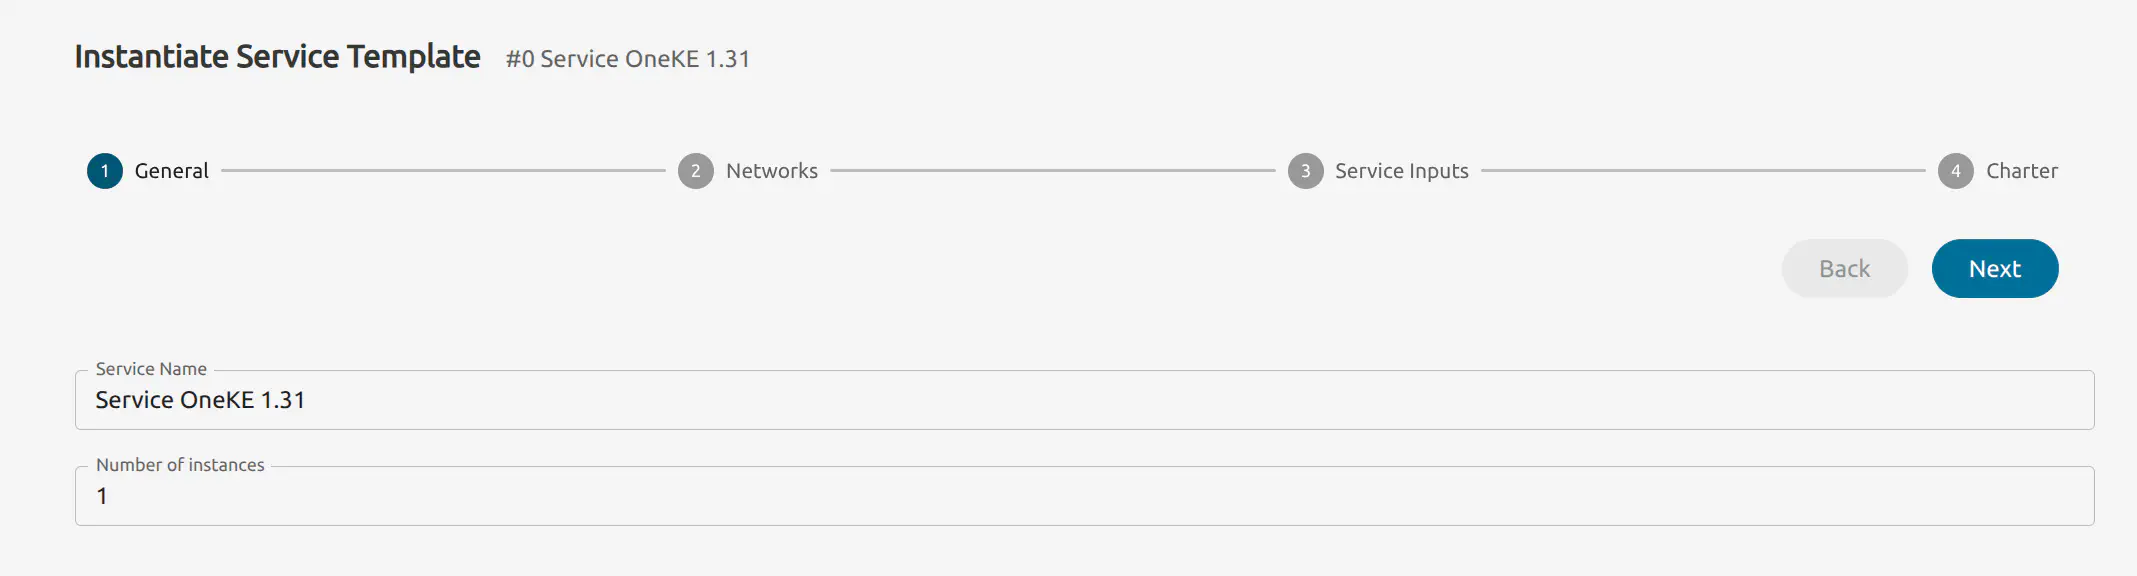
Click Next to go to the next step, Networks.
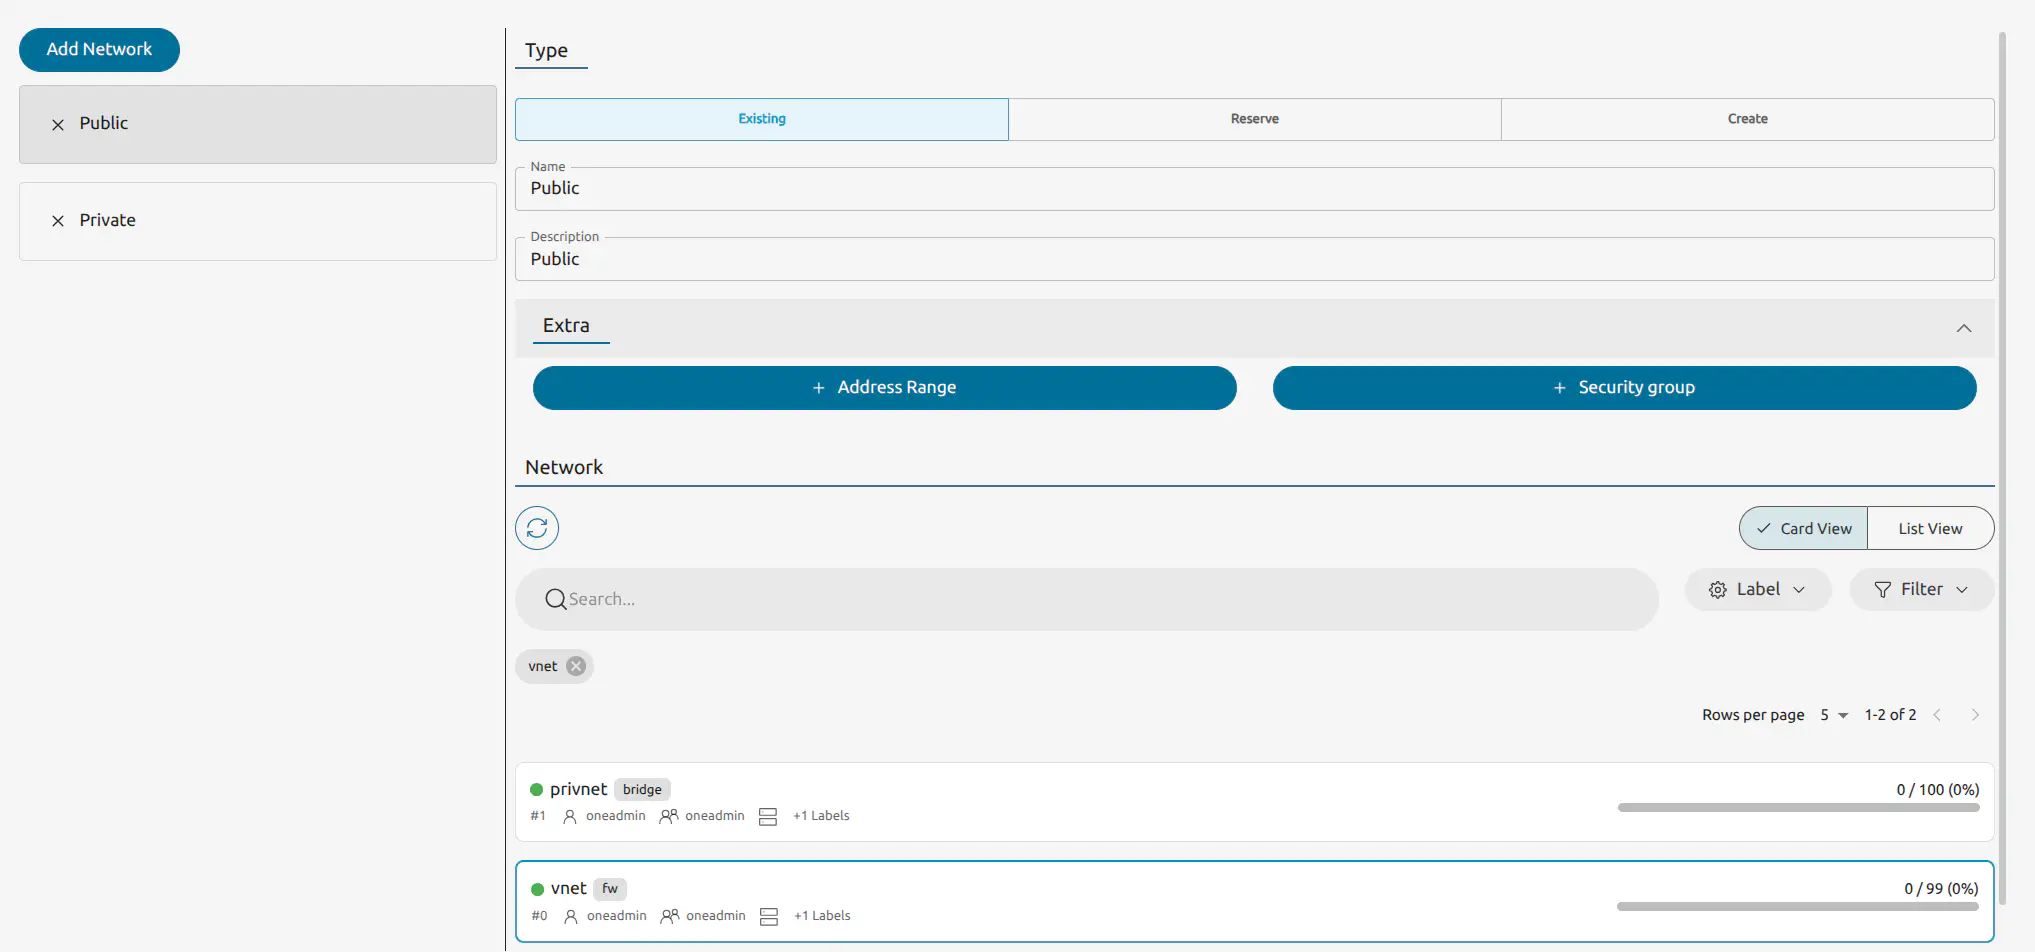
Select the Public item in the left hand column, then select the network labelled vnet in the right hand column. Select the Private item in the left hand column, then select the network labelled privnet in the right hand column.
Click Next. Sunstone displays the Service Inputs screen, select the Kubernetes Cluster tab:
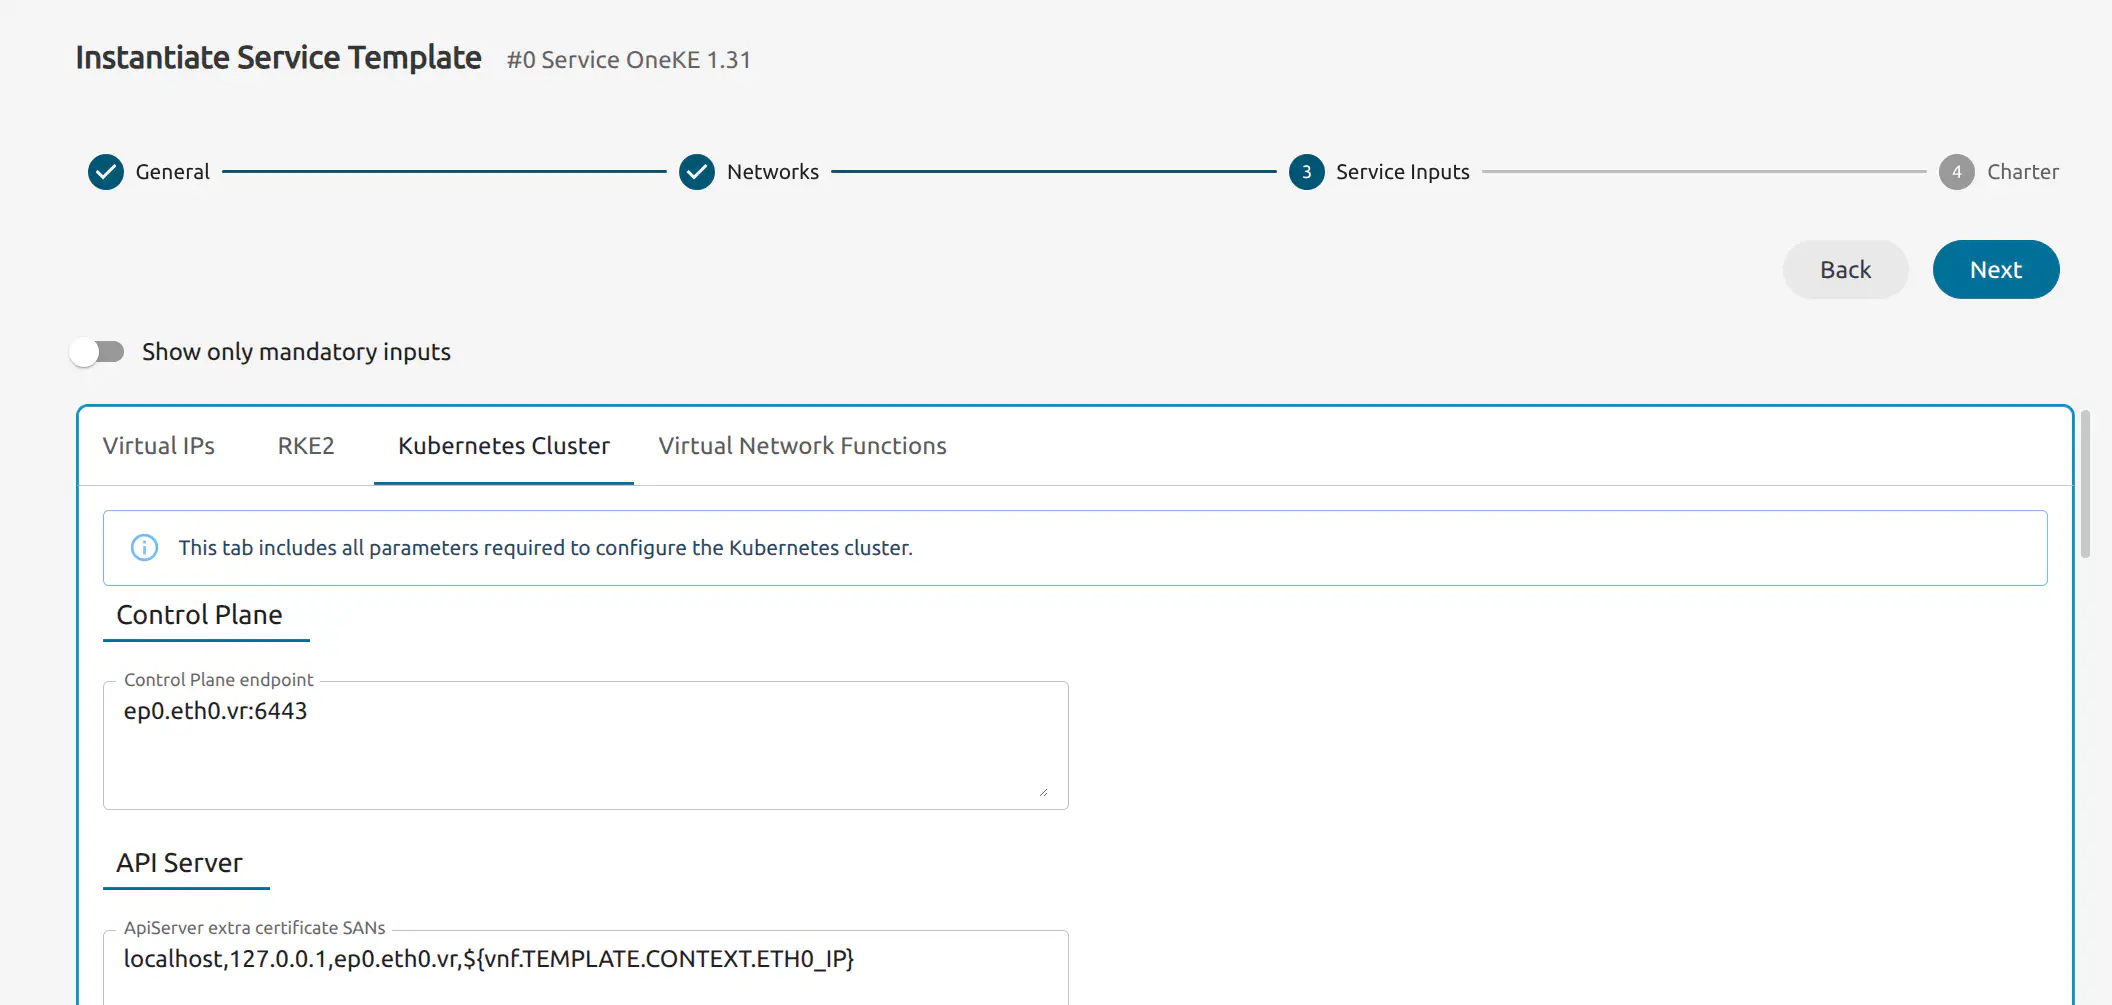
In this page you can define various parameters for the cluster, including a custom domain, plugins, VNF routers, storage options and others. For this tutorial we’ll apply a simple configuration with the following two features enabled:
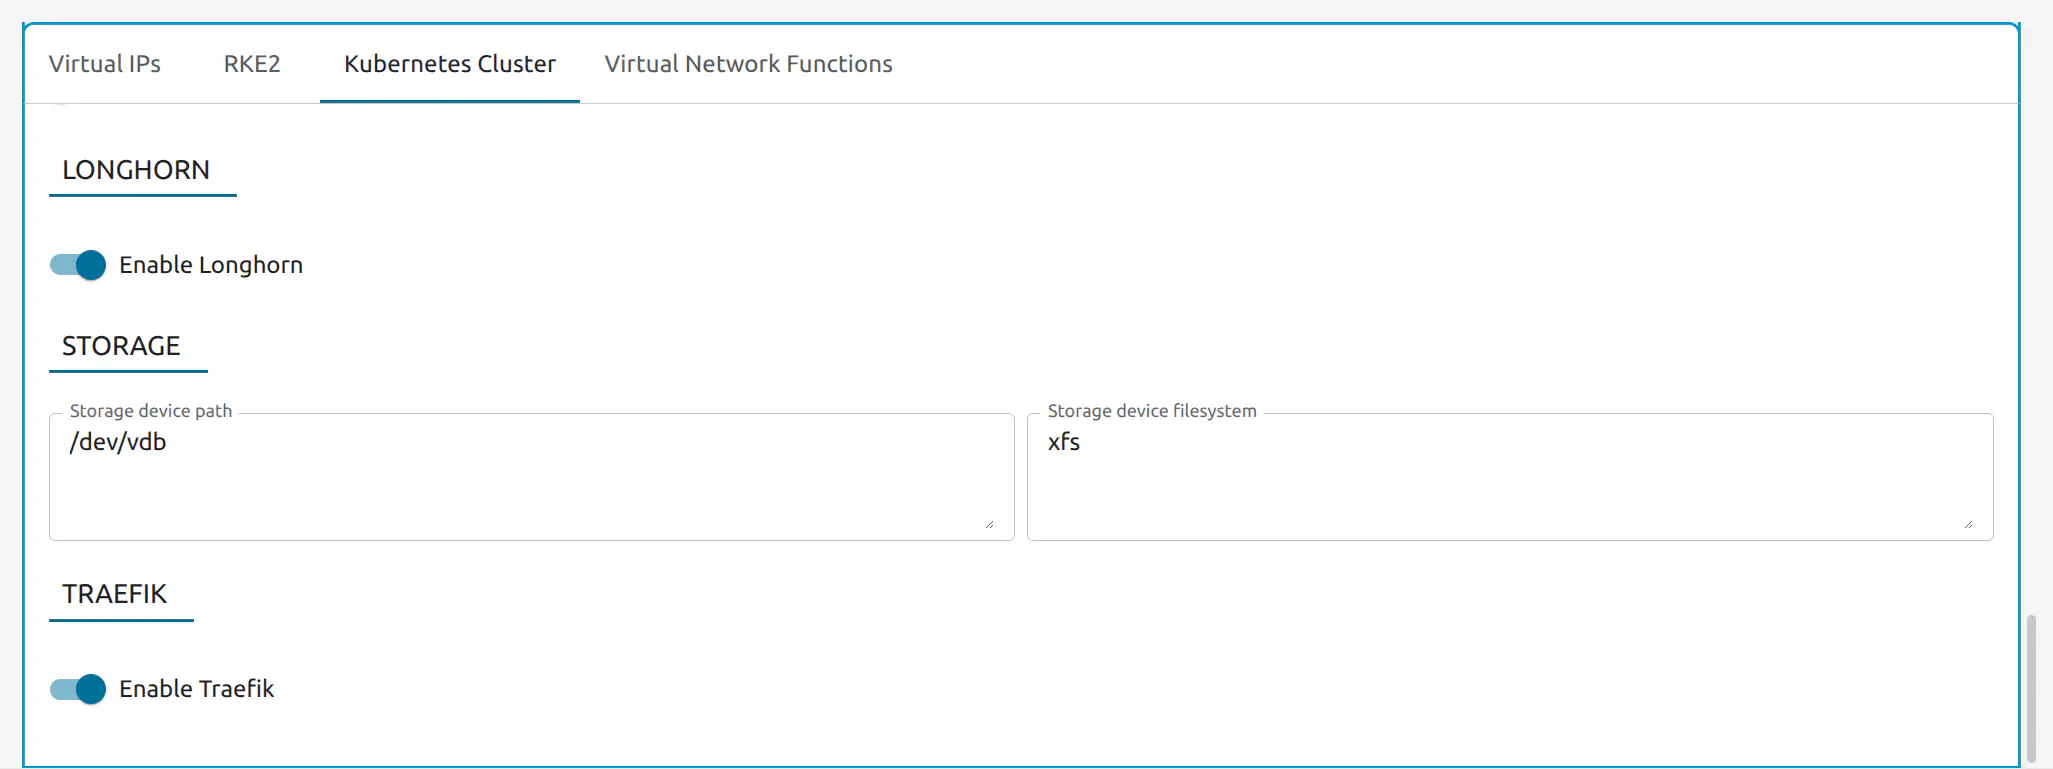
- Longhorn: A lightweight, cloud-native storage system that provides highly available persistent block storage by replicating data across your cluster nodes.
- Traefik: An automated edge router and ingress controller that handles external traffic and load balancing for your applications without manual configuration.
Scroll down to the end of the Kubernetes Cluster tab section and toggle Enable Longhorn and Enable Traefik to the enabled position:
Click Next. In the final step 4: Charter, no action is needed, click Finish. The OneKE appliance will now deploy VMs to initialize the Kubernetes cluster.
Verify the OneKE Service Deployment
To verify that the OneKE Service has correctly deployed, you can either use the Sunstone UI, or the command line of the Front-end server. The OneKE service may take 2-5 minutes to initialize.
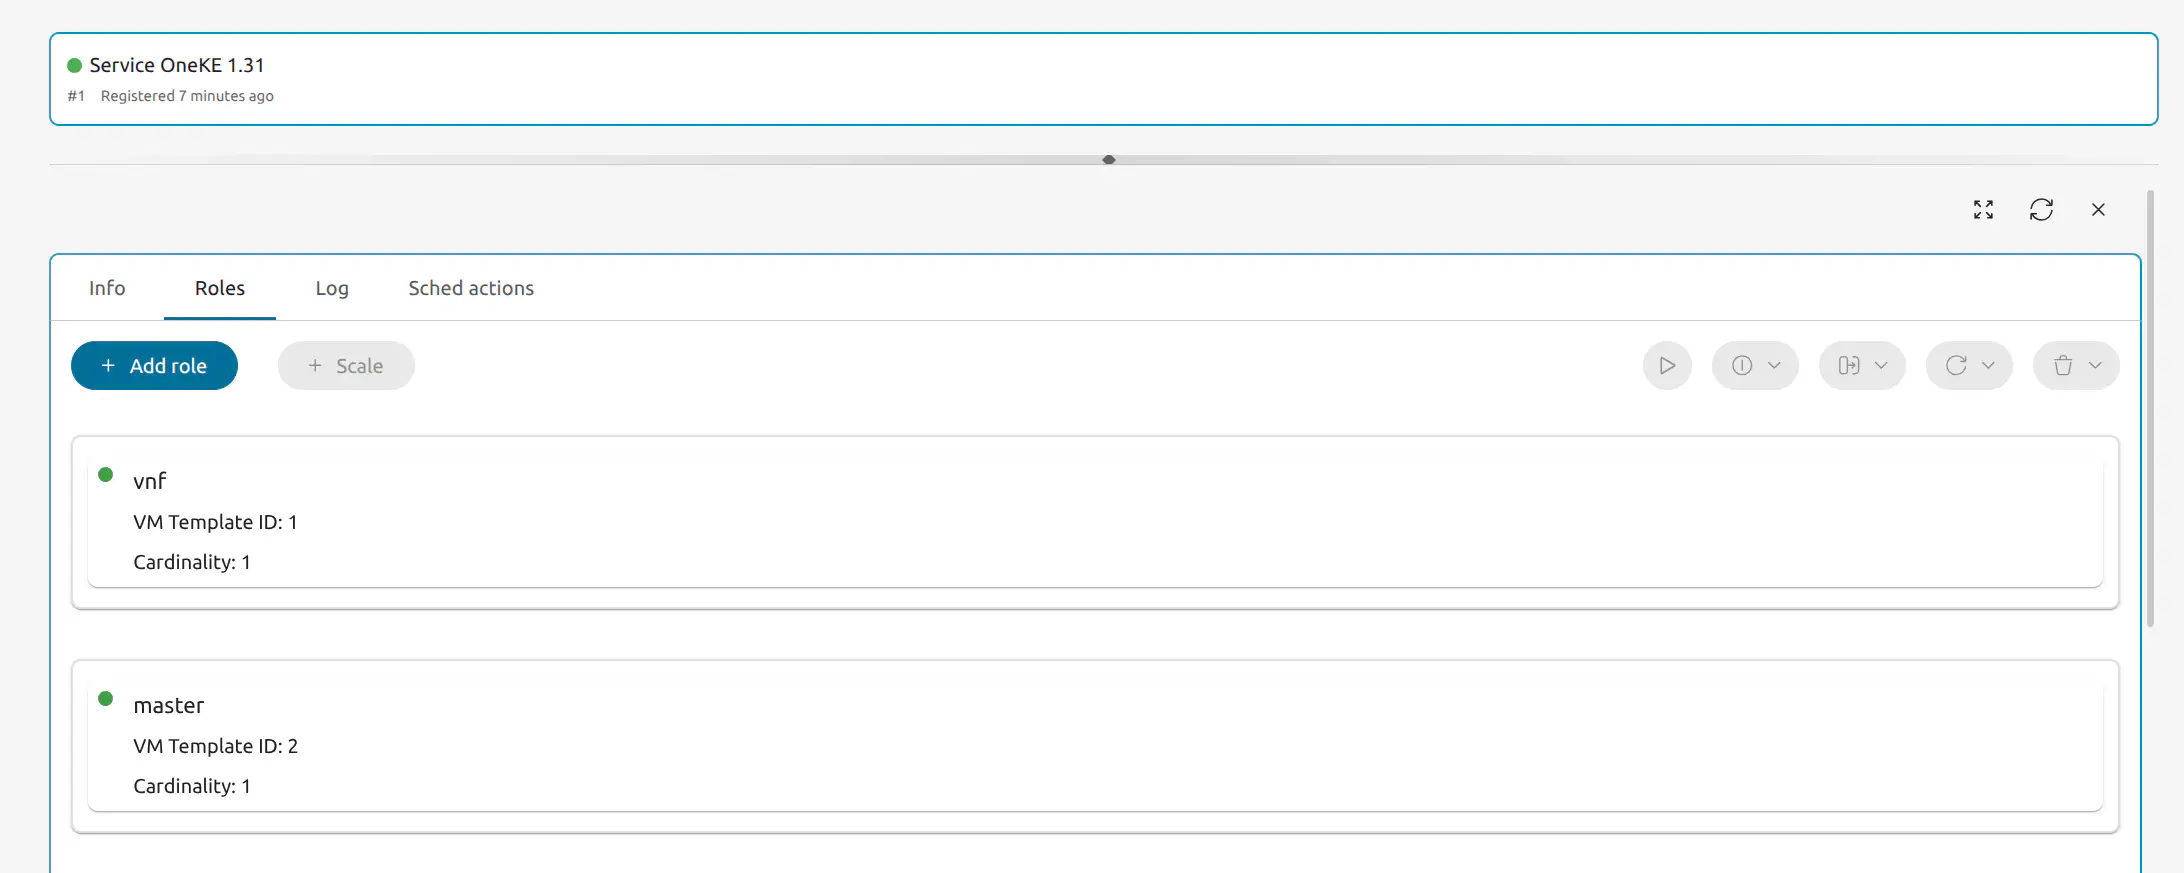
In the Sunstone GUI, open the left-hand pane, select Instances -> Services. You should see the OneKE service. Wait until the circle in front of the Service OneKE 1.31 label is green. You can click the refresh icon
The OneKE service’s VMs should be visible in the Roles tab:
You can also verify the deployment using the Front-end server’s command line. Open a terminal in the Front-end server then switch to the oneadmin user: sudo su - oneadmin. Run oneflow list. In the command line output, check that the STAT column displays RUNNING:
oneadmin@ip$ oneflow list
ID USER     GROUP    NAME                     ...             STARTTIME  STAT
1 oneadmin oneadmin Service OneKE 1.31        ...        04/29 08:18:17  RUNNING
To verify that the VMs for the cluster were correctly deployed, you can use the onevm list command that lists the existing VMs for the cluster:
oneadmin@ip$ onevm list
ID USER     GROUP    NAME                 ...   STAT  CPU     MEM HOST        ...       TIME
6 oneadmin oneadmin worker_0_(service_2)  ...   runn    2      3G localhost   ...   0d 00h00
5 oneadmin oneadmin master_0_(service_2)  ...   runn    2      3G localhost   ...   0d 00h00
4 oneadmin oneadmin vnf_0_(service_2)     ...   runn    1    512M localhost   ...   0d 00h00
At this point you have successfully instantiated the Kubernetes cluster on the KVM hypervisor node installed with your OpenNebula Front-end. If the state of the OneKE service as reported by oneflow list remains in DEPLOYING, see below.
Before deploying the test application described in this tutorial, you will need to find out the IP address of the VNF node on the public network – in this case, the vnet network that we set as public network when instantiating the OneKE service – since this is the address that we will use to connect to the application.
Check the IP Address for the VNF Node
In Sunstone
To check the VNF node IP in Sunstone, in the left-hand sidebar go to Instances -> VMs, this shows the VMs previously instantiated by the OneKE appliance. Check the information displayed in the item labeled vnf_0_(service_ID). In the image below, the relevant VM is is vnf_0_(service_1) and the relevant IP address is 172.16.100.2.

From the Command Line
To check the VNF node IP on the command line, on the Front-end server, as user oneadmin run:
onevm list
This command shows a list of the VMs instantiated by the OneKE service. Take note of the ID of the VNF VM:
ID USER     GROUP    NAME                  ...  STAT  CPU     MEM HOST       ...      TIME
 2 oneadmin oneadmin worker_0_(service_1)  ...  runn    2      3G localhost  ...  0d 15h59
 1 oneadmin oneadmin master_0_(service_1)  ...  runn    2      3G localhost  ...  0d 15h59
 0 oneadmin oneadmin vnf_0_(service_1)     ...  runn    1    512M localhost  ...  0d 15h59
Then run the following command to recover the IP address:
onevm show <VM ID> | less
This displays the complete information for the VM, piped through the less pager. Use the up and down arrow to scroll, until you find the VM NICS table:
VM NICS
 ID NETWORK              BRIDGE       IP              MAC               PCI_ID
  0 vnet                 minionebr    172.16.100.2    02:00:ac:10:64:02
  1 privnet              onebr1       192.168.200.2   02:00:c0:a8:c8:02
The relevant IP is the first displayed for the vnet network, 172.16.100.2. Press q to return to the command prompt.
If you do not see all VMs listed, or if the OneKE Service is stuck in DEPLOYING, see Known Issues below.
Step 4. Deploy an Application
In this tutorial we will deploy a very simple application designed for training purposes: a MariaDB database to which you can add sample data from the Kubernetes master. The database will reside in the Kubernetes cluster’s Longhorn storage, so the first step is to enable storage for the cluster.
Enable Longhorn Storage
Run oneflow list to recover OneKE’s service ID:
oneadmin@IP$ oneflow list
ID USER     GROUP    NAME               ...       STARTTIME STAT
1 oneadmin oneadmin Service OneKE 1.31  ...  04/29 08:18:17 RUNNING
Enable Longhorn storage with the following command, inserting the appropriate service ID:
oneflow scale <OneKE service ID> storage 1
This command instantiates a new VM that will manage the Longhorn storage for the Kubernetes cluster.
The command may take 2-5 minustes to complete. During that time the OneKE service will change state from RUNNING to SCALING to COOLDOWN and then back to RUNNING. You must wait until this cycle is finished to continue with the next steps. You can continuously check the status of the cluster by running (as oneadmin on the Front-end command line):
oneflow top
Once the status reverts from COOLDOWN to RUNNING return to the command prompt using Ctrl+C.
On the Front-end server, check the status of the newly-created storage on the command line VM with onevm list:
oneadmin@ip-172-31-47-22:~$ onevm list
  ID USER     GROUP    NAME                    ...   STAT  CPU   MEM HOST        ...       TIME
   7 oneadmin oneadmin storage_0_(service_1)   ...   runn    2    3G localhost   ...   0d 04h38
   6 oneadmin oneadmin worker_0_(service_1)    ...   runn    2    3G localhost   ...   0d 05h36
   5 oneadmin oneadmin master_0_(service_1)    ...   runn    2    3G localhost   ...   0d 05h36
   4 oneadmin oneadmin vnf_0_(service_1)       ...   runn    1  512M localhost   ...   0d 05h36
Log into the Master Node and Deploy the Application
First, we will need to connect to the Kubernetes master node via SSH. To this, we need to use the VNF node as “jump host”, i.e. we connect first to the VNF node and from there to the Kubernetes master node.
As we have seen above, in this example the IP address of the VNF is 172.16.100.2. With our network configuration, the IP address for the Kubernetes master node is probably 192.168.200.4 (the second IP address in the private network privnet that we assigned to the OneKE service). Of course if your configuration varies (for example if you installed additional networked Virtual Machines before deploying the OneKE service), then you will have to use the appropriate IPs.
To connect to the Kubernetes master node, from the Front-end, as user root run:
ssh -A -J root@172.16.100.2 root@192.168.200.4
An example run as user root:
root@ip-172-31-47-22:~# ssh -A -J 172.16.100.2 192.168.200.4
Warning: Permanently added '172.16.100.2' (ED25519) to the list of known hosts.
The authenticity of host '192.168.200.3 (<no hostip for proxy command>)' can't be
established.

...
...

8 updates can be applied immediately.
8 of these updates are standard security updates.
To see these additional updates run: apt list --upgradable

1 additional security update can be applied with ESM Apps.
Learn more about enabling ESM Apps service at https://ubuntu.com/esm


The list of available updates is more than a week old.
To check for new updates run: sudo apt update


   ___   _ __    ___
  / _ \ | '_ \  / _ \   OpenNebula Service Appliance
 | (_) || | | ||  __/
  \___/ |_| |_| \___|


 2/3 Configuration step is in progress...

 * * * * * * * *
 * PLEASE WAIT *
 * * * * * * * *
In the above example the Kubernetes master is self-configuring, hence the “PLEASE WAIT” message. Once the cluster is ready, you will see a message: All set and ready to serve 8)
Once you have connected to the Kubernetes master node, check if kubectl is working, by running kubectl get nodes:
root@oneke-ip-192-168-200-4:~# kubectl get nodes
NAME                     STATUS   ROLES                       AGE     VERSION
oneke-ip-192-168-200-4   Ready    control-plane,etcd,master   5h32m   v1.31.3+rke2r1
oneke-ip-192-168-200-6   Ready    <none>                      5h32m   v1.31.3+rke2r1
oneke-ip-192-168-200-8   Ready    <none>                      4h38m   v1.31.3+rke2r1
The last row in the output is the storage role in the cluster created in the previous step, with IP 172.168.200.8.
Now we are ready to download and deploy our example application.
We can download the application from the master node itself, by running:
wget https://github.com/alpeon/training-files/raw/refs/heads/main/OneKE/test-app.tar
This downloads the test-app.tar package file. Unpack it with:
tar -xvf test-app.tar
This creates the test-app directory, which contains the YAML manifest files we will use to deploy the application.
Switch to the test-app directory:
cd test-app
Create all of the applications in the directory:
kubectl apply -f .
This will output something similar to the following:
root@oneke-ip-192-168-200-4:~/test-app# kubectl apply -f .
deployment.apps/mariadb created
persistentvolumeclaim/mariadb-data created
service/mariadb created
deployment.apps/test-app created
ingressroute.traefik.io/test-app-ingress created
service/test-app-service created
Check the status of the applications:
kubectl get pods
This should display the status of the database and the test-app application:
NAME                        READY   STATUS    RESTARTS   AGE
mariadb-55496464b6-66kl9    1/1     Running   0          45s
test-app-56b5745c76-bxxld   1/1     Running   0          45s
The process may take a few minutes to complete. When both pods display status Running, you are ready to connect to the application.
Connect to the Application
From the Front-end node, as user oneadmin run curl <VNF node IP>. In our case:
curl 172.16.100.2
You should be greeted with:
oneadmin@ip-172-31-47-22:~$ curl 172.16.100.2
<!DOCTYPE html>
<html lang="en">

<head>
  <meta charset="UTF-8">
  <meta http-equiv="X-UA-Compatible" content="IE=edge">
  <meta name="viewport" content="width=device-width, initial-scale=1.0">
  <title>Spaceship: Nebula Explorer</title>
</head>

<body>

  <div>
      <h1>
        'sup Space Man, want to explore some Nebula?
      </h1>

      <div>
        Visit /create-db to create the database
        <br>
        Visit /insert-dummy to insert some dummy data
        <br>
        Visit /get-data to print out the dummy data

        </div>

        <div>
          <h2>
            See you, Space Cowboy!
          </h2>
          <pre>
          ⠀⠀⠀⠀⠀⠀⠀⠀⠀⠀⠀⠀⠀⠀⠀⠐⢦⣤⣤⣤⣄⣤⣾⣿⣿⣿⣿⣿⣿⣿⣿⣿⣿⣿⣿⣿⣿⣿⣿⣿⣿⣿⣿⣿⣿⣿⣿⣽⣿⢨⡿⠟⠛⣻⣿⣿⣿⣿⣿⣿⣿⣿⣿⣿⣿
          ⠀⠀⠀⠀⠀⠀⠀⠀⠀⠀⠀⠀⠀⢲⣤⣤⣀⣾⣿⣿⣿⣿⣿⣿⣿⣿⣿⣿⣿⣿⣿⣿⣿⣿⣿⣿⣿⣿⣿⣿⣿⣿⣿⣿⣿⣿⣿⣿⣿⣿⣿⣉⠻⣿⣿⣿⣿⣿⡏⠉⠉⠉⠉⢩⣿
          ⠀⠀⠀⠀⠀⠀⠀⠀⠀⠀⠀⠀⠀⢈⣩⣿⣿⣿⣿⣿⣿⣿⣿⣿⣿⣿⣿⣿⣿⣿⣿⣿⣿⣿⣿⣿⣿⣿⣿⣿⣿⣿⣿⣿⣿⣿⣿⣿⣿⣿⣿⣿⣷⣶⡭⢝⣻⣿⣿⣿⣷⣿⣿⣿⣿
          ⠀⠀⠀⠀⠀⠀⠀⠀⠀⠀⠠⢤⣾⣿⣿⣿⣿⣿⣿⣿⣿⣿⣿⣿⣿⣿⣿⣿⣿⣿⣿⣿⣿⣿⣿⣿⣿⣿⣿⣿⣿⣿⣿⣿⣿⣿⣿⣿⣿⣿⣿⣿⣿⣿⣿⣿⣯⣭⡿⠛⣻⣿⣿⣿⣿
          ⠀⠀⠀⠀⠀⠀⠀⠀⠀⠀⠀⢠⣿⣿⣿⣿⣿⣿⣿⣿⣿⣿⣿⣿⣿⣿⣿⣿⣿⣿⣿⣿⣿⣿⣿⣿⣿⣿⣿⣿⣿⣿⣿⣿⣿⣿⣿⣿⣿⣿⣿⣿⣿⣿⣿⣿⣿⣿⣶⣿⣻⣿⣿⣿⣿
          ⠀⠀⠀⠀⠀⠀⠀⠀⠀⠀⣰⣿⣿⣿⣿⣿⣿⣿⣿⣿⣿⣿⣿⣿⣿⣿⣿⣿⣿⣿⣿⣿⣿⣿⣿⣿⣿⣿⣿⣿⣿⣿⣿⣿⣿⣿⣿⣿⣿⣿⣿⣿⣿⣿⣿⣿⣿⣿⣷⣶⣶⣥⣬⣭⣿
          ⠀⠀⠀⠀⠀⠀⠀⠀⠰⠚⣿⣿⣿⣿⣿⣿⣿⣿⣿⣿⣿⣿⣿⣿⣿⣿⣿⣿⣿⣿⣿⣿⣿⣿⣿⣿⣿⣿⣿⣿⣿⣿⣿⣿⣿⣿⣿⣿⣿⣿⣿⣿⣿⣿⣿⣿⣿⣿⣿⣿⣿⣯⡍⠹⠿
          ⠀⠀⠀⠀⠀⠀⠀⢀⣴⣿⣿⣿⣿⣿⣿⣿⣿⣿⣿⣿⣿⣿⣿⣿⣿⣿⣿⣿⣿⣿⣿⣿⣿⣿⣿⣿⣿⣿⣿⣿⣿⣿⣿⣿⣿⣿⣿⣿⣿⣿⣿⣿⣿⣿⣿⣿⣿⣿⣿⣿⡇⣴⣶⣶⣾
          ⠀⠀⠀⡄⠀⠀⣠⢟⣾⣿⣿⣿⣿⣿⣿⣿⣿⣿⣿⣿⣿⣿⣿⣿⣿⣿⣿⣿⣿⡿⣿⣿⣿⣿⠋⢻⣿⣿⣿⣿⣿⣿⣿⣿⣿⣿⣿⣿⣿⣿⣿⣿⣿⣿⣿⣿⣿⣿⣿⣿⡇⢛⡛⣹⣿
          ⠀⠀⠀⣷⡀⠀⢱⠟⢻⣿⣿⣿⣿⣿⣿⣿⡿⢫⣽⣿⣿⣿⣿⣿⣿⣿⣏⢹⠏⣼⣿⣟⣛⣙⡒⣾⣿⣀⢹⣿⣿⣿⣿⣿⣿⣿⣿⣿⣿⣿⣿⣿⣿⣿⣿⣿⣿⣿⣿⣿⠿⢛⣣⣿⣿
          ⡄⠀⢀⣿⣇⣤⣾⢾⣿⣿⣿⣿⣿⣿⣿⣿⡇⣾⢿⣿⣿⣿⣿⣿⣿⣿⢿⣇⠀⠙⠿⠿⣿⡏⠛⢿⡮⠙⢻⡿⢡⣿⣿⣿⣿⣿⣿⣿⣿⣿⣿⣿⣿⣿⣿⣿⣿⣿⣭⢶⣿⡿⣿⣿⣿
          ⣇⠀⢸⣿⡏⠁⠀⣾⣿⣿⣿⣿⣿⣿⣿⣿⣧⢧⡸⡿⠟⣿⣿⣿⣿⣿⠈⣿⠀⠀⠀⠀⠀⠀⠀⠬⡷⠖⠋⣠⣾⣿⣿⣿⣿⣿⣿⣿⣿⣿⣿⣿⣿⣿⣿⡿⠿⠋⠁⠀⠙⠻⢶⣍⡛
          ⡿⢿⡇⢹⡿⢦⡀⠙⠛⢿⣿⣿⣿⣿⣿⣿⣿⣎⢻⡛⠂⣿⣿⡿⠙⠃⠈⠁⠀⠀⠀⠀⠀⠀⠀⠀⠀⠀⠈⠁⠀⣿⡟⢛⣦⣹⣿⣿⣿⣿⣿⣿⣿⣿⣷⣶⠾⠀⠀⠀⠀⠀⠀⠉⠻
          ⣦⣿⡉⠻⣿⣯⠹⠀⣐⢦⣿⣿⣿⣿⣿⣿⣿⣿⣷⣄⣠⠘⢿⣷⣄⡀⠀⠀⠀⠀⠀⠀⠀⠀⠀⠀⠀⠀⠀⠀⠀⣿⢿⠟⢠⣿⣿⣿⣿⣿⣿⢿⡛⠋⠁⠀⠀⠀⠀⠀⠀⠀⠀⠀⠀
          ⢻⠙⢿⣦⡈⠛⣄⡀⠈⠀⠉⠛⣿⣿⣿⣿⣿⣿⣿⣿⣿⣧⢸⠇⠀⠀⠀⠀⠀⠀⠀⠀⠀⠀⠀⠀⠀⠀⠀⠀⠀⠸⠄⠀⣾⣿⣿⣿⣿⣿⠛⠛⠛⠀⠀⠀⠀⠀⠀⠀⠀⠀⠀⠀⠀
          ⠘⠀⠀⠙⢻⣶⣄⠙⢦⡀⠀⠀⠈⠹⣿⣿⣿⣿⣿⣿⣿⣿⣧⠀⠀⠀⠀⠀⠀⠀⠀⠀⠀⠀⠀⠀⠀⠀⢀⠀⠀⢀⡆⣼⣿⣿⣿⢻⡍⠁⠀⠀⠀⠀⠀⠀⠀⠀⠀⠀⠀⠀⠀⠀⠀
          ⠀⠀⠀⠀⠀⠈⠻⢷⣄⠈⠦⡀⣀⣴⢶⣿⣟⠛⠫⠍⠉⠉⠉⠙⠛⠛⠛⠛⠛⠛⠛⠛⢻⣿⣟⡽⠶⠚⢿⣷⡾⠋⡰⠋⢹⣟⠙⢷⠁⠀⠀⠀⠀⠀⠀⠀⠀⠀⠀⠀⠀⠀⠀⠀⠀
          ⠀⠀⠀⠀⠀⢀⣀⣀⠻⢿⡟⠉⠻⠶⠧⠄⠀⠀⠀⠀⠀⠀⠀⠀⠀⠀⠀⠀⠀⠀⣠⣶⠿⢯⡥⣤⠤⣤⣀⣻⢅⡴⠃⠀⢸⠛⠀⠀⠀⠀⠀⠀⠀⠀⠀⠀⠀⠀⠀⠀⠀⠀⠀⠀⠀
          ⠀⠀⣀⠀⢰⣿⡿⠿⢧⣤⣾⡿⠛⠻⢿⡛⠲⢤⣀⠀⠀⠀⠀⠀⠀⠀⠀⠀⣠⢾⡿⠋⠀⠠⣄⣈⢛⣄⡹⣧⡞⠀⠀⠀⠀⠀⠀⠀⠀⠀⠀⠀⠀⠀⠀⠀⠀⠀⠀⠀⠀⠀⠀⠀⠀
          ⠀⠀⠈⠁⢺⣿⡇⣠⣶⣿⣿⣿⣿⣿⣿⣿⣷⣶⣭⡳⢤⡀⠀⠀⠐⢤⣠⢞⣵⠋⠀⠀⠀⠀⠈⠛⠿⠋⣹⣾⡛⠶⣄⠀⠀⠀⠀⠀⠀⠀⠀⠀⠀⠀⠀⠀⠀⠀⠀⠀⠀⠀⠀⠀⠀
          ⠀⠀⠀⠀⣸⣿⣾⣿⣿⣿⣿⣿⣿⣿⣿⣿⣿⣿⣿⣿⣷⢿⣷⣶⣶⣿⣵⣿⣿⣷⣄⠀⠀⠀⠀⠀⠀⣼⠃⠀⠙⠲⡌⠳⣄⠀⠀⠀⠀⣀⡤⠶⠶⠦⣤⣀⠀⢀⣀⡀⠀⠀⠀⠀⠀
          ⠀⣠⣴⣾⣿⣿⣿⣿⣿⣿⣿⣿⣿⣿⣿⣿⣿⣿⣿⣿⣿⣷⣝⣿⣧⣝⣻⡿⣿⣿⣿⣷⣦⣄⣀⣀⣼⣿⡷⣄⠀⠀⠙⢦⣸⣧⠔⣛⣿⠷⠋⠙⠲⠶⣄⠉⠉⠀⠀⠀⠀⠀⠀⠀⠀
          ⣼⣿⣿⣿⣿⣿⣿⣿⣿⣿⣿⣿⣿⣿⣿⣿⣿⣿⣿⣿⣿⣿⣿⣿⣝⢿⣄⣉⣷⢬⣿⣿⣿⣿⣿⣿⣿⣿⠿⠿⣷⣄⠀⠀⠛⠛⠛⠉⠀⠀⠀⠀⠀⠀⠈⢷⡄⠀⠀⠀⠀⠀⠀⠀⠀
          ⣿⣿⣿⣿⣿⣿⣿⣿⣿⣿⣿⣿⣿⣿⣿⣿⣿⣿⣿⣿⣿⣿⣿⣿⣿⣆⠹⣿⣷⣿⣿⣿⣿⣿⡿⠛⠉⠀⠀⠀⠈⠛⢷⣤⣀⠀⠀⠀⠀⠀⠀⠀⠀⠀⠀⠀⠹⣄⢀⠀⠀⠀⠀⠀⠀
          ⣿⣿⣿⣿⣿⣿⣿⣿⣿⣿⣿⣿⣿⣿⣿⣿⣿⣿⣿⣿⣿⣿⣿⣿⣿⣿⣆⠈⠻⣿⣿⣿⣿⣮⡳⣄⠀⠀⠀⠀⠀⠀⠀⠈⠛⠛⠲⢤⣀⠀⠀⠀⠀⠀⠀⠀⠀⠈⠻⣶⡄⠀⠀⠀⠀
          ⣿⣿⣿⣿⣿⣿⣿⣿⣿⣿⣿⣿⣿⣿⣿⣿⣿⣿⣿⣿⣿⣿⣿⣿⣿⣿⣿⣷⣄⠘⣿⣿⣏⠉⠻⣽⣧⣤⣴⣖⣲⠶⠬⠽⠿⠶⠖⠷⣬⡉⠉⠂⠀⠀⠀⠀⠀⠀⠀⠀⠉⠓⠶⠶⡂
          ⣿⣿⣿⣿⣿⣿⣿⣿⣿⣿⣿⣿⣿⣿⣿⣿⣿⣿⣿⣿⣿⣿⣿⣿⣿⣿⣿⣿⣿⡃⠈⢻⣿⢧⢀⣠⣙⣻⣿⣿⣿⣷⣄⠀⠀⠀⠀⡀⣿⡇⠀⠀⠀⠀⠀⠀⠀⠀⠀⠀⠀⠀⠀⠀⠀
          ⣿⣿⣿⣿⣿⣿⣿⣿⣿⣿⣿⣿⣿⣿⣿⣿⣿⣿⣿⣿⣿⣿⣿⣿⣿⣿⣿⣿⣿⣿⣾⣿⣿⣤⠟⢿⣿⣿⣿⣿⣿⣿⣿⣷⣄⠀⢰⡷⣿⣇⣀⣀⣀⣴⣶⣤⣀⠀⠀⠀⠀⠀⠀⠀⠀
          ⣿⣿⣿⣿⣿⣿⣿⣿⣿⣿⣿⣿⣿⣿⣿⣿⣿⣿⣿⣿⣿⣿⣿⣿⣿⣿⣿⣿⣿⣿⣿⣿⣿⡟⠇⠀⢻⣿⣿⣿⣿⣿⣿⣿⣿⡗⢒⣋⣉⣉⣭⣏⠻⣶⡖⢽⣏⠳⣤⡀⠀⠀⠀⠀⠀
          ⣿⣿⣿⣿⣿⣿⣿⣿⣿⣿⣿⣿⣿⣿⣿⣿⣿⣿⣿⣿⣿⣿⣿⣿⣿⣿⣿⣿⣿⣿⣿⣿⣿⣿⣄⠀⠈⣿⡿⣿⣿⣿⣿⣿⣿⣷⣾⣿⣿⣿⡏⠉⠳⢤⡉⢺⣿⡆⠀⠉⠂⠀⠀⠀⠀
          ⣿⣿⣿⣿⣿⣿⣿⣿⣿⣿⣿⣿⣿⣿⣿⣿⣿⣿⣿⣿⣿⣿⣿⣿⣿⣿⣿⣿⣿⣿⣿⣿⣿⣿⣿⣷⡀⣹⣿⣶⣝⠿⣿⣿⣿⢿⣿⣿⣿⣿⡇⠀⠀⠀⠙⣾⣿⢻⡄⠀⠀⠀⠀⠀⠀
          ⣿⣿⣿⣿⣿⣿⣿⣿⣿⣿⣿⣿⣿⣿⣿⣿⣿⣿⣿⣿⣿⣿⣿⣿⣿⣿⣿⣿⣿⣿⣿⣿⣿⣿⣿⣿⣿⣿⠙⣿⣿⣷⣌⠛⢿⣌⢻⣿⣿⣿⣿⣷⣴⡤⠀⣿⣿⢰⣿⠀⠀⠀⠀⠀⠀
          ⣿⣿⣿⣿⣿⣿⣿⣿⣿⣿⣿⣿⣿⣿⣿⣿⣿⣿⣿⣿⣿⣿⣿⣿⣿⣿⣿⣿⣿⣿⣿⣿⣿⣿⣿⣿⣿⣿⣧⡘⢿⣿⣿⣿⣦⡙⠿⣿⣿⣿⣿⣿⣿⠀⠀⣿⣿⣾⣿⣷⠀⠀⠀⠀⠀
        </pre>
Now we can create the database with:
curl 172.16.100.2/create-db
This should return the following:
oneadmin@ip-172-31-47-282:~$ curl 172.16.100.2/create-db
{"message":"Table 'data' created successfully"}
To insert some dummy data into the database:
curl 172.16.100.2/insert-dummy
Repeat this command to insert multiple data points. Then, verify the inserted data with:
curl 172.16.100.2/get-data
This will output data in JSON format, for example:
oneadmin@ip-172-31-47-22:~$ curl 172.16.100.2/get-data
[{"data1":"2025-06-23 11:51:27","data2":"50","id":1},{"data1":"2025-06-23 11:51:54","data2":"63","id":2},{"data1":"2025-06-23 11:52:09","data2":"84","id":3}]
And that’s it – you have successfully deployed a Kubernetes cluster, and deployed and tested an application.
For more information including additional features for the OneKE Appliance, please refer to the OpenNebula Apps Documentation.
Known Issues
OneFlow Service is Stuck in DEPLOYING
An error in network configuration, or any major failure (such as network timeouts or performance problems) can cause the OneKE service to lock up due to a communications outage between it and the Front-end node. The OneKE service will lock if any of the VMs belonging to it does not report READY=YES to OneGate within the default time.
If one or more of the VMs in the Kubernetes cluster never leave the DEPLOYING state, you can troubleshoot OneFlow communications by inspecting the file /var/log/one/oneflow.log on the Front-end node. Look for a line like the following:
[E]: [LCM] [one.document.info] User couldn't be authenticated, aborting call.
The line above means that provisioning the service exceeded the allowed time. In this case it is not possible to recover the broken VM instance; it must be recreated.
Before attempting to recreate the instance, ensure that your environment has a good connection to the public Internet and does not suffer from any impairments in performance.
To recreate the VM instance, you must first terminate the OneKE service. A service stuck in DEPLOYING cannot be terminated by the delete operation. To terminate it, you need to run the following command:
oneflow recover --delete <service_ID>
Then, re-instantiate the service from the Sunstone UI: in the left-hand pane, Service Templates -> OneKE 1.31, then click the Instantiate icon.
One or more VMs Fail to Report Ready
Another possible cause for failure of the OneKE Service to leave the DEPLOYING state is that a temporary network glitch or other variation in performance prevented one or more of the VMs in the service to report READY to the OneGate service. In this case, it is possible that you see all of the VMs in the service up and running, but the OneKE service is stuck in DEPLOYING.
For example on the Front-end, the output of onevm list shows all VMs running:
oneadmin@ip-172-31-47-22:~$ onevm list
  ID USER     GROUP    NAME                                             STAT  CPU     MEM HOST                                   TIME
   6 oneadmin oneadmin worker_0_(service_2)                             runn    2      3G localhost                          0d 01h36
   5 oneadmin oneadmin master_0_(service_2)                             runn    2      3G localhost                          0d 01h36
   4 oneadmin oneadmin vnf_0_(service_2)                                runn    1    512M localhost                          0d 01h37
Yet oneflow list indicates the OneKE service is DEPLOYING:
ID USER     GROUP    NAME                                                                   STARTTIME STAT
 2 oneadmin oneadmin OneKE 1.31                                                        06/20 12:30:07 DEPLOYING
In this case you can manually instruct the VMs to report READY to the OneGate server. Follow these steps:
From the Front-end node, log in to the VNF node as user
root, by running:ssh root@<VNF IP>(To find out the IP address of the VNF node, see above.)
For each VM in the OneKE service, run:
onegate vm update <ID> --data "READY=YES"For each VM, use the ID reported by the
onevm listcommand. For example, given theonevmoutput shown above, to update the Kubernetes master node runonegate vm update 5 --data "READY=YES".Then, on the VNF node you can check the status of the service with
onegate vm show:SERVICE 3 NAME : OneKE 1.31 STATE : RUNNING ROLE vnf VM 1 NAME : vnf_0_(service_2) ROLE master VM 2 NAME : master_0_(service_2) ROLE worker VM 3 NAME : worker_0_(service_2) ROLE storageOn the Front-end, run
oneflow listagain to verify that the service reportsRUNNING:[oneadmin@FN]$ oneflow list ID USER GROUP NAME STARTTIME STAT 2 oneadmin oneadmin OneKE 1.31 08/30 12:35:21 RUNNING
One or more VMs is Ready, but Unreachable
As in the previous situation, here onevm list shows all VMs running, but the service is stuck in DEPLOYING; additionally, the VNF VM is not reachable through SSH – and hence you cannot run the onegate vm update command.
In this case, we can try to scale down and up the role of the problematic VM from Sunstone, web UI:
- In Sunstone, go to Services, then select the OneKE Service.
- In the Roles tab, choose the problematic VM’s role (e.g.
worker).- Scale the role to
0.- Wait until VM shuts down and the scaling and cooldown period of the service finishes.
- Scale the role to
1.- Verify if the problem is solved and
oneflow listreports theRUNNINGstate.
We value your feedback
Was this information helpful?
Glad to hear it
Sorry to hear that