Managing Kubernetes with Rancher and the Cluster API Integration
Overview
In this tutorial, we will deploy a Kubernetes cluster using the Kubernetes Cluster API (CAPI) and the Rancher Kubernetes management platform through the OpenNebula Kubernetes (CAPI) appliance.
To follow this tutorial, you must first complete the miniONE installation with either on-prem resources meeting the relevant hardware requirements or an AWS c5.metal instance:
During this tutorial you will complete the following high-level steps:
- Configure a public and private network on the Front-end
- Download the CAPI Appliance
- Instantiate the CAPI Appliance
- Connect to the Rancher UI
- Deploy an OpenNebula RKE2 cluster
- Import the cluster into Rancher
Additionally, you will perform various operations on the workload cluster:
- Install Longhorn
- Deploy an Nginx service
- Add a worker node to the cluster
- Upgrade the workload cluster to the newest version
OpenNebula’s CAPI Appliance
OpenNebula’s Kubernetes (CAPI) appliance provides a ready-to-use solution for managing Kubernetes clusters through the Rancher web UI. The appliance is fully integrated to support OpenNebula as an infrastructure provider via the Cluster API Provider for OpenNebula.
This tutorial demonstrates how the CAPI appliance eliminates the need for extensive manual configuration – it allows you to create, manage, and upgrade CAPI-managed RKE2 clusters in a simple way, reducing operational overhead.
Step 1. Configure the Networks on the Front-end
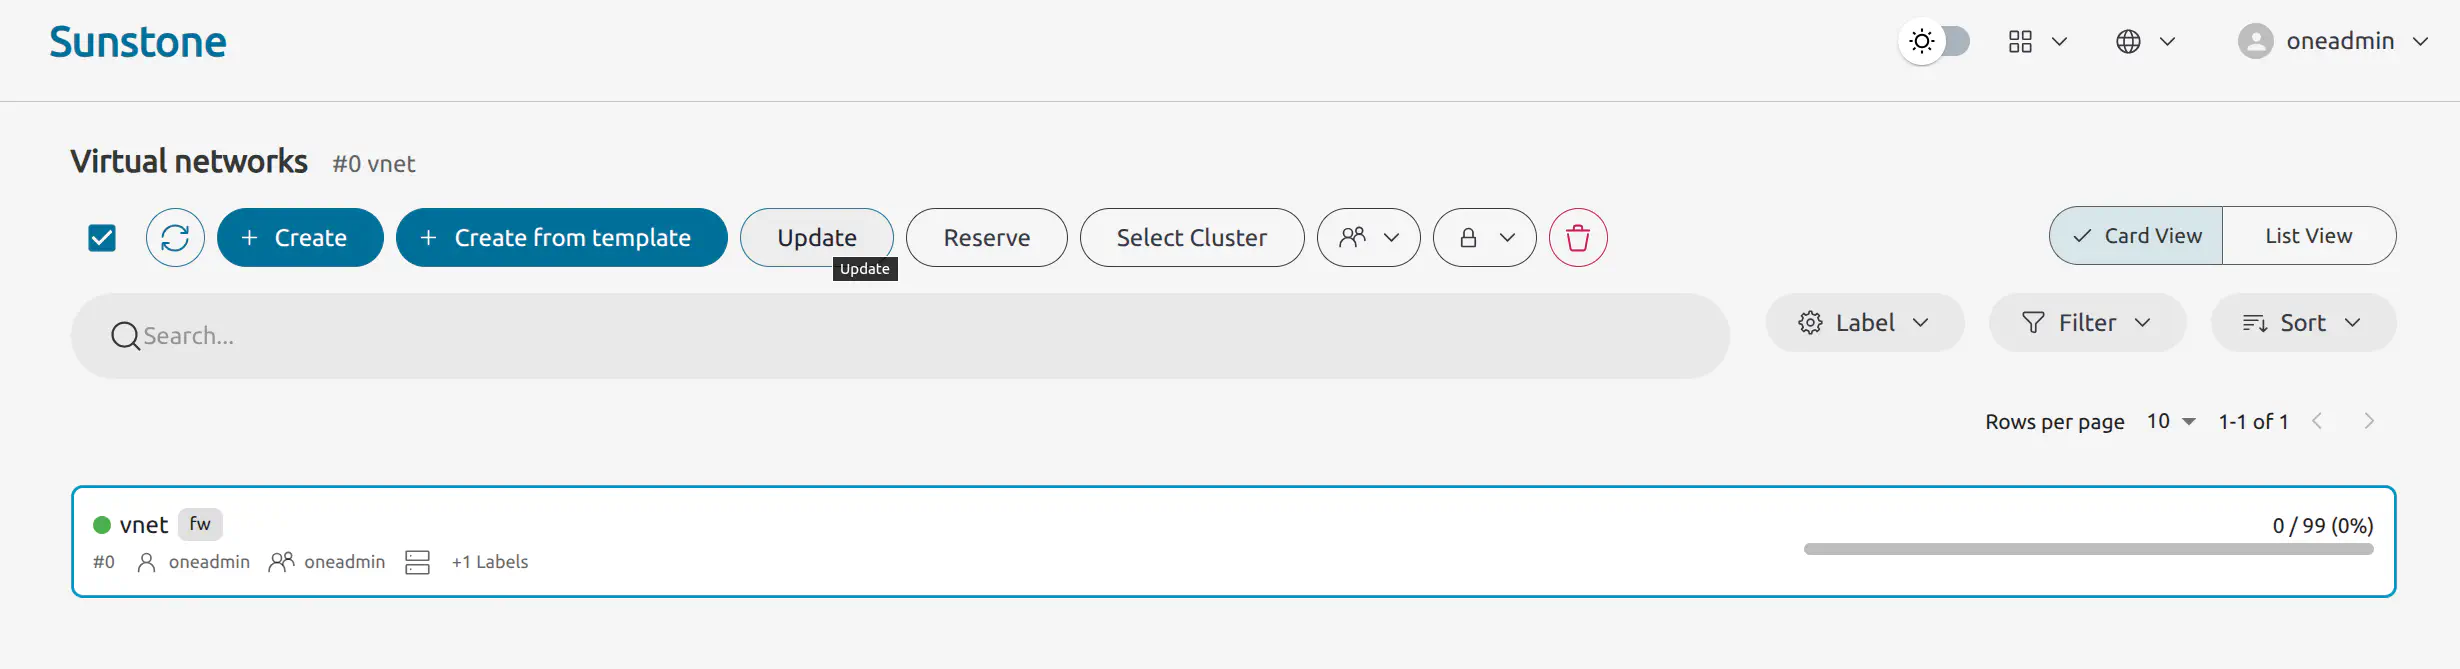
For the CAPI appliance to function correctly, we need to modify the configuration of the default public network and add a new private network. Go to Networks -> Virtual networks.
Modify the Default Public Network
Select the default public network named vnet. Click Update at the top of the screen:
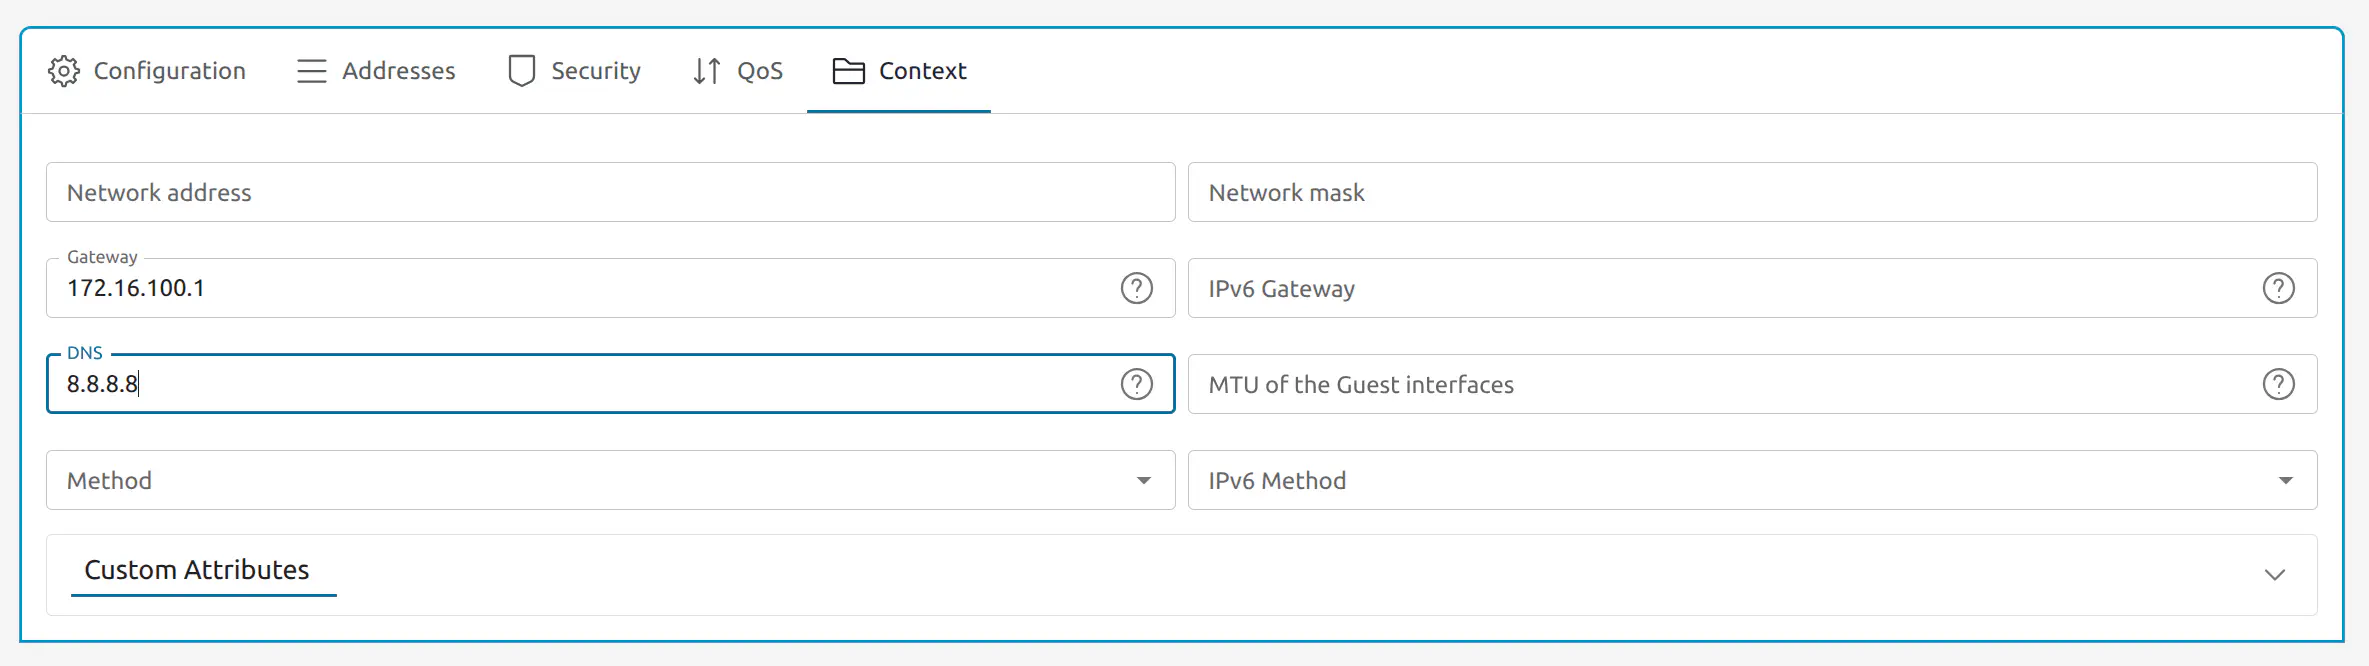
Click Next to go to Advanced options then in the Context tab change the DNS field to 8.8.8.8 and then click Finish:
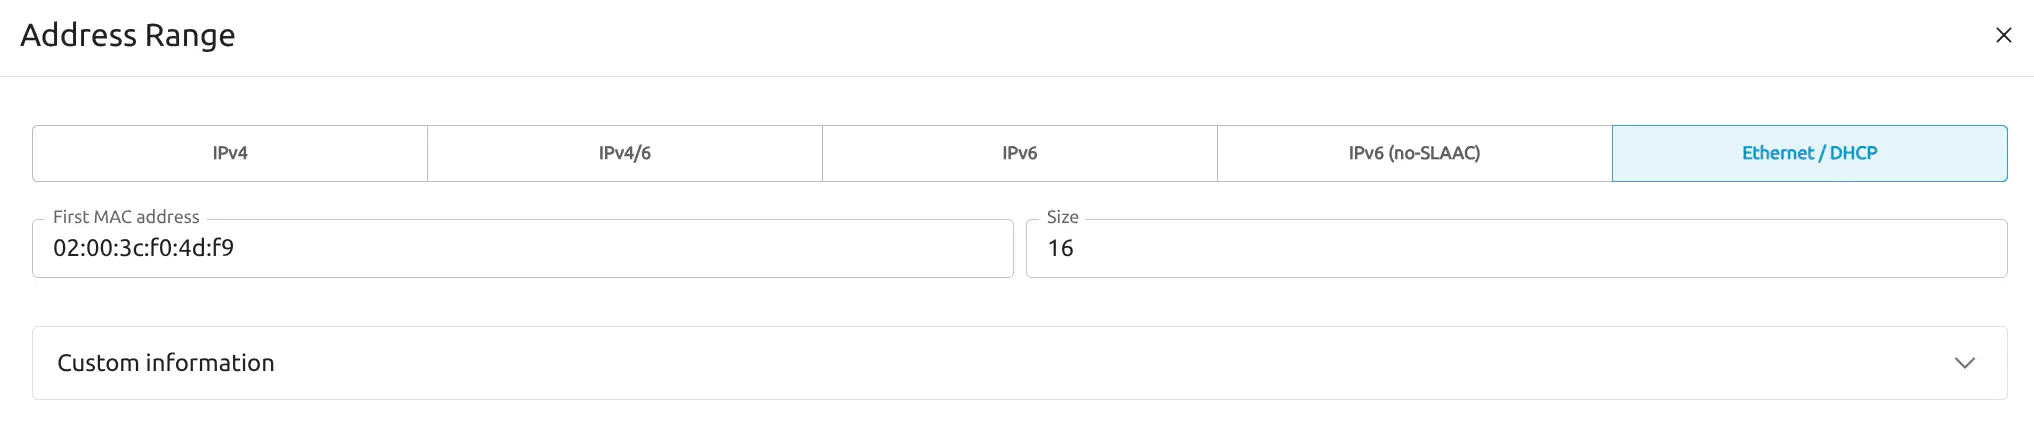
From the Virtual networks page, select vnet again if it is not already selected and in the Address tab click + Address Range. Select Ethernet / DHCP and enter 02:00:3c:f0:4d:f9 in the First MAC address field, set the size to 16:
Add a Private Network
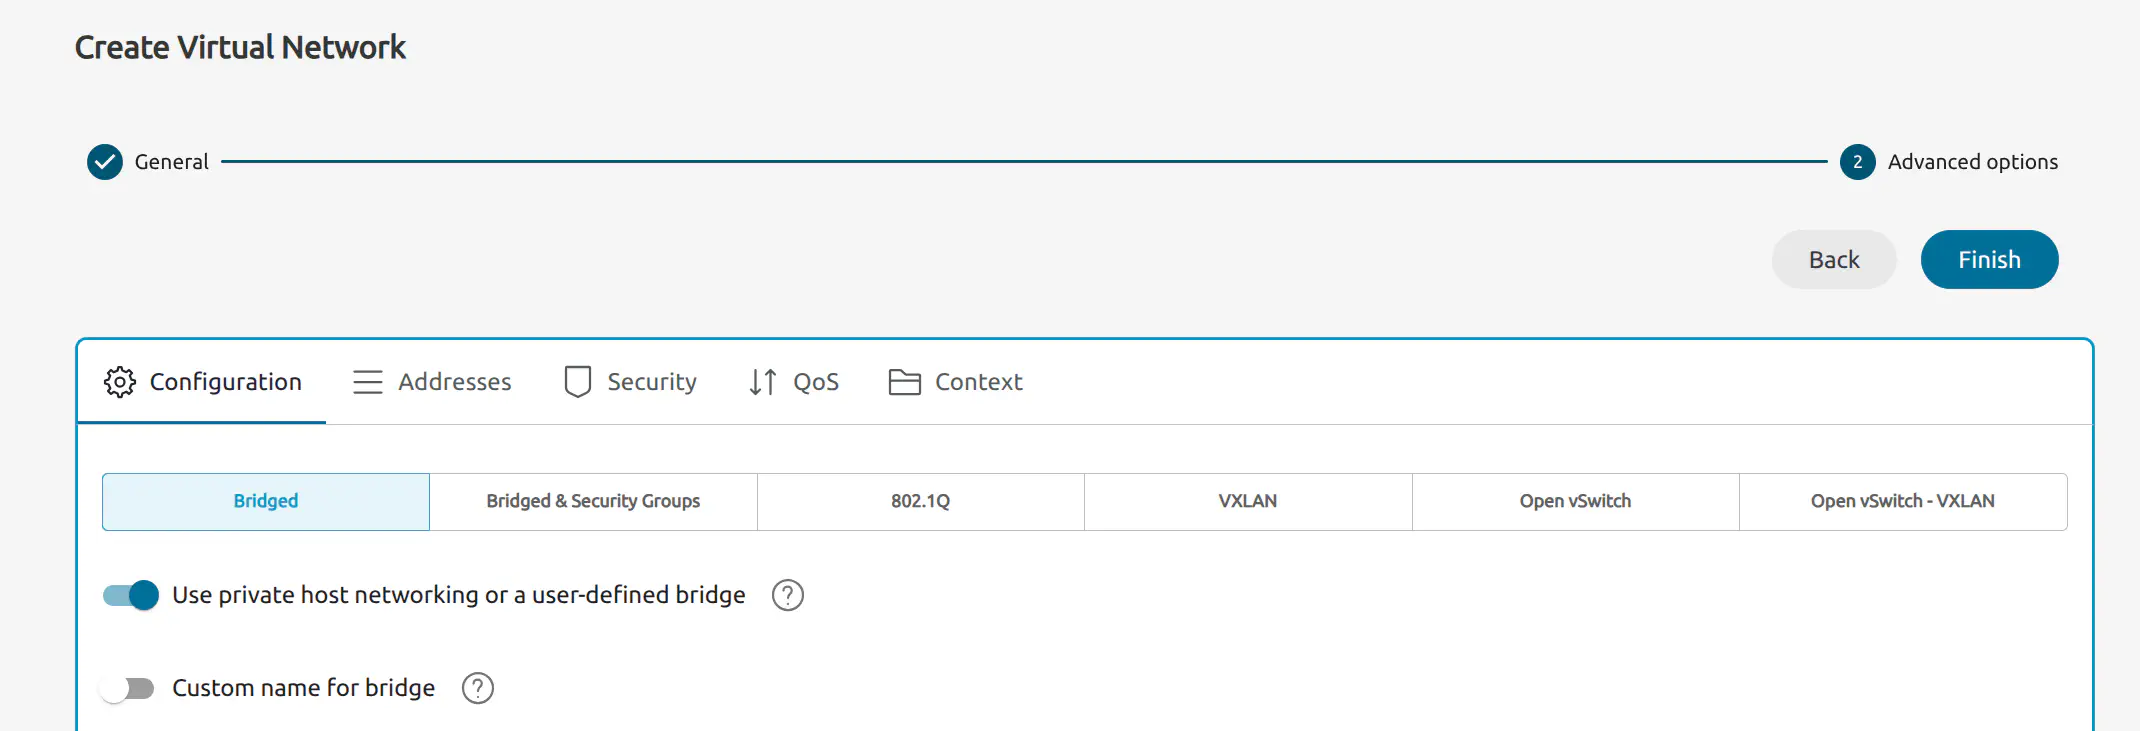
From the Virtual networks page, click the Create button at the top. Sunstone will display the Create Virtual Network screen. Enter a name for the network – for this example we will use private. Then, click Next.
In the next screen, activate the Use only private host networking or a user-defined bridge option:
Choose the Addresses tab and click + Address Range. Here we will enter a range of private IP addresses. For this example, in First IPv4 address enter 192.168.200.2, and set the network size to 100.
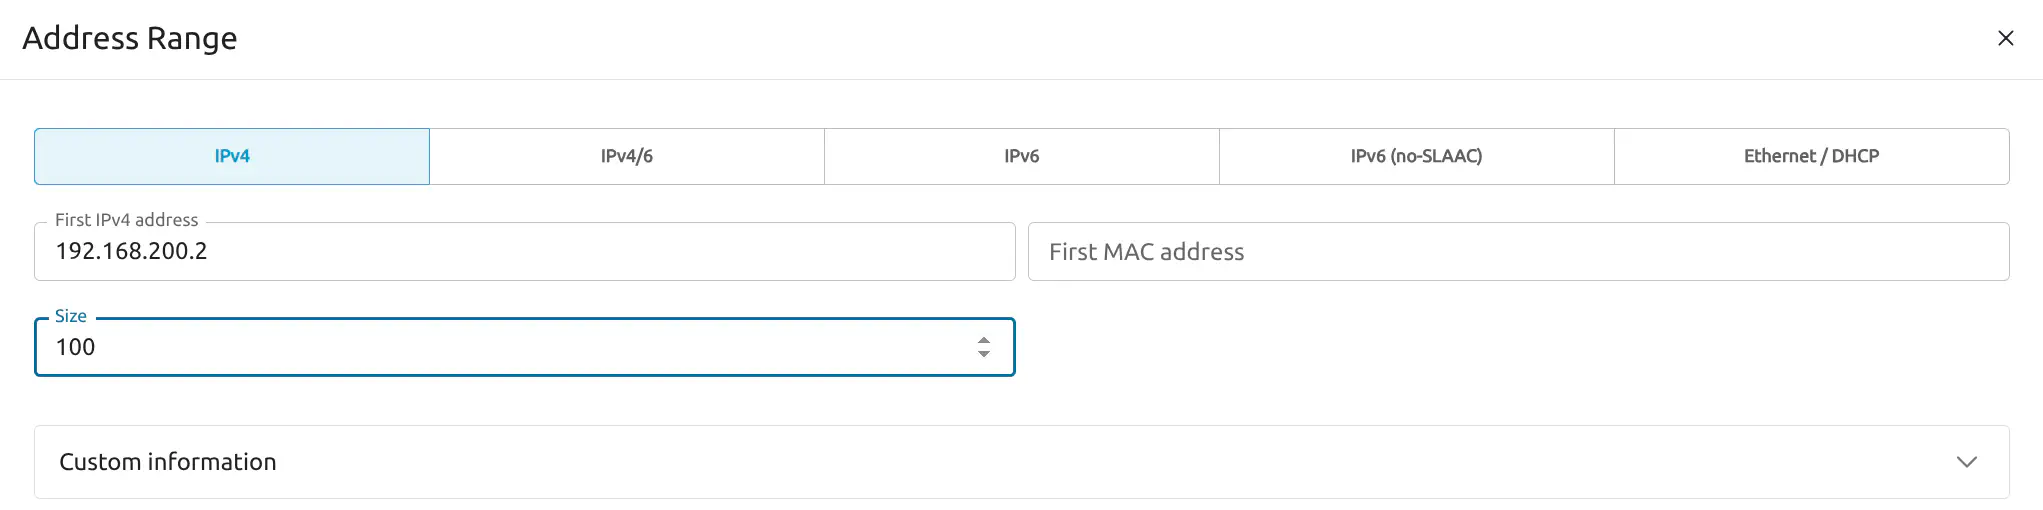
Click Finish.
Step 2. Download the CAPI Appliance
From your OpenNebula Front-end, you can download the CAPI appliance from the Sunstone UI or from the command line.
Download from the Sunstone UI
Download the CAPI Appliance with the following steps:
- On the left-hand pane, go to Storage -> Apps.
- On the Apps screen showing the available apps, filter for
capi. - Click Service Capi to select it, then click Import.
- In the import wizard, select the default image datastore, then click Finish.
Download from the Command Line
On the Front-end command line, switch to the oneadmin user:
sudo su - oneadmin
Then download the CAPI appliance from the marketplace:
onemarketapp export 'Service Capi' 'Service Capi' --datastore default
This automatically downloads the Service Capi appliance into the default datastore.
Step 3. Instantiate the CAPI Appliance
From the Sunstone UI
To instantiate the Service CAPI appliance, follow the same steps described for the WordPress VM:
- In the left-hand pane, go to Templates -> VM Templates.
- Select Service Capi, then click the Instantiate icon at the top.
Sunstone displays the Instantiate VM Template wizard. Leave the Configurations options as default, click Next twice to skip the User inputs and reach the Advanced options step:
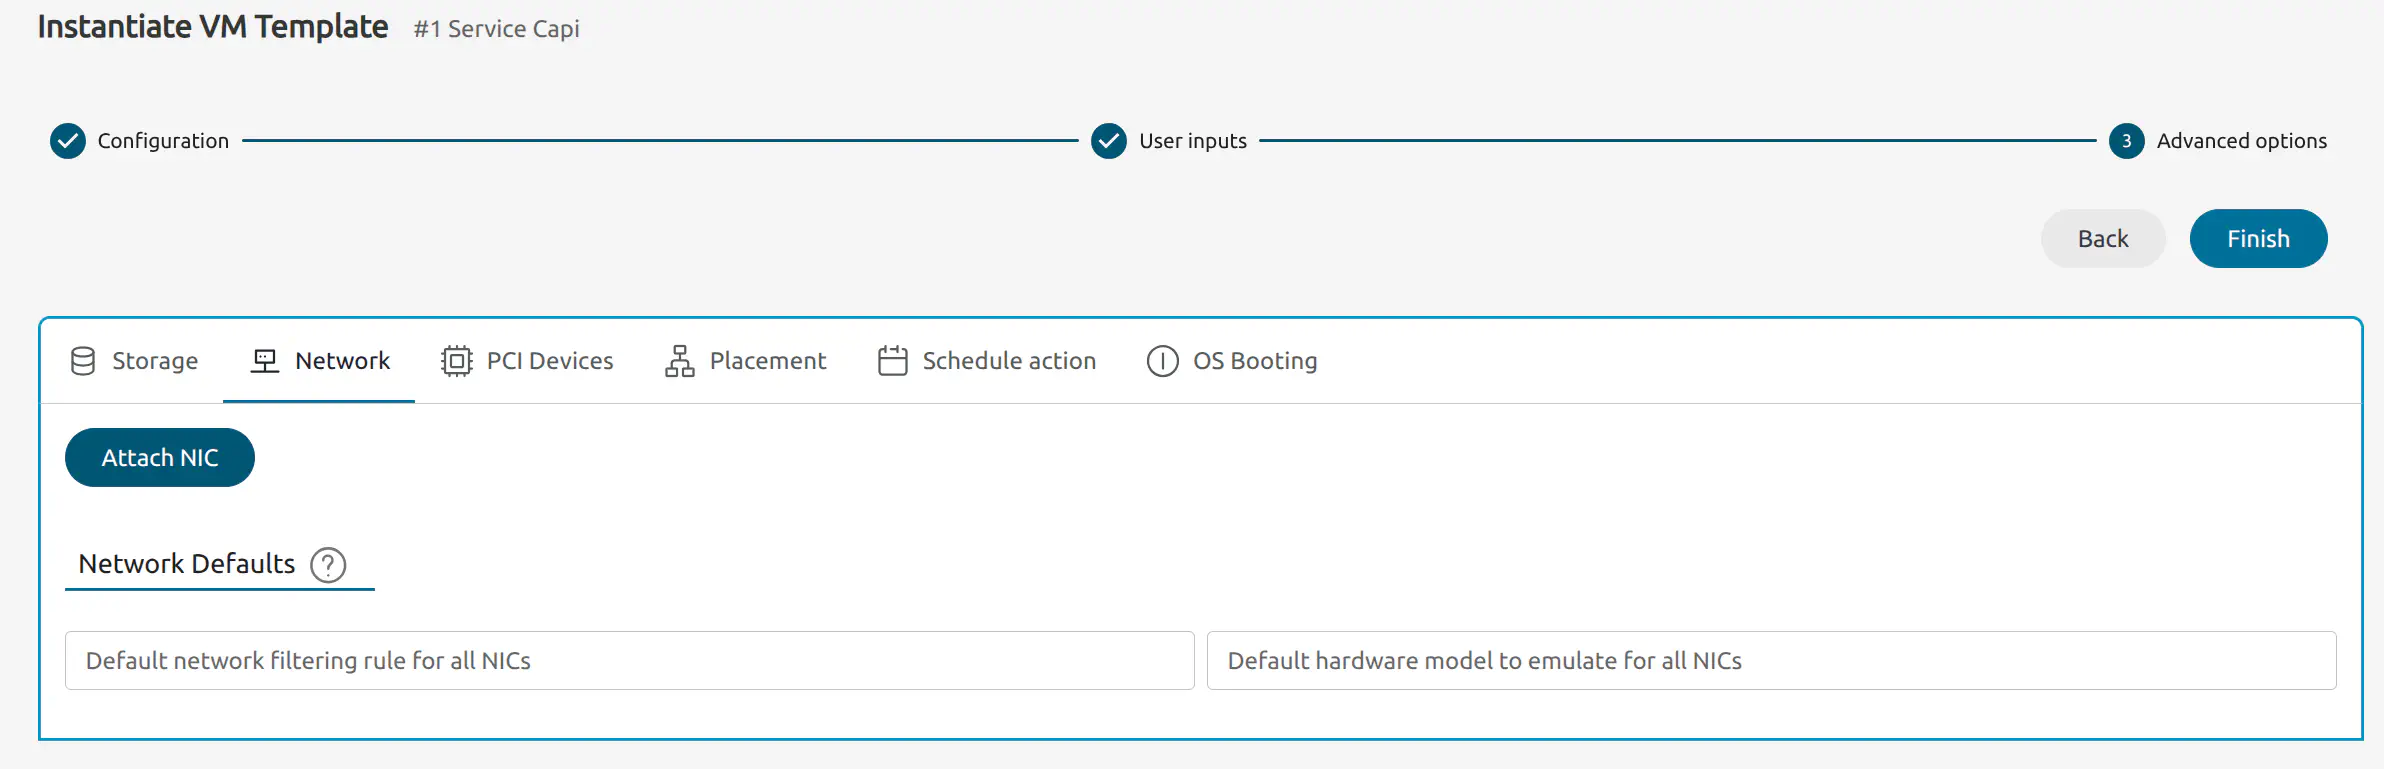
Click Next to advance to the Select a network step:
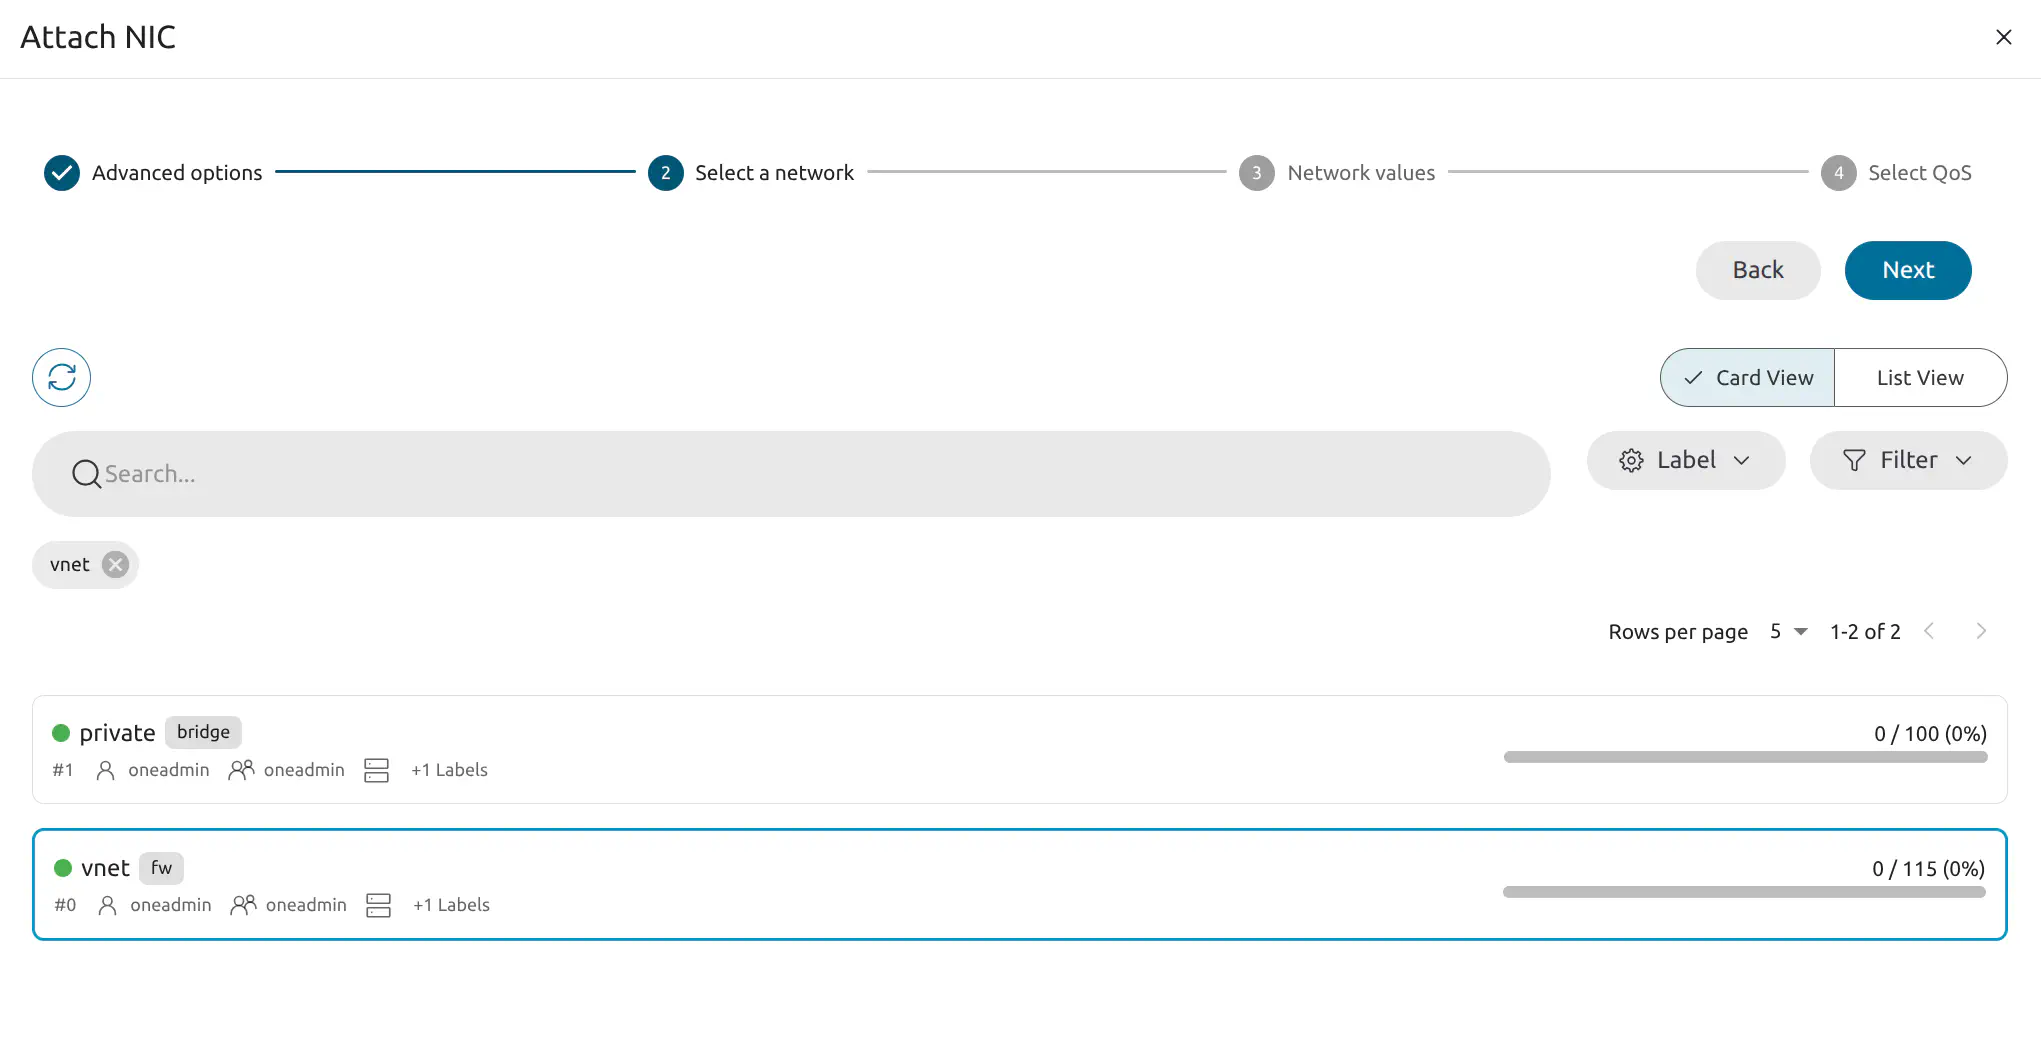
Select vnet, the default public network. Continue clicking Next until the final step and click Finish. Click Finish again to finish the instantiate VM workflow.
Sunstone will display the Instances -> VMs screen, showing the newly-created VM:
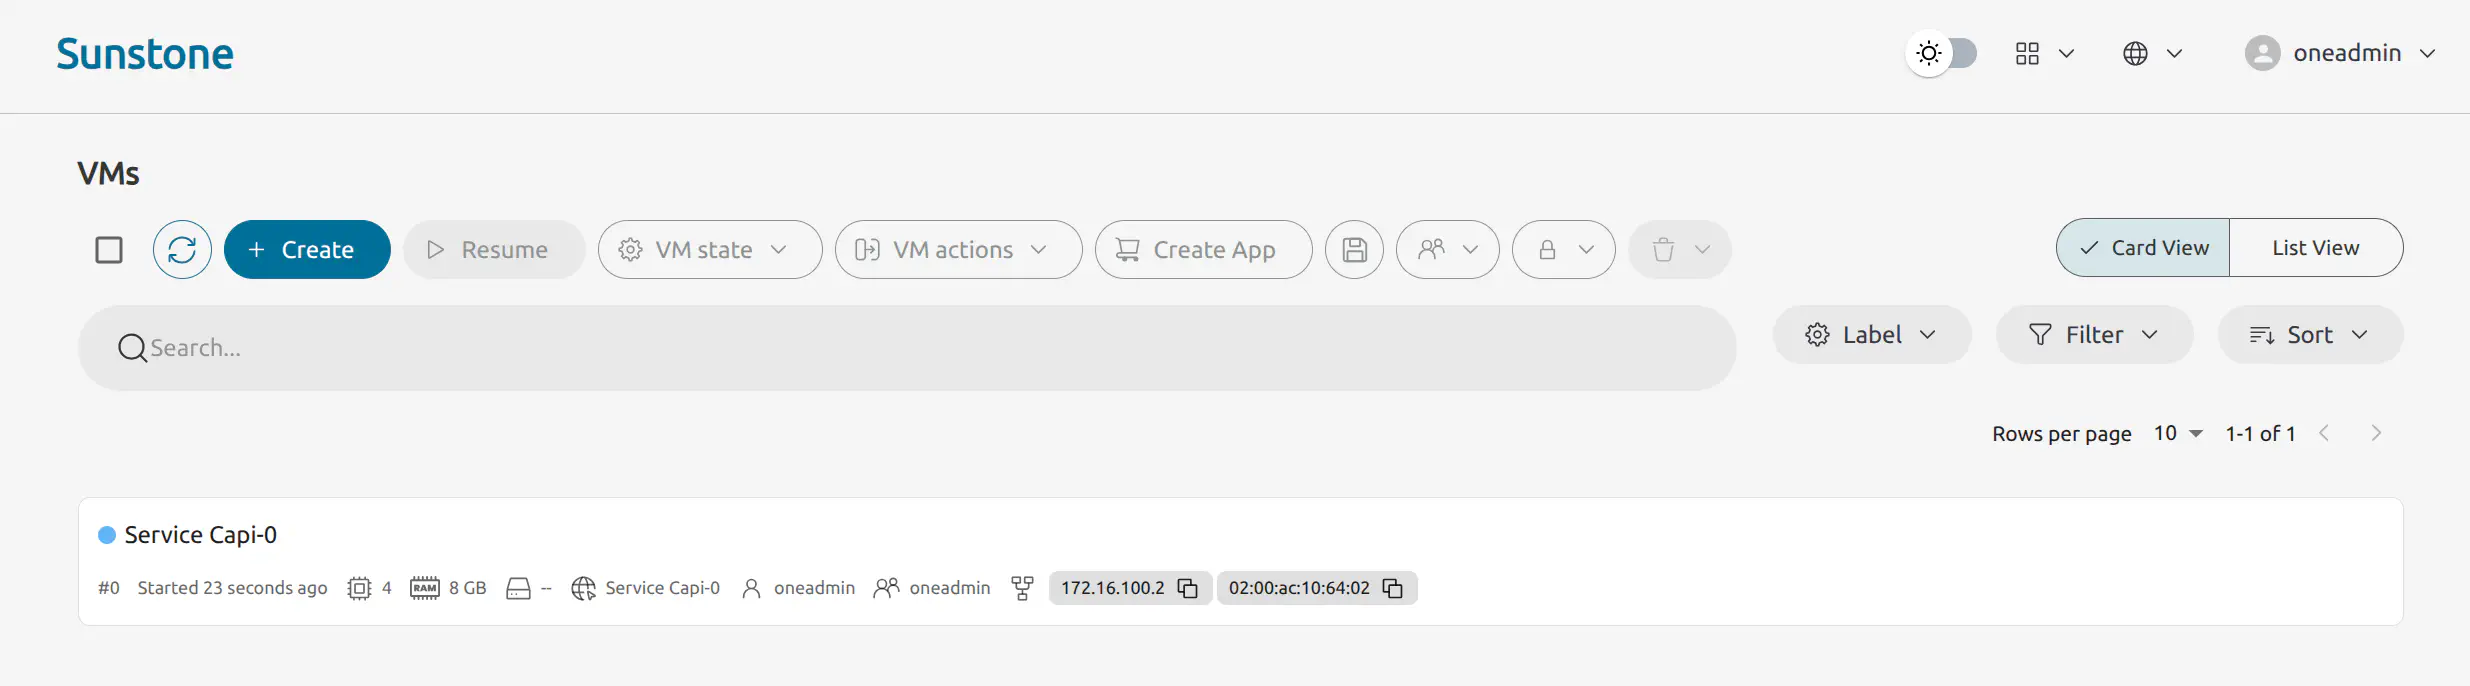
Wait a few moments until the VM displays the RUNNING state (green dot).
From the Command Line
To instantiate the CAPI appliance template without additional user inputs, as user oneadmin run:
onetemplate instantiate 'Service Capi' --nic vnet
This instantiates the template and attaches the NIC on the public network, vnet, to the Virtual Machine.
When you run the command, you will be prompted for user inputs such as the versions for CAPONE, K3s and Turtles. For this tutorial we can leave the values at their defaults, by hitting Enter at each prompt.
oneadmin@frontend:~$ onetemplate instantiate 'Service Capi' --nic vnet
There are some parameters that require user input. Use the string <<EDITOR>> to launch an editor (e.g. for multi-line inputs)
  * (ONEAPP_CAPI_CAPONE_VERSION) Capone Version
  * (ONEAPP_CAPI_CERT_MANAGER_VERSION) Cert Manager Chart Version
  * (ONEAPP_CAPI_K3S_VERSION) K3s Version
  * (ONEAPP_CAPI_RANCHER_HOSTNAME) Rancher Hostname
  * (ONEAPP_CAPI_RANCHER_PASSWORD) Rancher Password
  * (ONEAPP_CAPI_RANCHER_VERSION) Rancher Chart Version
  * (ONEAPP_CAPI_TURTLES_VERSION) Turtles Chart Version
VM ID:
2
If you leave the Rancher password empty, it will default to capi1234 (username admin).
The last number in the command output is the ID for the Virtual Machine, in this case 2.
 Note
Note
You will need to wait some minutes for the K3s cluster and the Rancher web UI to become available. The total time will depend on the Front-end machine and the resources assigned to the cluster – with the default resource values, the configuration process may take 6 to 8 minutes to complete.Step 4. Connect to the Rancher UI
If you are working on a screen attached to the OpenNebula Front-end server you can connect to the Rancher interface using a web browser and go to https://<CAPI_VM_IP>.sslip.io. In this tutorial, the IP is 172.16.100.2. You can obtain the VM’s IP from the Sunstone UI: in the left-hand pane go to Instances -> VMs, then check IP address displayed for the VM (see image above). If you are working on a remote server, please see the instructions on using port forwarding.
Alternatively, on the Front-end run:
onevm show <VM ID>
where VM ID is the number that was given by the onetemplate instantiate command. To quickly filter the IP from the output of onevm show, you can run:
onevm show <VM ID> | grep ETH0_IP=
For example:
oneadmin@frontend:~$ onevm show 2 | grep ETH0_IP=
  ETH0_IP="172.16.100.3",
In this case we will connect to https://172.16.100.3.sslip.io.
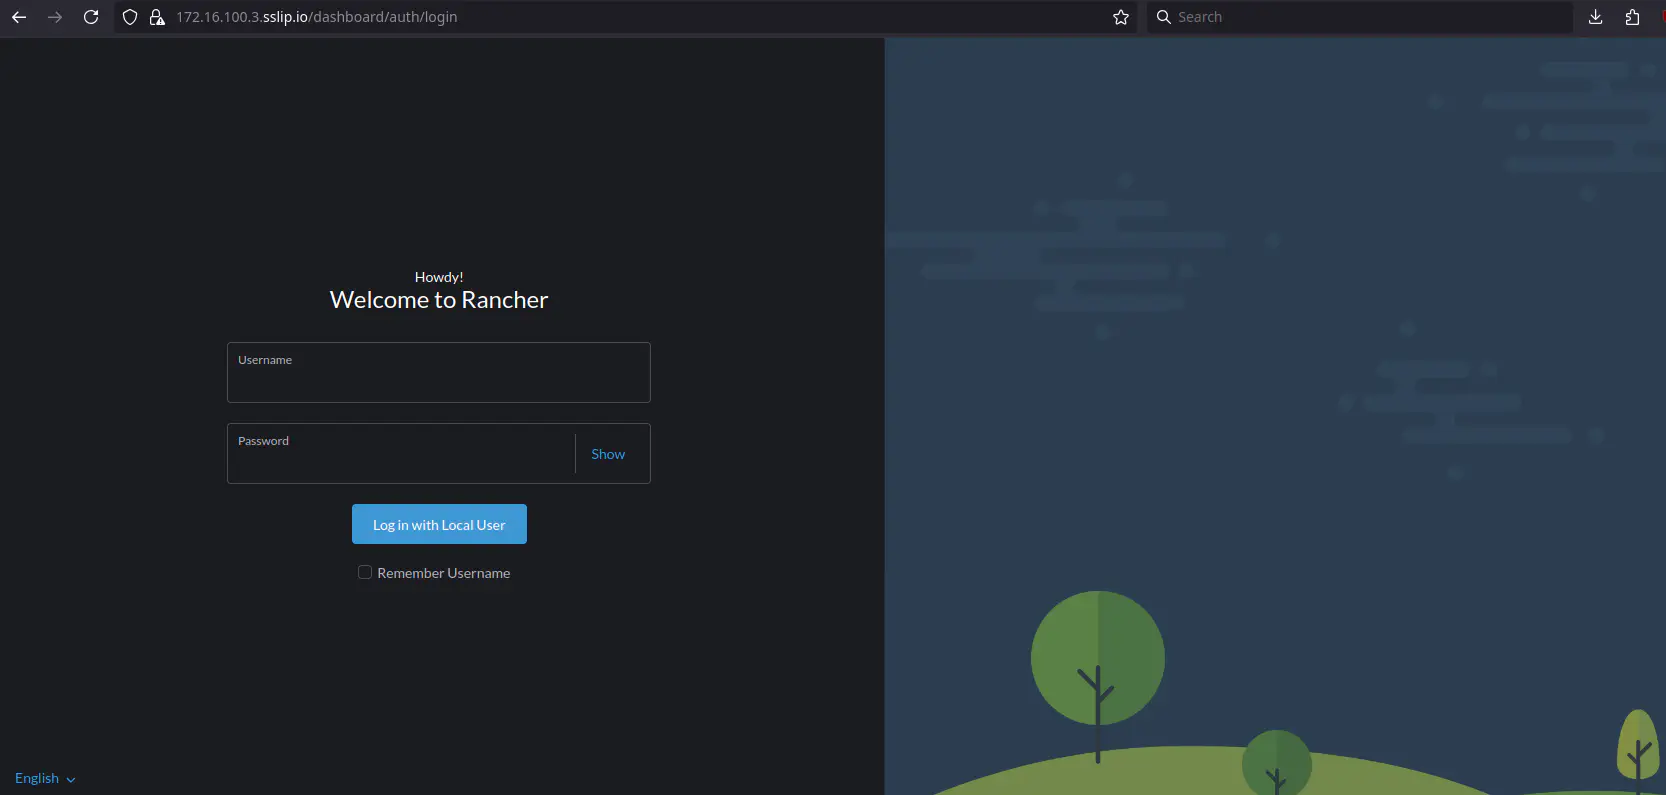
If you did not set a password when instantiating the VM, log in with these credentials:
- Username:
admin - Password:
capi1234
 Warning
As mentioned above, with the default resources the complete configuration process for the K3s cluster and Rancher can take between 6 and 8 minutes to complete. Occasionally, a bug related to the installation of Turtles – specifically with the helm-install-rancher-turtles pod – may cause the installation to hang. In such cases, if the Rancher interface does not come up you will need to restart the process. Tip
Tip
If the Rancher UI takes too long to become available or if you prefer to monitor the process manually, you can log in to the CAPI VM with:
onevm ssh <VM ID>
This will log you in as user root. To see the status of the pods during the configuration process, run:
kubectl get pods -A
Step 5. Deploy an OpenNebula RKE2 Cluster
To deploy an OpenNebula RKE2 cluster we will install it using the RKE2 Helm chart via the Rancher UI.
To install from the Helm chart, follow these steps:
In Rancher’s left-hand navigation pane, go to the Management Cluster by clicking the Rancher icon ![]() , then select Apps -> Charts.
, then select Apps -> Charts.
In the Filter charts results input field, type capone. This should display two charts, capone-kadm and capone-rke2.
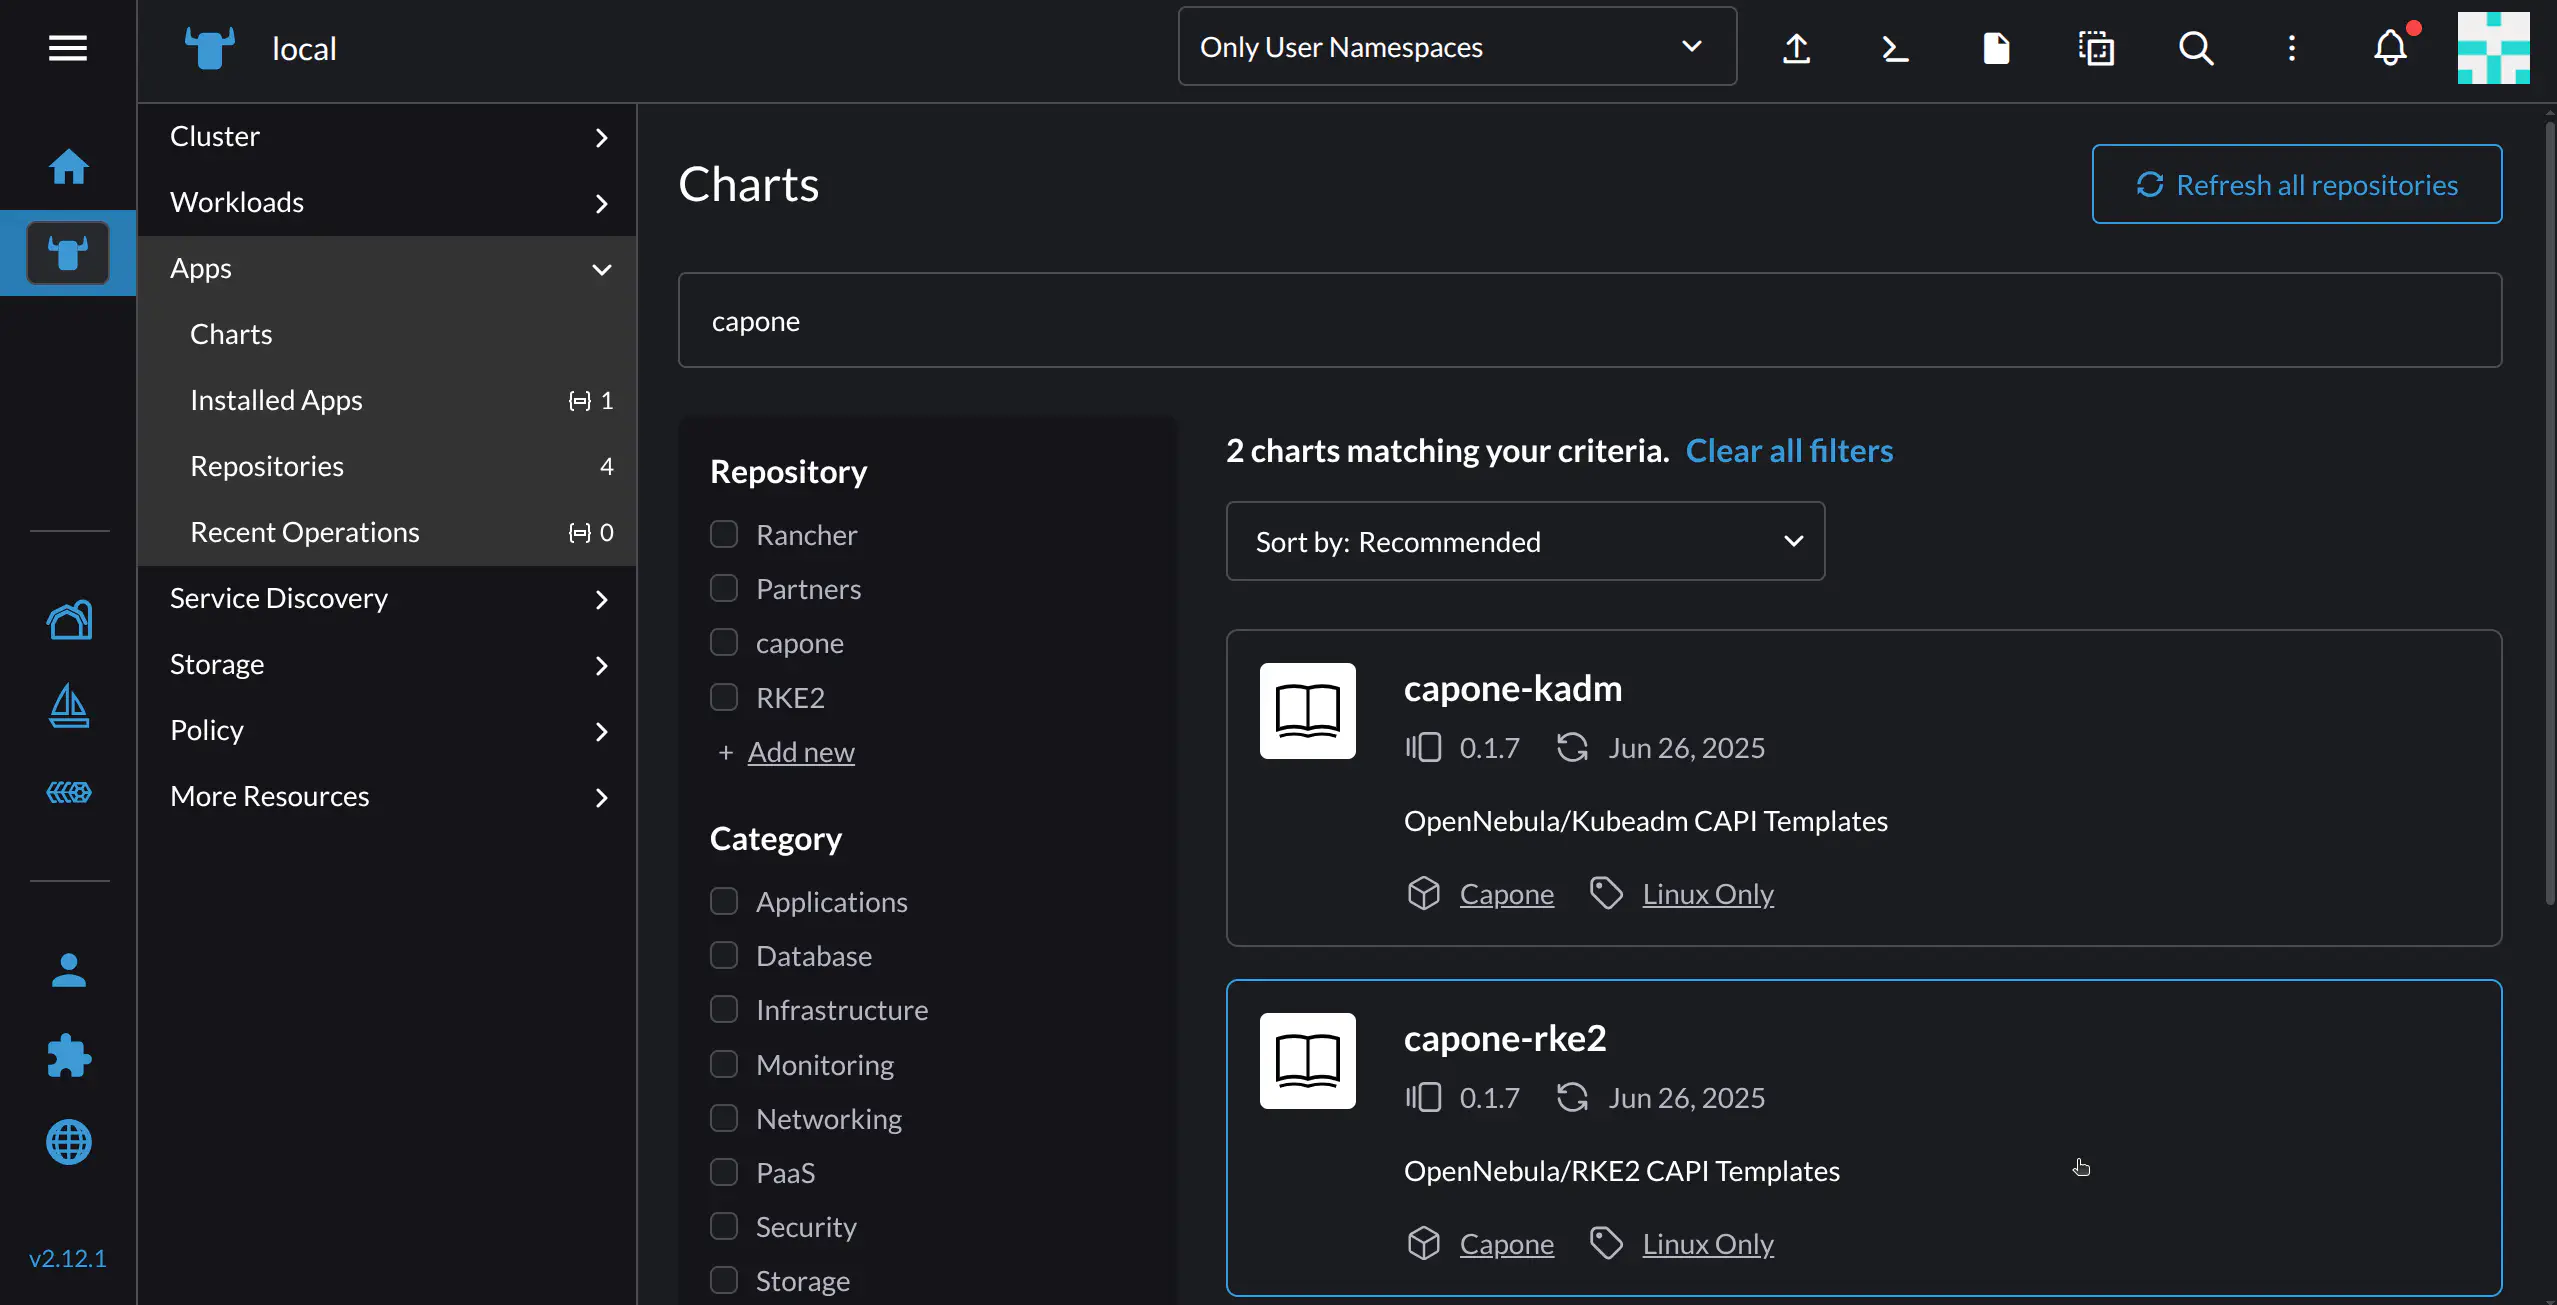
For this tutorial, select capone-rke2.
Rancher will take you to a screen displaying chart details. To install, click the Install button at top right.
In the next screen, you can specify the namespace where the resources will be created, as well as an optional name for the cluster. In this example we will use the default namespace, and name capone4.
Click Next. The next screen shows the YAML configuration file. Here you will need to edit some parameters to adapt the deployment to your environment.
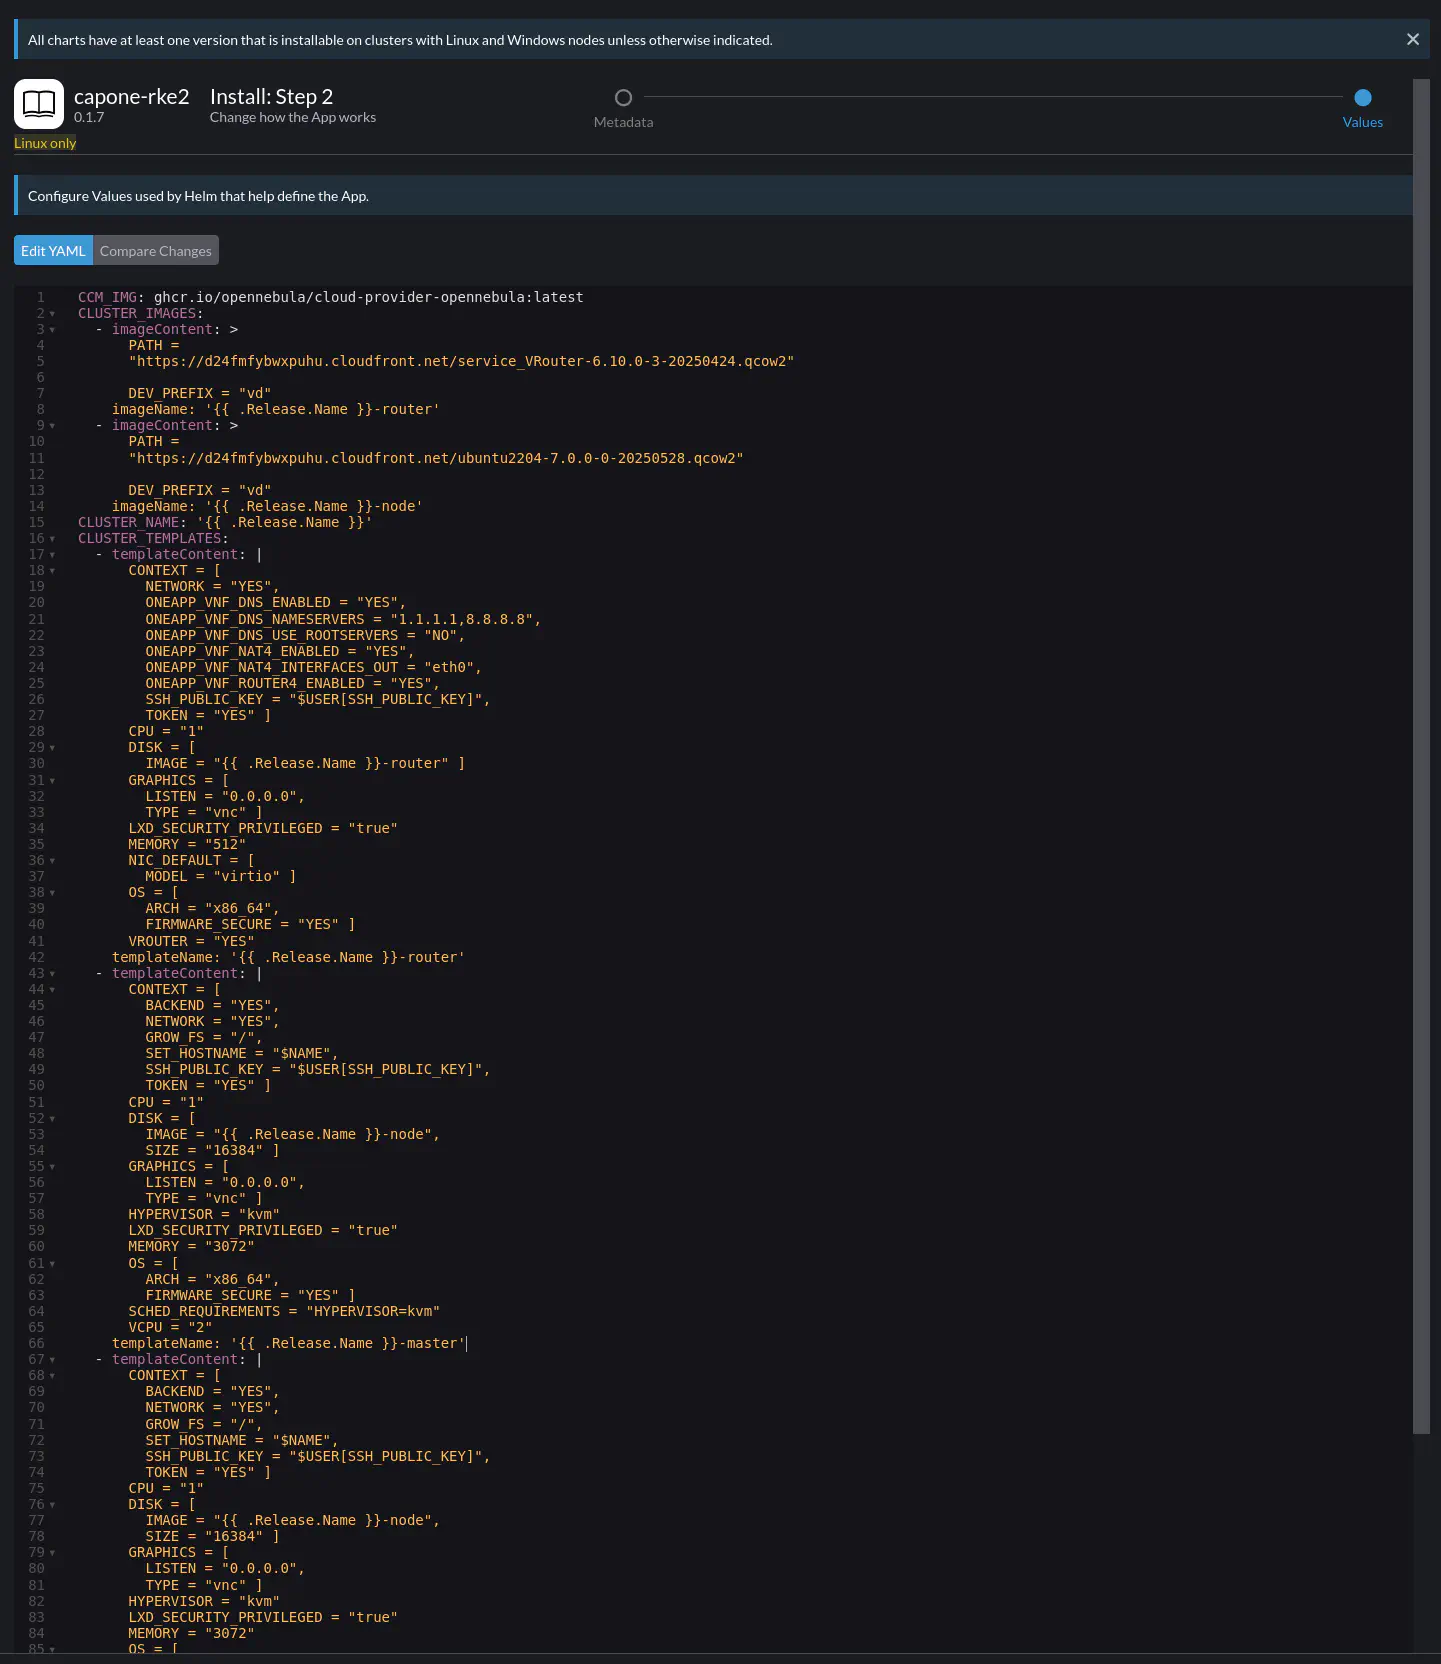
Note
It is not necessary to import the CAPONE appliances – the only requirement is that the public and private networks in the cluster definition already exist, as will be shown below.Scroll down to the end of the YAML file:
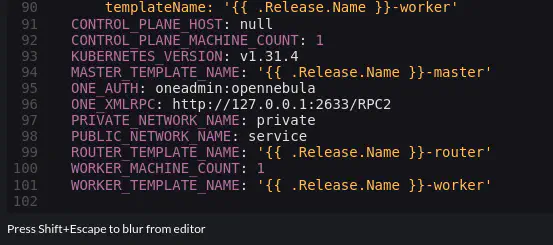
Here you will to ensure that the values of the following parameters match your installation:
ONE_AUTH: User credentials for the Front-end, in<user>:<password>format. By default, the user isoneadmin. The password is the same as for logging in to Sunstone. If you installed your Front-end using miniONE, the credentials were shown at the end of the installation output. (If you installed using miniONE and are unsure of the credentials, on the Front-end check the contents of/var/lib/one/.one/one_auth.)ONE_XMLRPC: The XML RPC endpoint. This will be the gateway address of the public network that the VM is connected to. In this example, the network isvnetand the address is172.16.100.1.PRIVATE_NETWORK_NAME: Name for the private network created on the Front-end, in our caseprivate.PUBLIC_NETWORK_NAME: Name for the public network created on the Front-end, in our casevnet.
To find the IP for ONE_XMLRPC on the Front-end (as oneadmin) run onevne show vnet | grep GATEWAY and.
The parameters that were modified for this example are shown below:
ONE_AUTH: oneadmin:ZMCoOWUsBg
ONE_XMLRPC: http://172.16.100.1:2633/RPC2
PRIVATE_NETWORK_NAME: private
PUBLIC_NETWORK_NAME: vnet
After modifying the parameters, click the Install button on the bottom right corner.
The cluster should install and deploy; this process can take a few minutes.
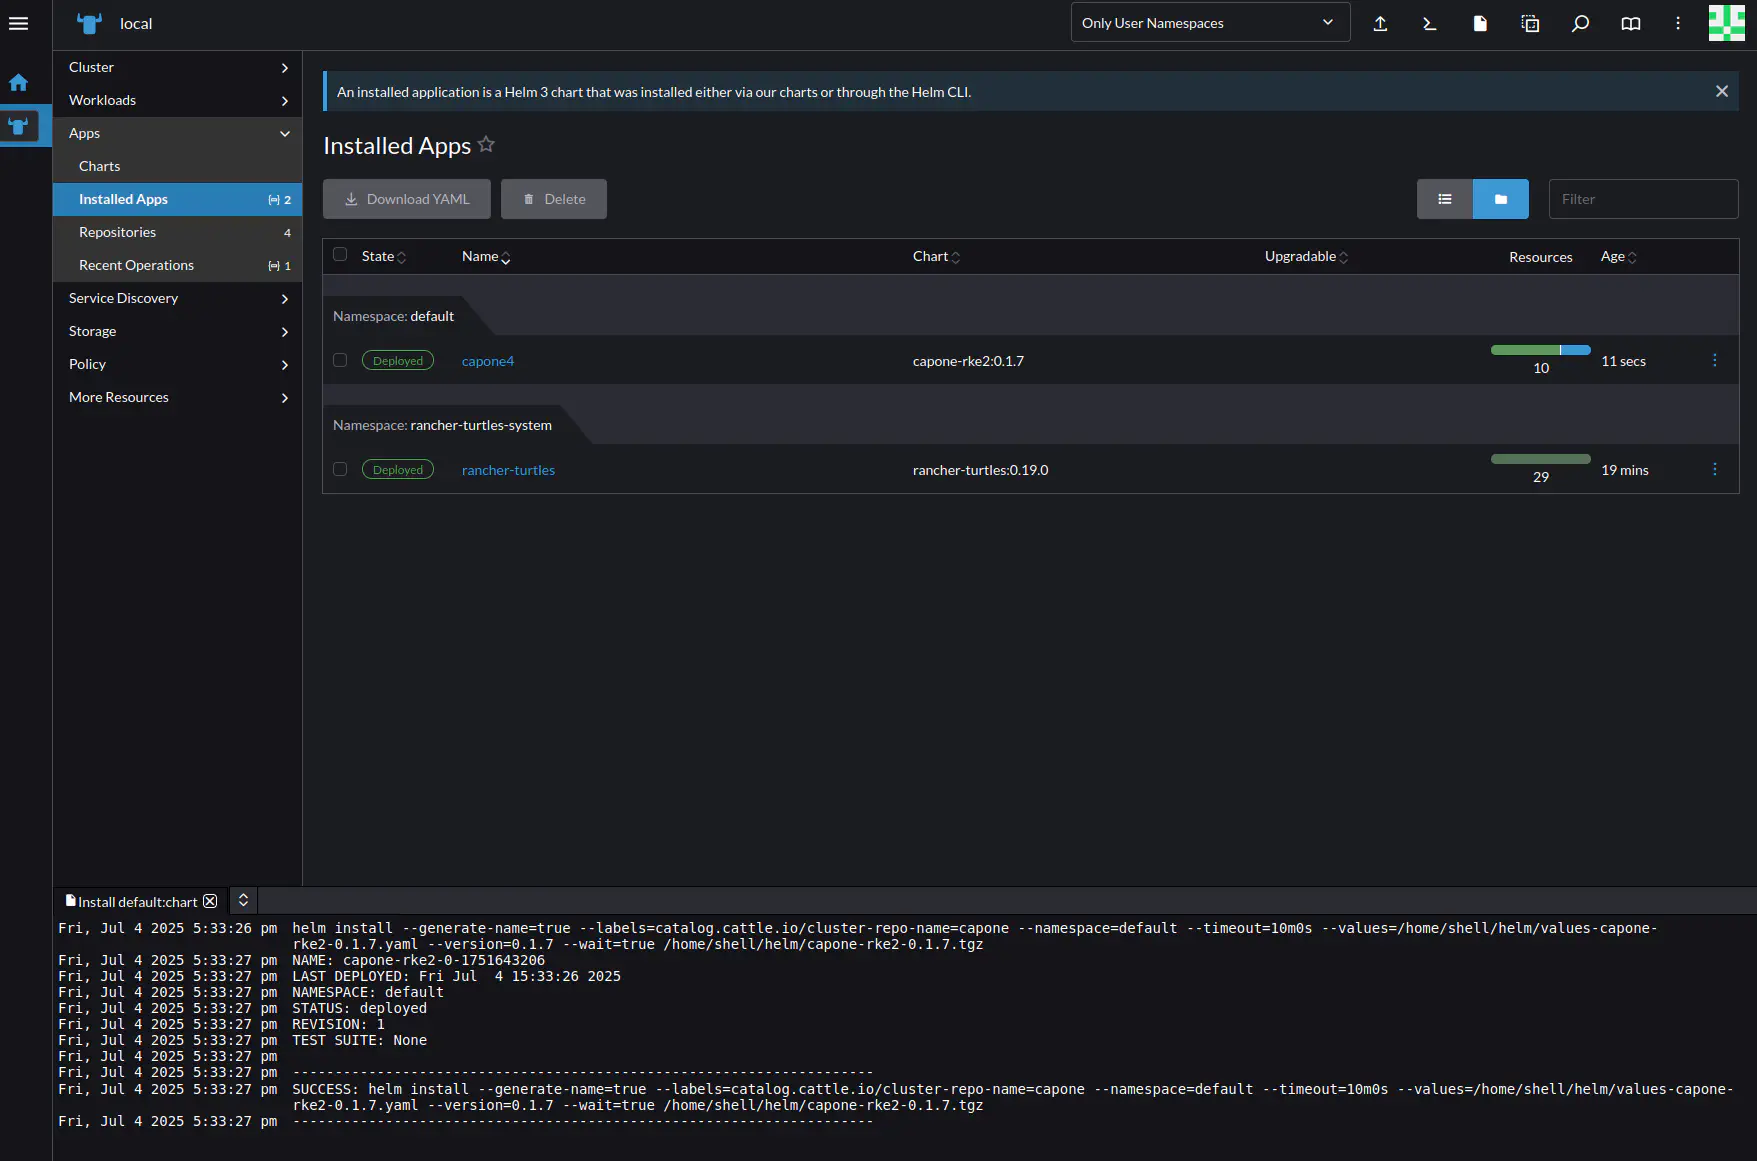
In Rancher’s left-hand navigation pane, go to the Management Cluster by clicking the Rancher icon ![]() , then select Apps -> Installed Apps. The list of applications should show the name of the cluster you deployed (in this example,
, then select Apps -> Installed Apps. The list of applications should show the name of the cluster you deployed (in this example, capone4), with status Deployed.
Note
You can also verify the deployment on the Front-end, by verifying that three new Virtual Machines have been instantiated:
- On the command line, as user
oneadminrunonevm list:
oneadmin@frontend:~$ onevm list
  ID USER     GROUP    NAME                                         STAT  CPU     MEM HOST                                TIME
   4 oneadmin oneadmin capone4-ljm6z                                runn    1      3G localhost                       0d 00h01
   3 oneadmin oneadmin vr-capone4-cp-0                              runn    1    512M localhost                       0d 00h01
   2 oneadmin oneadmin Capi-2                                       runn    2      8G localhost                       2d 19h37
   0 oneadmin oneadmin Alpine Linux 3.20-0                          runn    1    256M localhost                       2d 20h03
This shows the Virtual Router vr-capone4-cp-0, the master node capone4-ljm6z, and the CAPI appliance Capi-2; as well as an Alpine Linux VM previously installed.
- On the Sunstone UI, you can see the list of instantiated VMs by going to the left-hand pane and selecting Instances -> VMs.
Step 6. Import the Cluster into Rancher
To manage the cluster in the Rancher UI, you must first import it into Rancher. Go to Cluster Management by clicking the “farmhouse” icon ![]() near the bottom. Note that you may need to wait several minutes for the new cluster to appear, refresh the page periodically until it appears.
near the bottom. Note that you may need to wait several minutes for the new cluster to appear, refresh the page periodically until it appears.
In the left-hand pane select Clusters, and in the Clusters screen select the capone4 cluster.
Rancher displays the screen for the cluster, shown below.
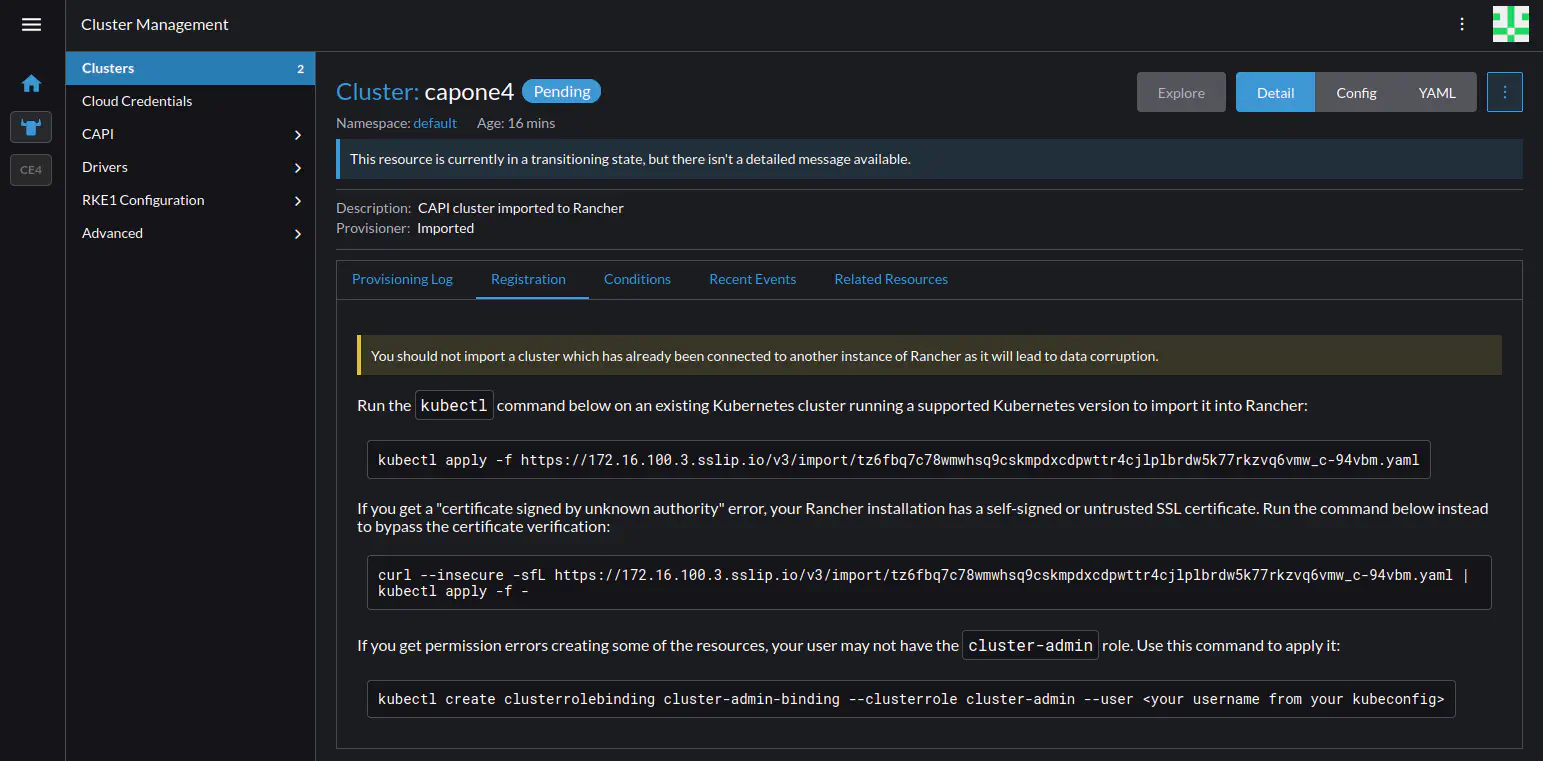
This screen shows three alternative commands that you can use for importing the cluster. In this case, since the Rancher installation uses a self-signed certificate, we will use the second command, with curl and kubectl:
curl --insecure -sfL https://172.16.100.3.sslip.io/v3/import/<import file>.yaml | kubectl apply -f -
Copy the command from the screen (you can click the command to copy it to the clipboard). Save this command somewhere (e.g. a text file), you will need to edit it and use it later.
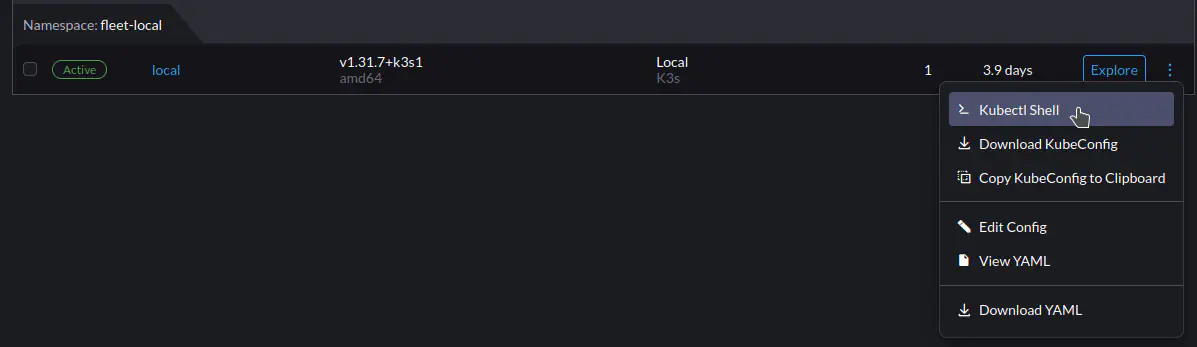
Go to the Kubectl Shell for the Management Cluster, go to Cluster Management (via the “farmhouse” icon ![]() at bottom left). Then, in the Clusters screen select the
at bottom left). Then, in the Clusters screen select the local cluster, click the three-dot menu ![]() on the right, and select Kubectl Shell from the drop-down.
on the right, and select Kubectl Shell from the drop-down.
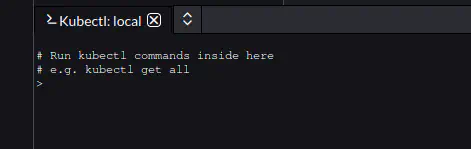
Rancher should display a tab on the bottom of the screen, with the Kubectl:local shell:
First, before running the import command you must retrieve the kubeconfig file for the workload cluster. For cluster capone4, run:
kubectl get secrets capone4-kubeconfig -o jsonpath="{.data.value}" | base64 -d > one-kubeconfig
This saves the configuration for the cluster into the one-kubeconfig file.
To import the cluster you need to edit the curl command you previously copied and saved. At the end of the command, after kubectl apply add --kubeconfig one-kubeconfig before the final -f -. For example (the URL has been truncated for brevity):
curl --insecure -sfL https://.../-94vbm.yaml | kubectl apply --kubeconfig one-kubeconfig -f -
Executing this command will import the cluster into Rancher. You should see something similar to the following output in the kubectl console:
clusterrole.rbac.authorization.k8s.io/proxy-clusterrole-kubeapiserver created
clusterrolebinding.rbac.authorization.k8s.io/proxy-role-binding-kubernetes-master created
namespace/cattle-system created
serviceaccount/cattle created
clusterrolebinding.rbac.authorization.k8s.io/cattle-admin-binding created
secret/cattle-credentials-dc221df551 created
clusterrole.rbac.authorization.k8s.io/cattle-admin created
deployment.apps/cattle-cluster-agent created
service/cattle-cluster-agent created
Importing the cluster may take several minutes.
Once the cluster has been imported, it becomes fully accessible from the Rancher UI, where it is displayed alongside the K3s cluster.
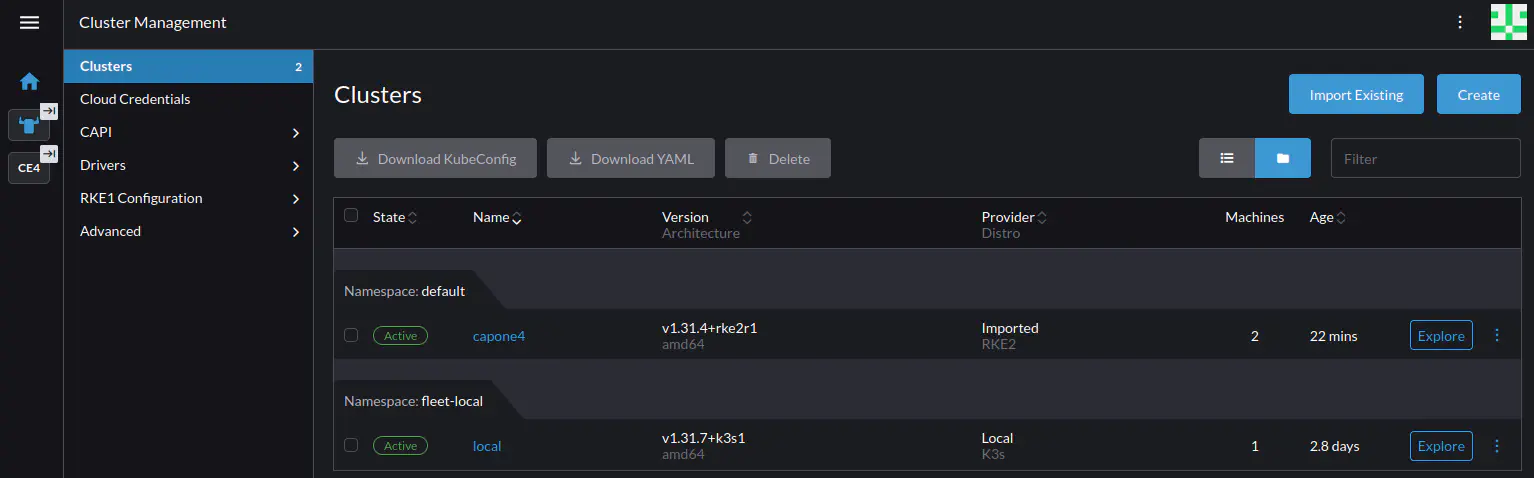
You can now explore and use the cluster – for instance installing Helm charts, executing kubectl commands, and even upgrading the Kubernetes version of the cluster. In the next sections we will perform a few example operations.
Operating the Cluster
This section provides a brief overview of performing day-to-day operations on the workload cluster through the Rancher UI. Here we will:
- Install Longhorn
- Create a Persistent Volume Claim (PVC) on Longhorn
- Deploy an Nginx instance that uses the Longhorn volume
- Expose the Nginx instance
Installing Longhorn
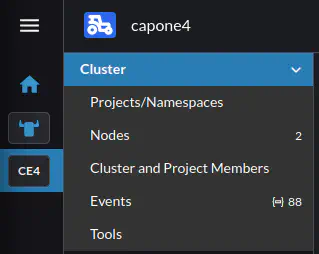
In the capone4 cluster, select Cluster Management, then the capone4 cluster:
In the left-hand nav pane for the cluster, go to Apps -> Charts. In the Filter charts results input field, type longhorn.
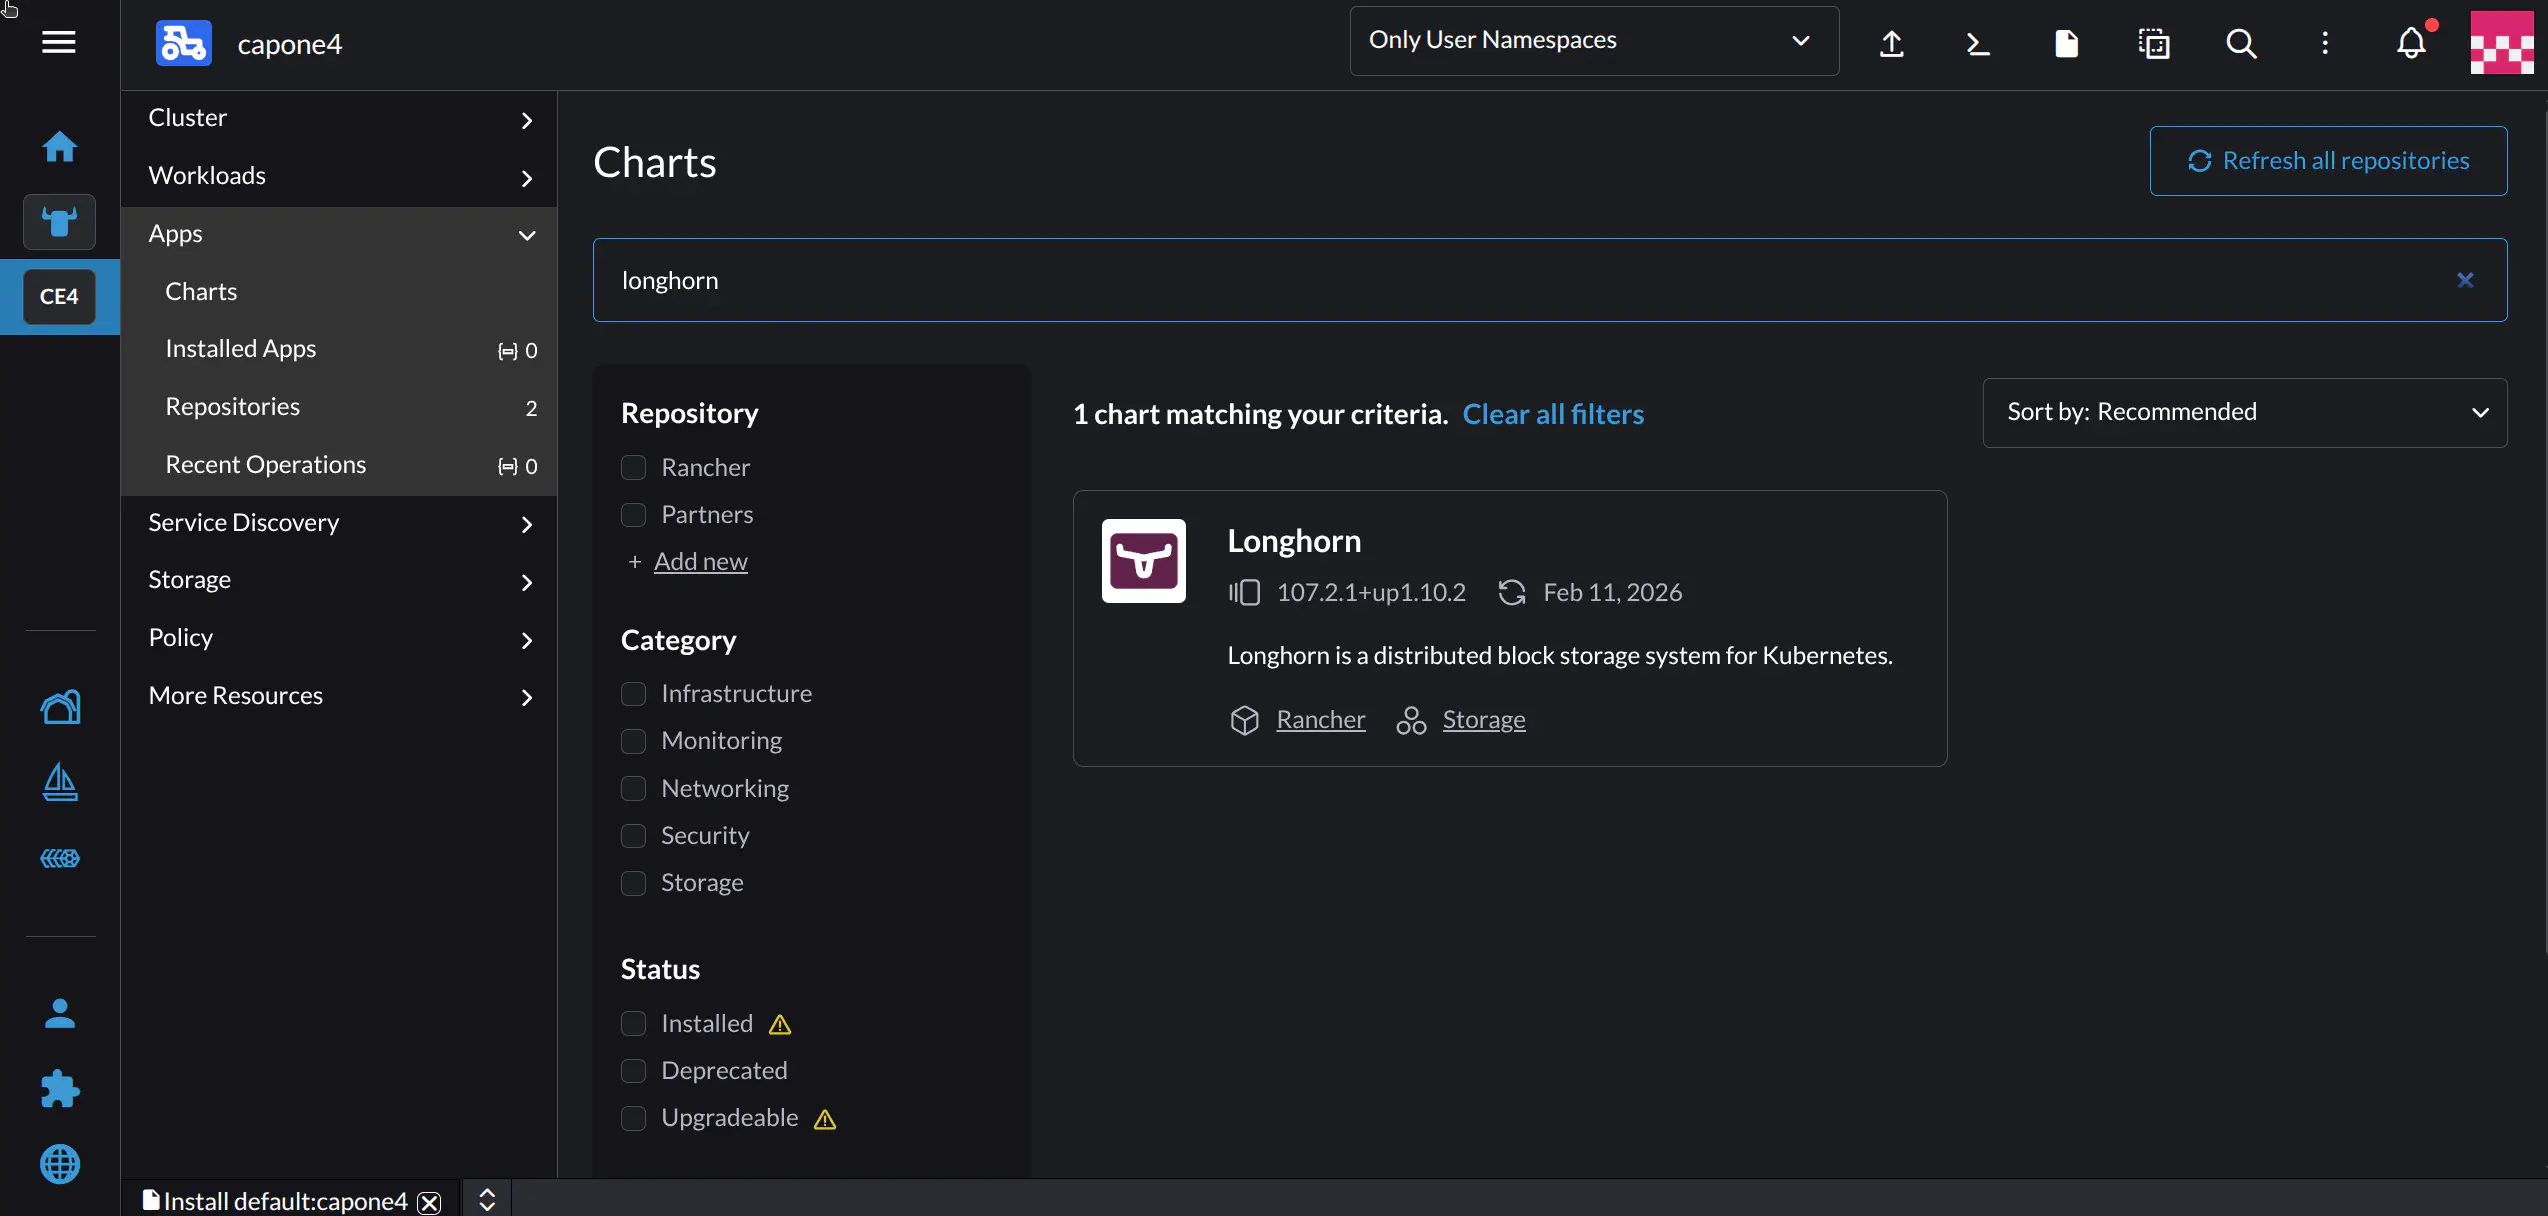
Select the Longhorn chart. Rancher should display the details screen for Longhorn:
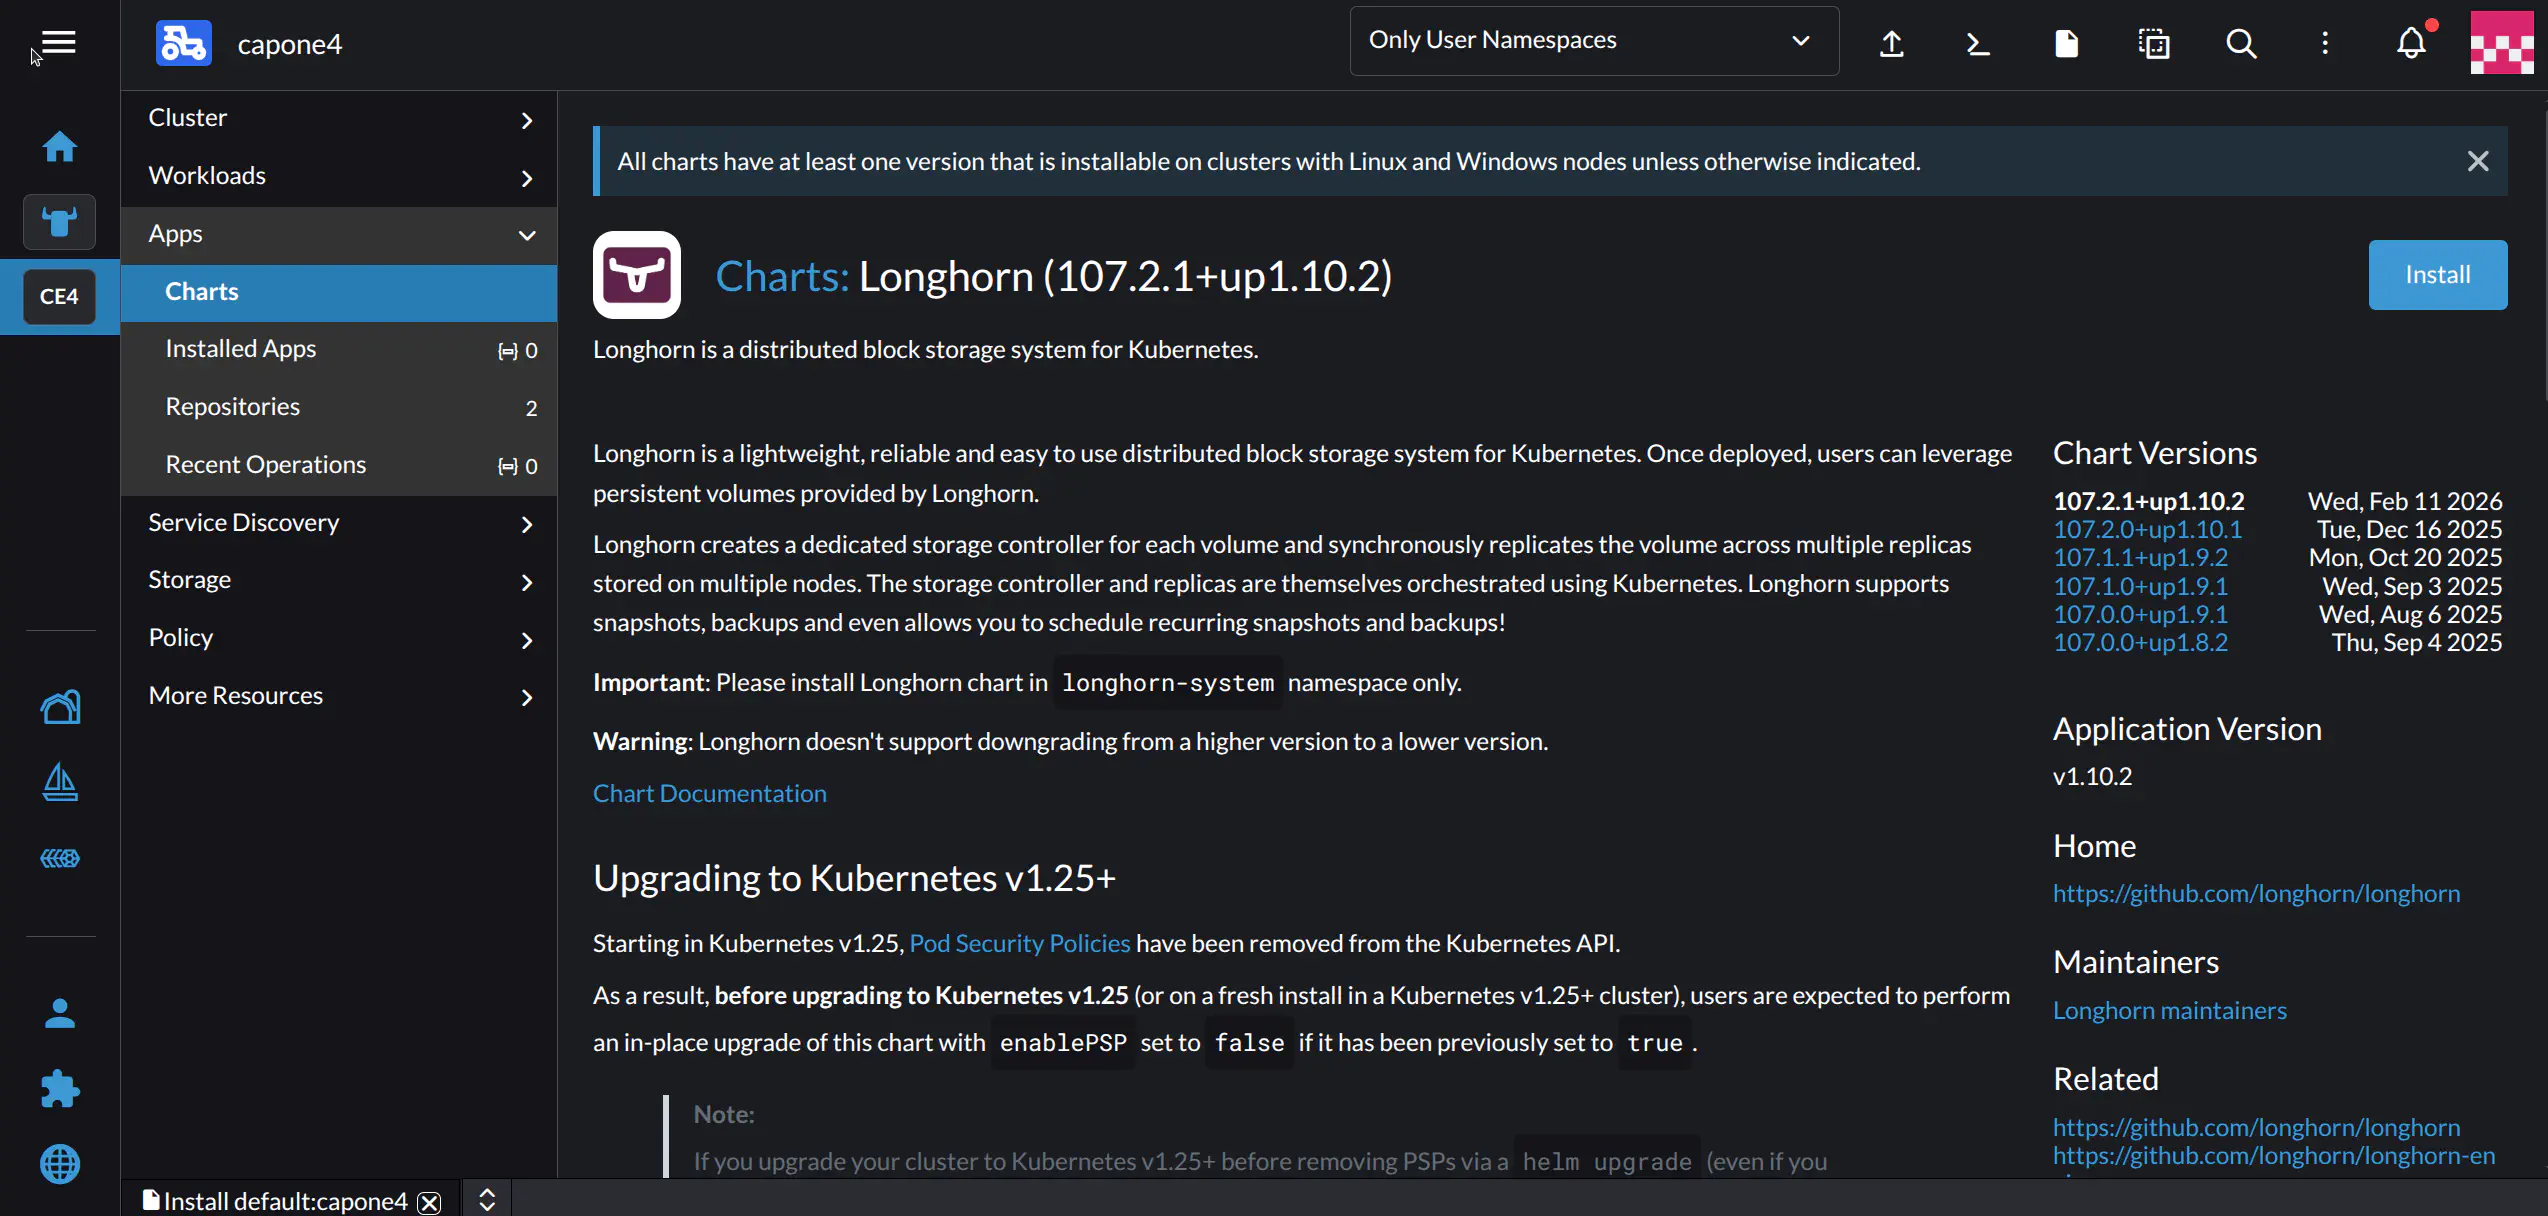
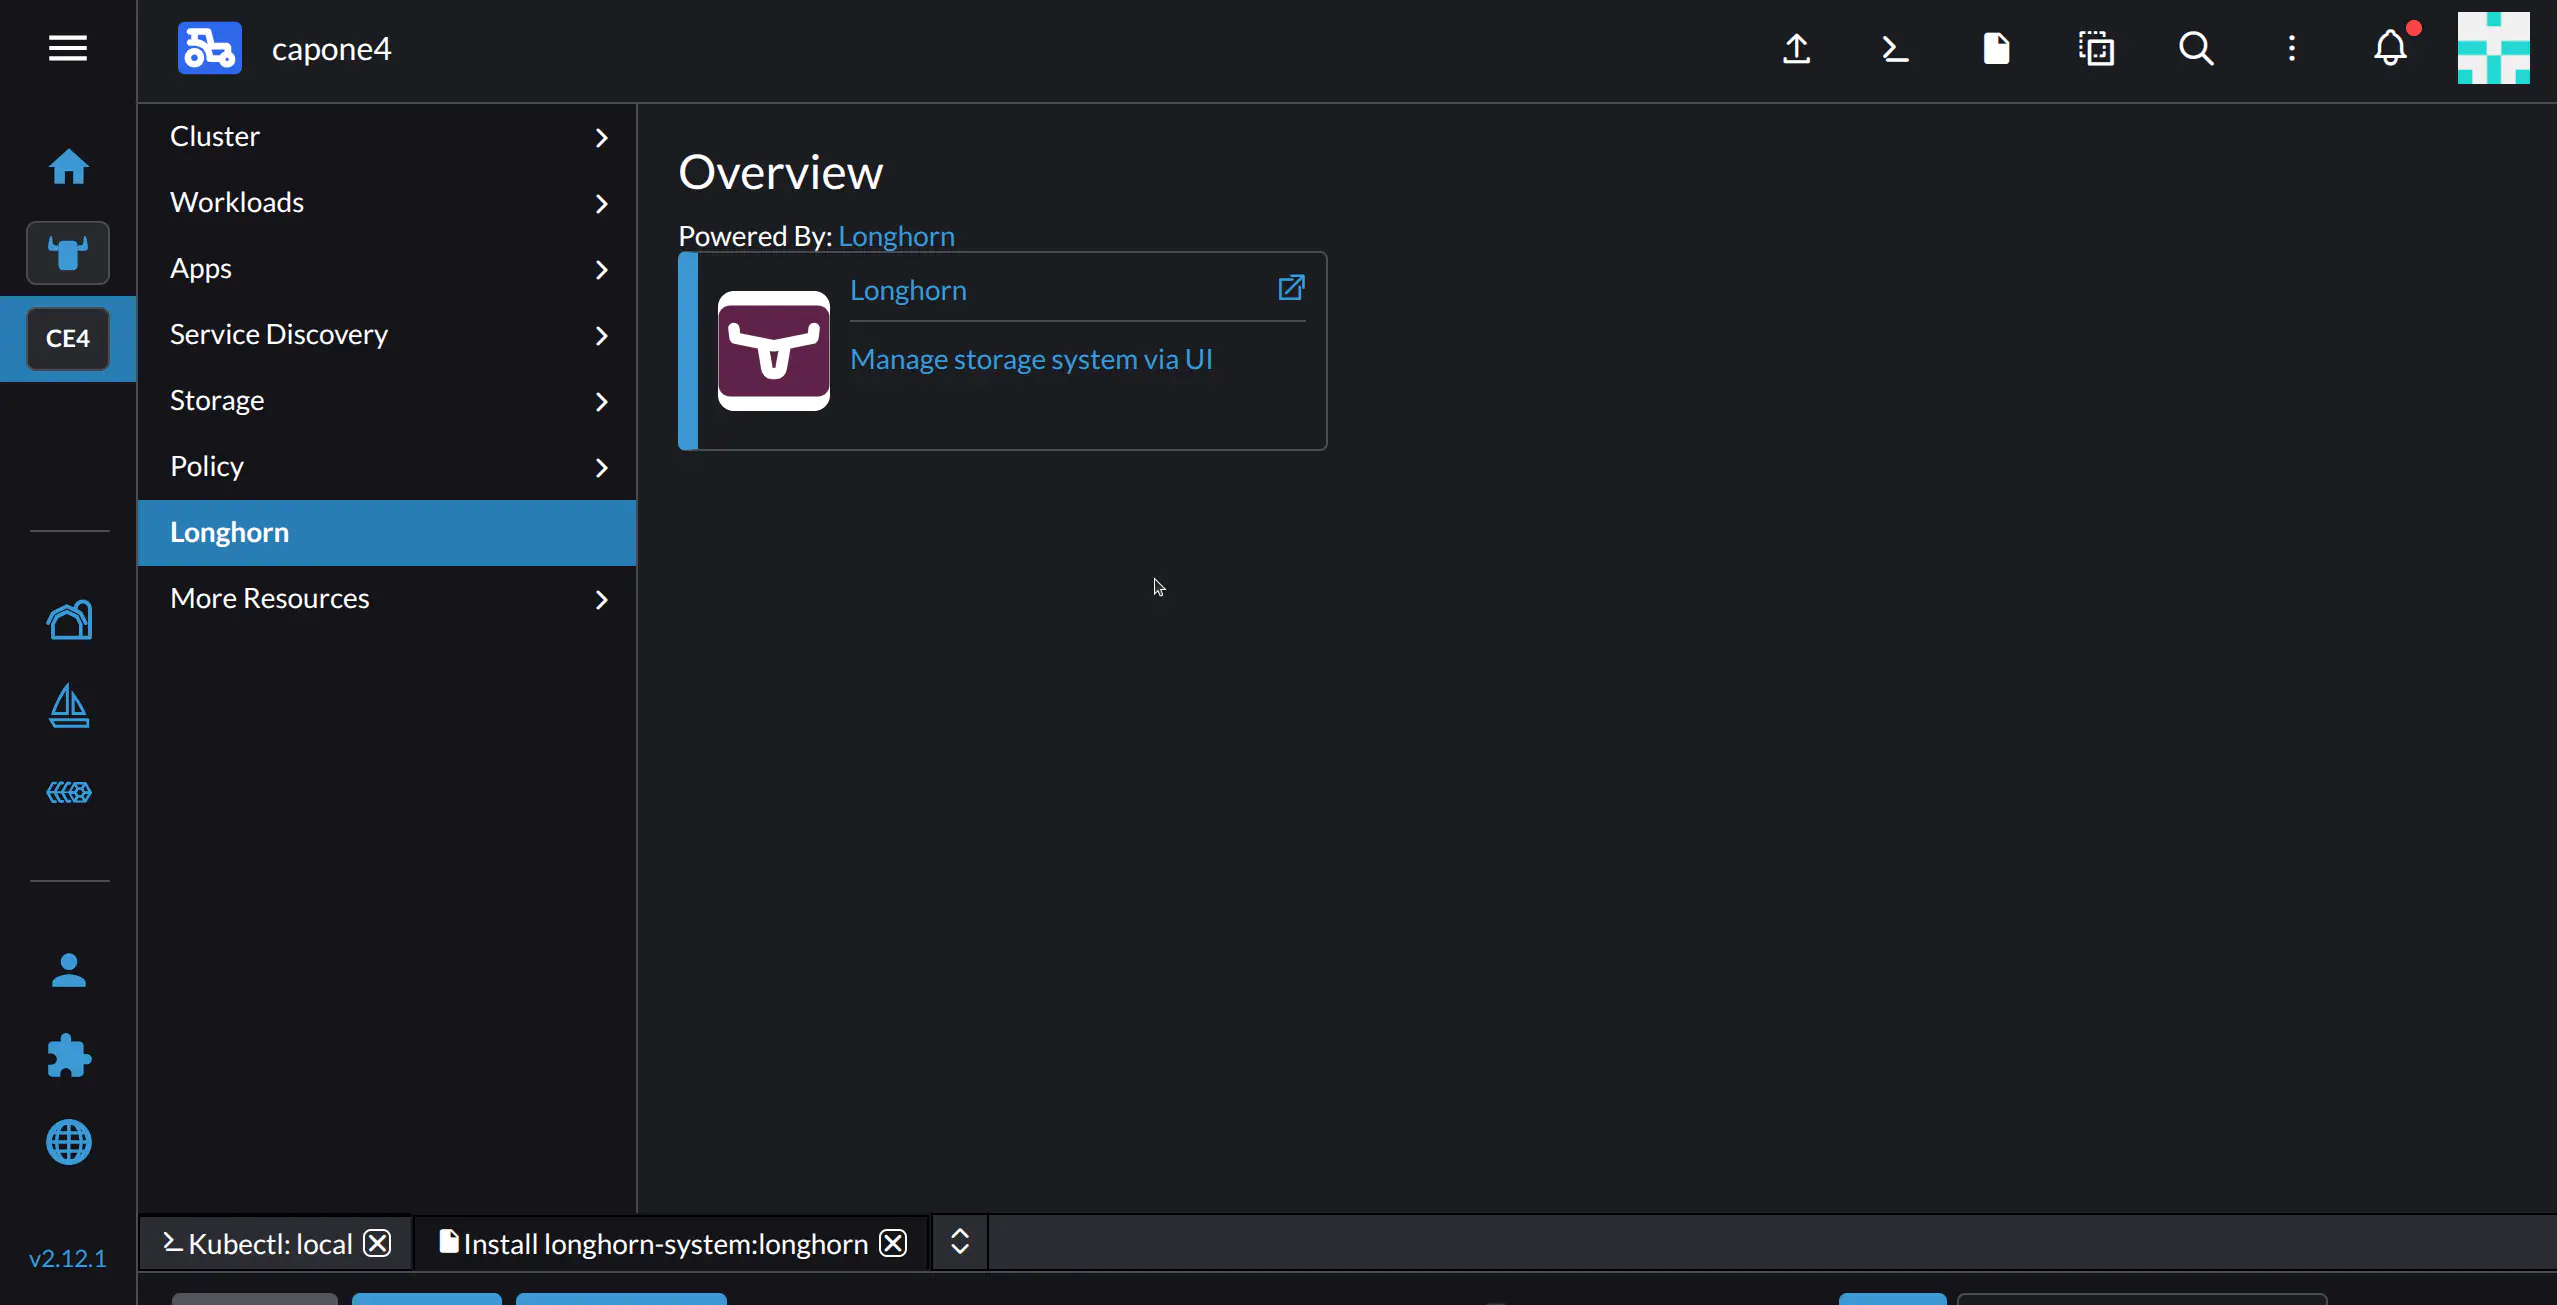
Click the Install button at top right. Don’t adjust any settings and click Next, then Install.
The Rancher UI will direct you to the Installed Apps screen. Longhorn will appear as a new item in the left-hand sidebar:
Creating a Persistent Volume Claim on Longhorn
In this step we will create the Persistent Volume Claim that will be used by our Nginx deployment.
To create a PVC, in the left-hand nav pane for the cluster select Storage -> PersistentVolumeClaims.
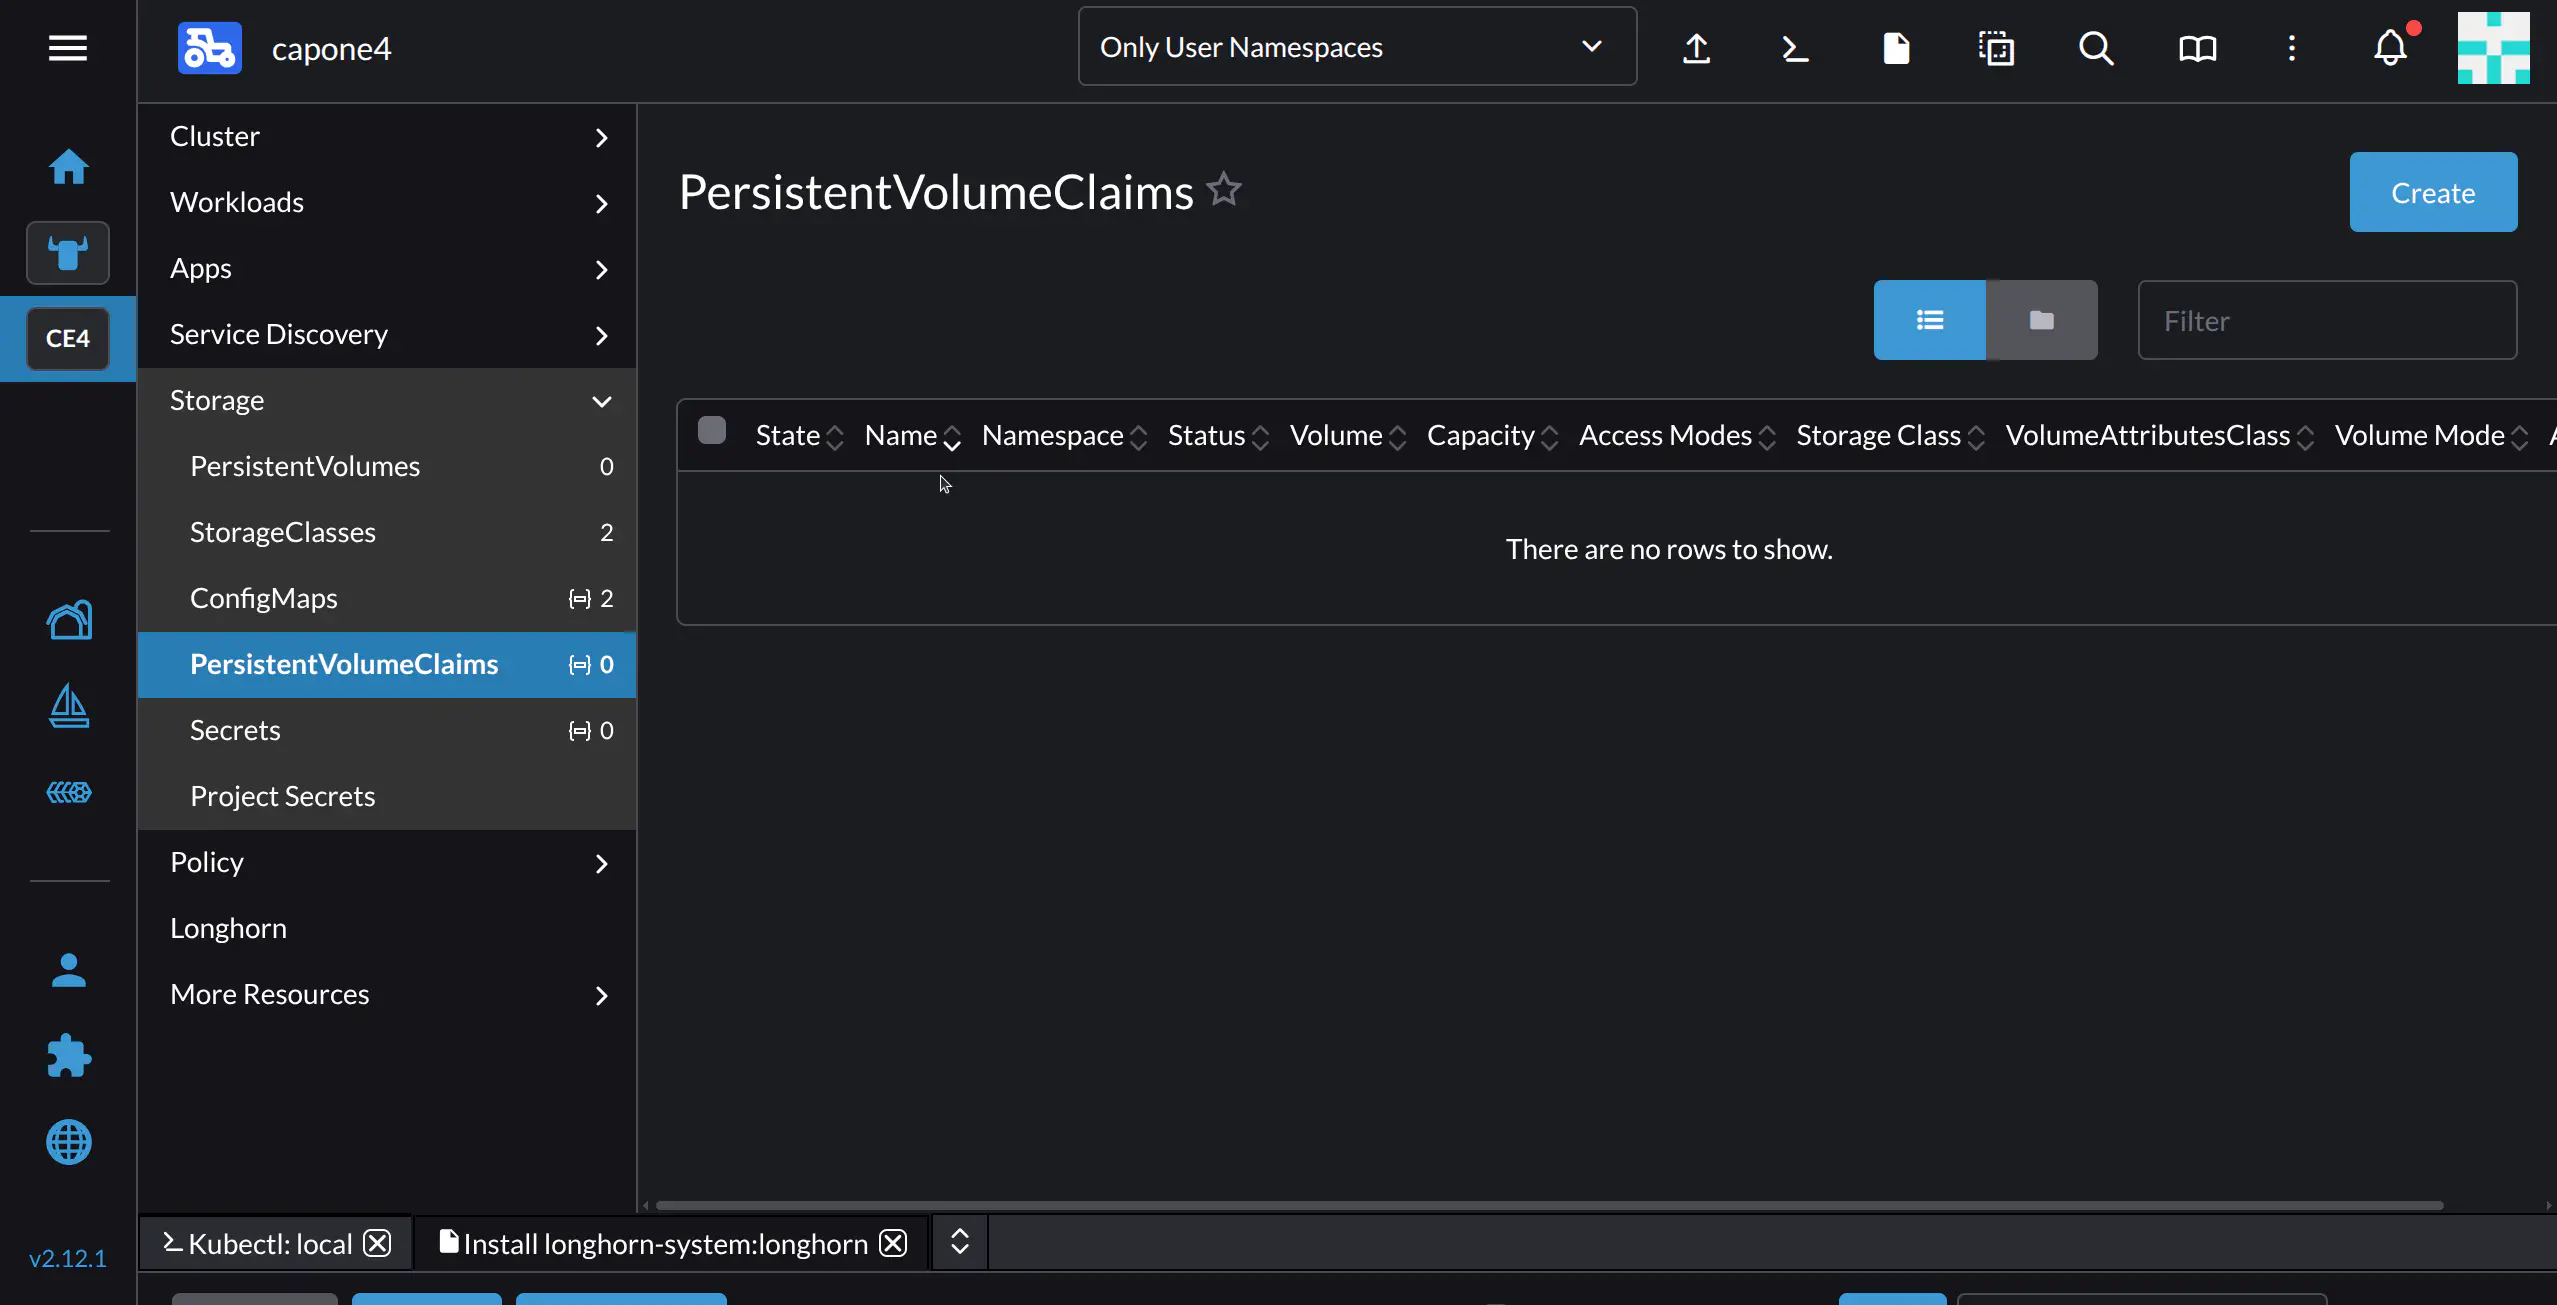
Rancher will display the PersistentVolumeClaims screen. To create a new PVC, click Create.
Fill in the required parameters for the PVC:
- In the Name field, type
nginx - In Source, leave at its default option, “Use a Storage Class to provision a new Persistent Volume”
- In the Storage Class drop-down, select
longhorn - In Request Storage, you can modify the default value of 10 GiB to your needs. In this example we will set it to 2 GiB
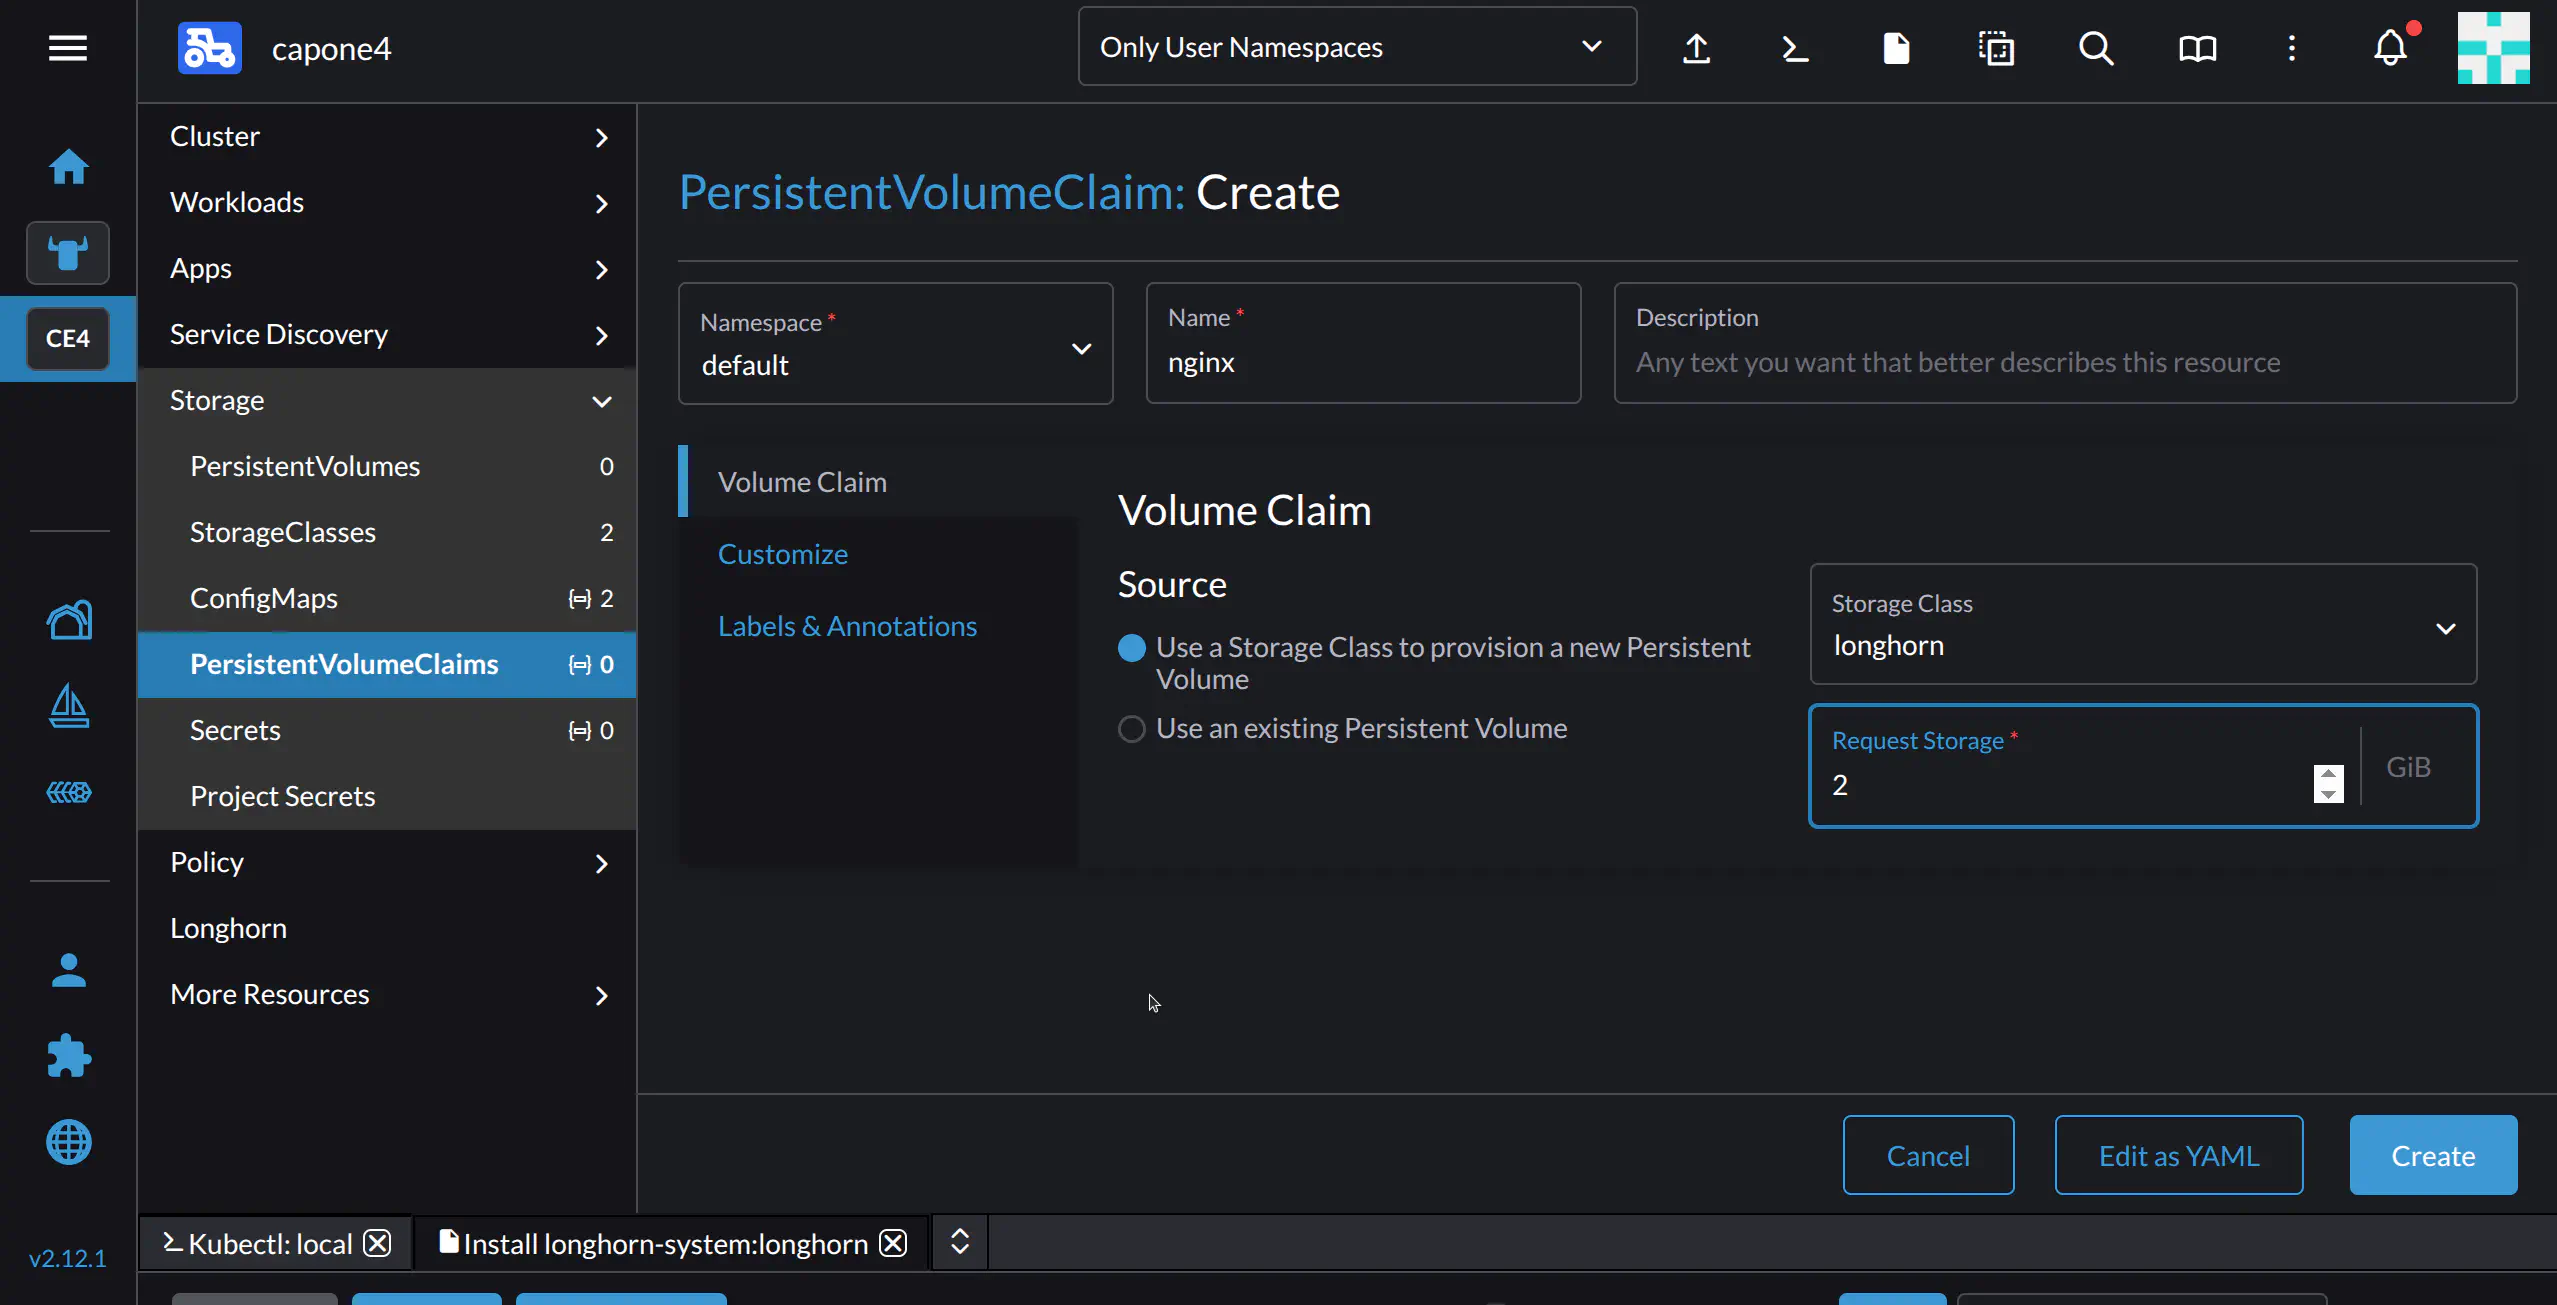
Click Create.
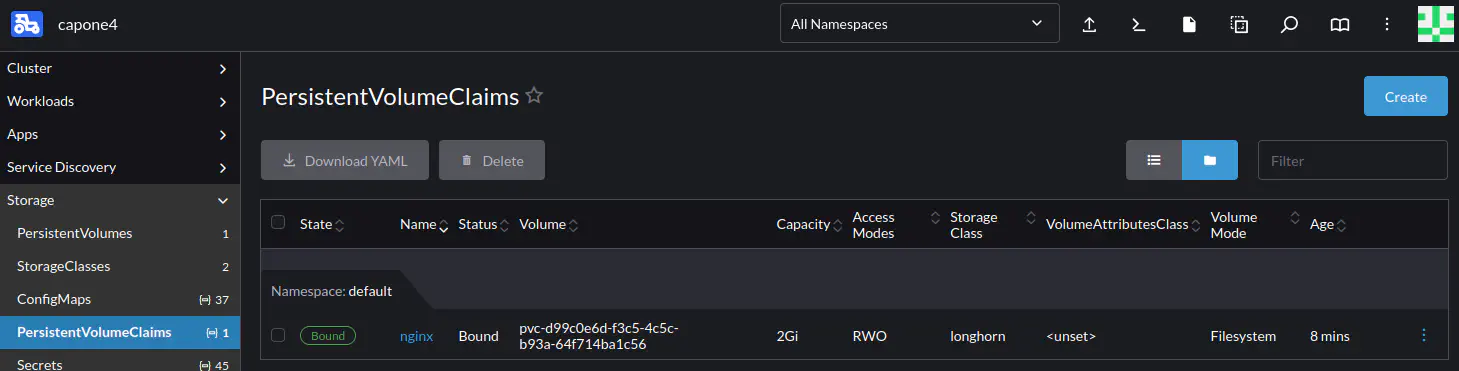
The PVC should now be listed in the Storage -> PersistentVolumeClaims tab for the cluster, shown below.
Creating an Nginx Deployment
We will create the Nginx deployment by importing the deployment’s YAML definition, to illustrate Rancher’s YAML import feature.
Go to the Cluster Dashboard (click the icon for the cluster on the left, then in the cluster nav pane click Cluster). Then, in the top bar click the Import YAML icon ![]() :
:
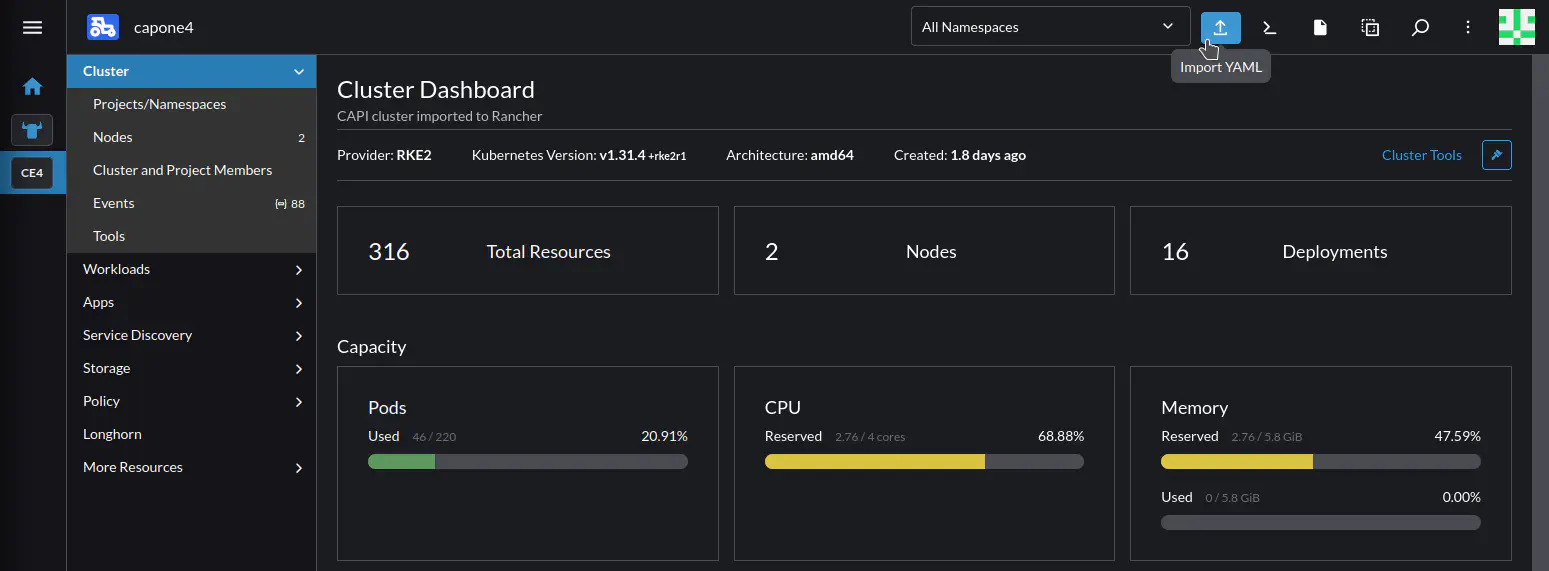
Rancher displays the Import YAML screen. To deploy Nginx, you can copy and paste the following definition:
---
kind: Deployment
apiVersion: apps/v1
metadata:
  name: nginx
spec:
  replicas: 1
  selector:
    matchLabels:
      app: nginx
  template:
    metadata:
      labels:
        app: nginx
    spec:
      containers:
      - name: http
        image: nginx:alpine
        imagePullPolicy: IfNotPresent
        ports:
        - name: http
          containerPort: 80
        volumeMounts:
        - mountPath: "/persistent/"
          name: nginx
      volumes:
      - name: nginx
        persistentVolumeClaim:
          claimName: nginx
Paste the definition into the input box, then click Import. Rancher will create a simple Nginx deployment that mounts the PVC we previously created.

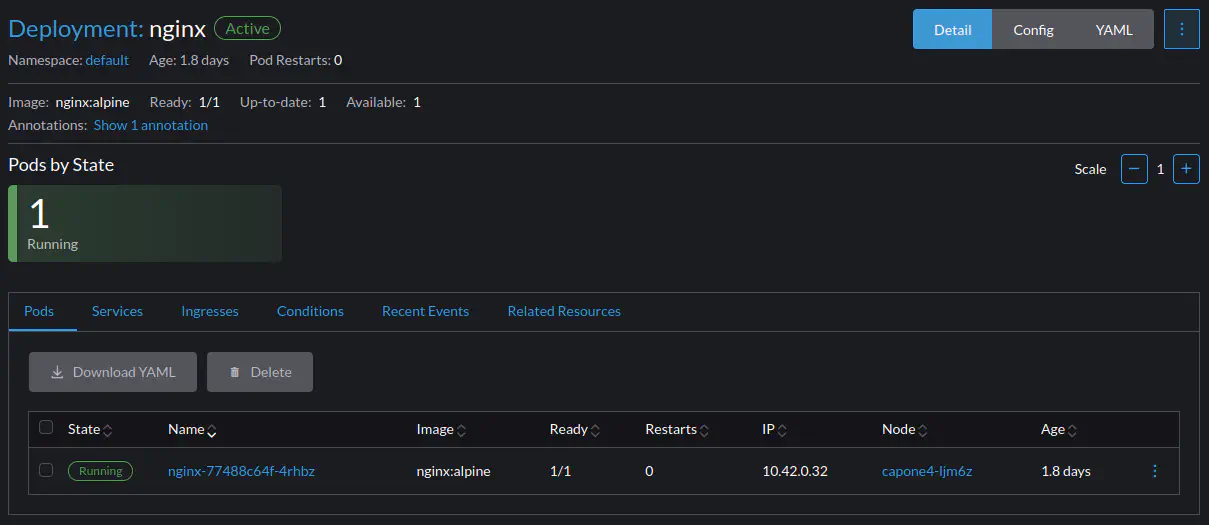
To see the Nginx deployment, in the menu for the cluster select Workloads > Deployments, and in the default namespace look for nginx.

Clicking nginx displays additional information for the deployment, including its IP, in this case 10.42.0.32:
Exposing the Nginx Deployment
For this tutorial, we’ll expose the Nginx deployment by creating a NodePort service.
To create the service, in Rancher click the Import YAML icon ![]() in the top bar. Then, copy-paste the below definition:
in the top bar. Then, copy-paste the below definition:
apiVersion: v1
kind: Service
metadata:
  name: nginx-service
spec:
  selector:
    app: nginx
  ports:
    - protocol: TCP
      port: 80
      targetPort: 80
      nodePort: 30080
  type: NodePort
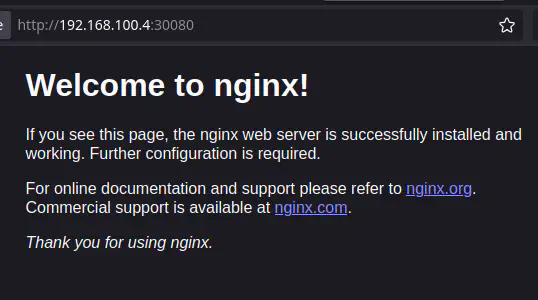
This will expose port 80 of the pod running the nginx service on port 30080 of the master node in the capone4 cluster.
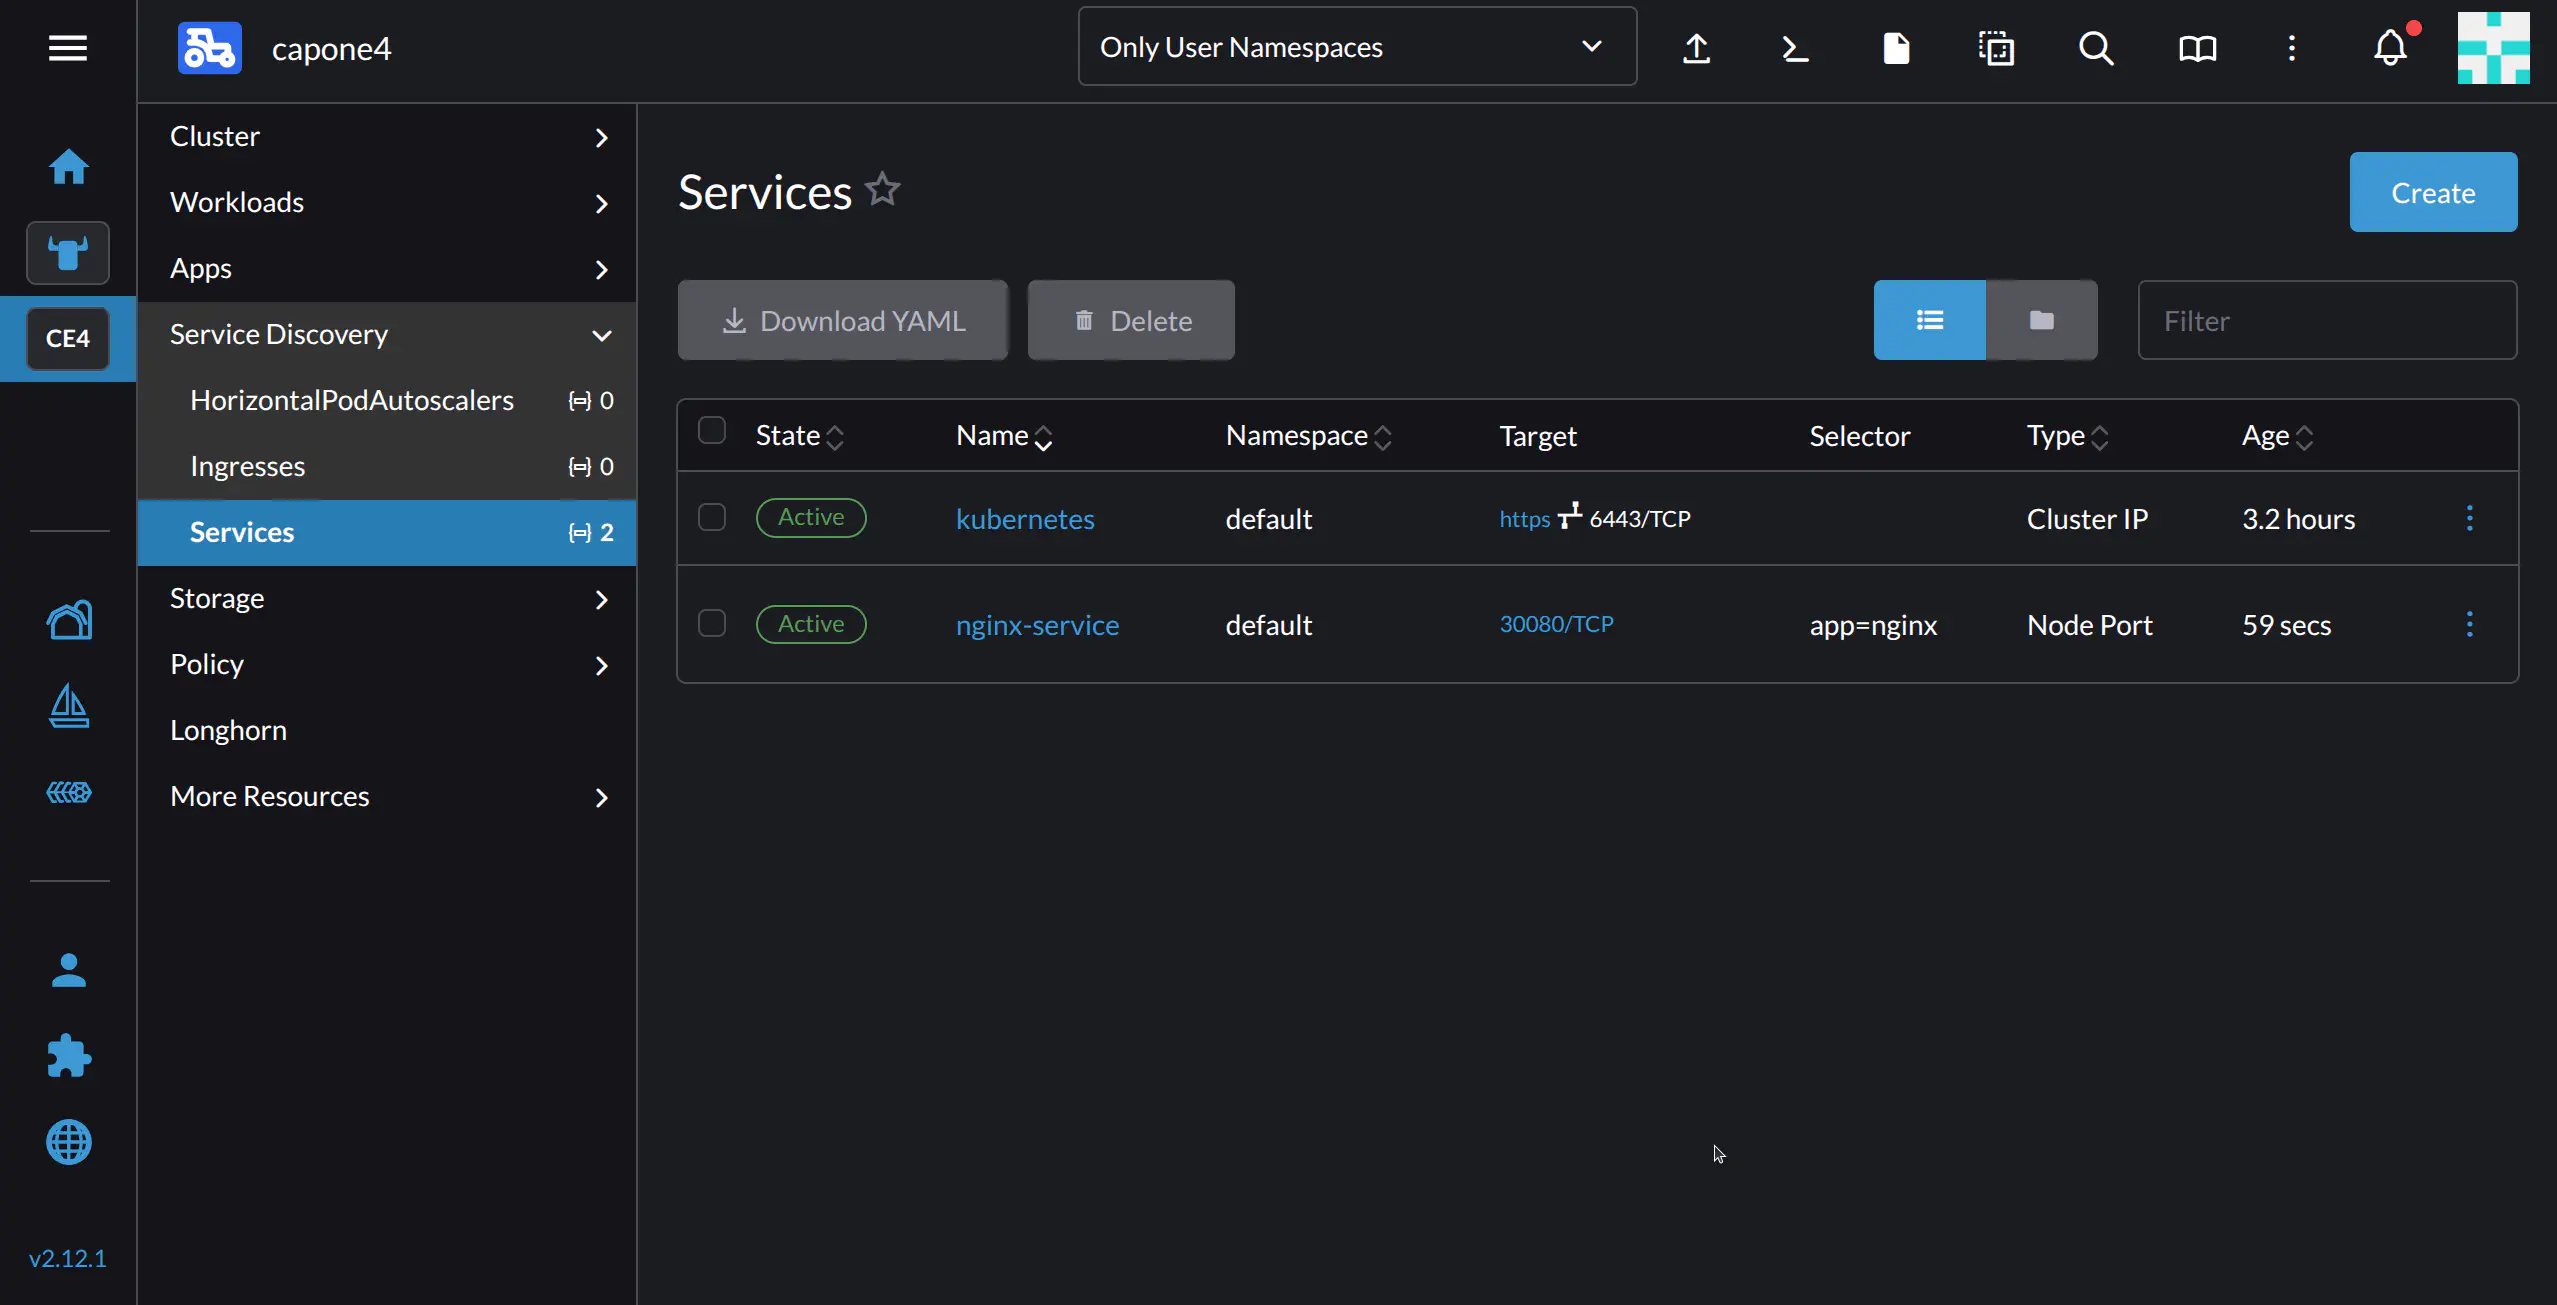
After clicking Import, you should see nginx-service in the cluster’s Services tab:
Now your Nginx deployment should be visible on the external IP of the node – which in this example setup is 192.168.100.4 – on port 30080:
Additional Tasks
Adding Worker Nodes to the Cluster
Note
Before creating a replica, ensure you have enough resources allocated to the CAPI deployment, and on the machine running the Front-end.To add a Worker Node to the cluster, use CAPI to create a replica of the cluster.
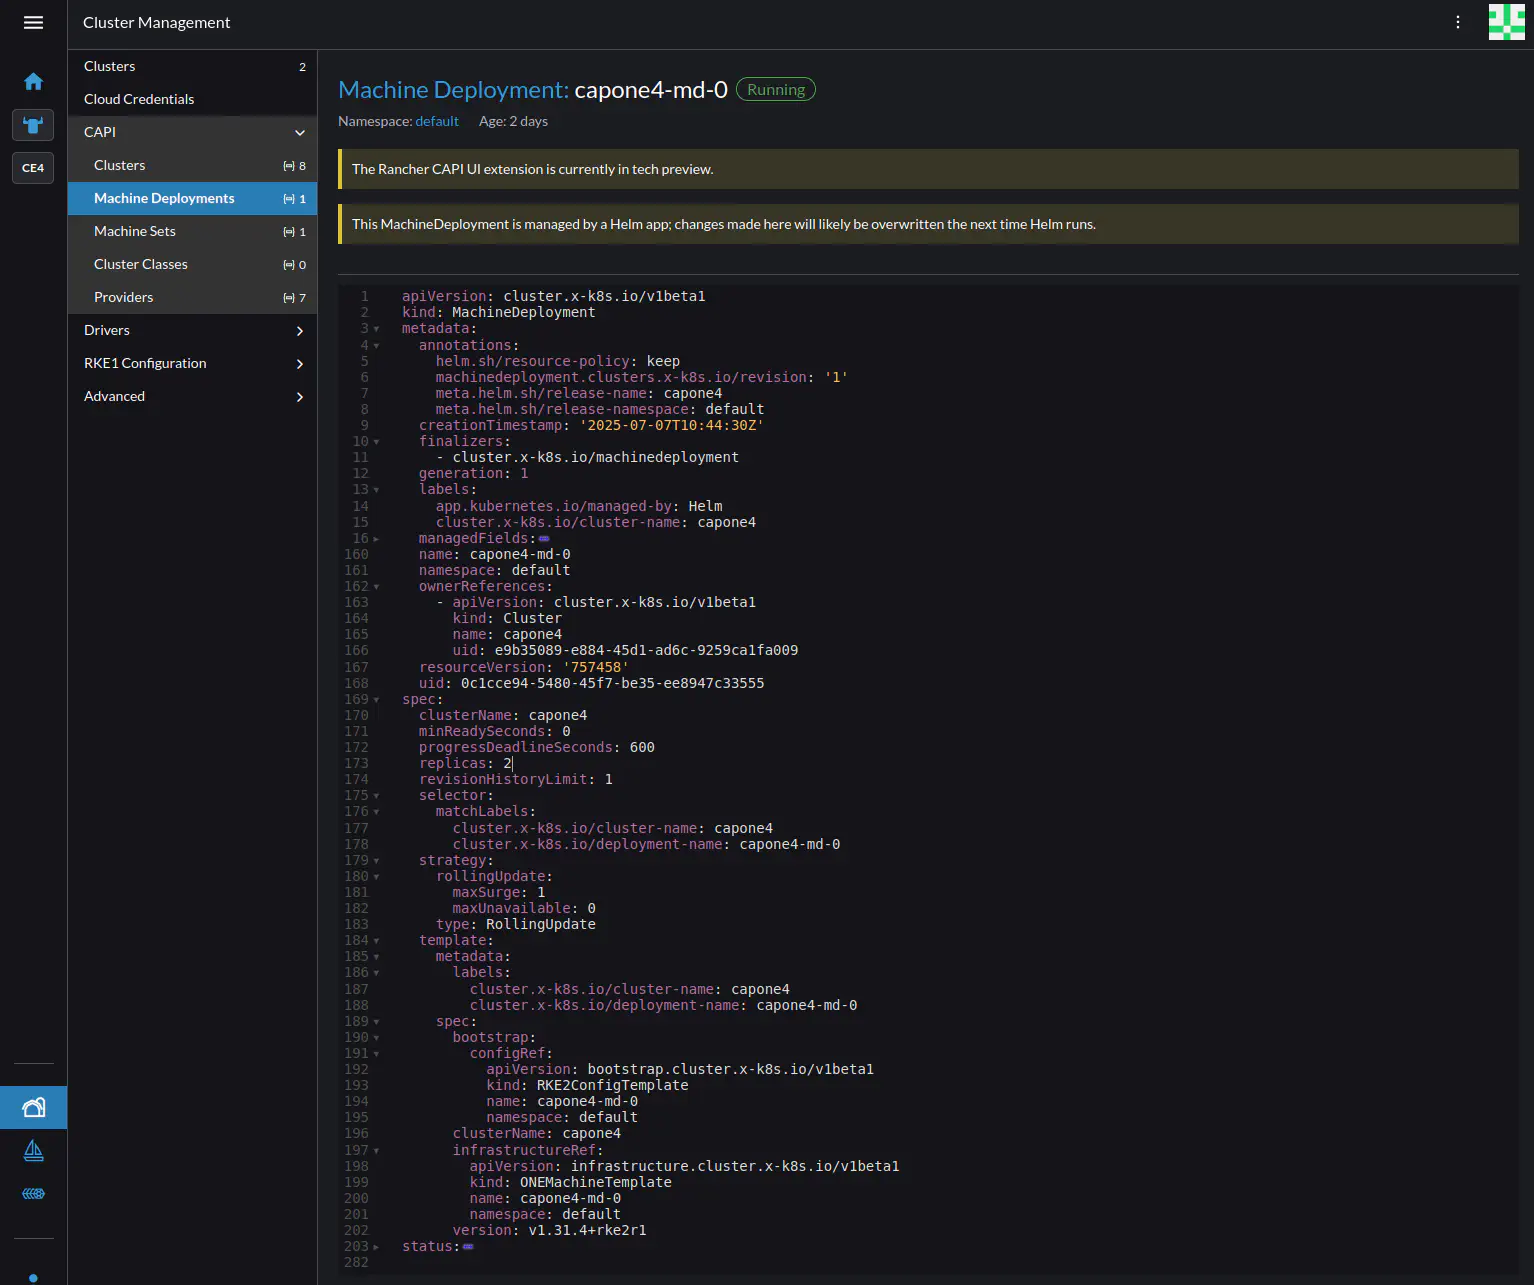
In Rancher, go to Cluster Management, then in the left-hand nav pane CAPI -> Machine Deployments. Rancher should display the current deployment of the capone4 cluster. Clicking the deployment name shows the YAML file for the deployment. To add a replica, click the three-dot menu ![]() at top right, then select Edit YAML. Find the string
at top right, then select Edit YAML. Find the string replicas: 1 and change the number to the desired number of replicas.
Upgrading the Workload Cluster
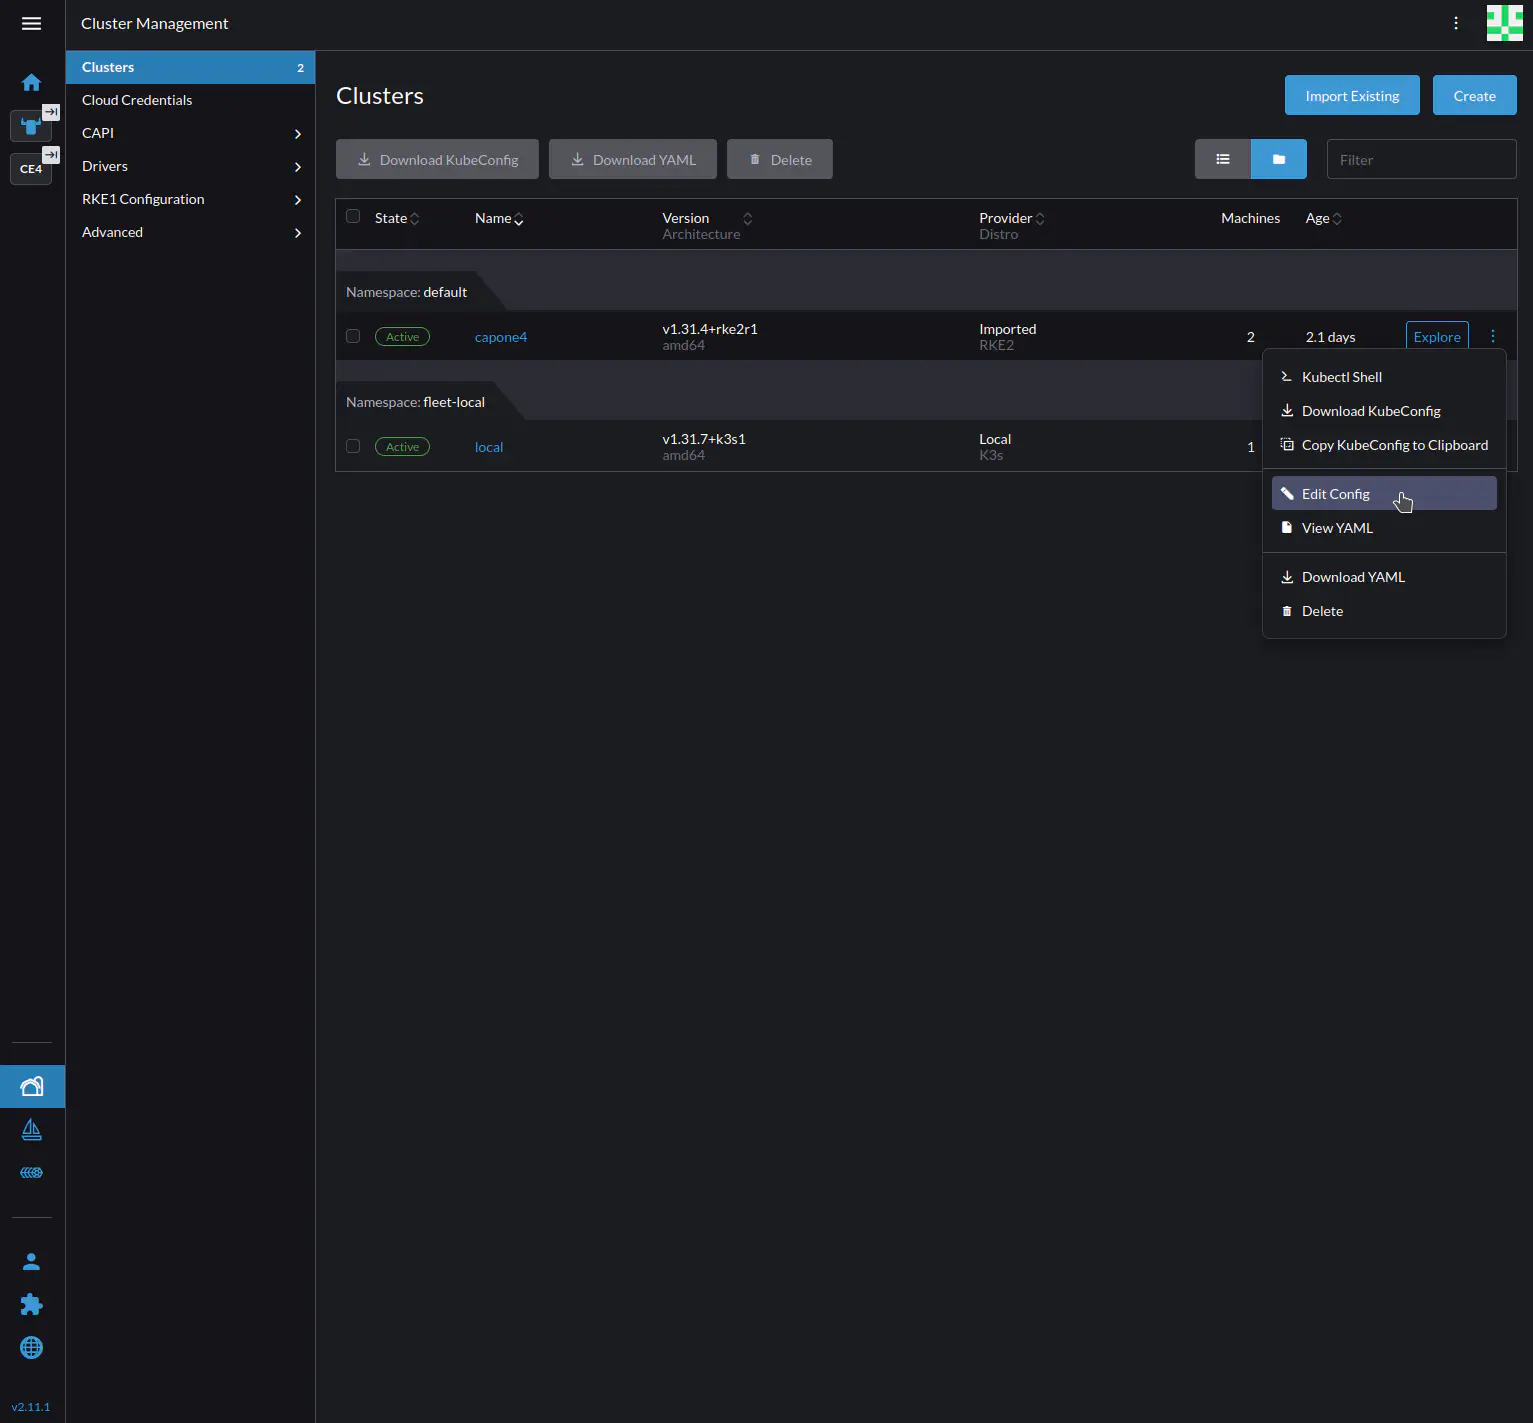
To upgrade the cluster from within Rancher, select Cluster Management at bottom left, then Clusters on the left-hand pane. Click the three-dot menu ![]() for the cluster, then select Edit Config from the drop-down.
for the cluster, then select Edit Config from the drop-down.
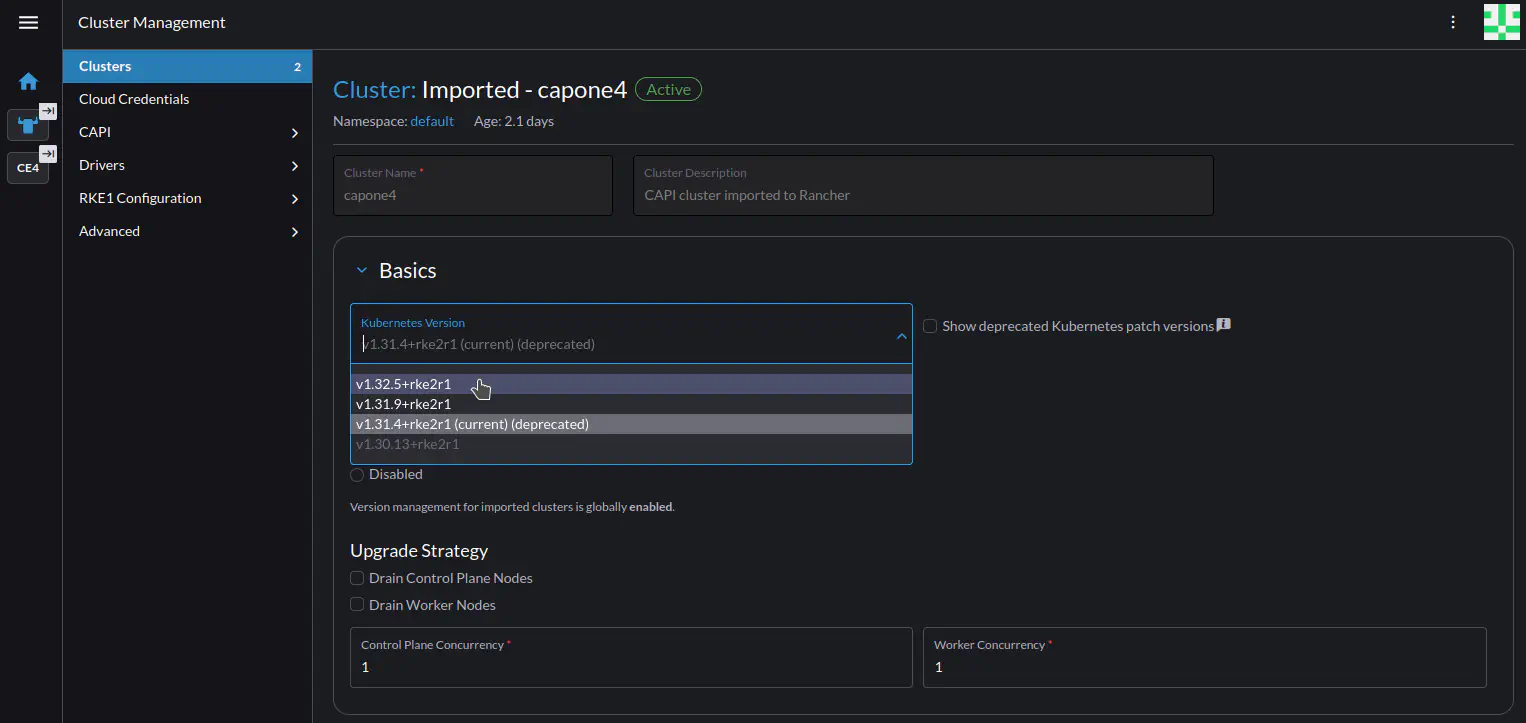
Rancher should display the configuration screen for the cluster. In the Basics section, select the desired version for upgrading, then press Save.
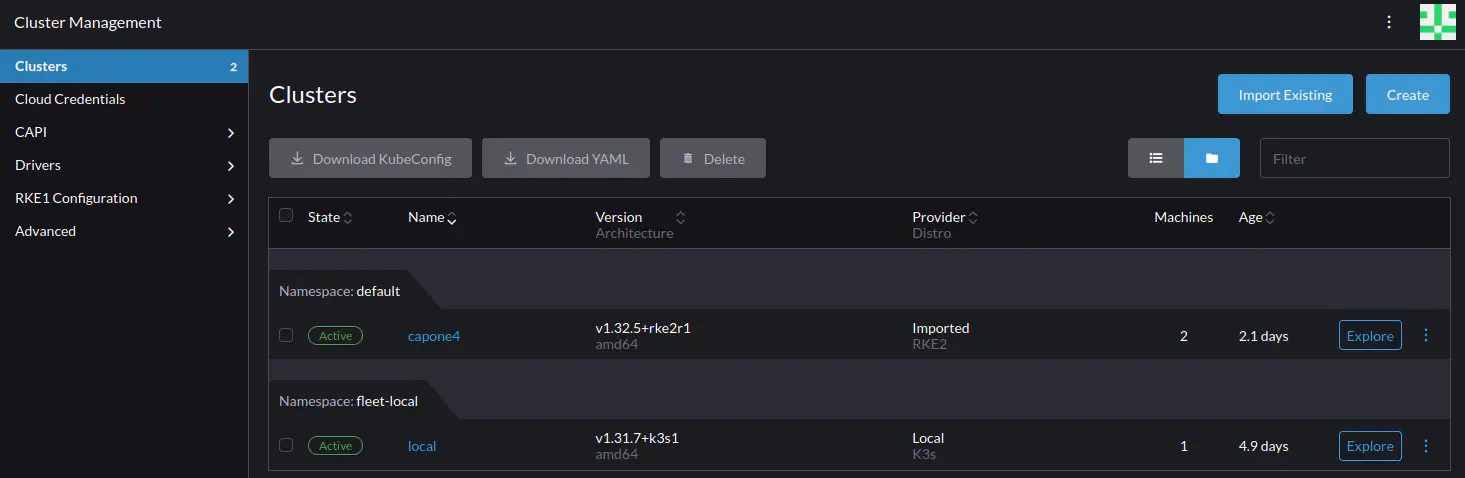
Rancher should display the Clusters screen, where the cluster should display status Upgrading. The upgrade can take several minutes. To see the upgrade process, click the Explore button to the right of the cluster – this takes you to the Cluster Dashboard where upgrade messages are displayed.
When the upgrade is finished, the Clusters screen should display the cluster with the new version.
Congratulations! You have successfully deployed a K3s cluster with the Rancher management platform as well as a production-grade workload cluster where you’ve created, exposed and tested a deployment – all with minimal configuration and using graphical interfaces.
Next Steps
To learn about OpenNebula in depth, the next sections of the documentation include all of the information necessary for configuration and administration, as well as software life cycle, releases and installation details.
If you are interested in installing OpenNebula by following further tutorials, you can head over to Automatic Installation with OneDeploy to automatically install a production-ready OpenNebula cloud.
Using SSH on Remote Hardware
If you are working with OpenNebula deployed on a remote server or an AWS instance, you will need to use port forwarding to access the Rancher UI. From the command line of the OpenNebula Front-end run:
sudo su - oneadmin
Run onevm list to obtain the ID of the CAPI VM, then run onevm ssh <CAPI_VM_ID> to access the CAPI VM command line. Then run the following command:
nohup kubectl -n cattle-system port-forward svc/rancher 8443:443 --address 0.0.0.0 > pf.log 2>&1 &
Then from your local machine, run the following port forwarding command, inserting the appropriate IP addresses for the CAPI VM and the remote server (include -i pem-file.pem if needed):
ssh -L 8443:<CAPI_VM_IP>:8443 user@<REMOTE_IP> # -i pem-file.pem
The choosen user must have sudo priviledges on the remote server. These commands will set up port forwarding such that the Rancher UI can be accessed through a browser on your local machine by visiting http://localhost:8443.
We value your feedback
Was this information helpful?
Glad to hear it
Sorry to hear that